How to Configure and Invoke GPTfy via REST API
This document provides step-by-step instructions on how to configure and invoke GPTfy. The process involves invoking GPTfy through the REST API using a JSON-based callout, specifically targeting a particular record.
REST API Overview
The REST APIs that are developed for this requirement are as follows:
POST Request: This is the API that is used to execute GPTfy via REST.
Step 1: Navigate to the Prompt tab of GPTfy
- Click on the “Prompts” tab.
- Click New.
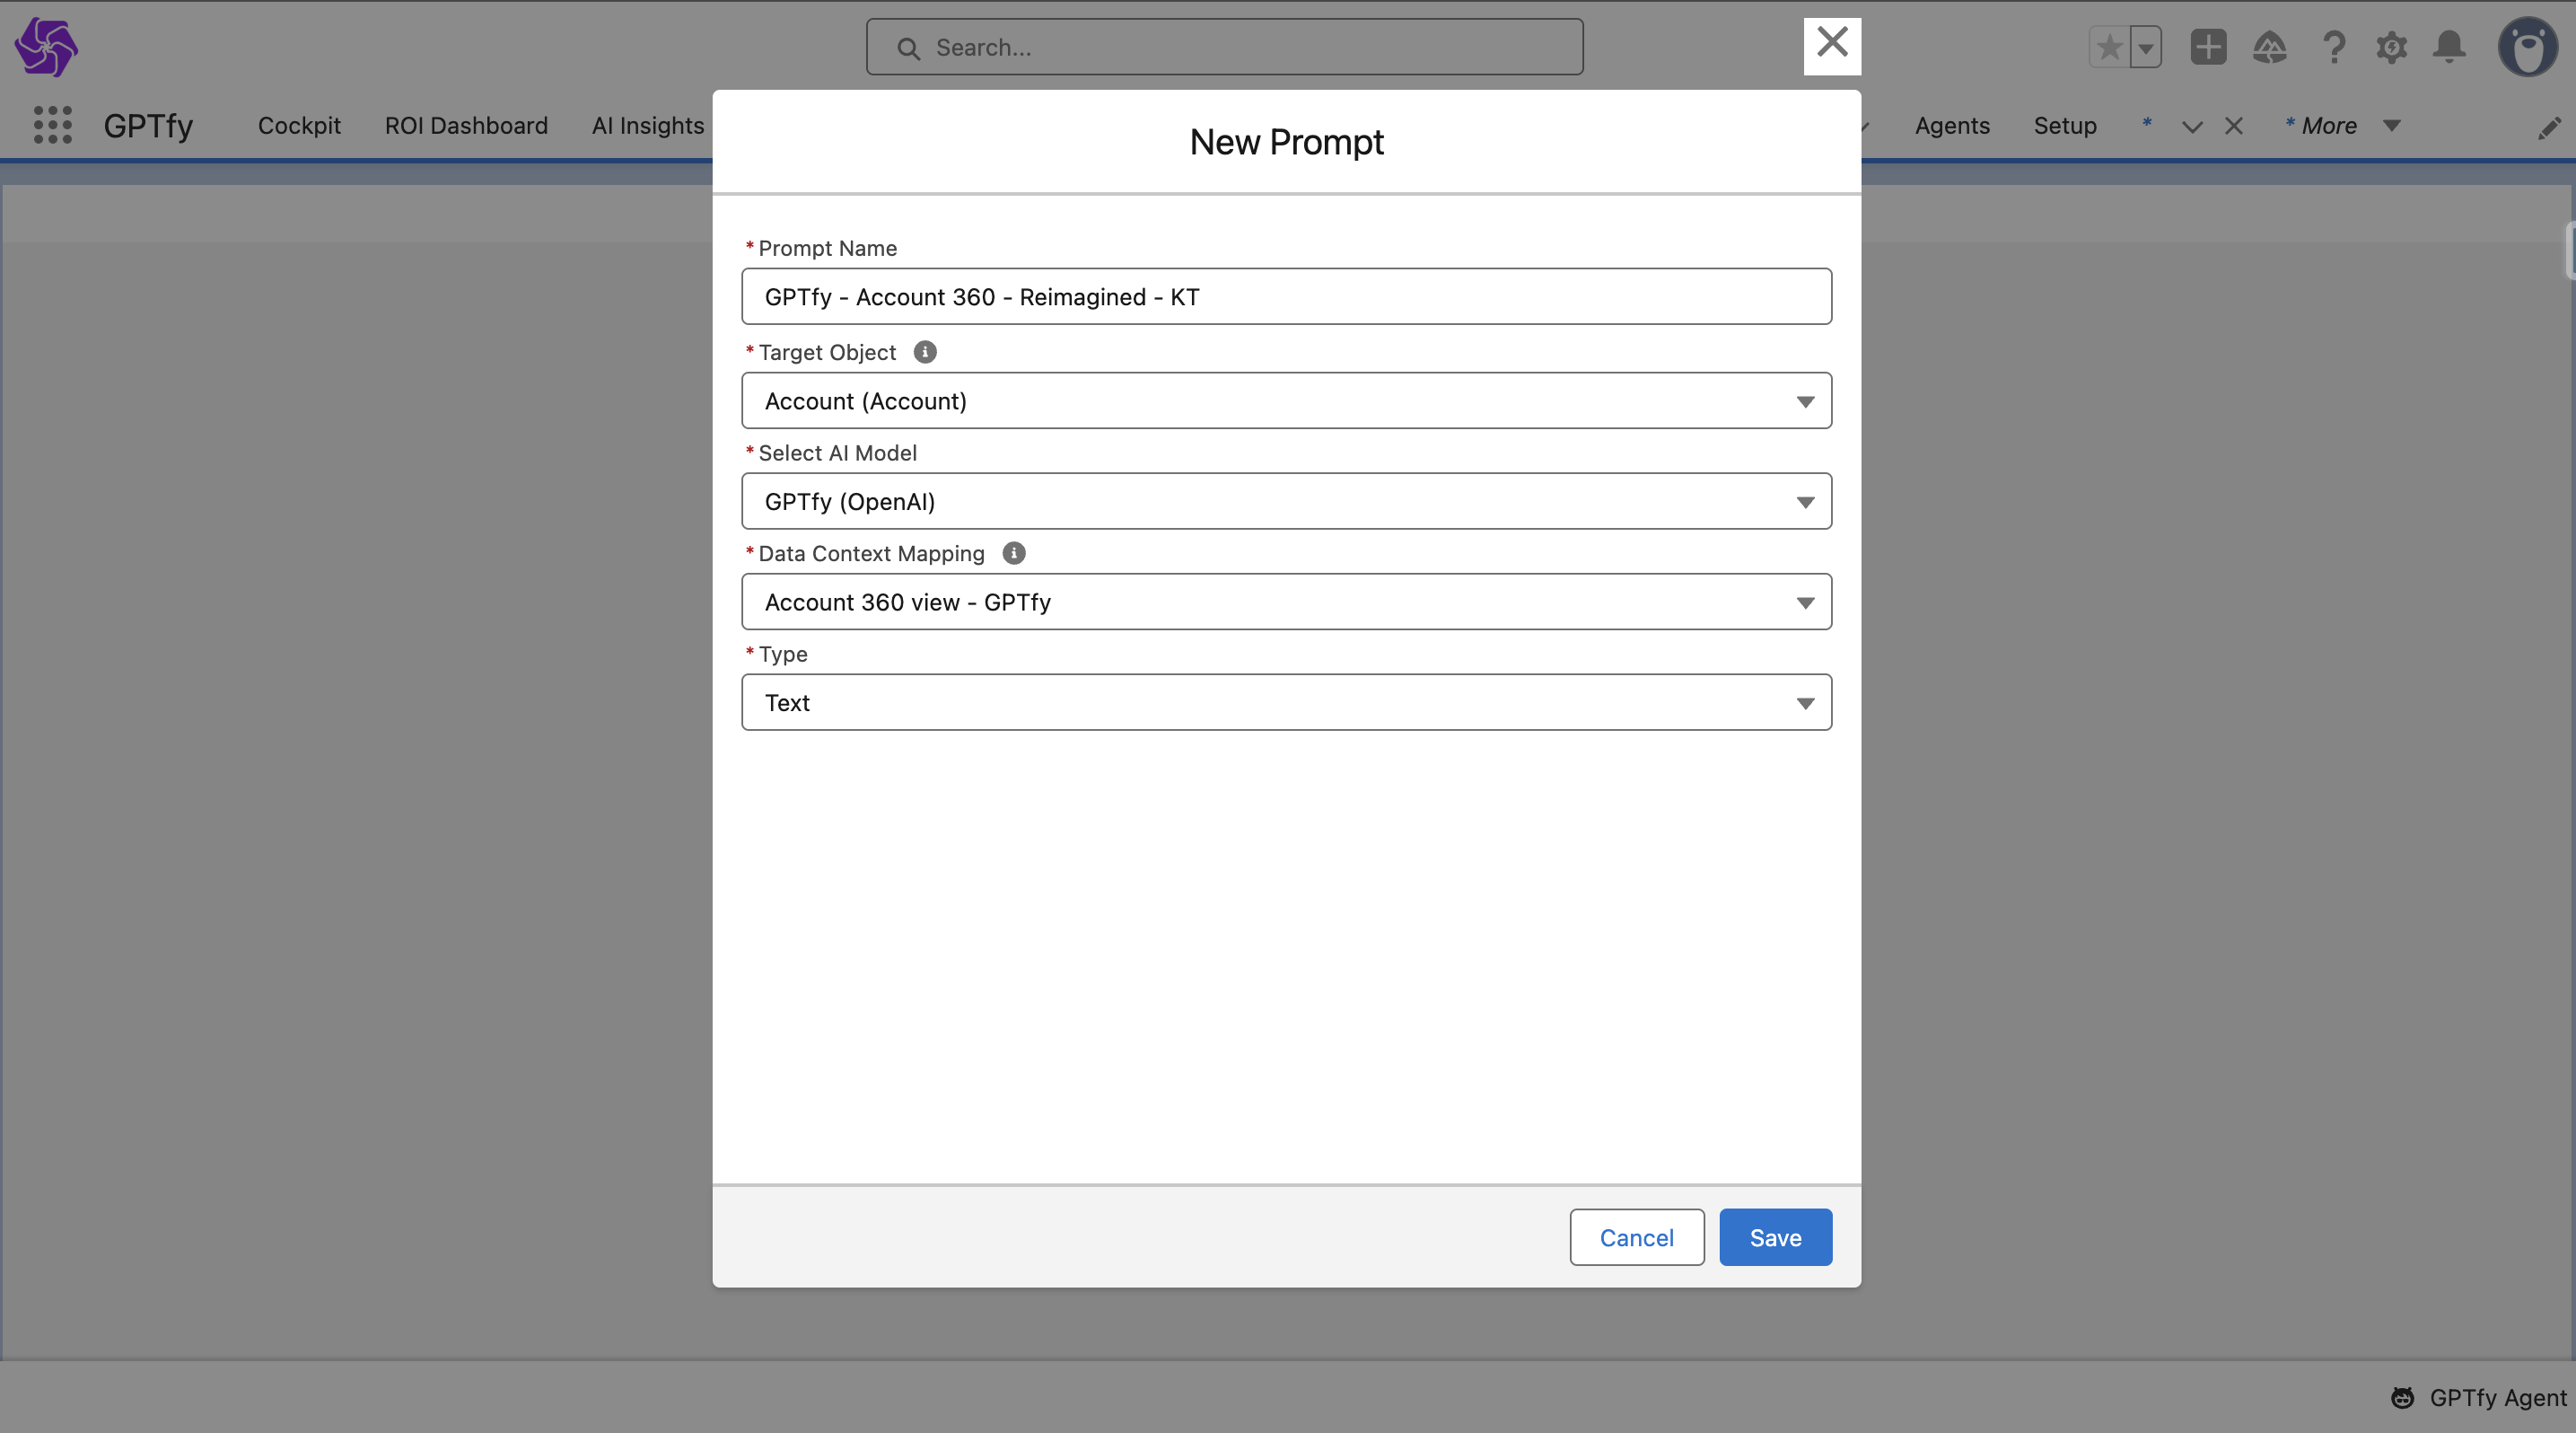
Step 2: Create a New Prompt
- Provide a suitable name for the prompt.
- Select the target object on which the prompt will be invoked.
- Specify the connection details.
- Define the mapping created for the prompt.
- Choose the prompt type (JSON or Text).
- Click on the “Save” button to save the prompt configuration.
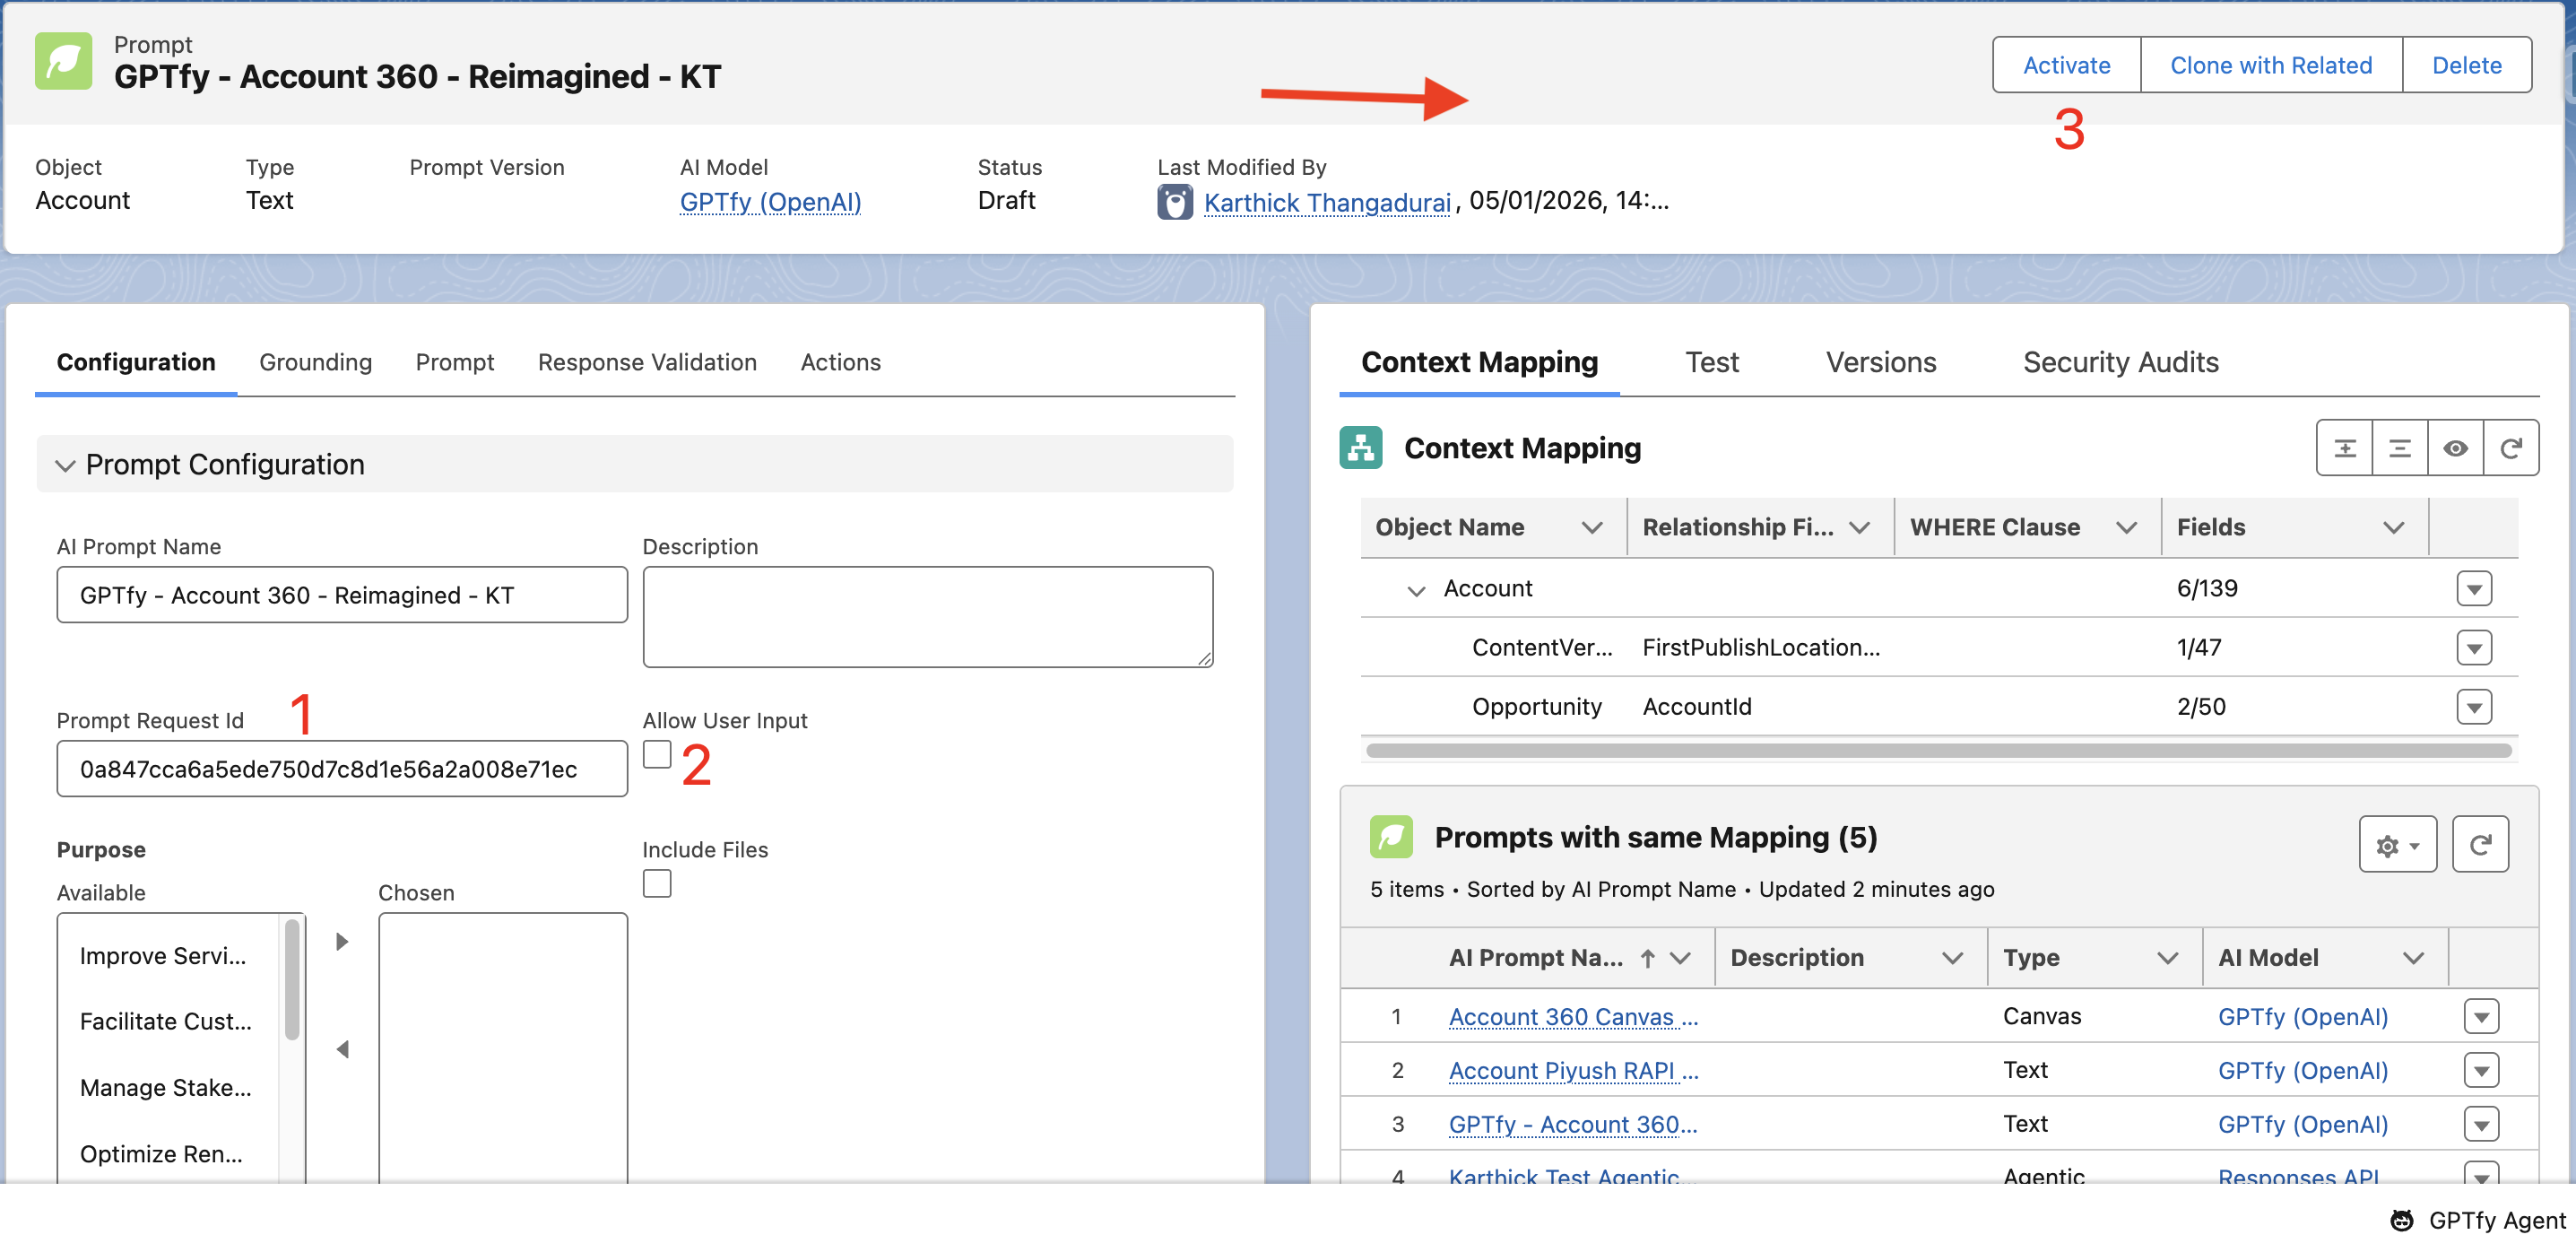
- Once the prompt is created, PromptRequestId (1) gets generated.
- Click on Allow user Input checkbox (2), if we need to give personalised input at time of running.
- Activate the Prompt by clicking on the Activate button (3).
Step 3: Access a REST Tool for API Invocation
To proceed with the invocation, access any REST tool, such as Salesforce Developer Workbench or Postman. (This example uses Salesforce Developer Workbench.)
Step 4: Use the REST Explorer in Salesforce Developer Workbench
- Within the workbench, navigate to the “Utility” tab and select “REST Explorer.”
- In the REST Explorer, select the “POST” method as we are making a POST request to execute GPTfy via REST.
Step 5: Enter the GPTfy REST Call URL
In the POST method, input the GPTfy REST call URL for the API invocation:
API Endpoint:
/services/apexrest/ccai/v1/executePrompt
Body
{
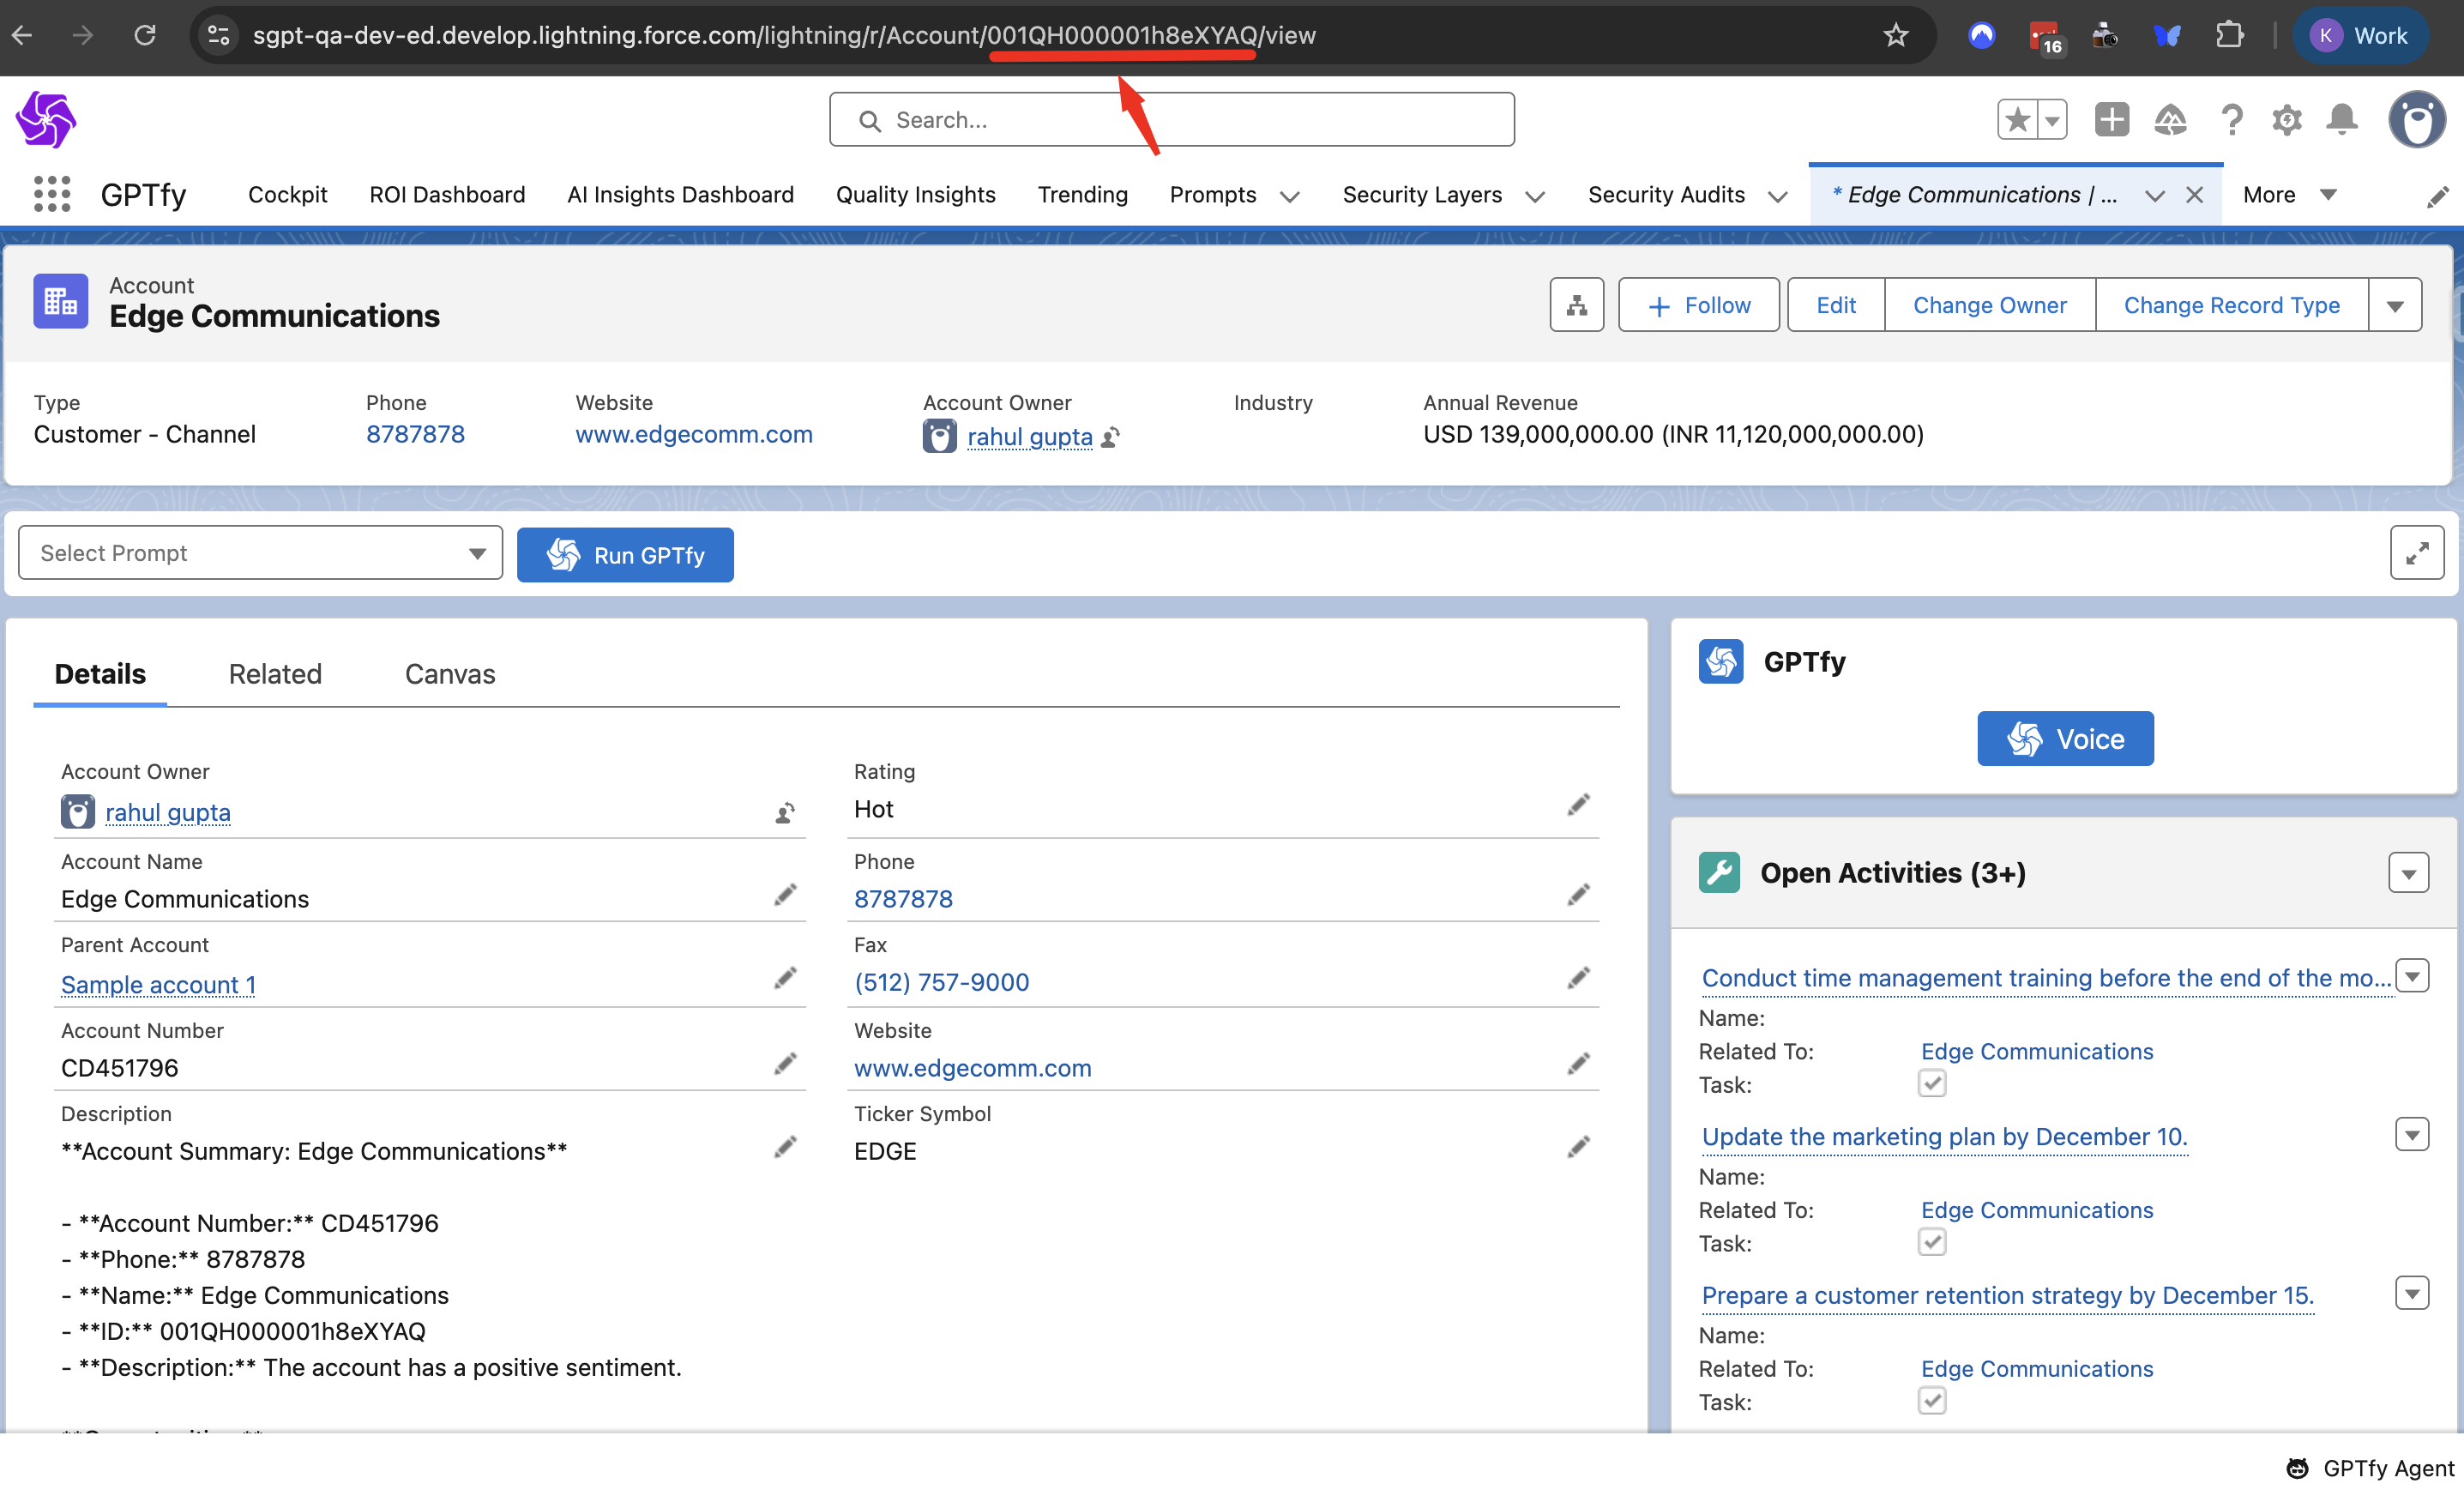
"promptRequestId": "0a847cca6a5ede750d7c8d1e56a2a008e71ec",
"recordId": "001QH000001h8eXYAQ",
"customPromptCommand": ""
}
Step 6: Prepare the Request Body in JSON Format
- Copy the PromptRequestId and RecordId from the previous prompt creation step.
- Paste the collected data into the appropriate fields within the JSON format of the request body.
- Insert the custom prompt command if any.
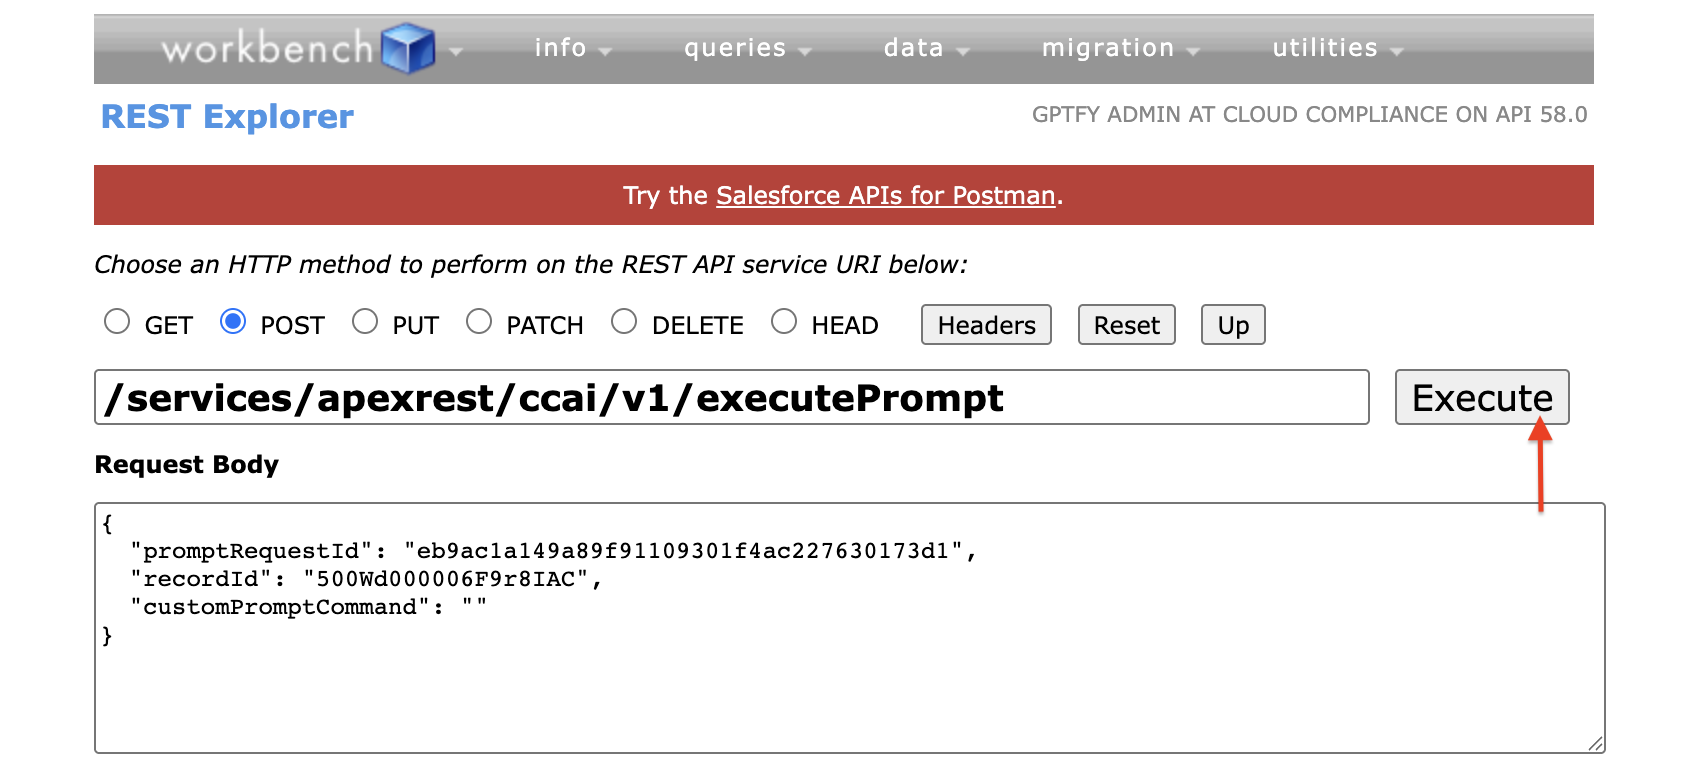
Step 7: Execute the REST API
Click the Execute button in the REST Explorer to invoke the GPTfy REST API.
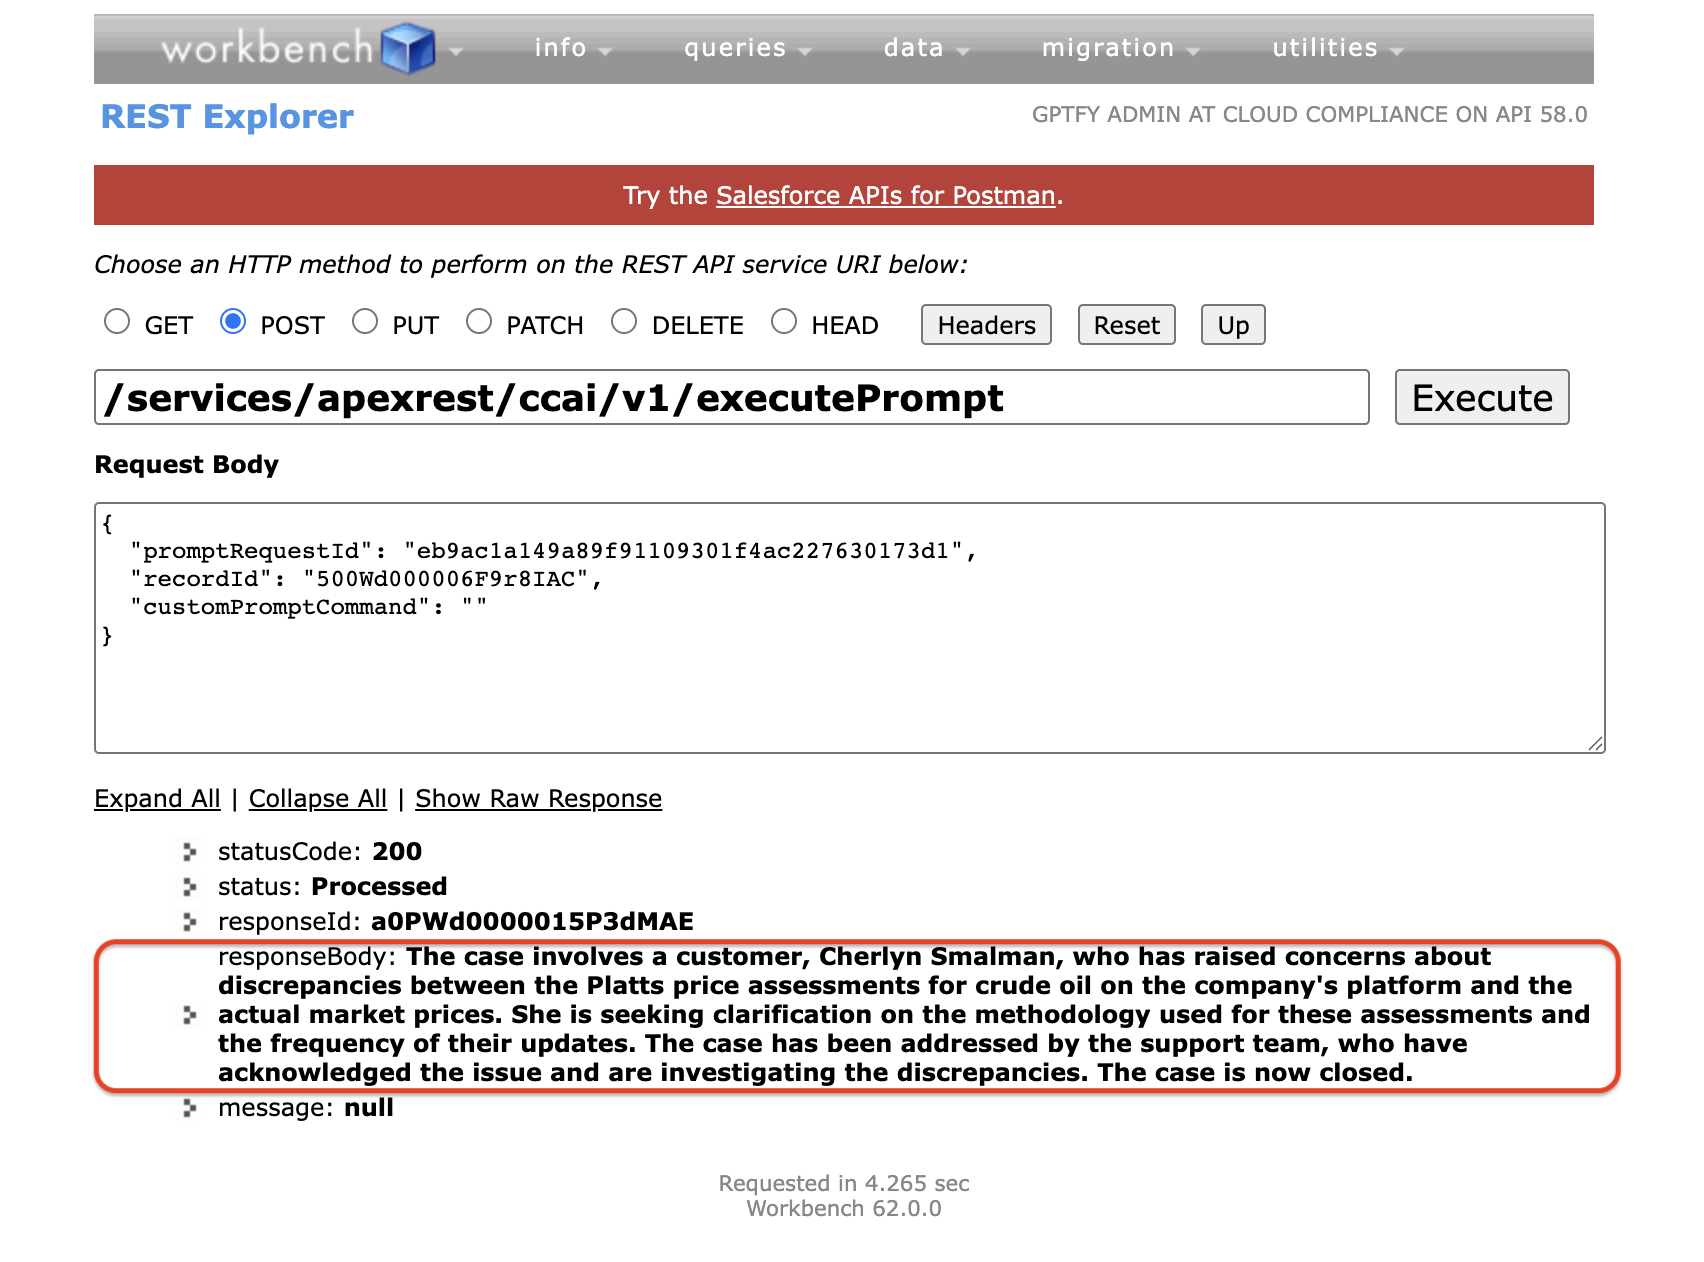
Step 8: Review the API Response
The REST API will return a Success status code (200) upon successful execution. The response will include important details such as:
- Status
- Success
- responseId
- responseBody