Set Up Your Data Context Mapping
Securely send the right Salesforce data to AI, while protecting what’s sensitive.
Follow these simple steps to configure Data Context Mapping in GPTfy. This tells GPTfy which Salesforce data to include in the payload while applying masking rules for privacy and compliance.
Step 1: Open Data Context Mapping
- Go to GPTfy Cockpit in your Salesforce environment.
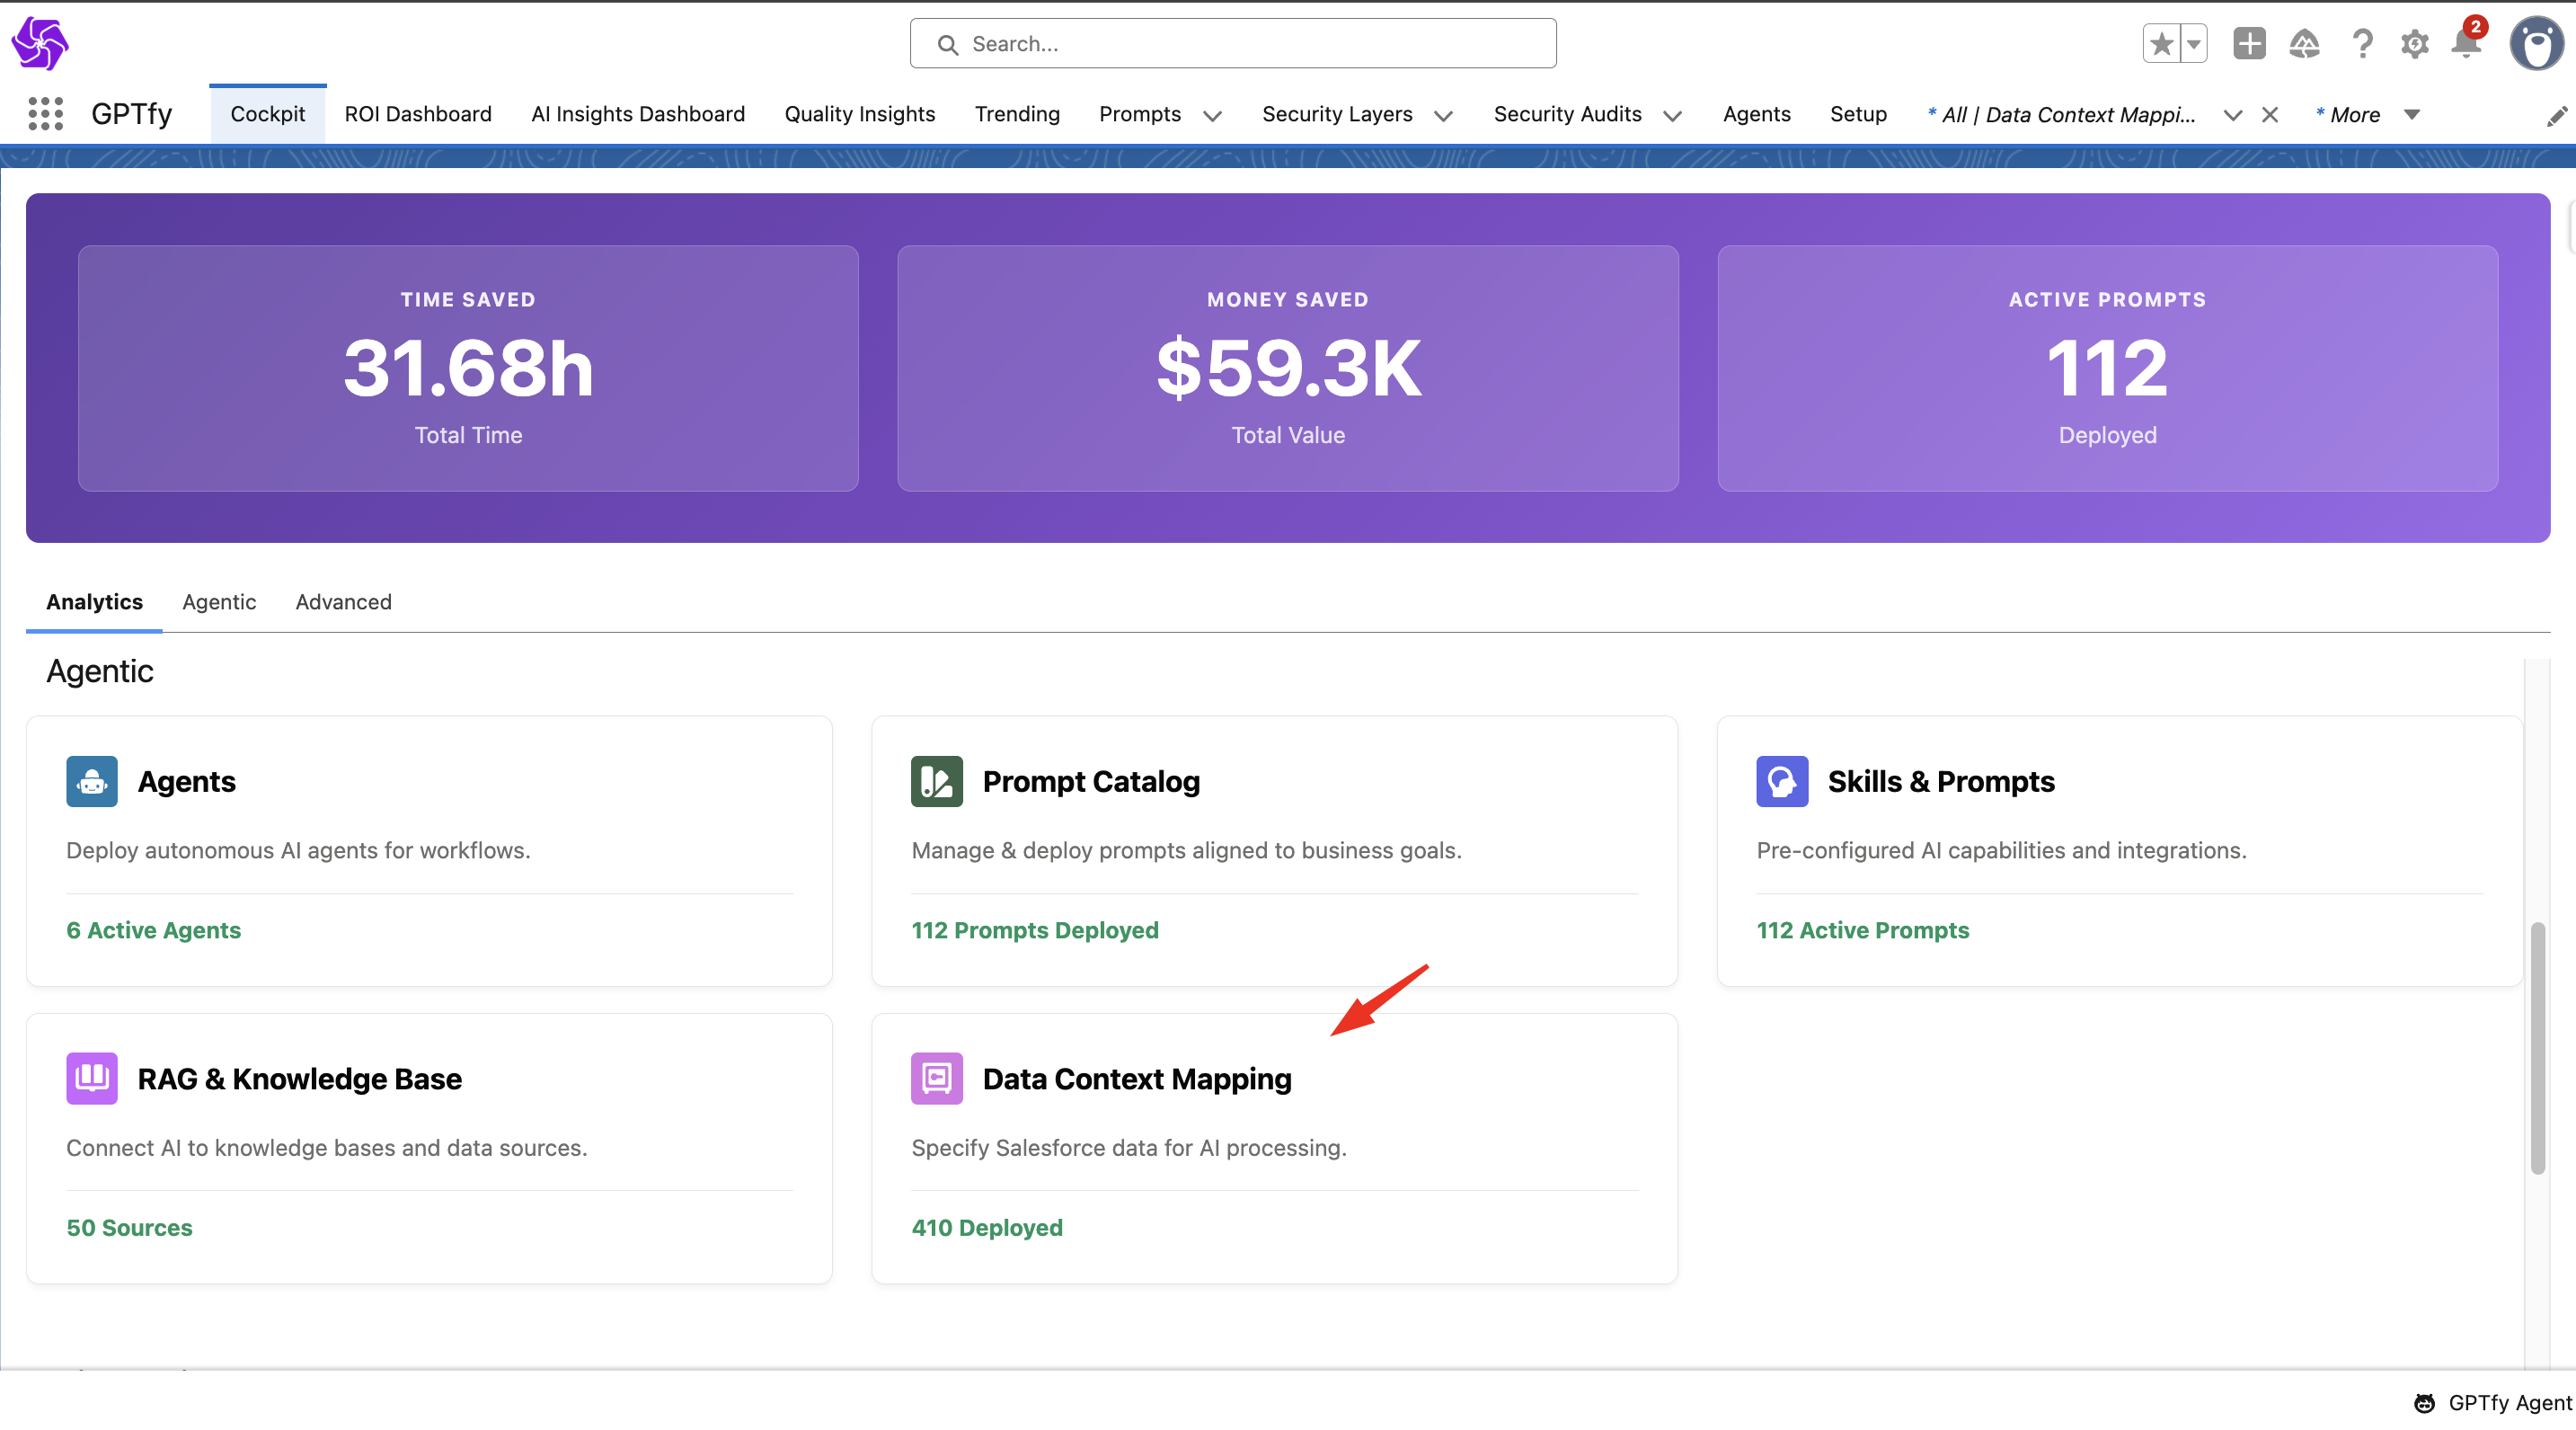
- Click the Agentic → Data Context Mapping tab.
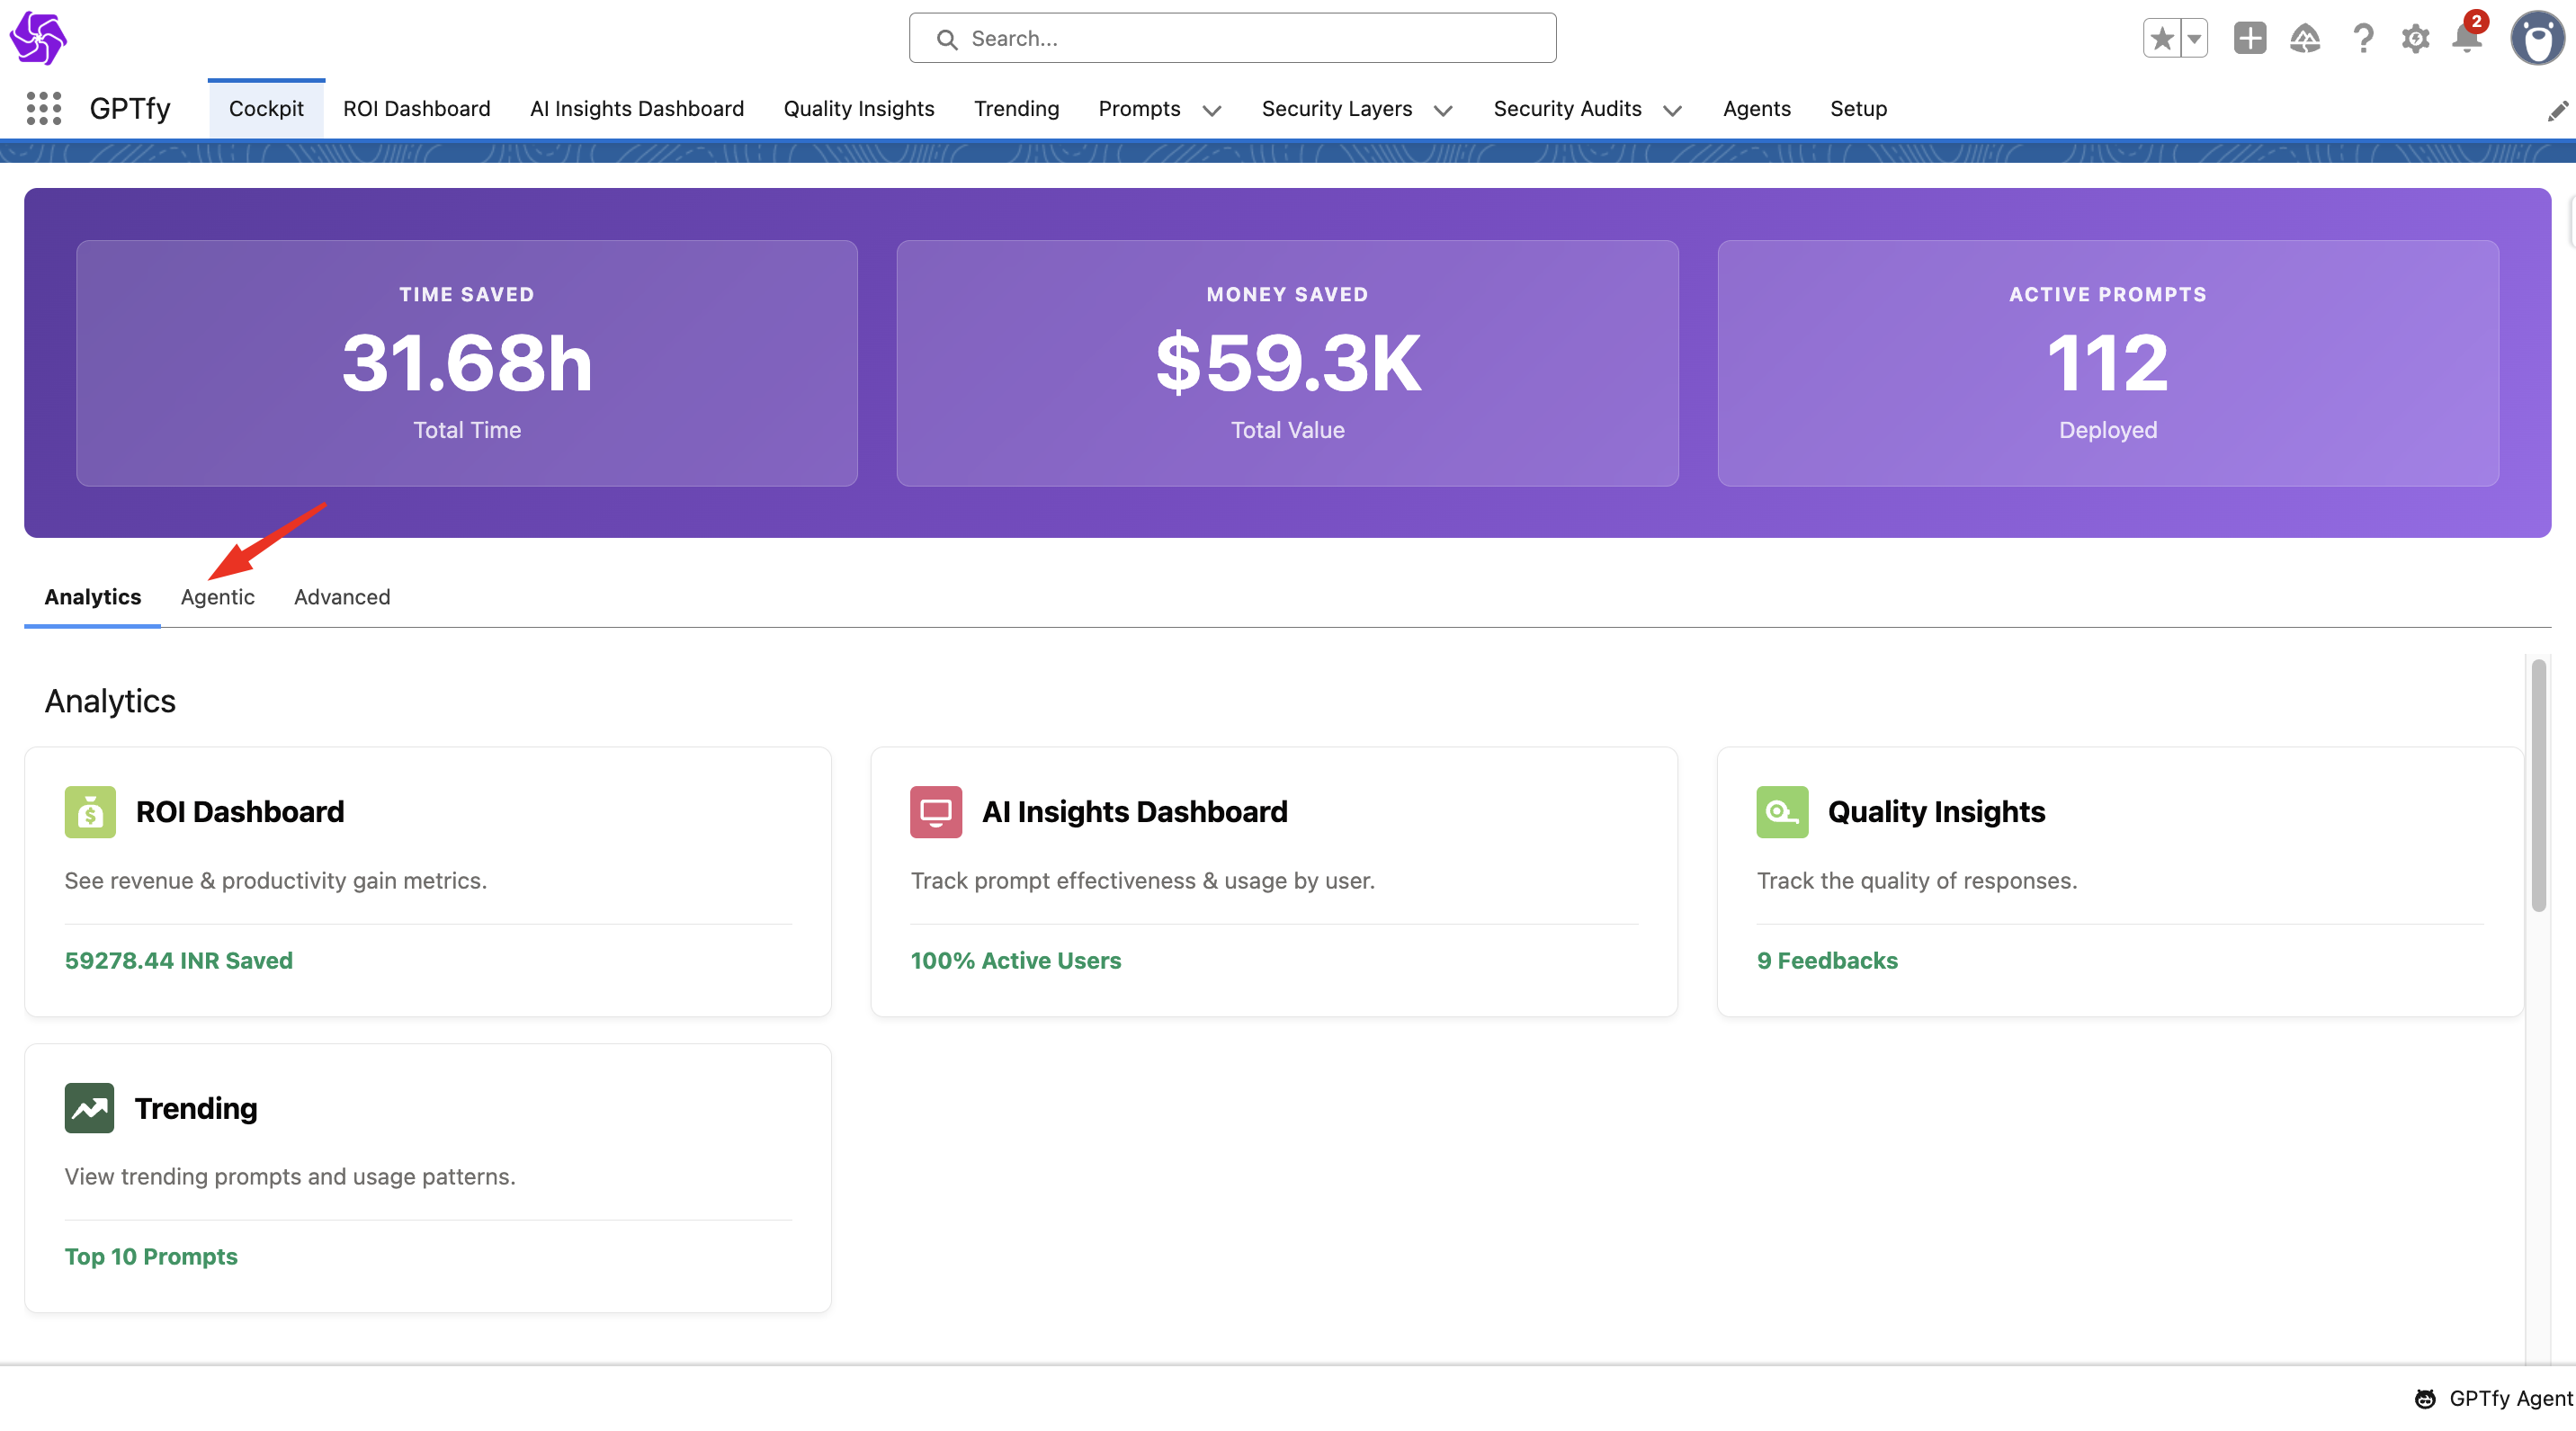
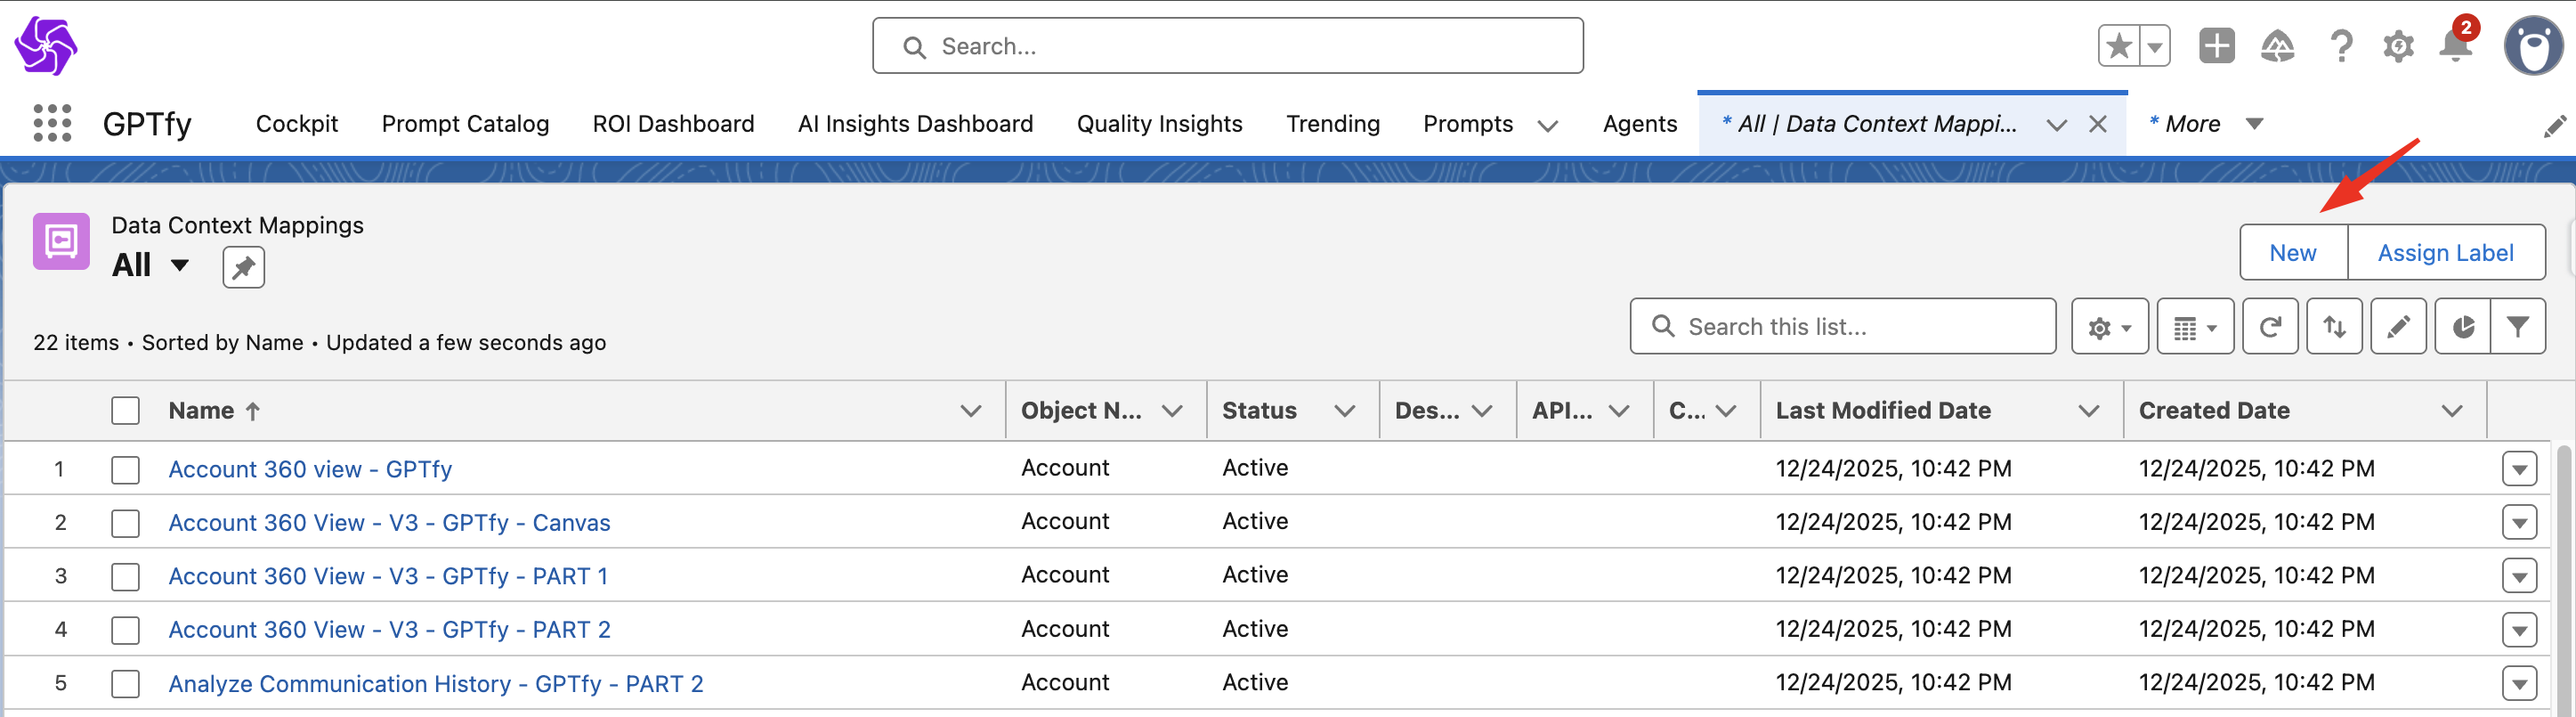
- Select the New button in the top-right corner.
Step 2: Start a New Data Context Mapping
A configuration window will appear:
- Mapping Name: Enter a clear, descriptive name. This should reflect the type of prompts the mapping supports (e.g., “Case Mapping").
- Target Object: Choose the main Salesforce object (e.g., Case, Opportunity).
Tip: Start typing the object name to jump to it faster. - The Object Label auto-populates.
- Click Save to continue.
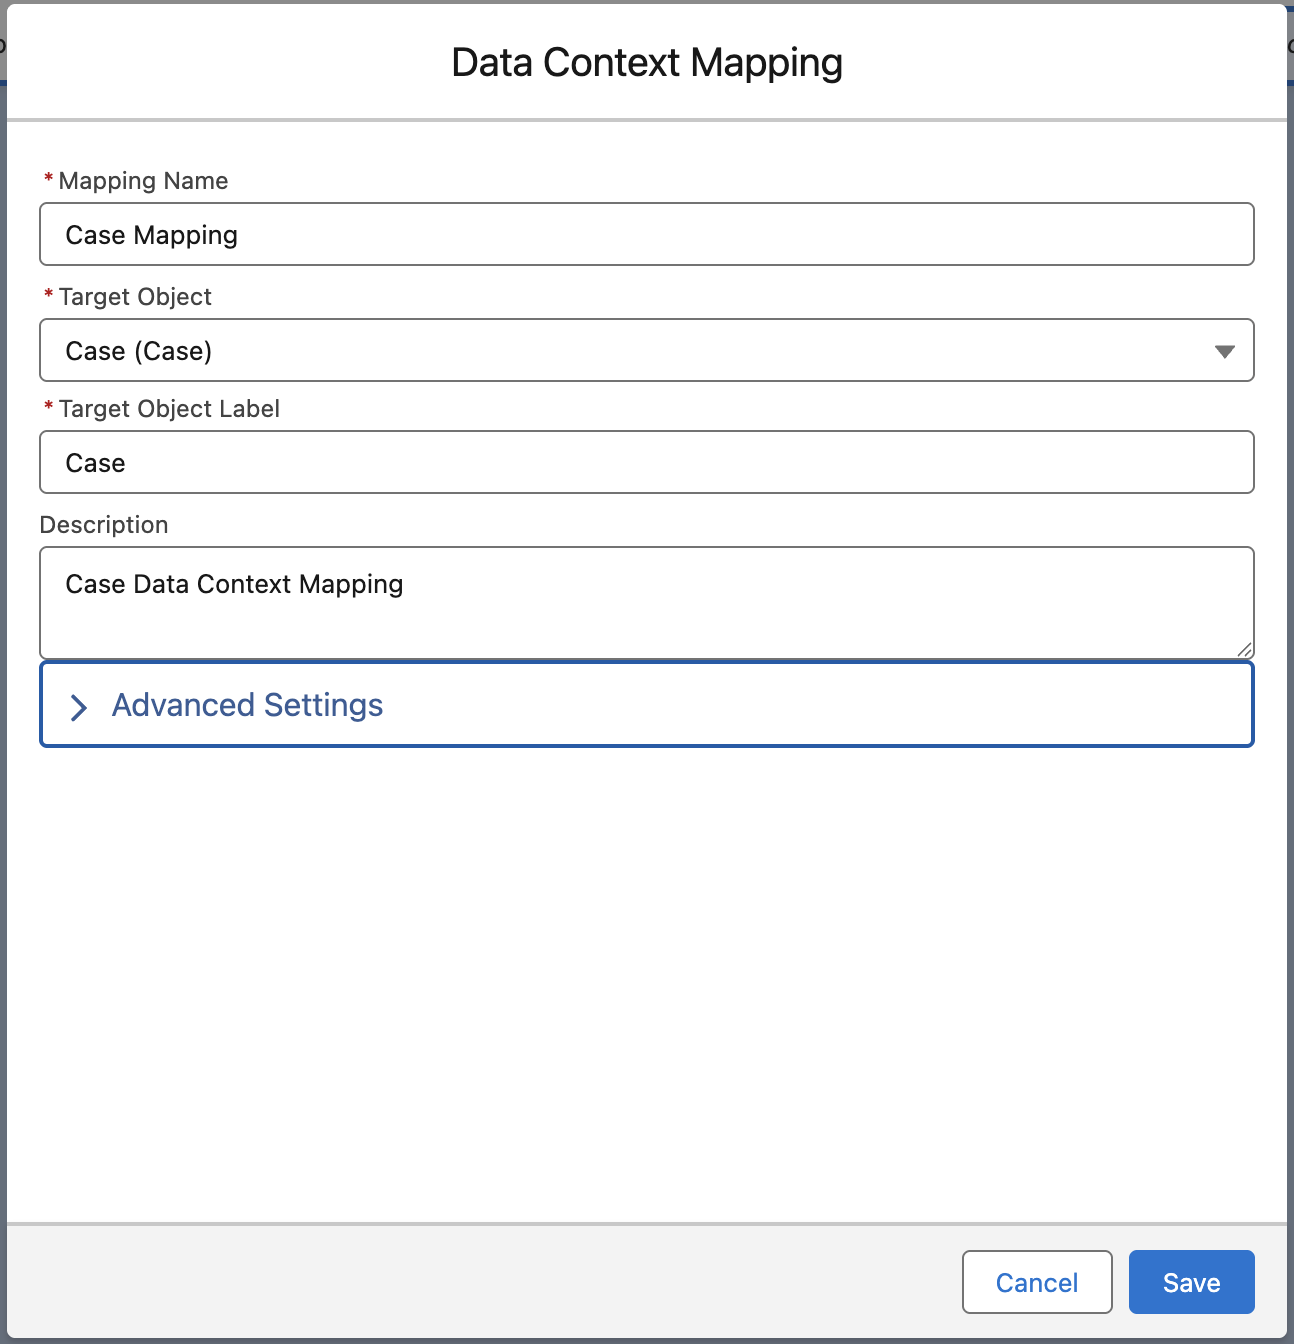
Advanced Settings
- Choose an Active API Data Source or Apex Security Layer if applicable.
- Use this only if the data will be fetched via external API connections instead of directly from Salesforce.

Step 3: Add Related Objects
To give GPTfy a richer context:
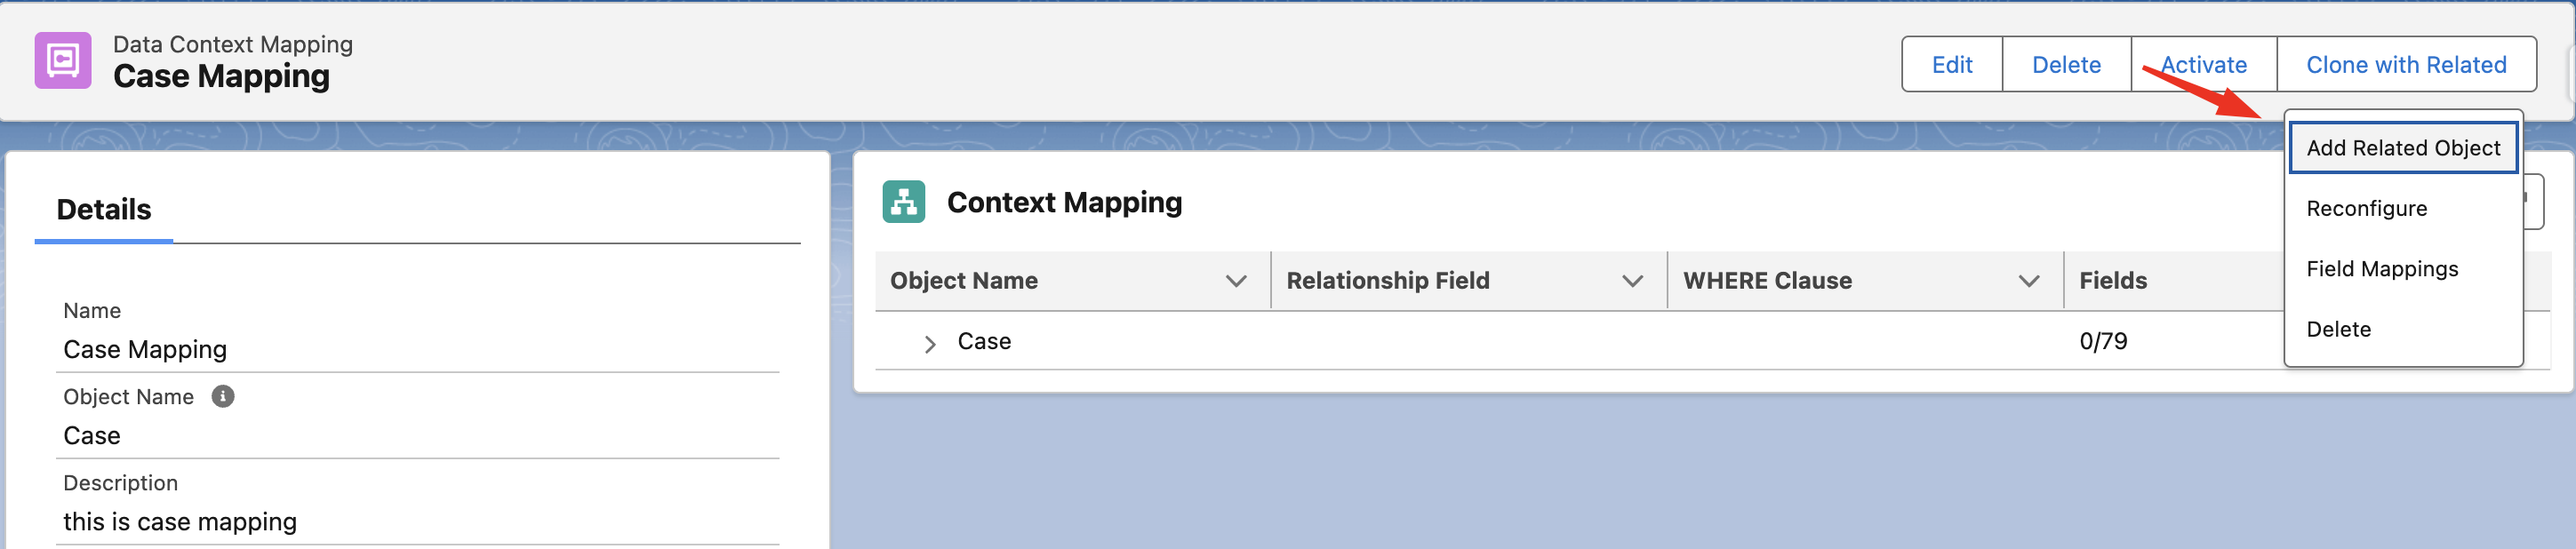
- In the Context Mapping section, click the dropdown next to your main object.
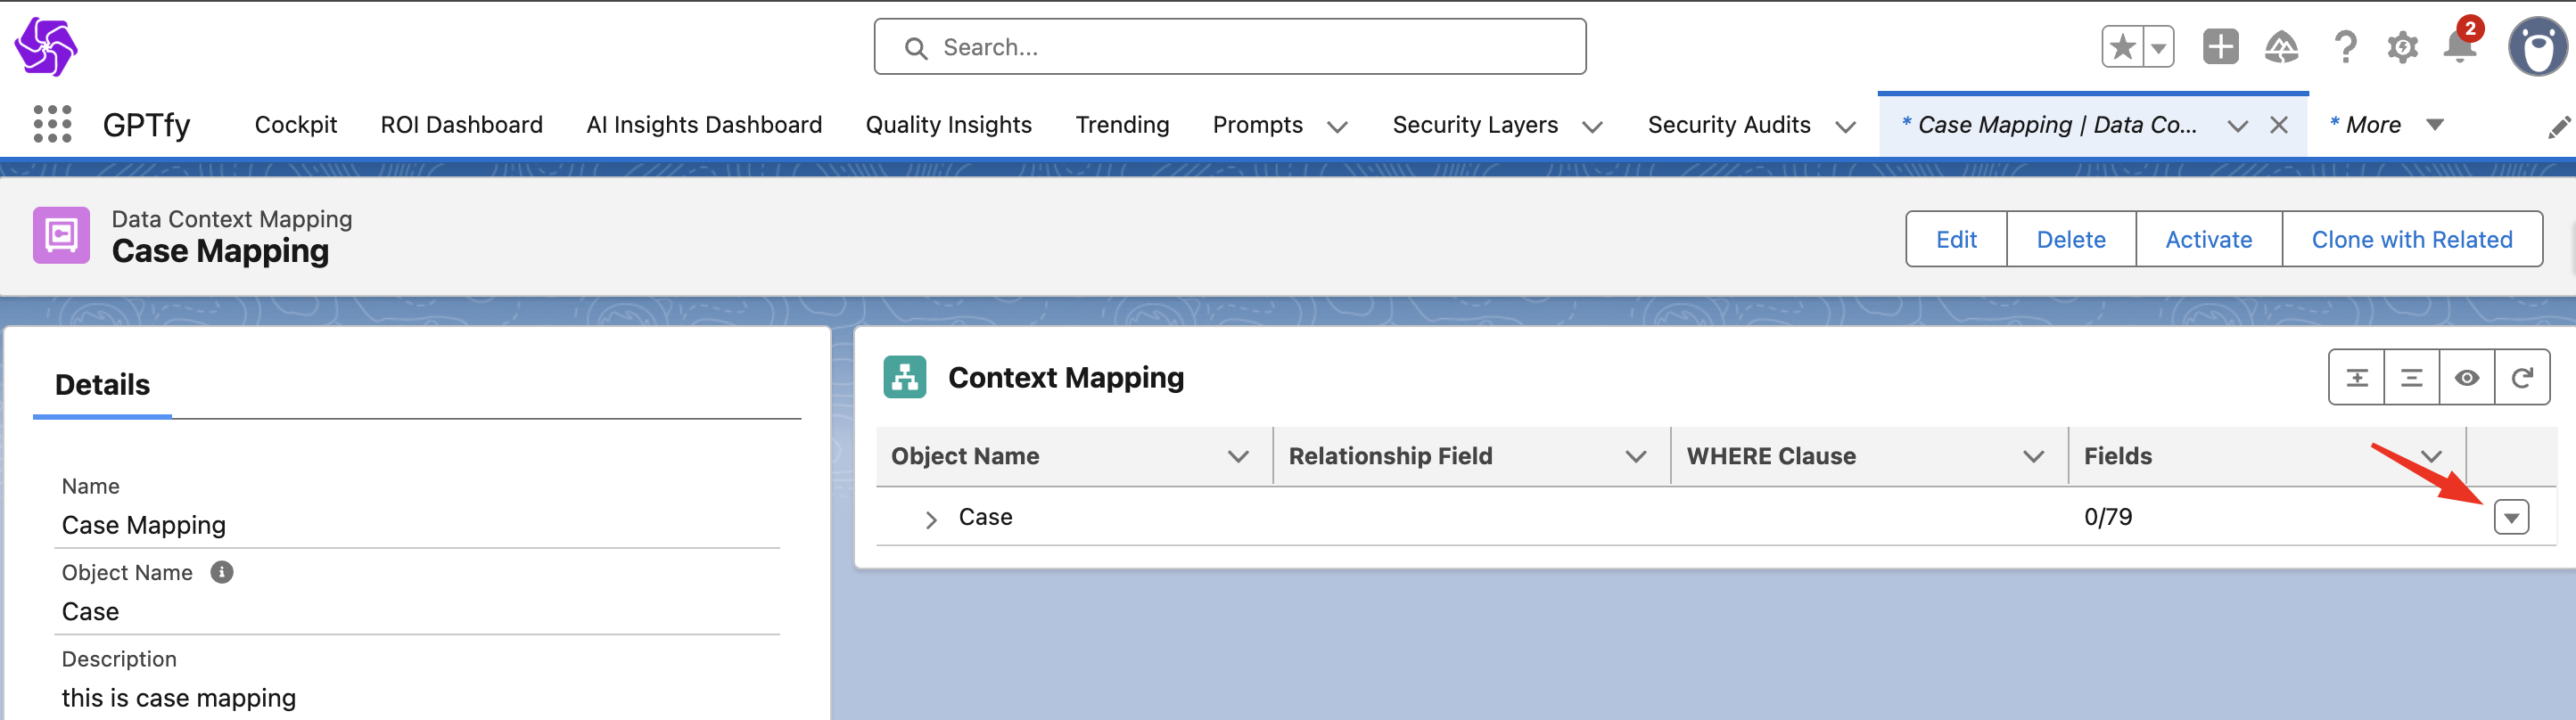
- Select Add Related Object.
- In the popup, choose a related child object (e.g., Case Comments).
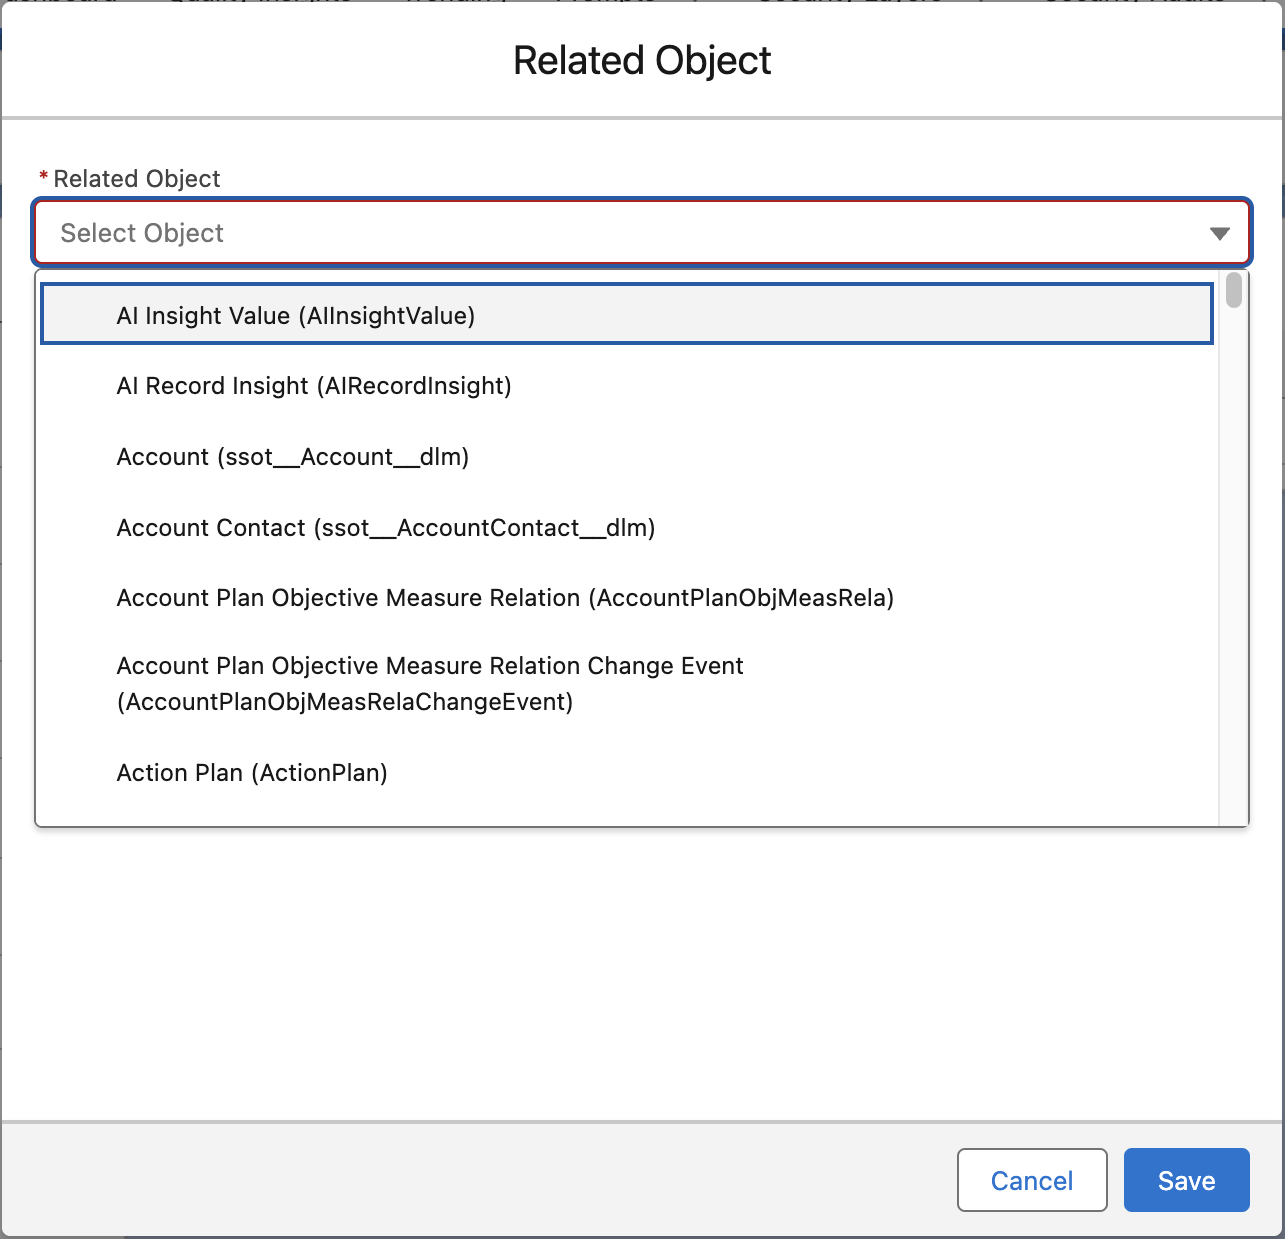
- You can repeat this step to add more child objects or even grandchildren (up to three levels deep).
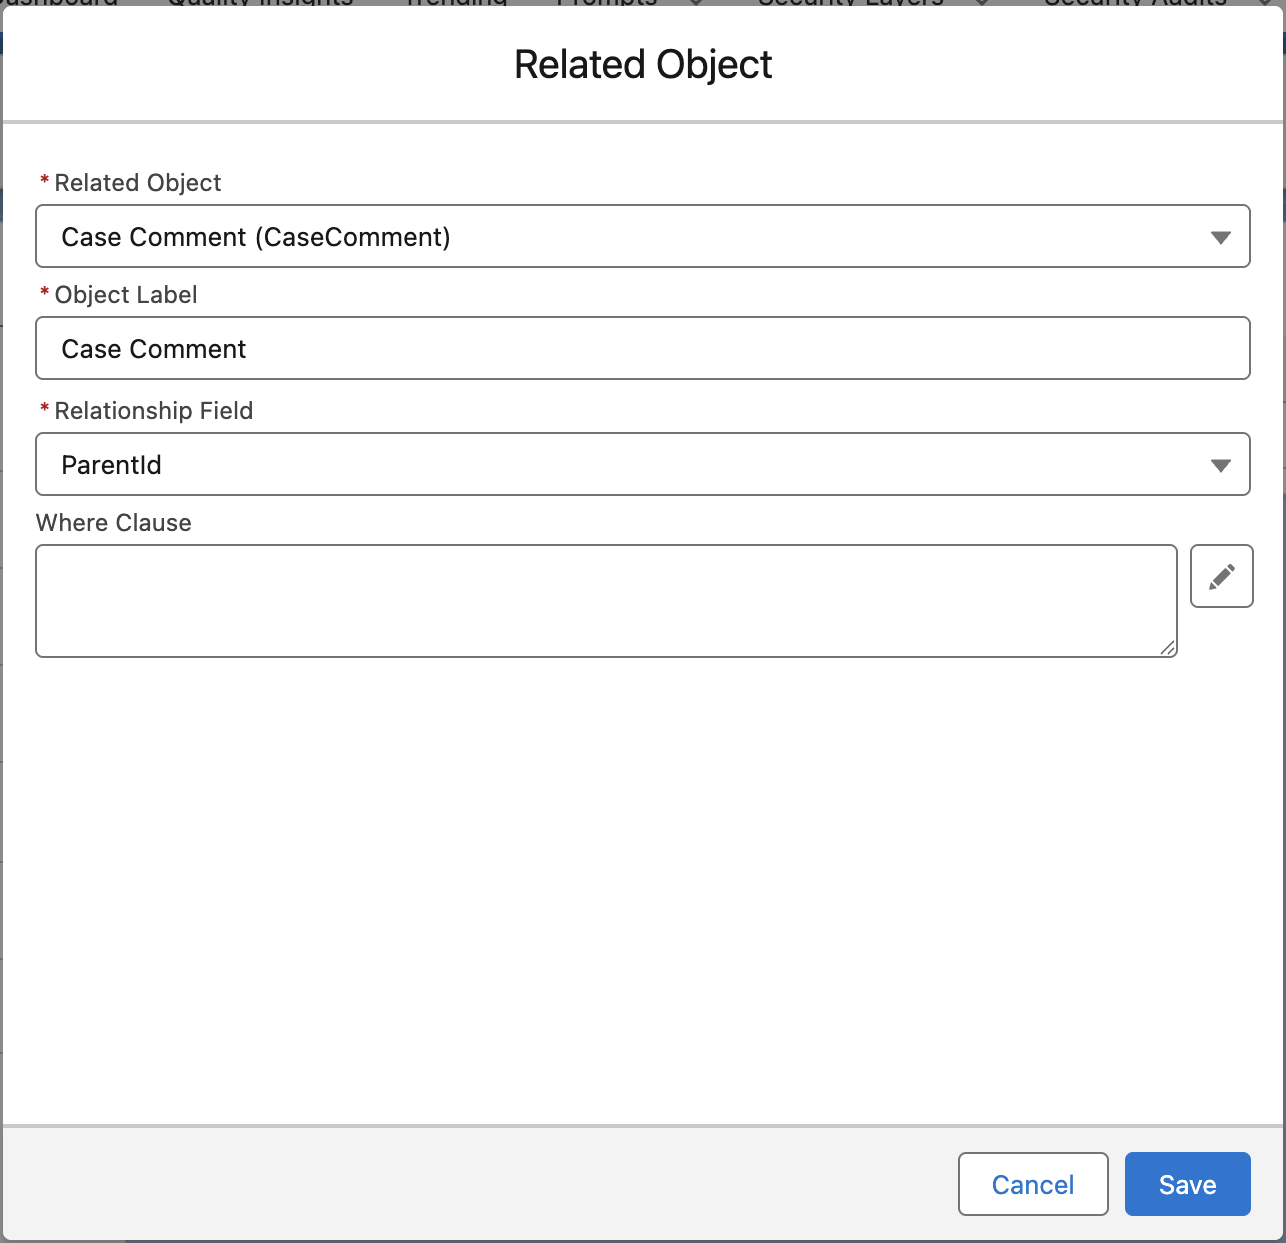
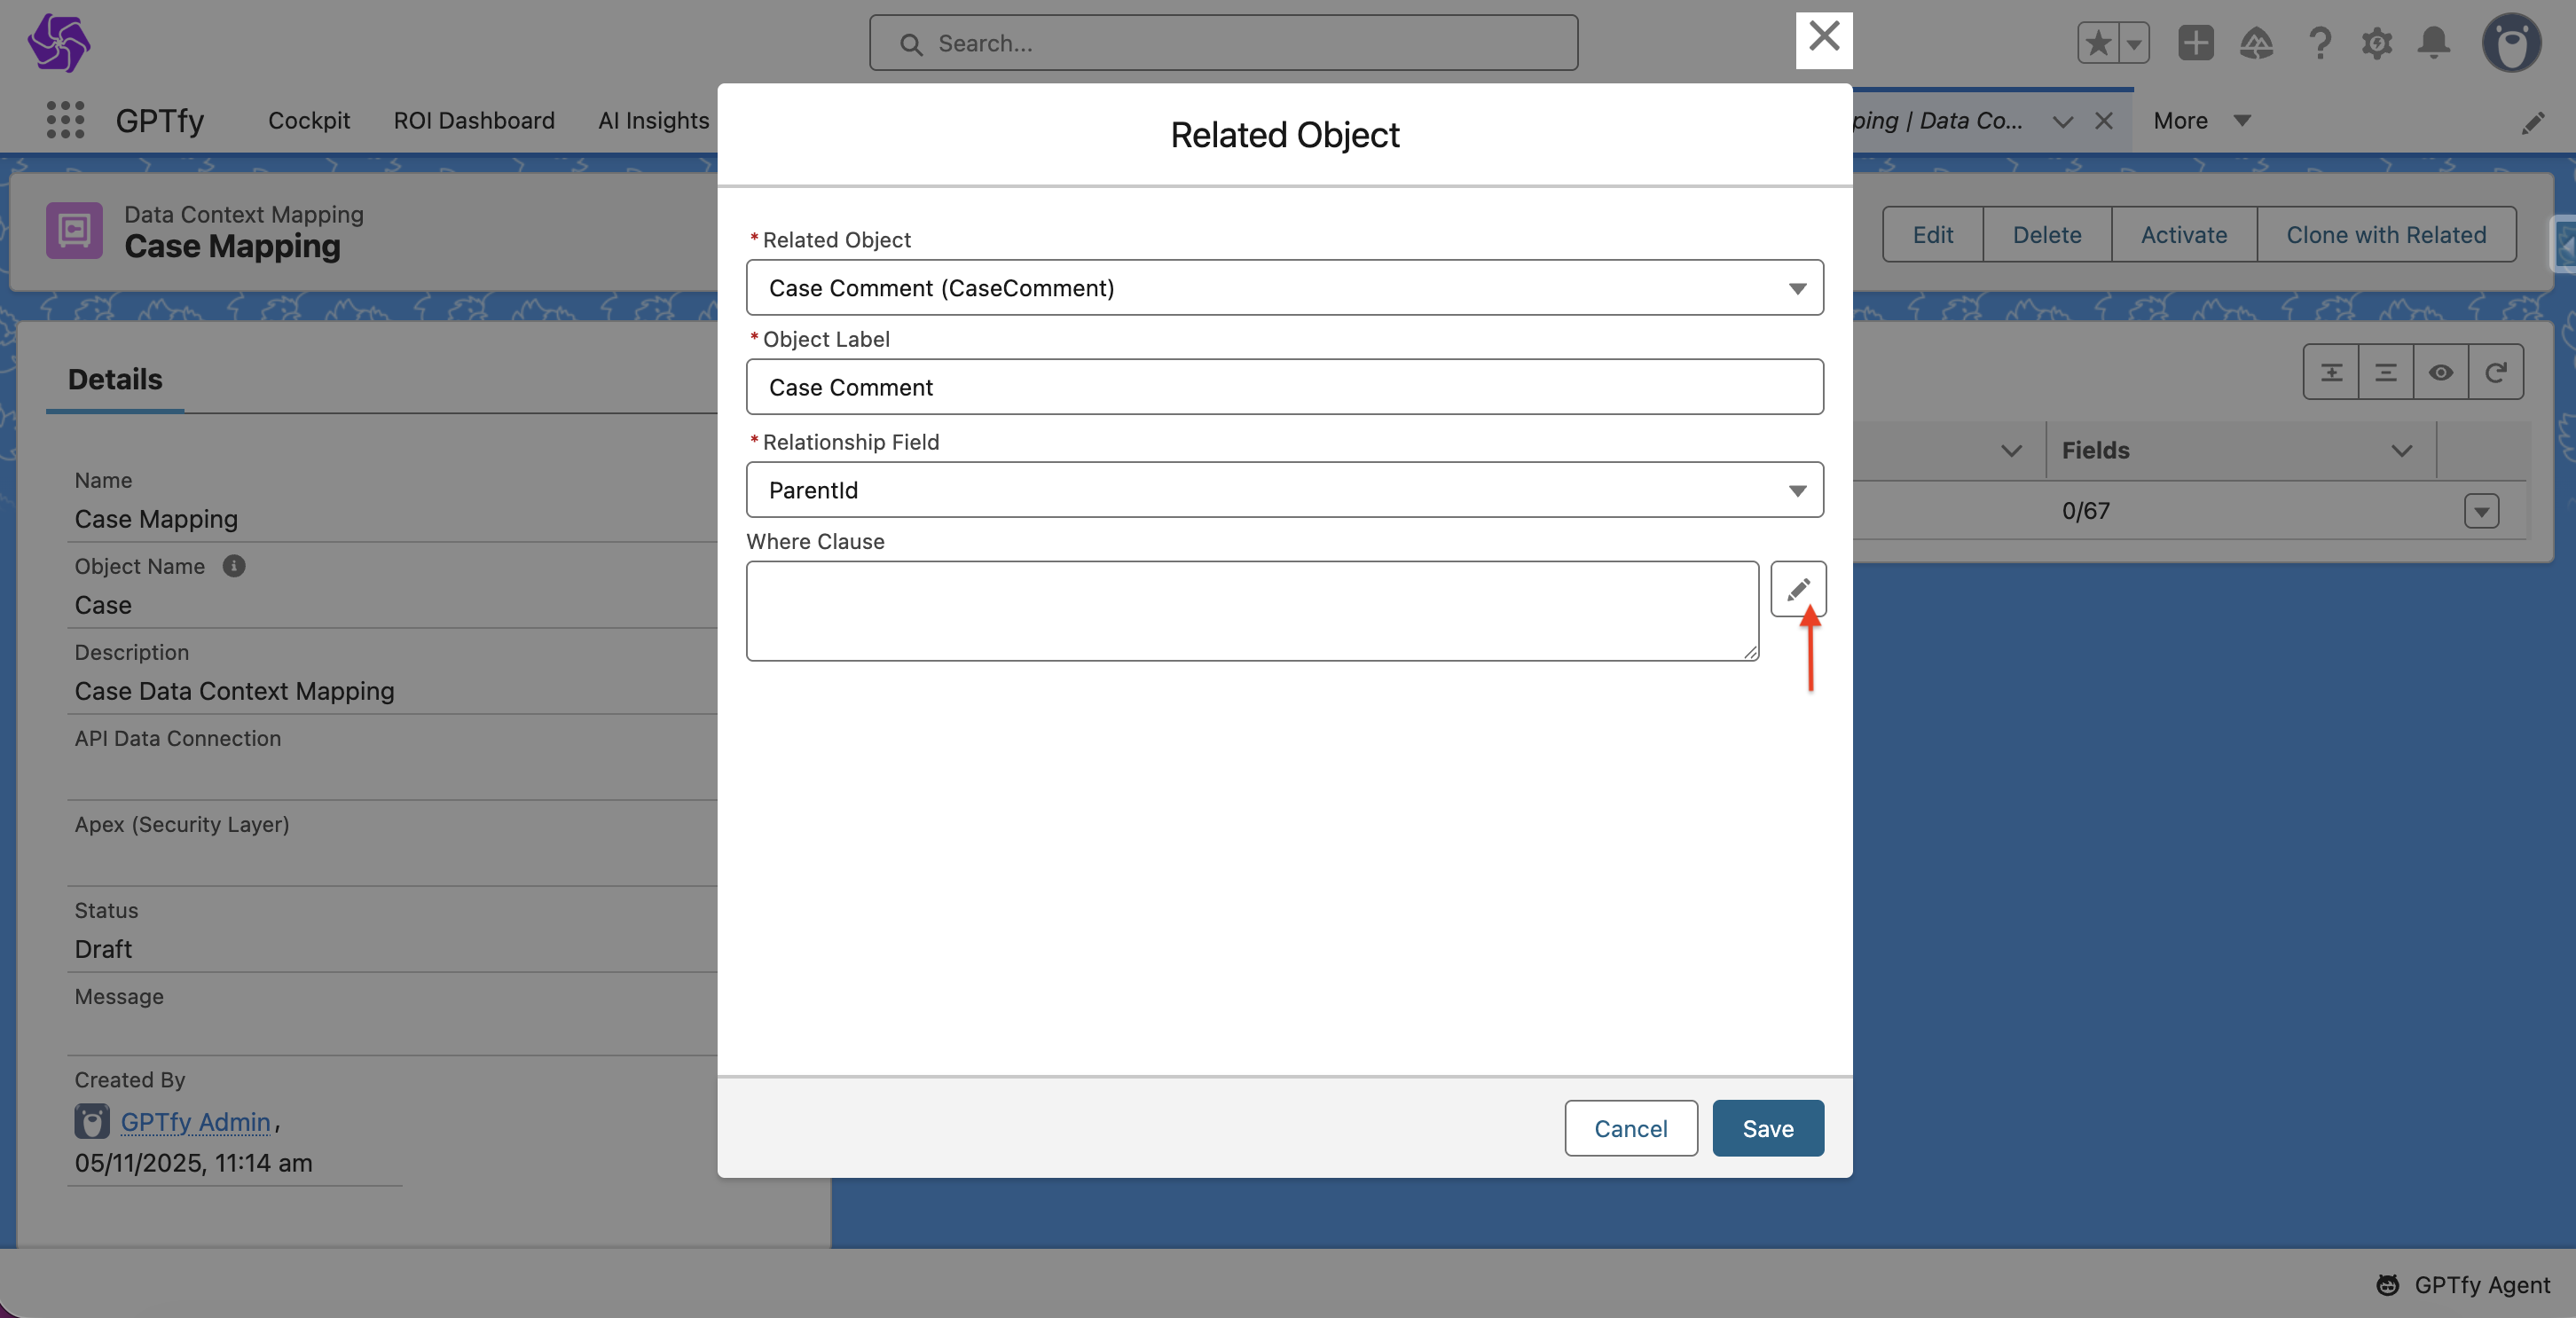
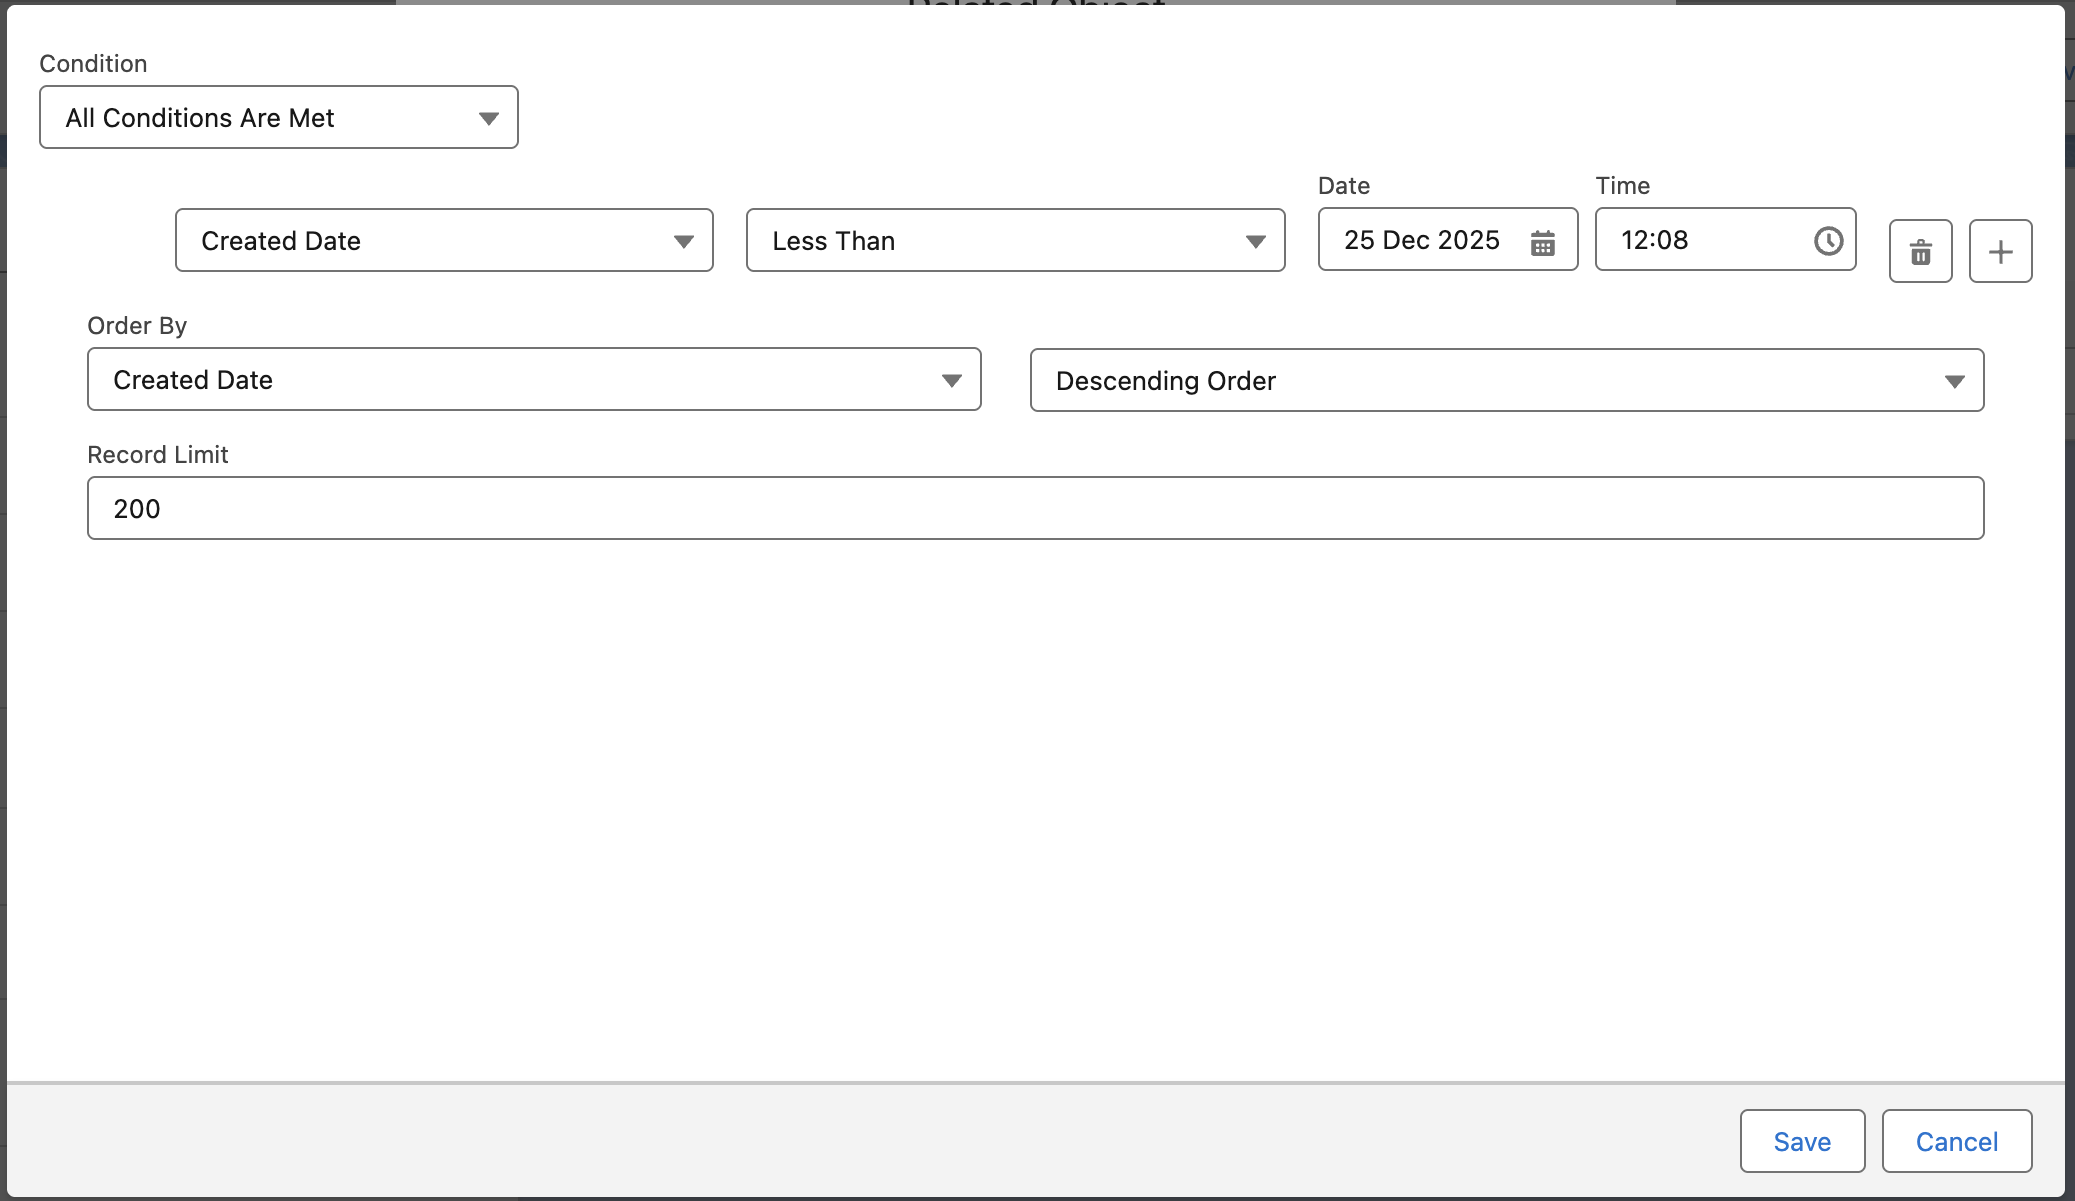
Optional Filters (Per Related Object)
-
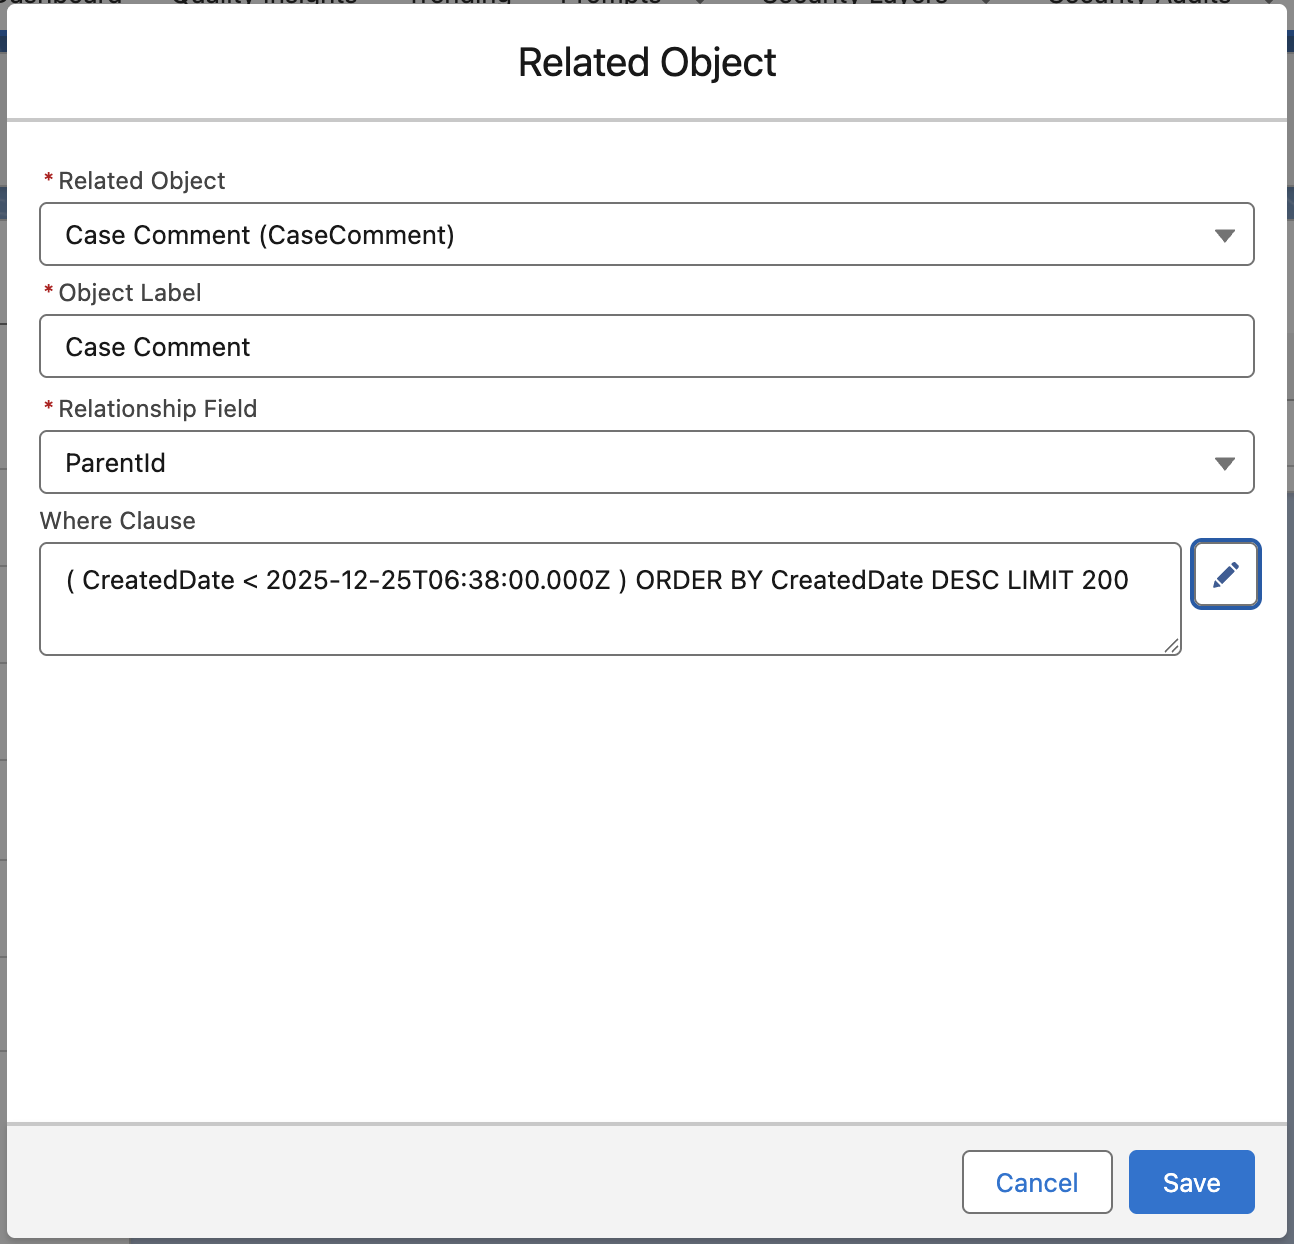
Where Clause: Limit which records are sent to the AI.
Example: CreatedDate < '2010-07-15T00:00:00Z'
Use the Pencil Icon to create filters visually.
- Order By: Choose a field to sort records (default is newest first).
- Record Limit: Restrict the number of records sent per object.
Repeat this section to add related objects for any other child objects needed. You can even add a child object to a child object (in other words, a grandchild to the main object). Three deep (main, child, and grandchild objects) is the limit, though.
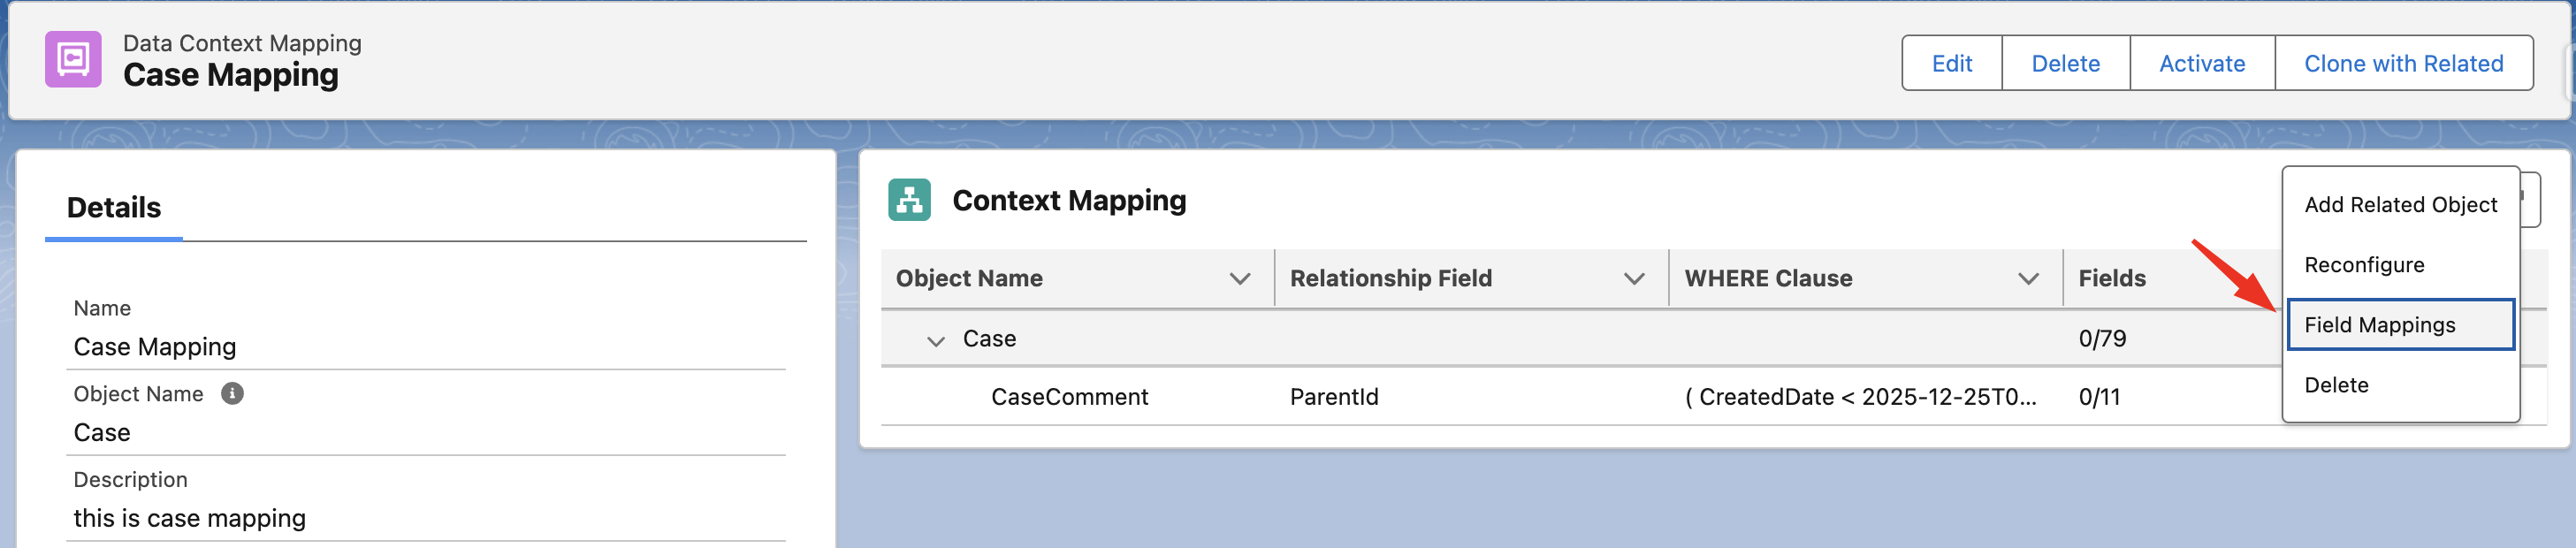
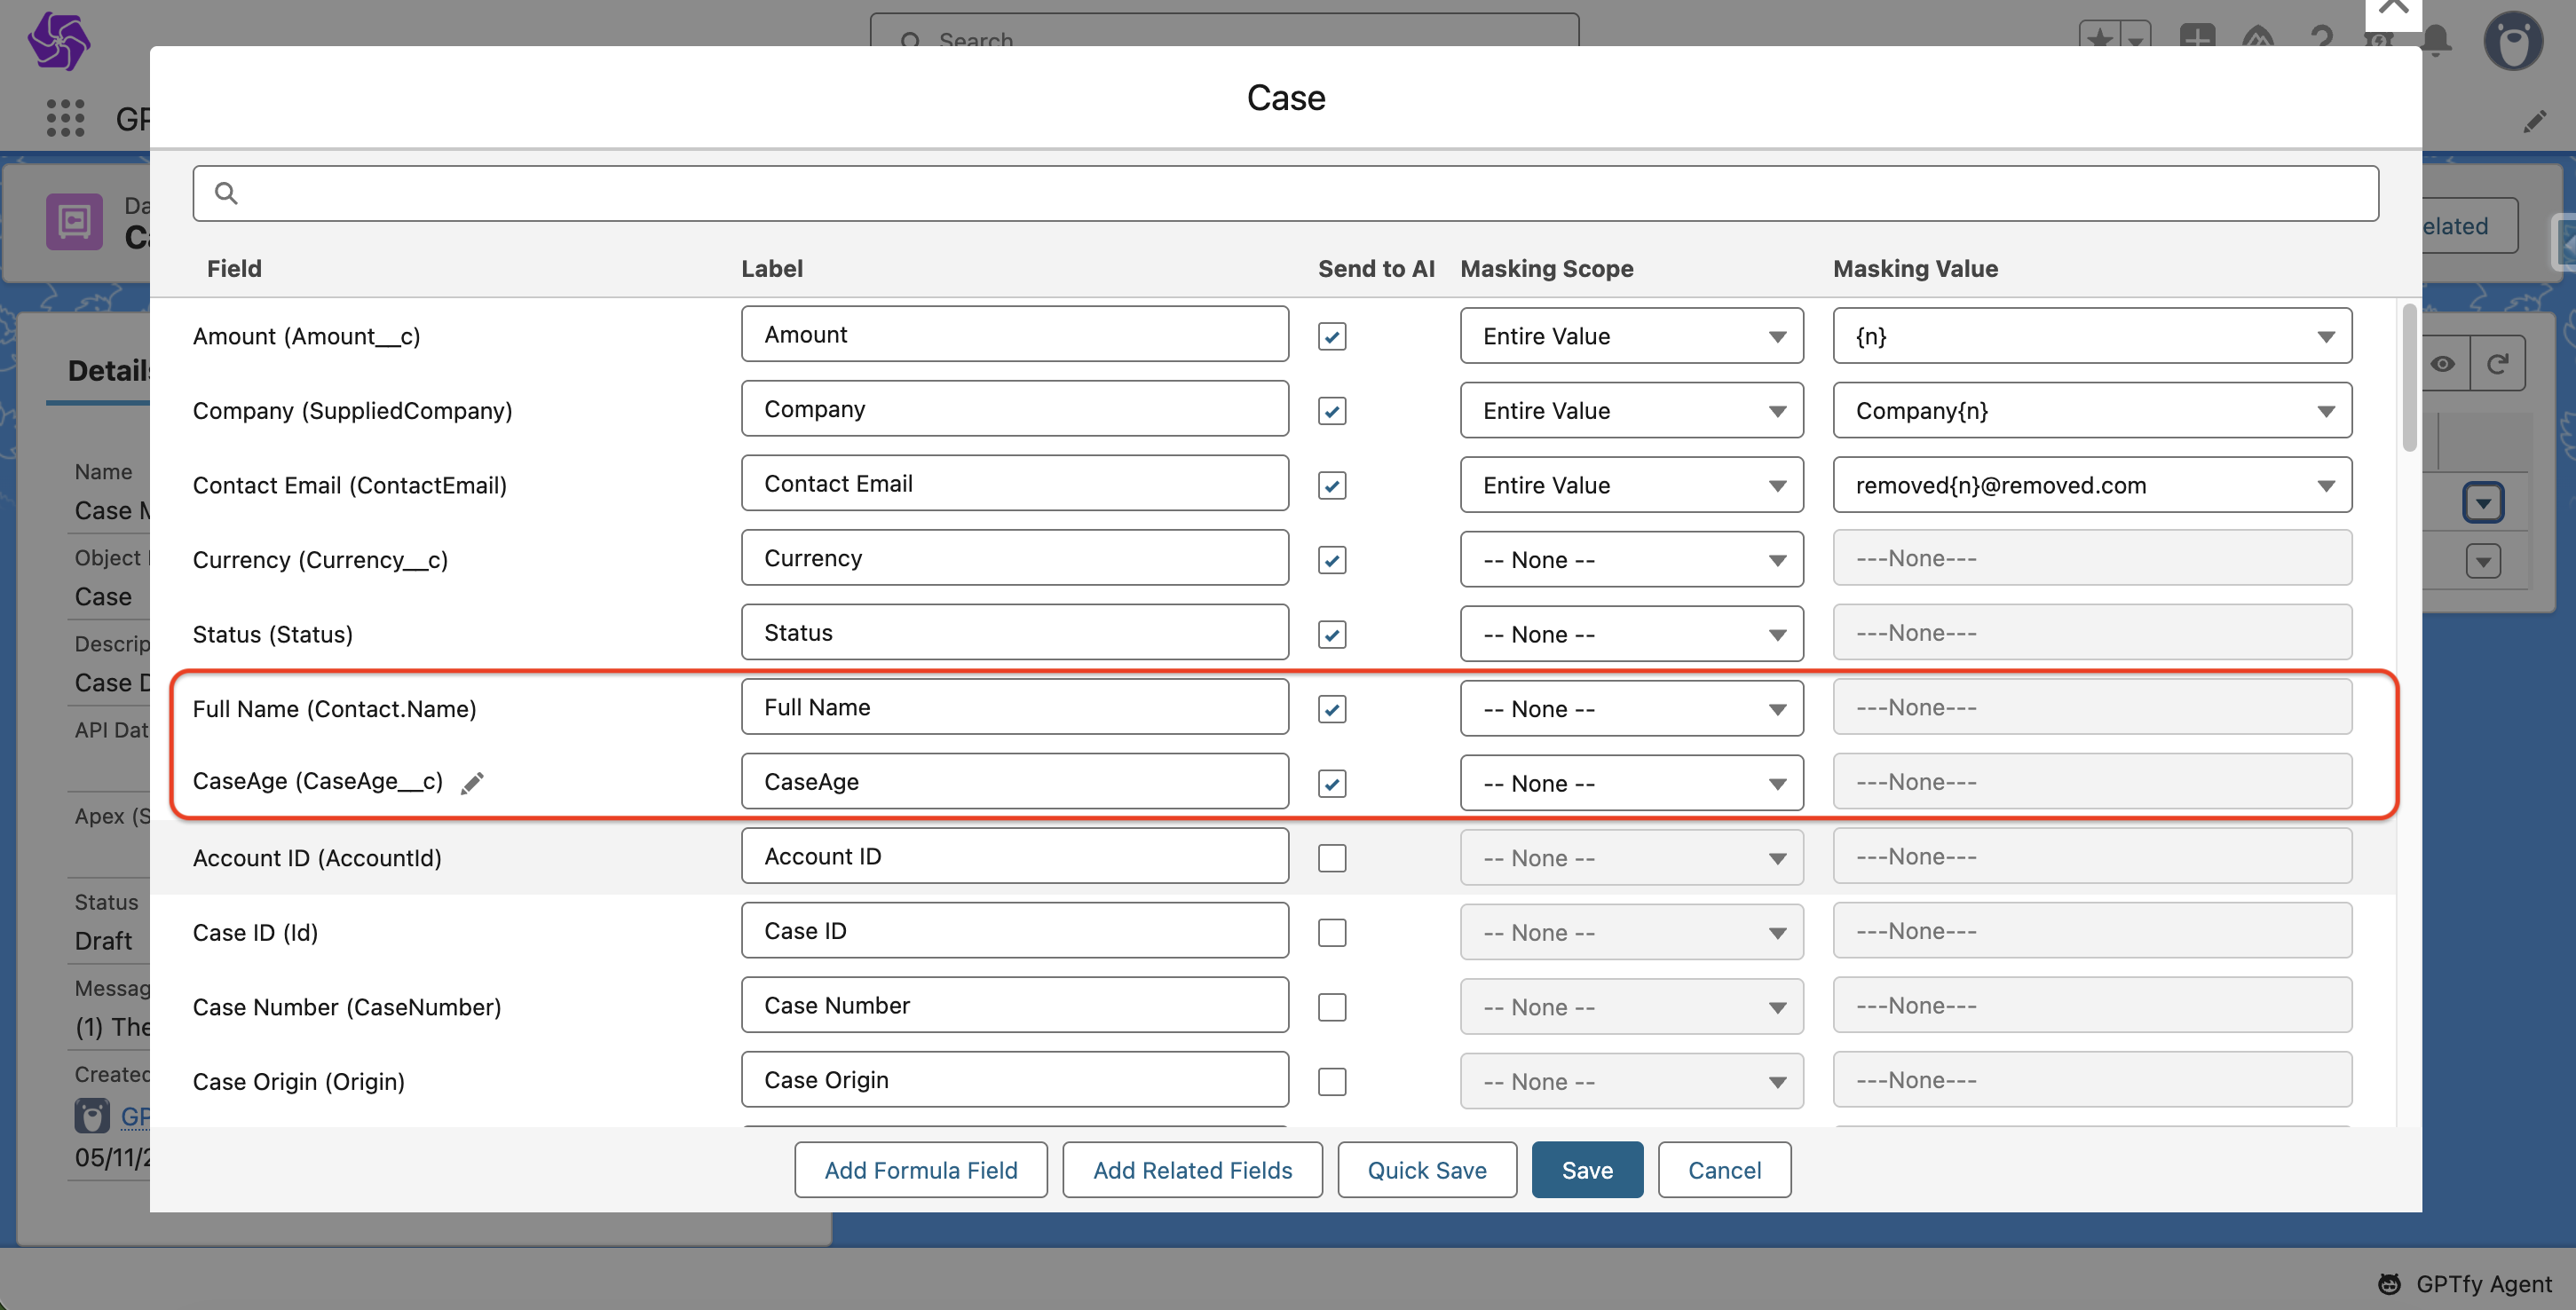
Step 4: Set Up Field Mappings and Masking
Define what data to send—and what to protect.
- In the Content Mapping section, click the dropdown next to an object.
- Select Field Mappings.
For each field:
- Field: API name
- Label: Friendly name
- Send to AI: Check to include it in prompt data
- Masking Scope: Choose how to anonymize PII
- Entire Value: Mask the full field value
- Specific Patterns: Mask only identified PII patterns (for long text)
- Masking Value: Choose the placeholder (e.g.,
PersonFull(n))

Click Quick Save to save the options and keep the window open with the latest field displayed at the top. Use Save to record your changes and exit the window.
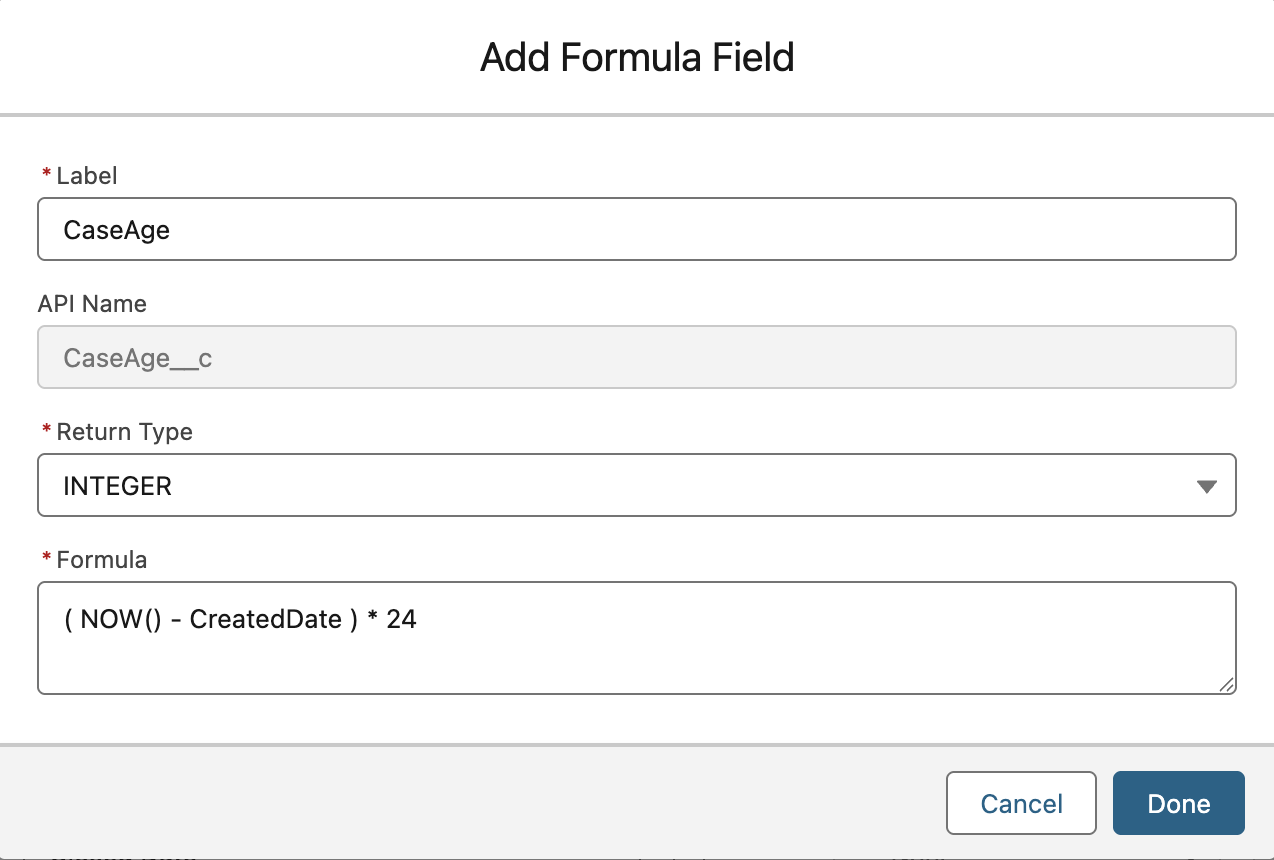
Add Dynamic Formula Fields
You can now add Salesforce dynamic formulas directly in your Field Mappings without needing new fields on the Salesforce object.
- Click Add Formula Field.
- Write your Salesforce-style formula
Example:Name & " (" & Website & ")" - Validation of the formula happens while saving.
- This field can be referenced for related fields as well.
Benefits of Dynamic formulas:
- Save you from creating too many formula fields on objects.
- Allow richer, context-specific information during prompt execution.
- Automatically included during Export, Import, and Activation.
Note: Formulas are evaluated live at the time of AI invocation, so always validate them for accuracy.
Add Related Fields
Use this to bring in fields from parent or system-level objects.
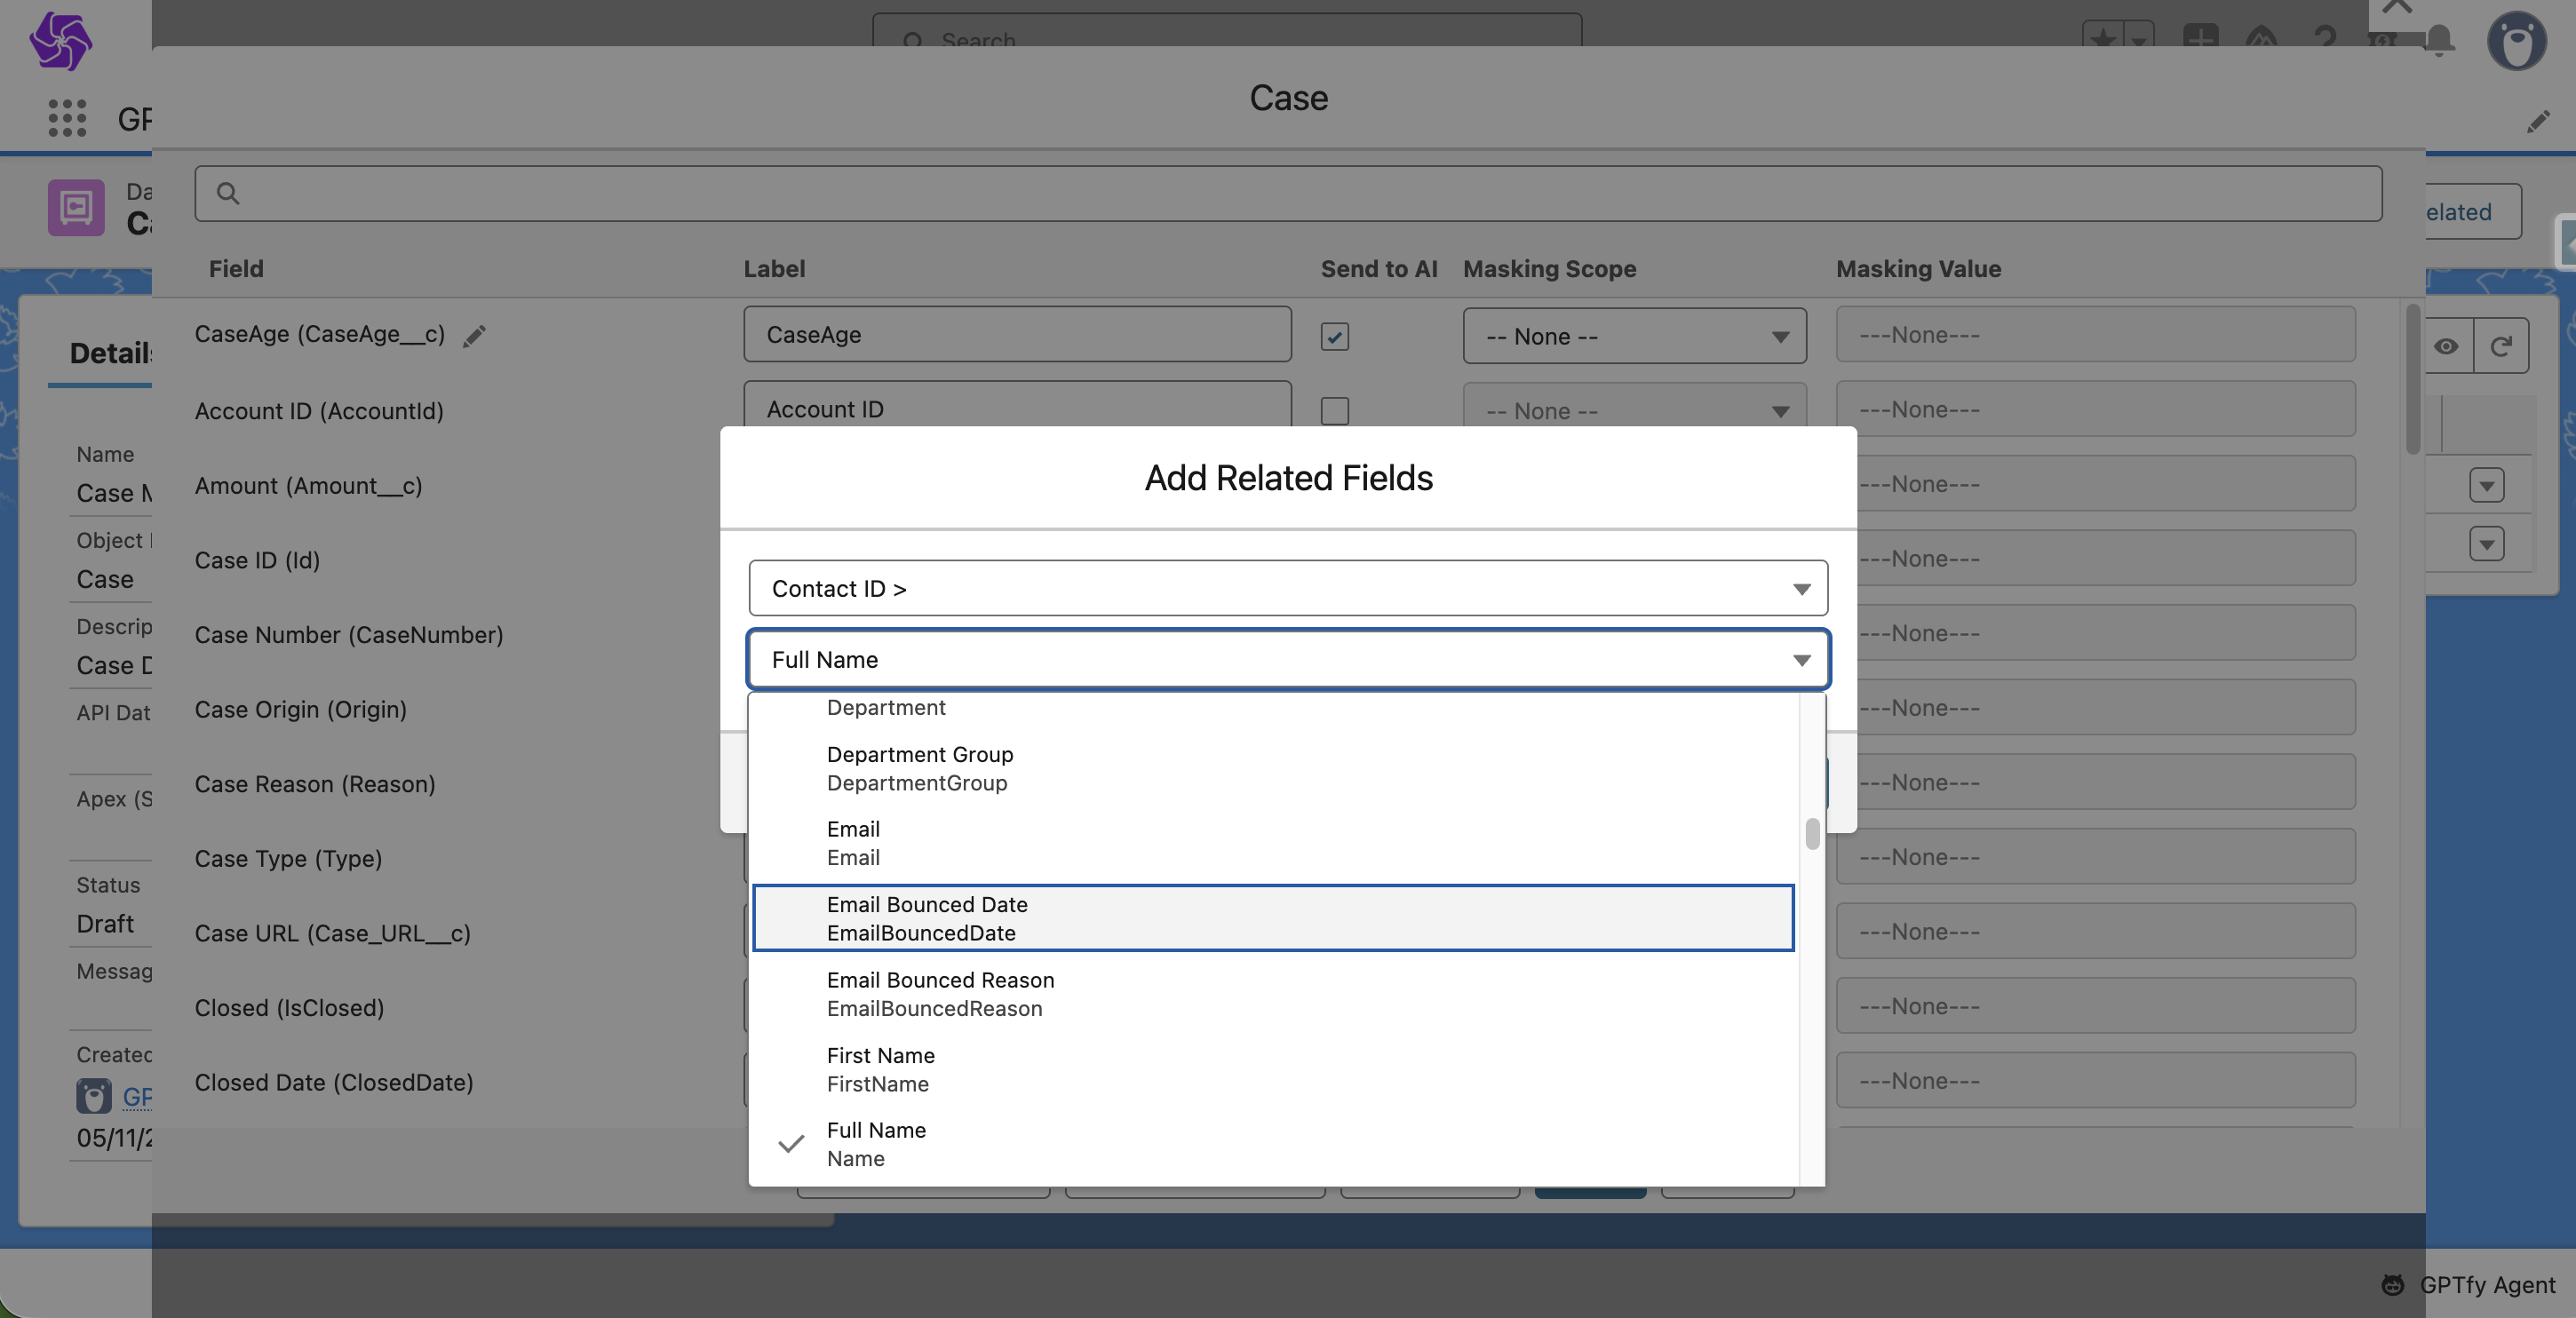
Example: While mapping Task, use the “Add Related Fields” button to access fields from the related Account or User (creator/last modifier).
The Add Related Fields functionality works for 5 levels up.
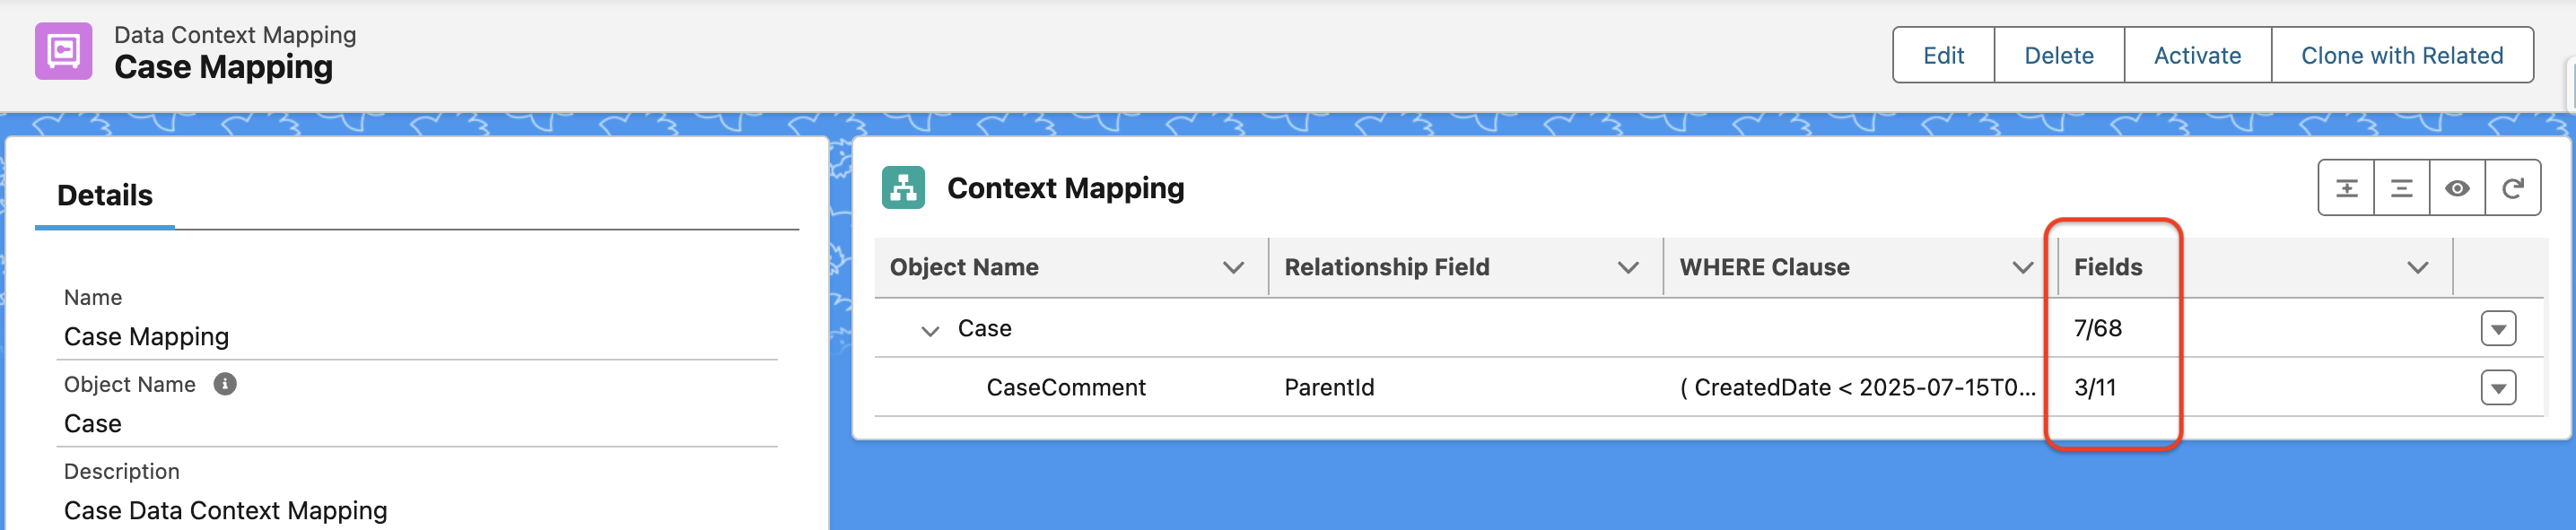
Note: You can see how many of the available fields you selected for each object when you look back at the Context mapping screen. Ensure that you have at least one field selected on the added object(s)
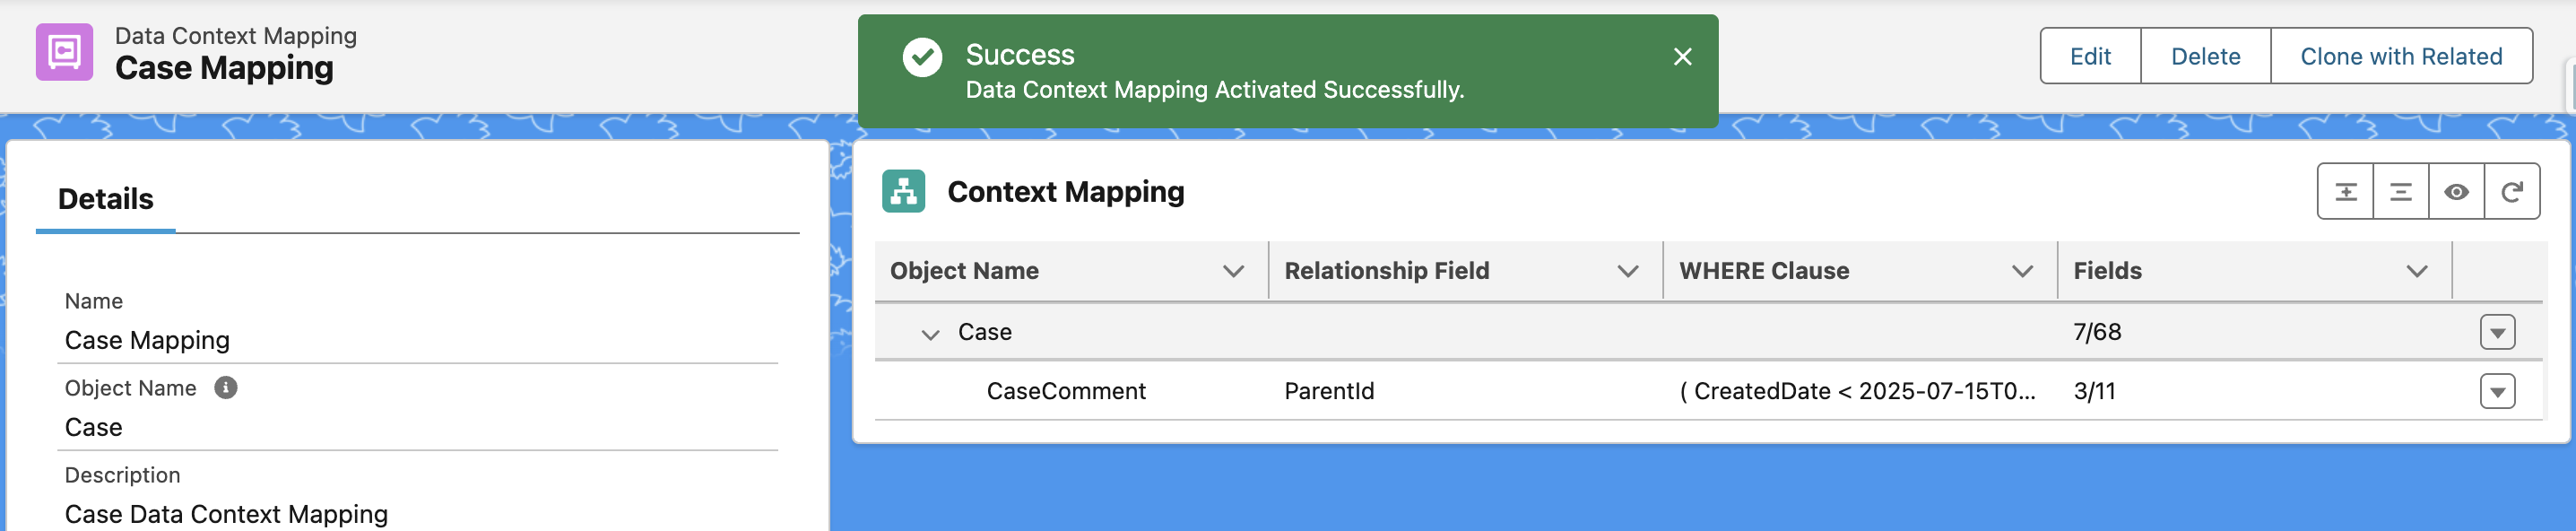
Step 5: Activate Your Data Context Mapping
Click Activate to:
- Validate your mapping configuration
- Make it available for selection when building prompts
Note: Mapping won't be usable in prompts until it's activated.
Best Practices
- Send only what’s needed
Avoid overloading mapping with extra fields. Be intentional. - Mask all PII
Use masking to stay compliant with privacy standards like GDPR or HIPAA. - Keep it generic
Design mappings that work across multiple prompts and scenarios. - Review regularly
Update context mappings as your data model or prompt strategy evolves.
Bonus Feature
Use the Clone with Related button to quickly duplicate a mapping, including all related objects and fields that are included in the mapping.
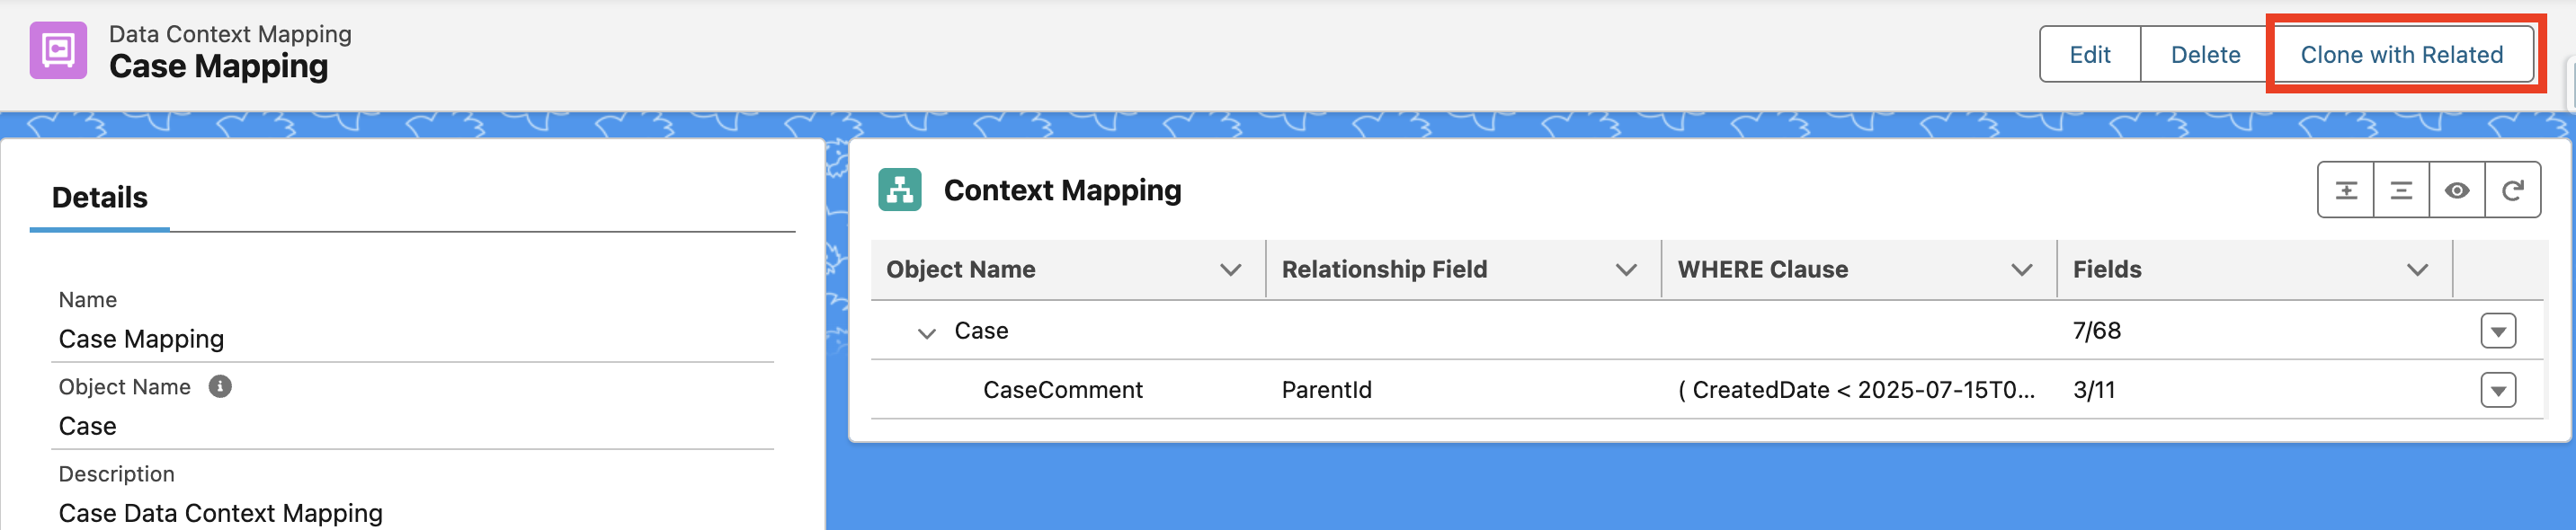
This is great for:
- A/B testing different masking approaches
- Creating prompt-specific variations
Note: Remember to rename the cloned mapping to avoid confusion.