GPTfy Security Layers for Data Anonymization
GPTfy ensures that sensitive data is anonymized before it reaches AI models by using multi-layered security. These layers provide different strategies to mask personally identifiable information (PII) and maintain compliance with privacy standards.
What You Can Do:
- Identify and anonymize sensitive data using both prebuilt and custom rules.
- Apply anonymization strategies based on the field type (e.g., Email, Phone).
- Mask data dynamically using Regular Expressions (Regex), blocklists, field logic, or custom Apex classes.
- Audit and verify anonymization through Security Audit records.
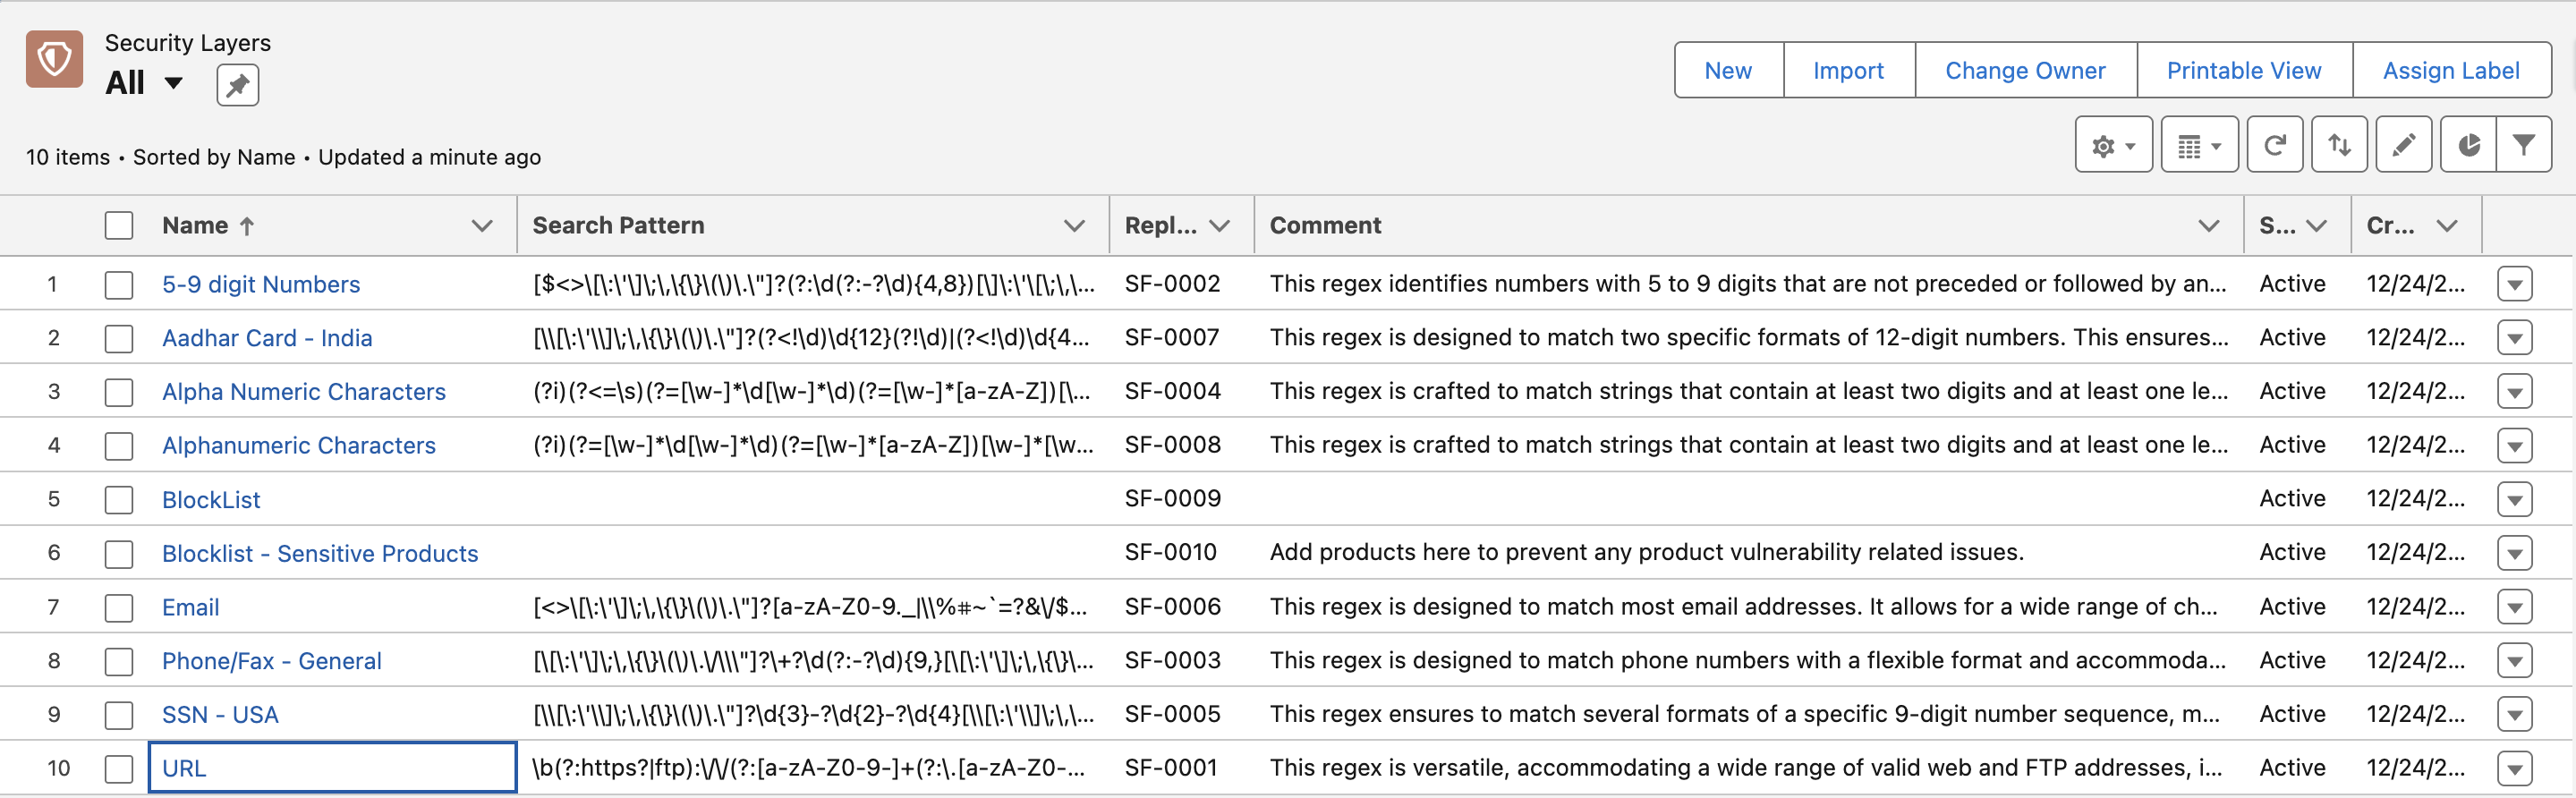
GPTfy Security Layers:
| Layer | Description | Best Use |
|---|---|---|
| Layer 1: Field Value Based | Masks entire field values based on field mapping (e.g., Email, Phone, Name). | Email, Phone, Name fields |
| Layer 2: Format-Based (Regex) | Masks specific patterns within long text fields using Regex (e.g., Emails, Phones, SSNs inside notes). | Emails, Phones, SSNs inside long text |
| Layer 3: Blocklist-Based | Masks sensitive words or terms from long text using blocklists (e.g., Product names, Confidential IDs). | Unstructured text |
| Layer 4: Apex-Based | Executes custom Apex logic for complex or unmatched data patterns (e.g., custom rules for specialized data). | Complex data masking |
Note: Layers 2 and 3 operate on long text fields to mask specific strings within unstructured content.
Field-Level Controls for Regex Matching:
| Checkbox | Functionality | Benefits | Potential Drawbacks |
|---|---|---|---|
| Match Complete Word | Adds (?<=\s)(?=\s) to match whole words. | Prevents partial matches within other words (e.g., avoids matching "cat" in "category"). | Might miss matches not surrounded by whitespace. |
| Ignore Special Characters | Ignores special characters at the start or end of a match (e.g., ., : ; {}). | Allows flexible matching for inconsistently formatted data. | Could result in unintended matches if special characters are meaningful. |
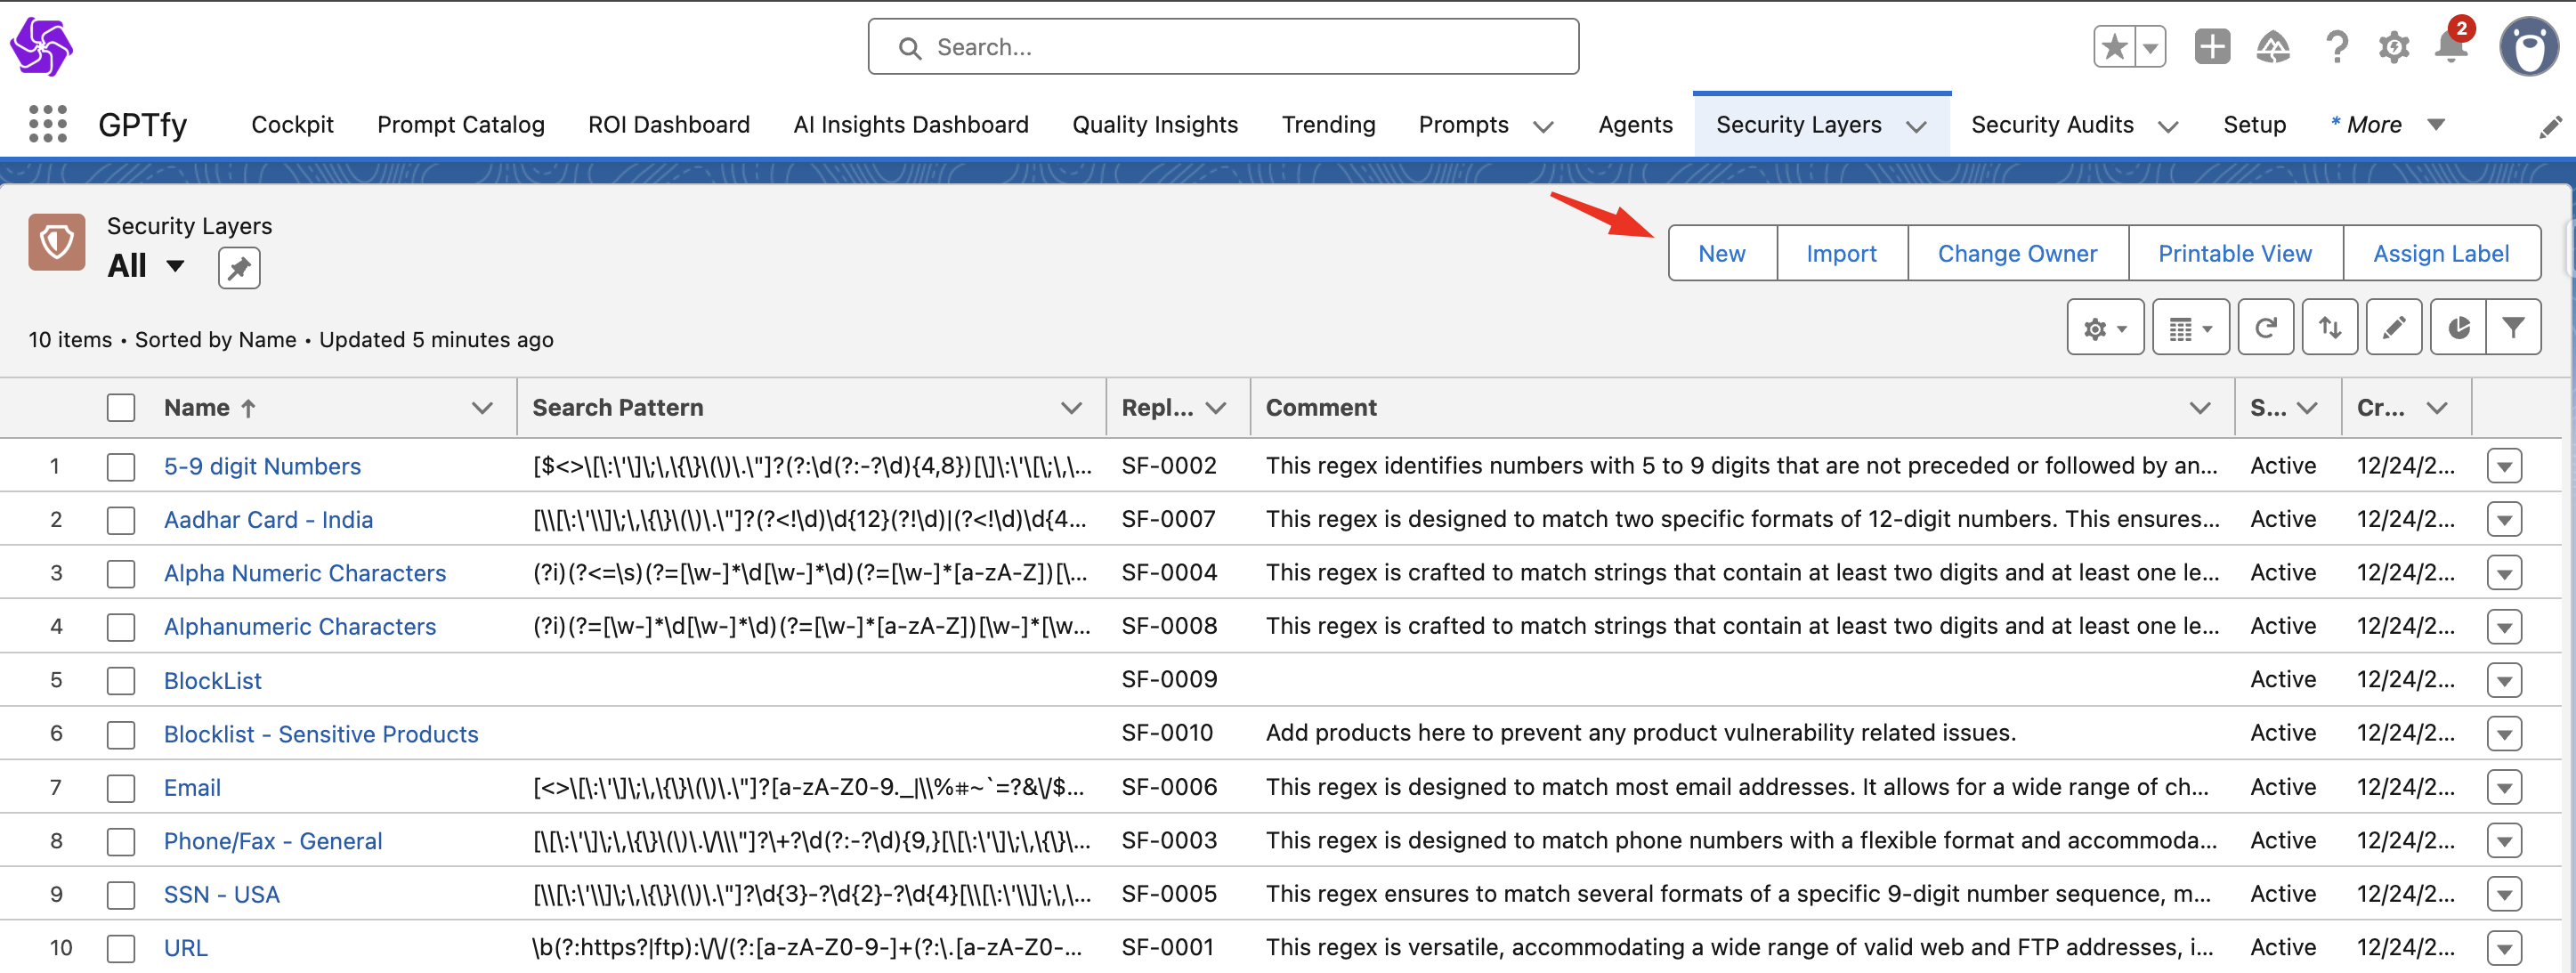
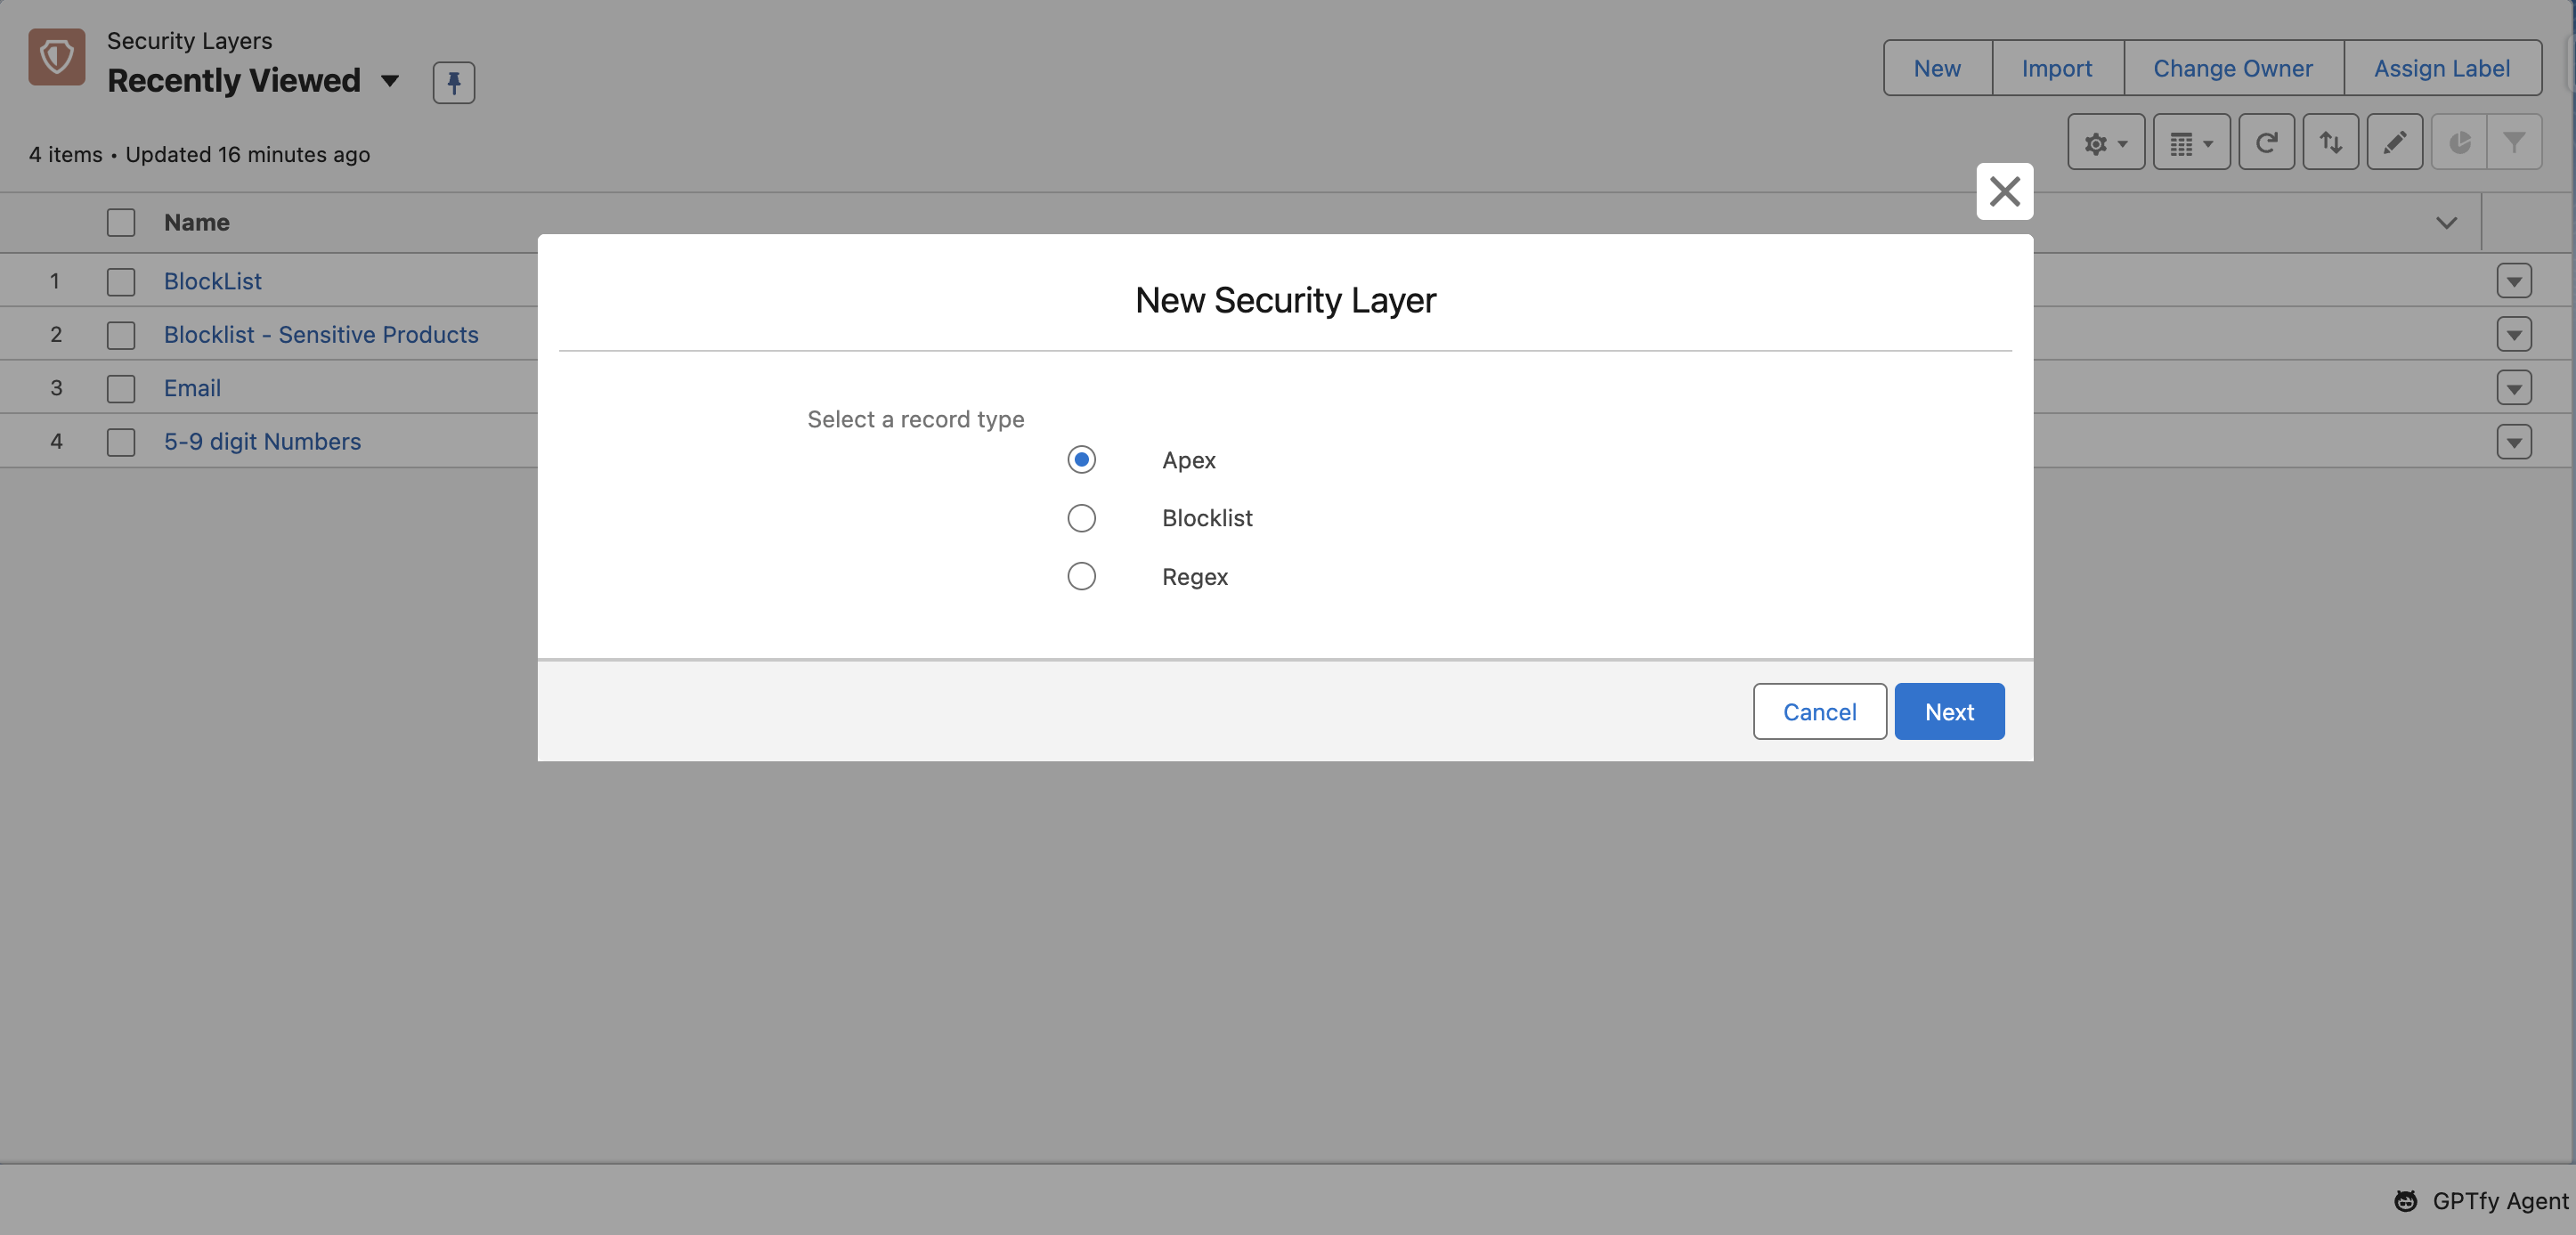
How to Create a New Security Layer?
There are 3 types of records to create security layers:
- Apex
- Blocklist
- Regex
Configure the New Blocklist Record
Once you have selected "Blocklist" as the Record Type, fill in the details as shown below to define what specific data should be hidden.

1. Information Section
| Field | Description |
|---|---|
| Name | Enter a unique name for this rule (e.g., BlockList). |
| Type | Select a category for reporting purposes. |
| Status | Set to Active. Note: If set to 'Inactive', the rule will be saved but will not mask any data. |
| Comment | (Optional) Add internal notes describing why this blocklist exists. |
2. Blocklist Configuration
This is where you define the specific terms to be masked.
| Field | Description |
|---|---|
| Blocklist | Enter the exact strings, codes, or phrases you want to hide. Format: You can enter multiple items separated by a delimiter (such as a semicolon ;)Example: This field allows mixed data types including product codes (62GBA41), brand names (Google, Philips), email addresses (alice.johnson@example.com), and even strings with special characters (1!2@3#4$%). |
| Replacement Value | This will get created automatically after record saved. Example: SF-0009 Result: When the AI encounters "Google" or "Iphone 13", it will receive "SF-0009" instead. This ensures the AI understands the structure without seeing the private data. |
3. Save
Click Save to enforce the rule.
Configure the New Regex Record
Once you have selected "Regex" as the Record Type, fill in the details as shown below to define the specific pattern of data (like ID numbers, emails, or credit cards) that should be hidden.
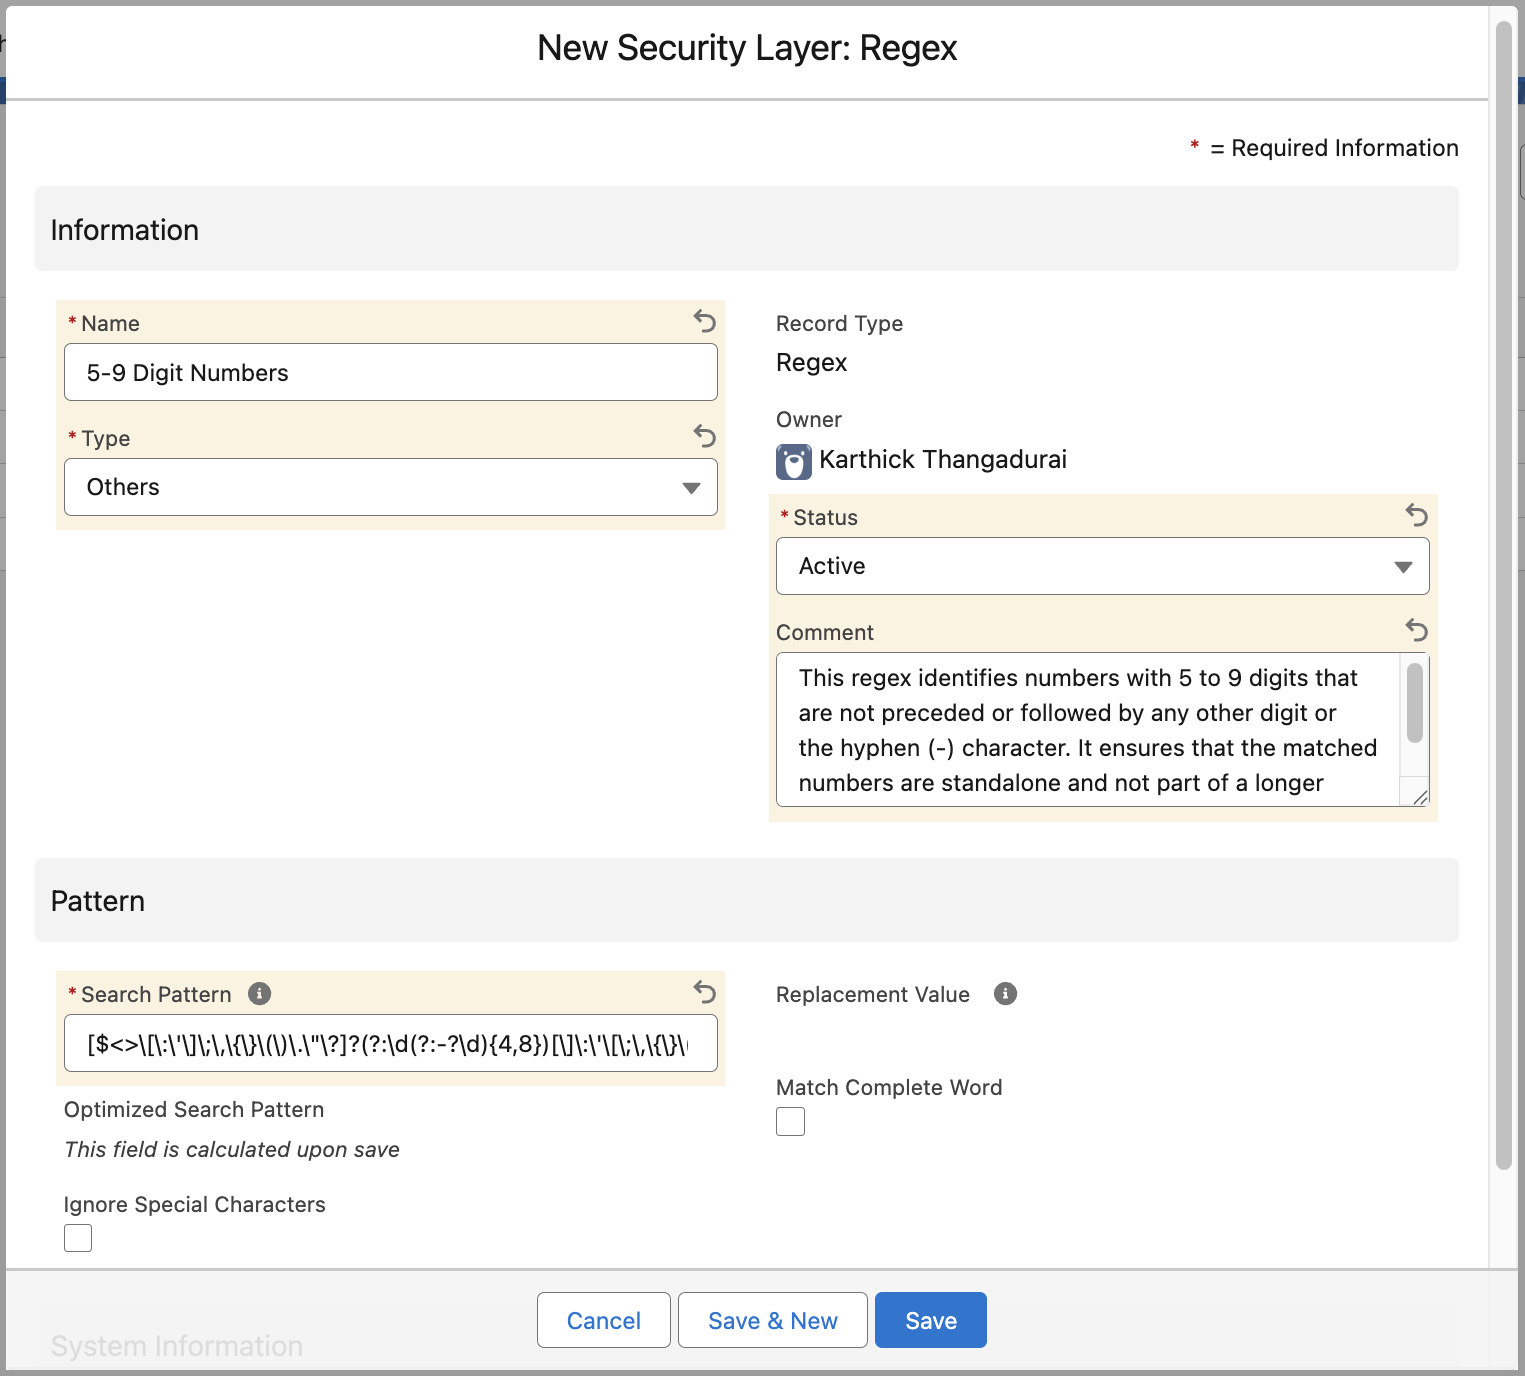
1. Information Section
| Field | Description |
|---|---|
| Name | Enter a unique name for this rule (e.g., 5-9 digit Numbers). |
| Type | Select a category for reporting purposes. |
| Status | Set to Active. Note: If set to 'Inactive', the rule will be saved but will not mask any data. |
| Comment | (Optional) Add internal notes describing why this blocklist exists. |
2. Pattern Configuration
This is where you define the Regular Expression (Regex) logic to catch data patterns.
| Field | Description |
|---|---|
| Search Pattern | Enter the Regular Expression string that defines what to look for. Example: [$<>[\]\:\'\/]\;\\,\{\}|\(\)\.\"]?(?:\d(?:-?\d){4,8})...What this does: This complex string tells the system to find any sequence of numbers between 5 and 9 digits long, even if they are surrounded by special characters like brackets or quotes. |
| Optimized Search Pattern | This will get created upon save. |
| Replacement Value | This will get created automatically after the record is saved. Example: SF-0002 Result: When the AI encounters a number like "12345-6789", it replaces it with this ID code to keep the data safe while preserving the context that a number existed there. |
| Match Complete Word | Check this box if the pattern must match a whole word (e.g., ensuring "999" doesn't match inside "19991"). |
| Ignore Special Characters | Check this to strip special characters before attempting to match the pattern. |
3. Save
Click Save to enforce the rule.
💡 Pro Tip: Regex can be tricky. Always test your pattern using an online regex tester (like Regex101) to ensure it catches exactly what you want without accidentally masking innocent text.
Configure New Apex Security Layer (Layer 4)
The Apex Security Layer enables the creation of custom, programmatic masking logic when standard Blocklists or Regex patterns are insufficient.
To implement this, follow these two steps:
Step 1: Create the Apex Class
- Create a new Apex Class that implements the interface:
AIApexSecurityLayerInterface. - Write your custom masking logic within the class methods.
- Note the exact API Name of the class (e.g.,
SampleApexSecurityLayerClass).
Apex Class Example:
global class SampleApexSecurityLayerClass implements ccai.AIApexSecurityLayerInterface {
   global ccai.AIApexSecurityLayerDataWrapper getExtractData(ccai.AIApexSecurityLayerDataWrapper wrapper) {
        Map<String, String> pIIKey = (Map<String, String>)JSON.deserialize(wrapper.response.ccai__Data_PII_Key__c, Map<String, String>.class);
        pIIKey.put('489-36-83535566u', 'AP-0874-001');
        wrapper.response.ccai__Data_PII_Key__c = JSON.serialize(pIIKey);
        return wrapper;
    }
}
Step 2: Create the Security Layer Record
- Navigate to Security Layers and click New.
- Select Apex as the Record Type and click Next.
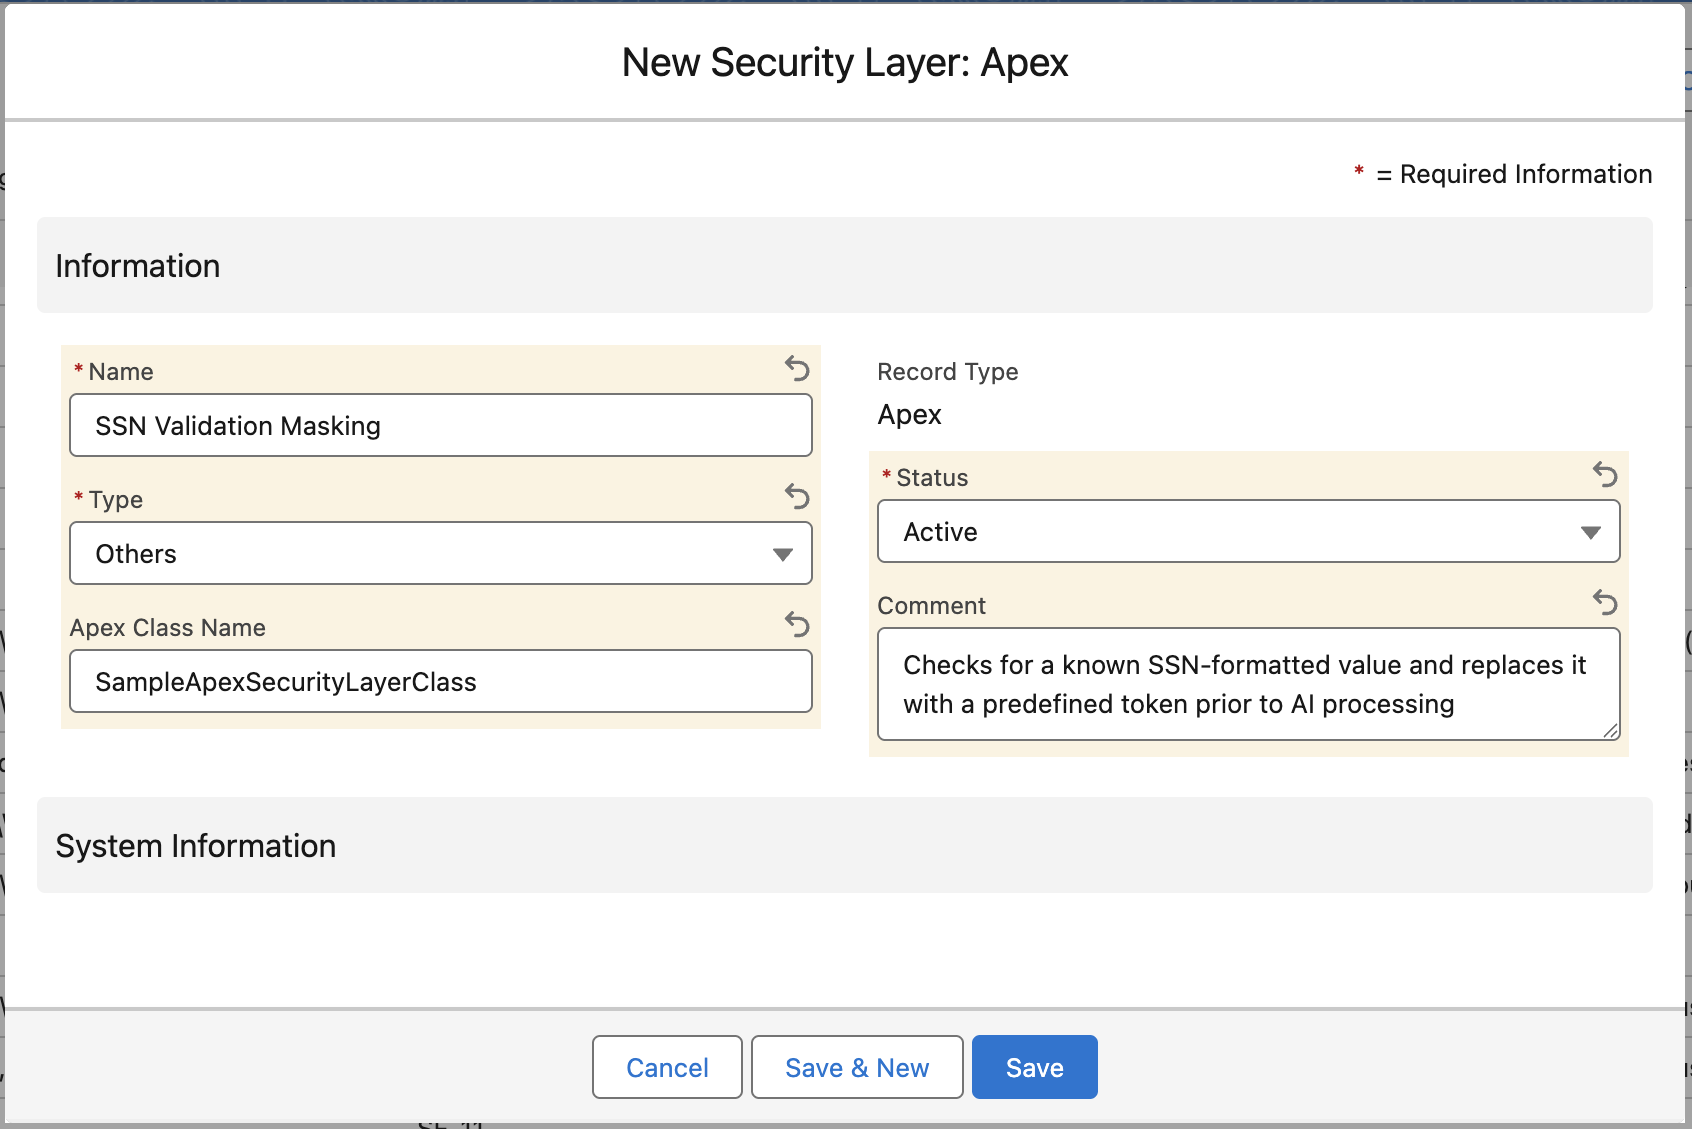
- Fill in the details as shown in the screenshot:
| Field | Description |
|---|---|
| Name | Enter a descriptive name (e.g., SSN Validation Masking). |
| Type | Select the category for reporting (e.g., Others). |
| Apex Class Name | Enter the exact name of the class created in Step 1. Example: SampleApexSecurityLayerClass |
| Status | Set to Active. Critical Note: Only layers with a status of Active will be visible for selection in Step 3. |
| Comment | Describe the logic. Example: "Checks for a known SSN-formatted value and replaces it with a predefined token prior to AI processing." |
- Click Save.

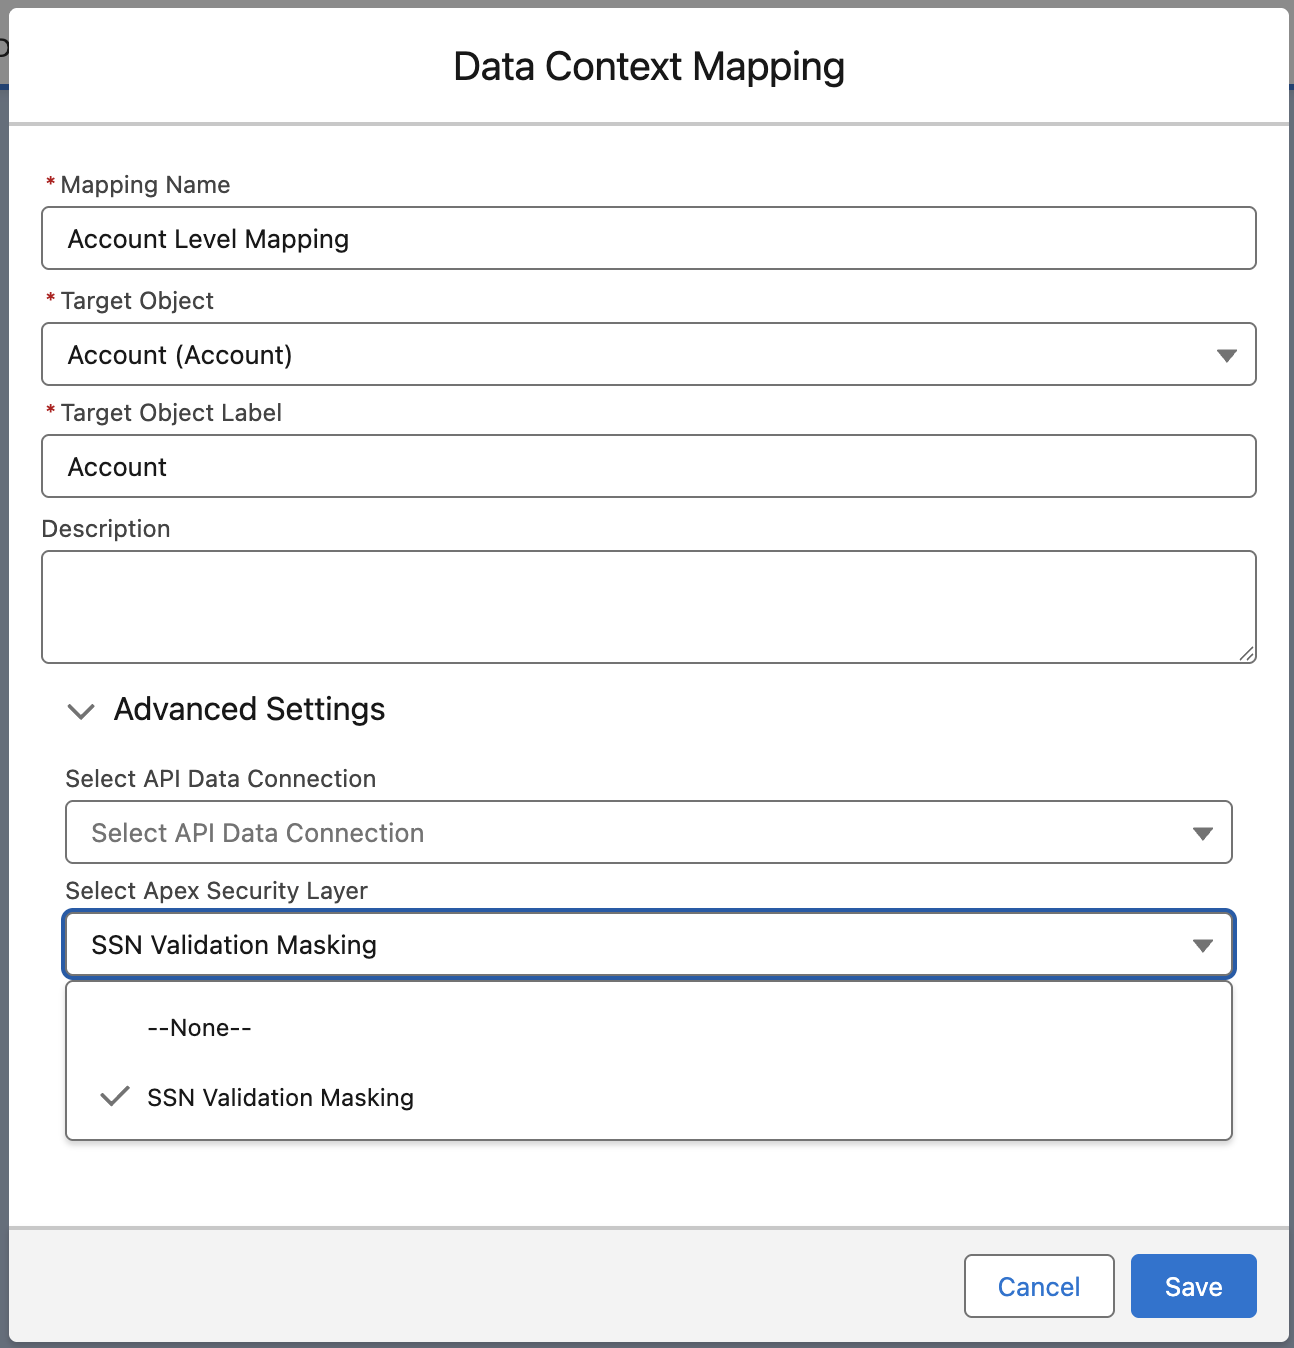
Step 3: Activate in Data Context Mapping
- Navigate to Data Context Mapping.
- Create a new mapping or Edit an existing one (e.g., Account Level Mapping).
- Scroll down and expand the Advanced Settings section.
- Locate the Select Apex Security Layer dropdown.
- Select the layer you created in Step 2 (e.g., SSN Validation Masking).
- Click Save.
Steps to Use Security Layers in Data Context Mapping:
-
Access the Field Mapping Window:
- Navigate to Data Context Mapping under the Agentic tab in the GPTfy Cockpit.
- Open a mapping from the listed Data Context mappings.
- Select an object and click Field Mappings.
-
Choose the Appropriate Security Layer:
- For regular fields (e.g., Email, Phone), select Entire Value (Layer 1).
- For long text fields, select Specific Patterns to activate Layers 2 and 3.
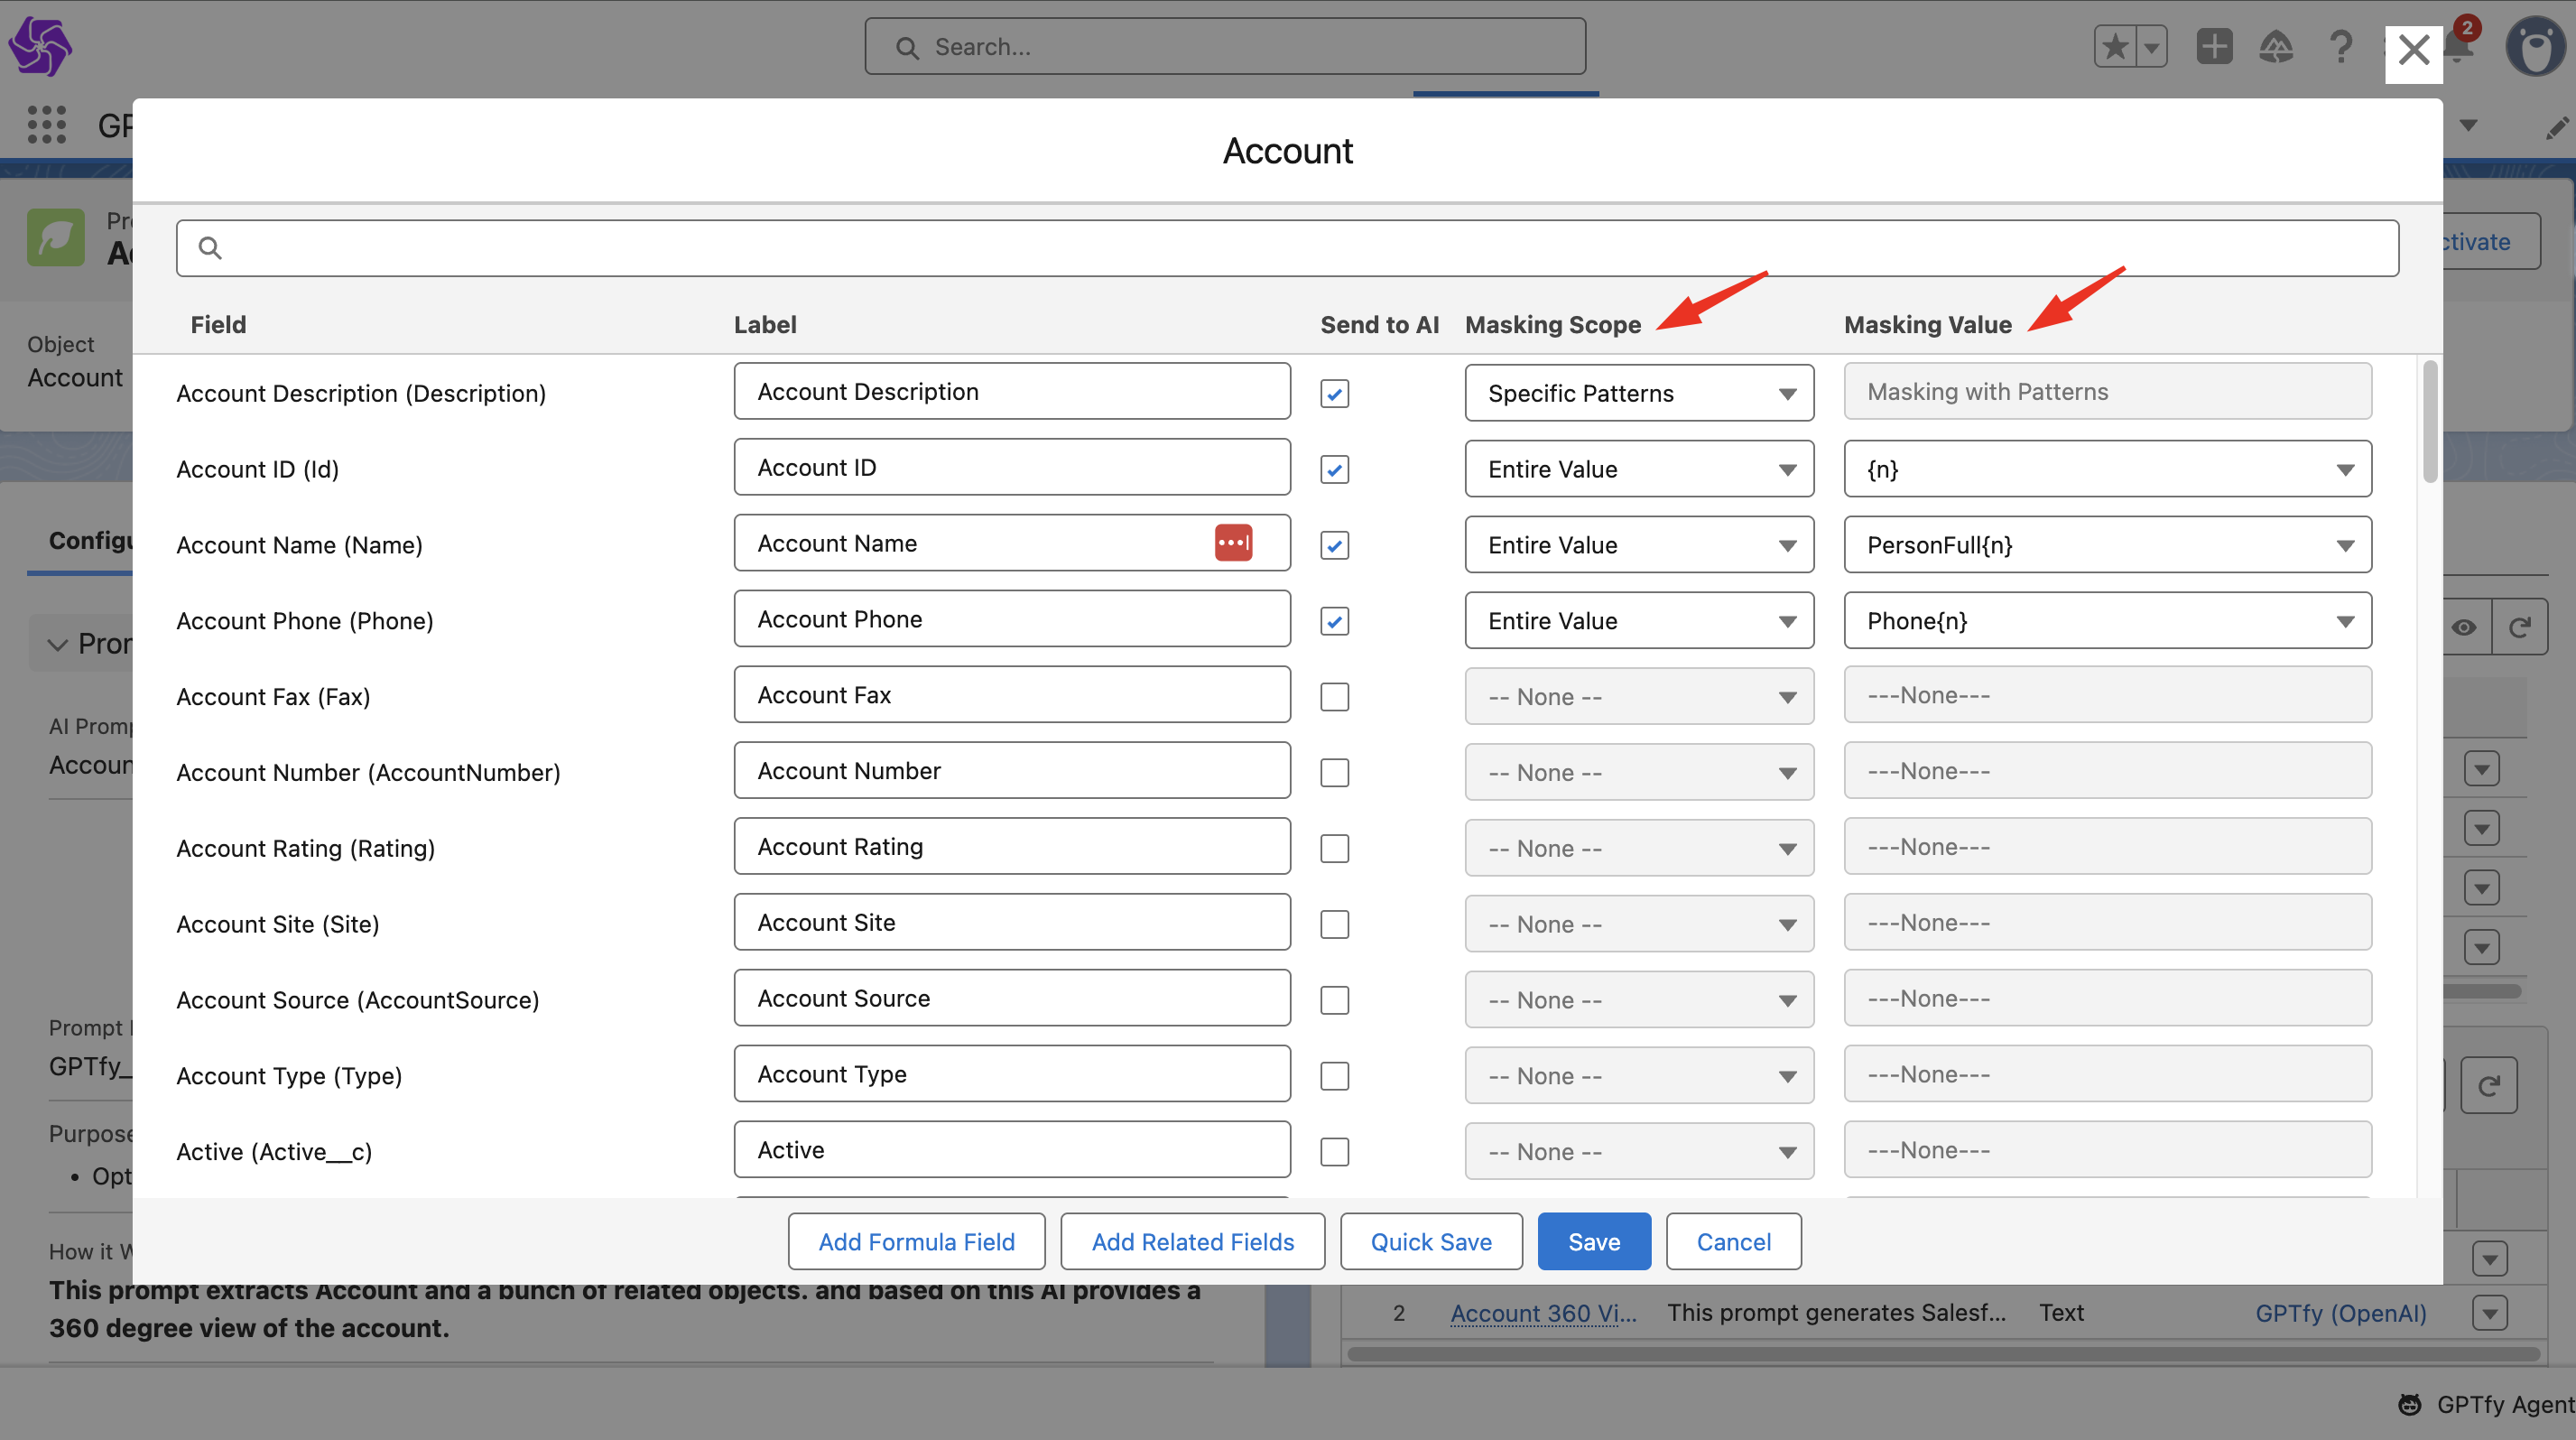
-
Save Your Field Mapping:
- After configuring masking layers and values, click Save.
-
Activate the Prompt:
- Apply the security layers by activating an existing prompt or creating a new one with the mapping.
- Run the Prompt:
- Execute the prompt on any Salesforce record to trigger anonymization.
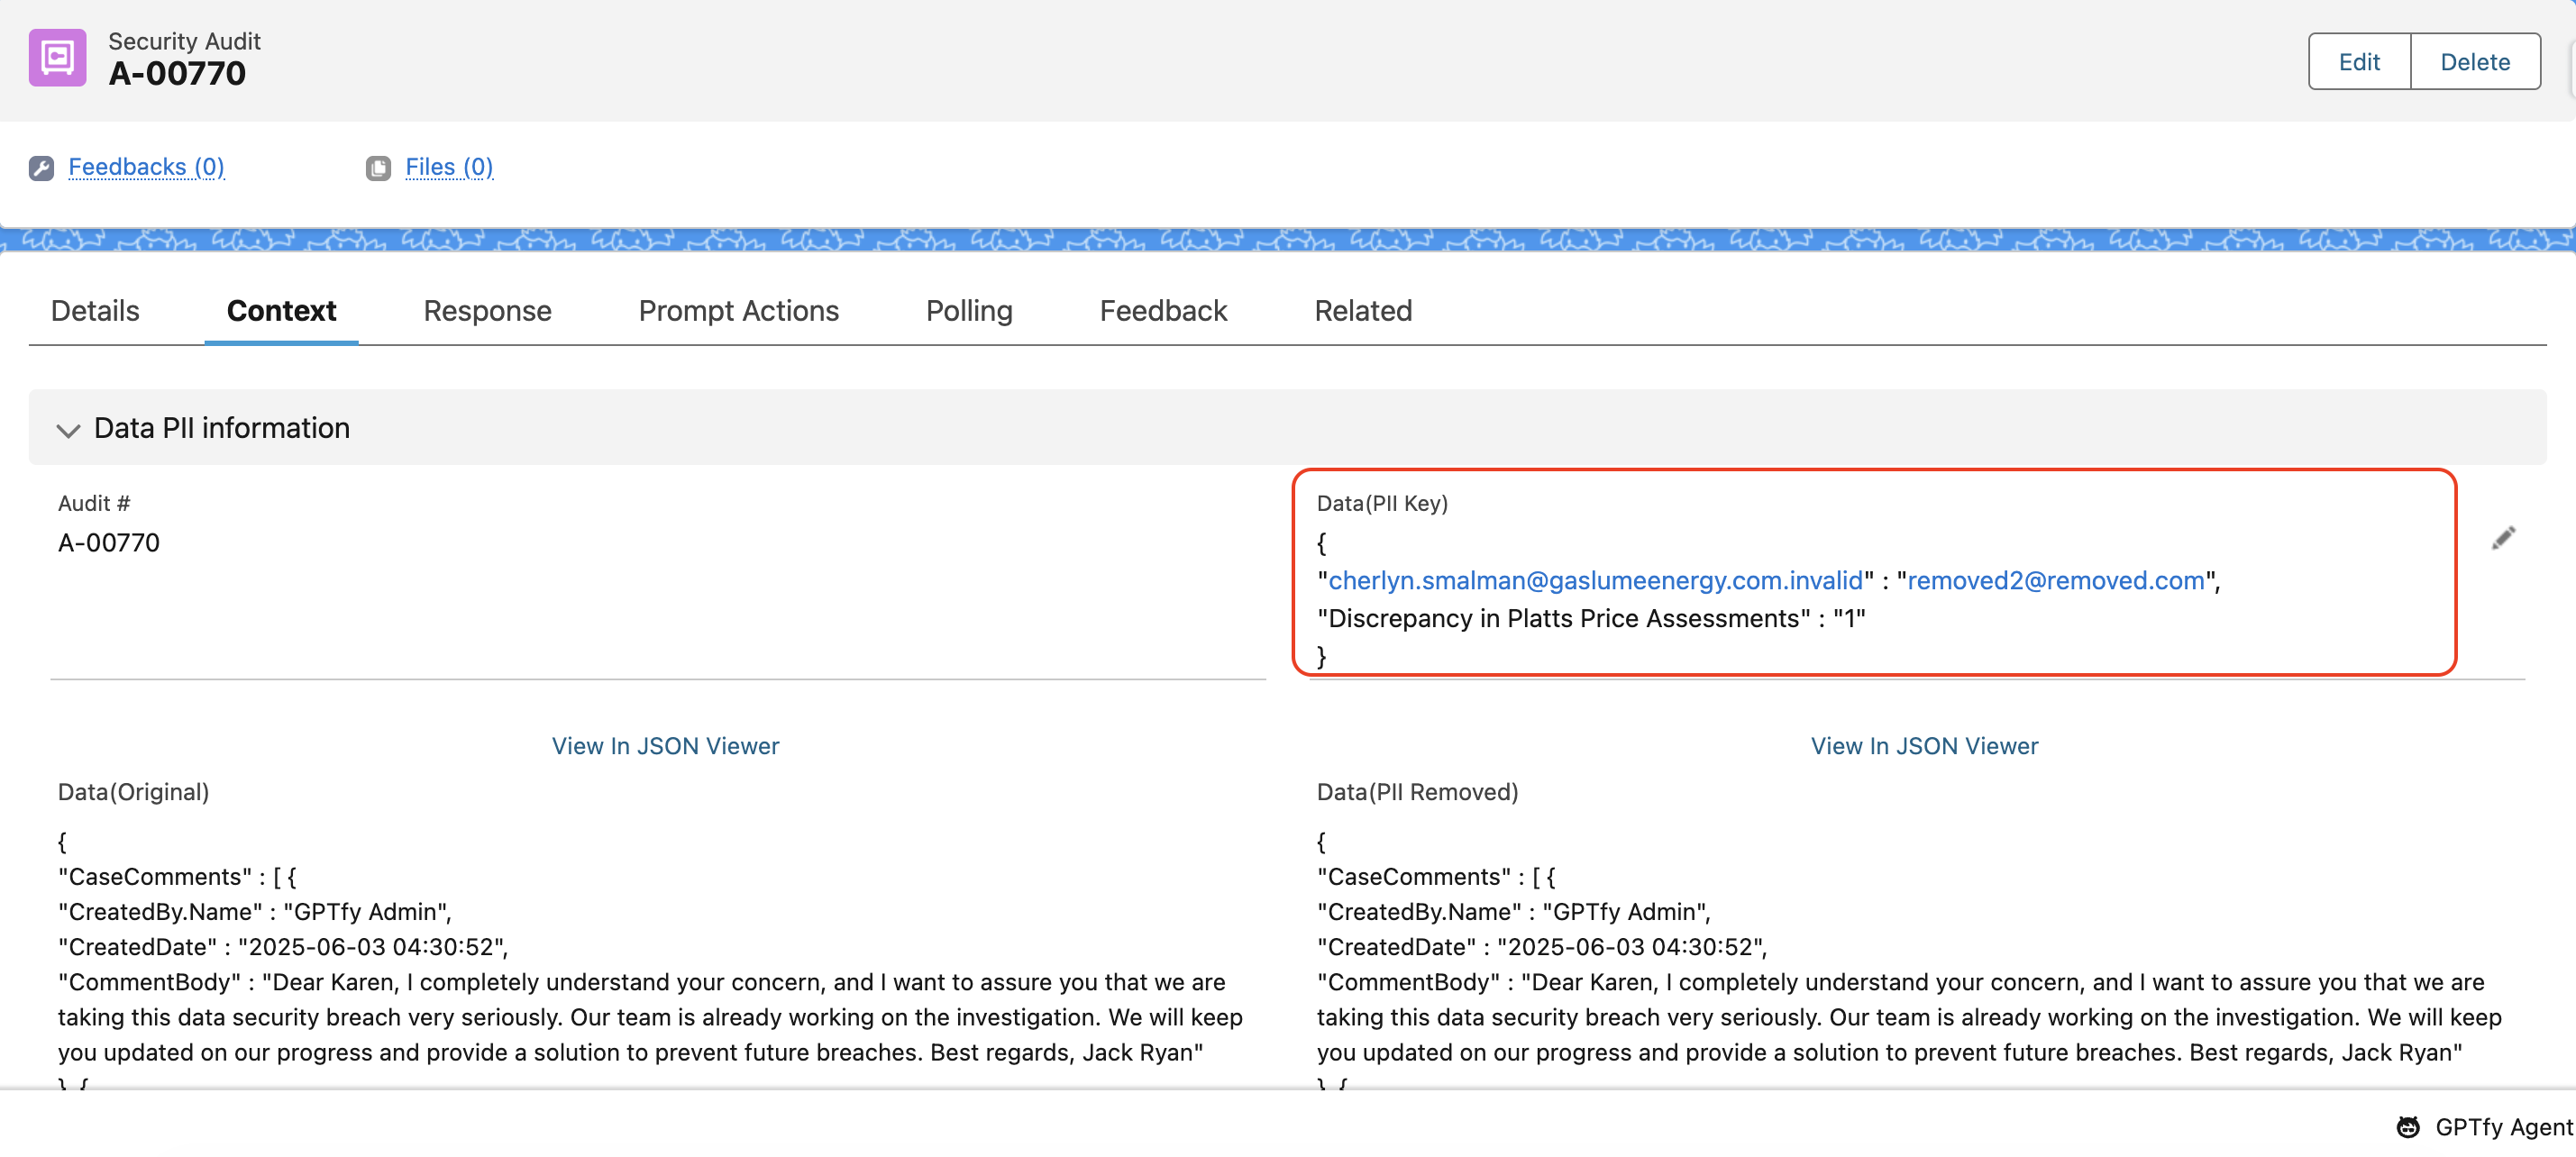
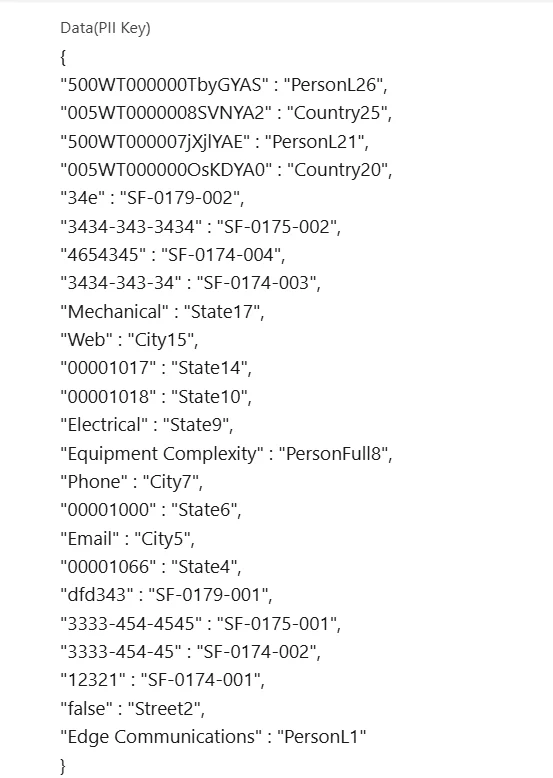
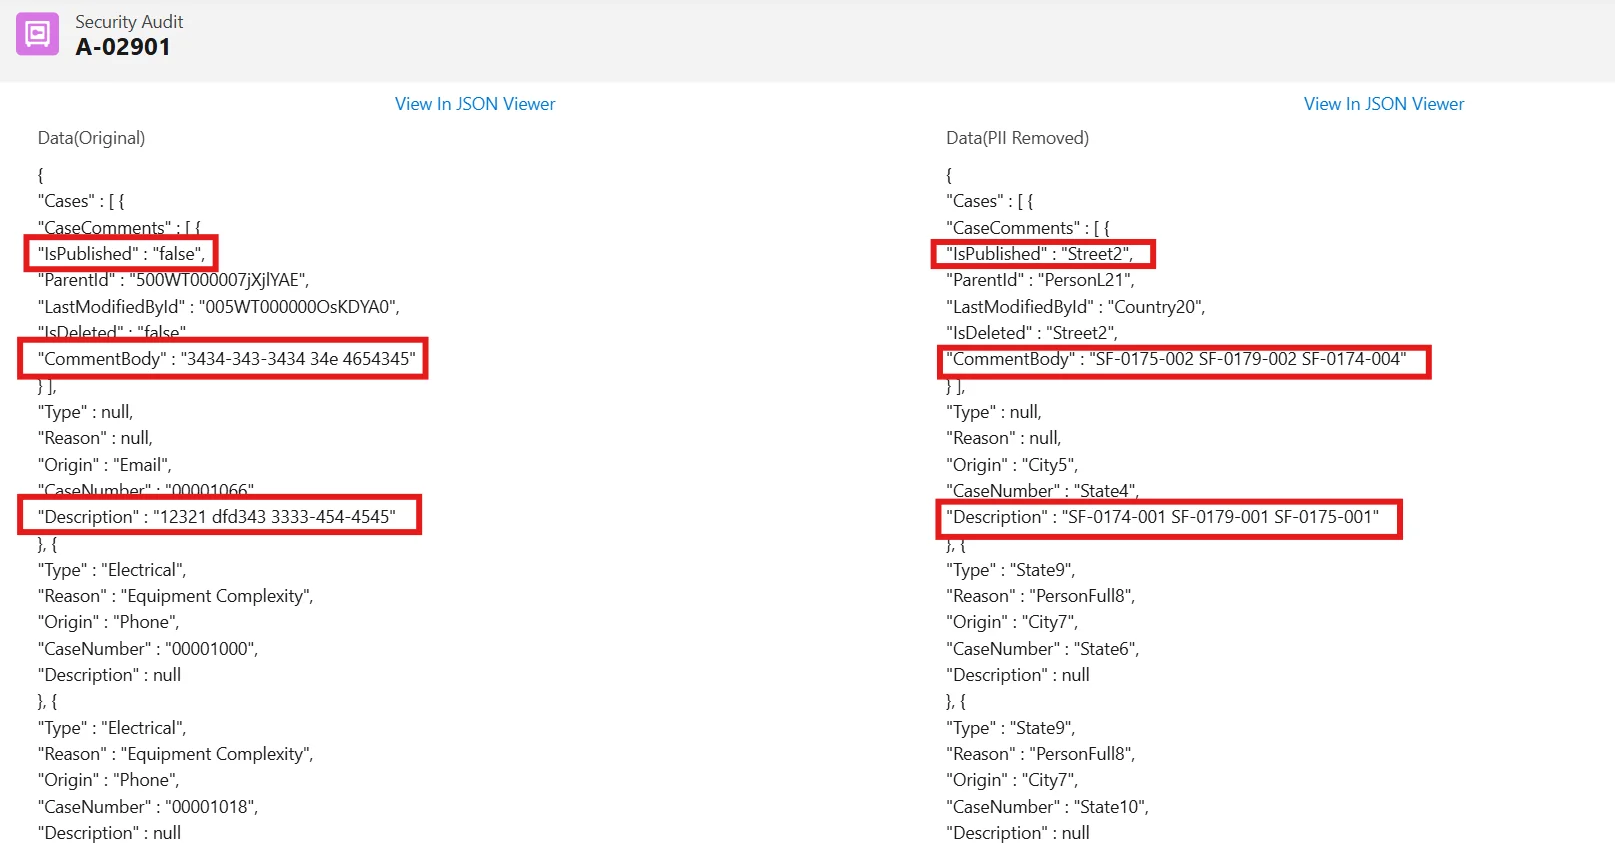
- Verify Anonymization in the Security Audit Record:
- Open the linked Security Audit record to check:
- Data (Original): The original field value.
- Data (PII Removed): The masked value.
- Open the linked Security Audit record to check:
Security Layer Sample Example:
| Original Value | Masked By | Security Layer |
|---|---|---|
| 34e | SF-0179-022 | Layer 2 – Regex |
| 12321 | SF-0174-001 | Layer 2 – Regex |
GPTfy applies rules in a top-down approach. Larger values are prioritized before submatches.
Field Name: Description
| Original Value | Masked By | Security Layer |
|---|---|---|
| Contact at 489-36-83525566u | AP-0874-001 | Layer 4 – Apex |
Description 1: Includes sensitive text (489-36-83525566u) — masked by Apex layer.
Description 2: Regular masking (using Layer 2 or 3) applies first.
Name field: (Entire Value masking by Layer 1.)
Important: Apex logic is triggered after Layer 1, 2, and 3 if masking is still required.
Summary:
- Use Layer 1 for complete field-level anonymization.
- Use Layers 2 and 3 for inline masking within long text.
- Use Layer 4 (Apex) when custom, complex masking is needed.
- Customize Regex behavior using checkboxes to improve accuracy.
- View and audit anonymization results directly in GPTfy’s security logs.
This multi-layered approach helps you stay compliant and confident in how your data is handled.