Enabling GPTfy Console on Experience Cloud
GPTfy is now available on Experience Cloud, too. This article helps in understanding step-by-step procedures on how to enable the GPTfy console in the experience cloud.
Step 1: Update a workspace on a site
Sites can be updated from Setup → Digital Experiences.
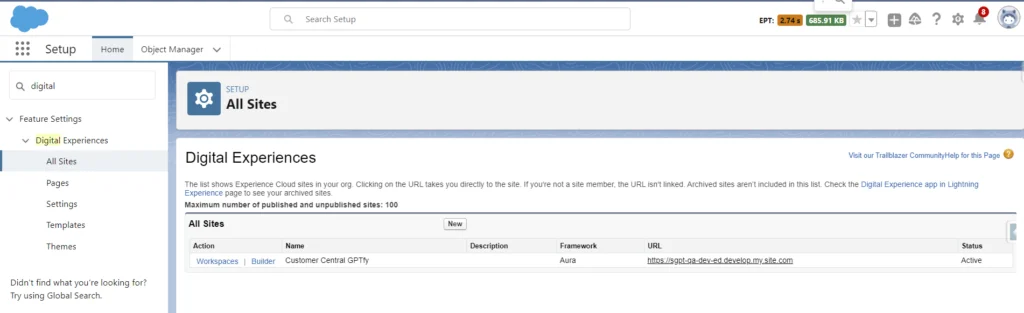
- Click on Workspaces on a preferred site where GPTfy has to be enabled.
Step 2: Assign Permission set
-
Under the workspace, click on the Administration tile and it will open the window where we need to assign the profiles that can access this site.
-
Click on Members in the left pane to see the list of profiles and Permission sets to assign.

- Select All in search, and add profiles of the user who needs to see the GPTfy console of the records.
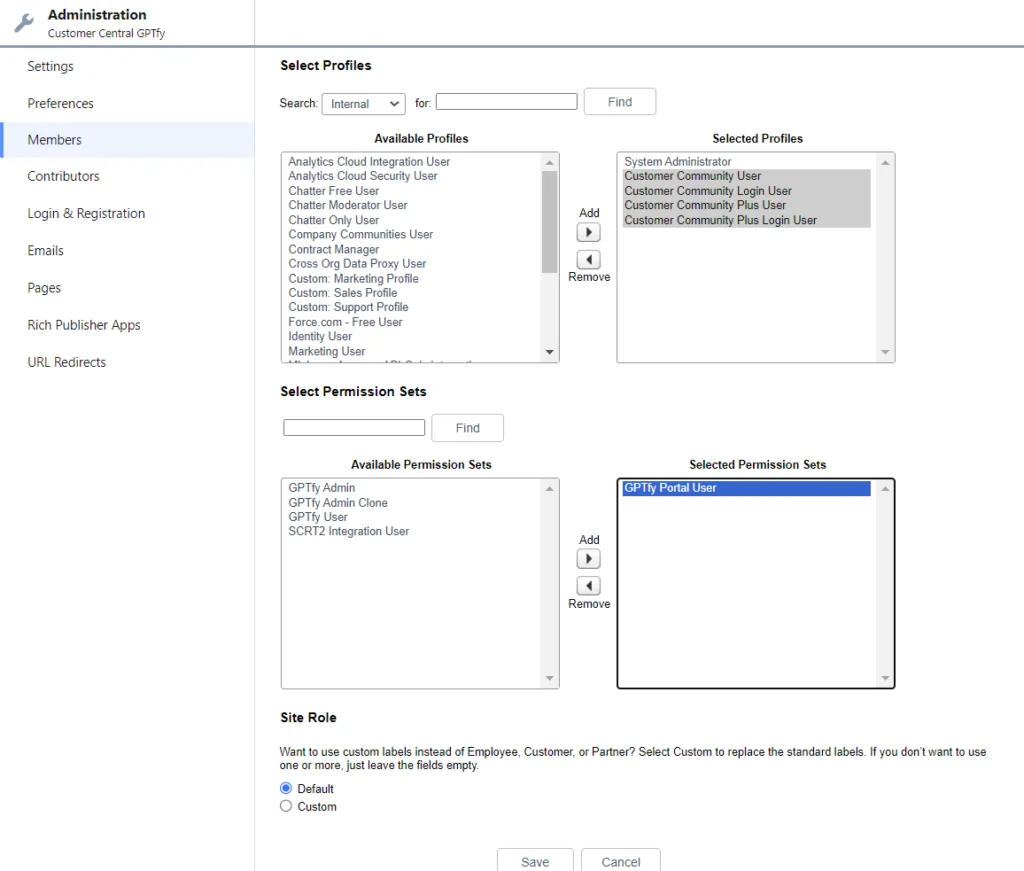
For example, select Customer Community profiles into selected profiles.
- Add the GPTfy Portal User permission set, assign it, and click Save.
Make sure the site is activated.
Step 3: Add GPTfy Console component
-
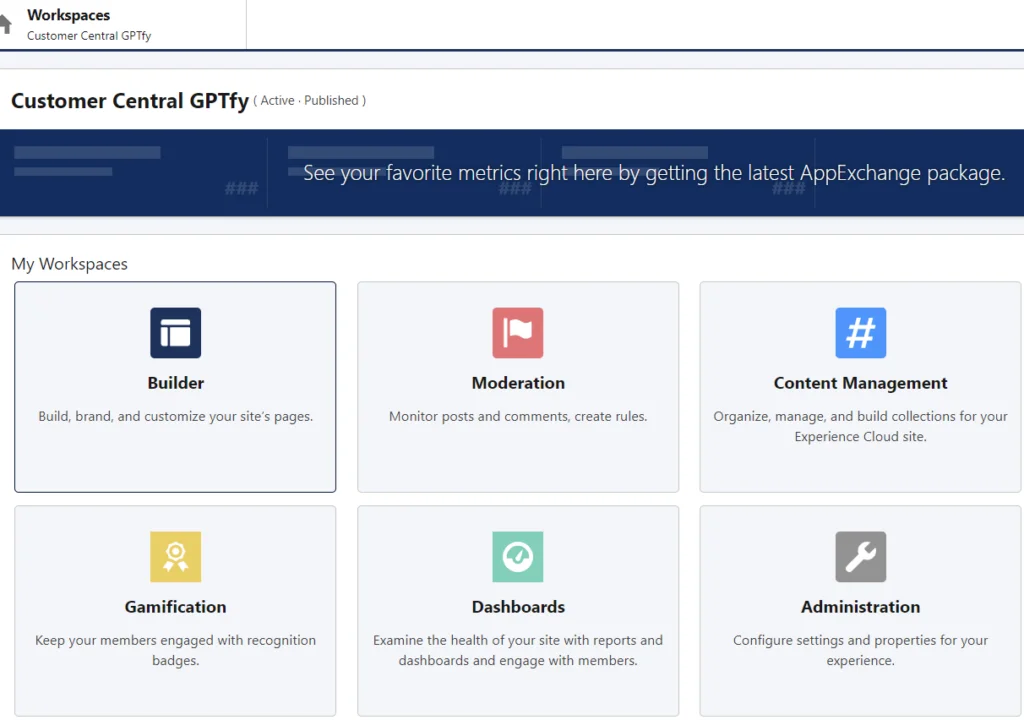
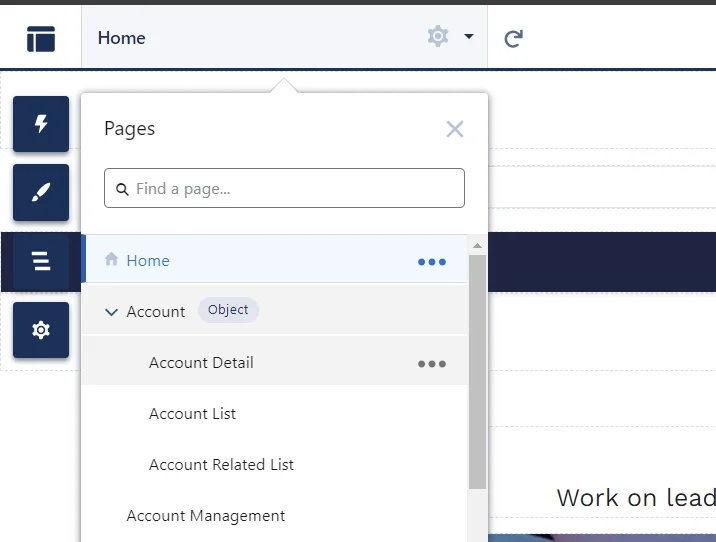
Once the permission set is assigned, click on the Workspaces by clicking the Home button.
-
Select the Builder button.
- Click on Home to find the Account detail page where the user needs to add the console.
- Click on the Component icon and find GPTfy Console under custom components.
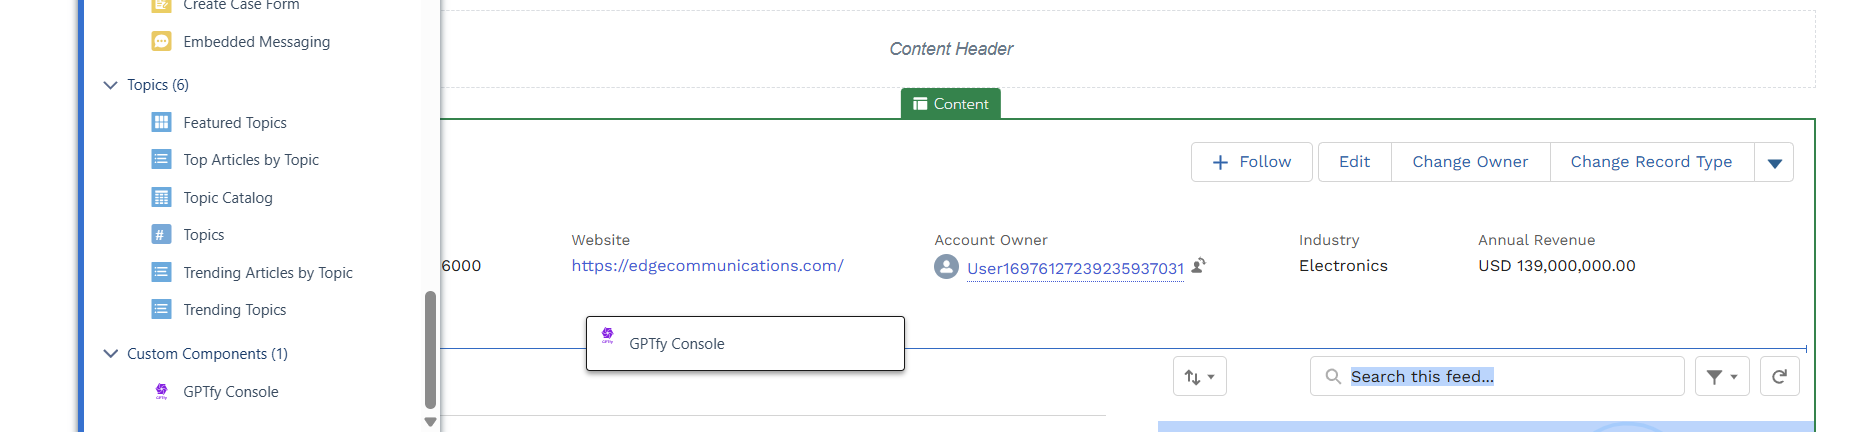
- Drag and drop the GPTfy console onto the detail page.
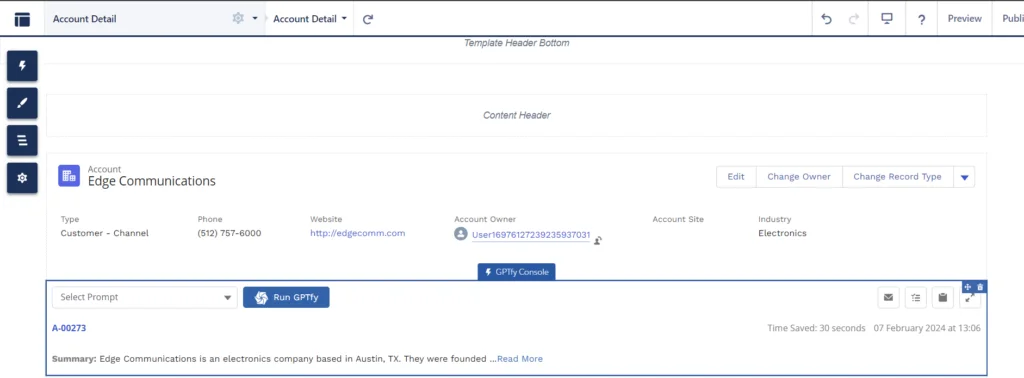
When a prompt is active, the console will show up on the record page.
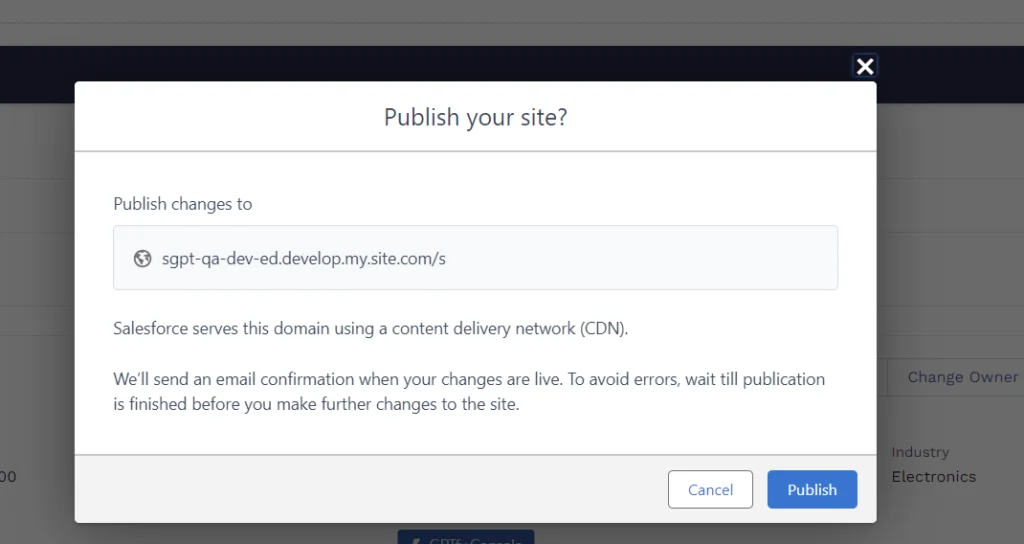
- Once the console is added, click Publish.
Step 4: Login as experience cloud user
- Once the site is published, log in to Experience Cloud as a user whose profile has been assigned with the GPTfy Portal User permission set.
- Open any account record, and the GPTfy console can be seen.
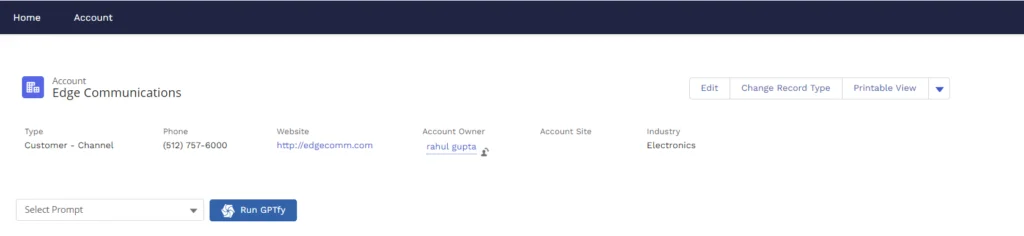
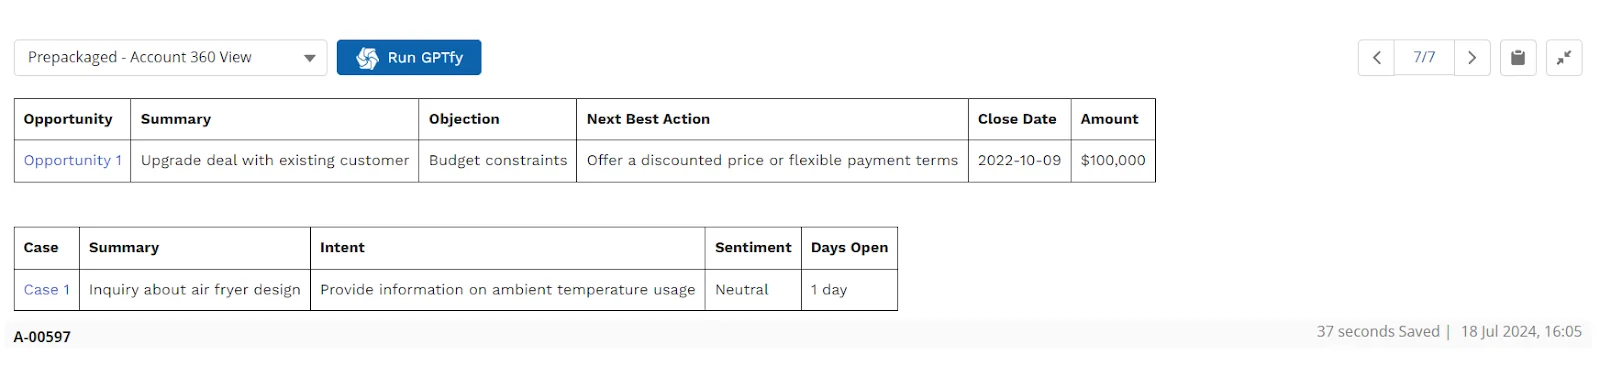
Step 5: Run GPTfy
- Click on the drop-down to select a prompt and click Run GPTfy.
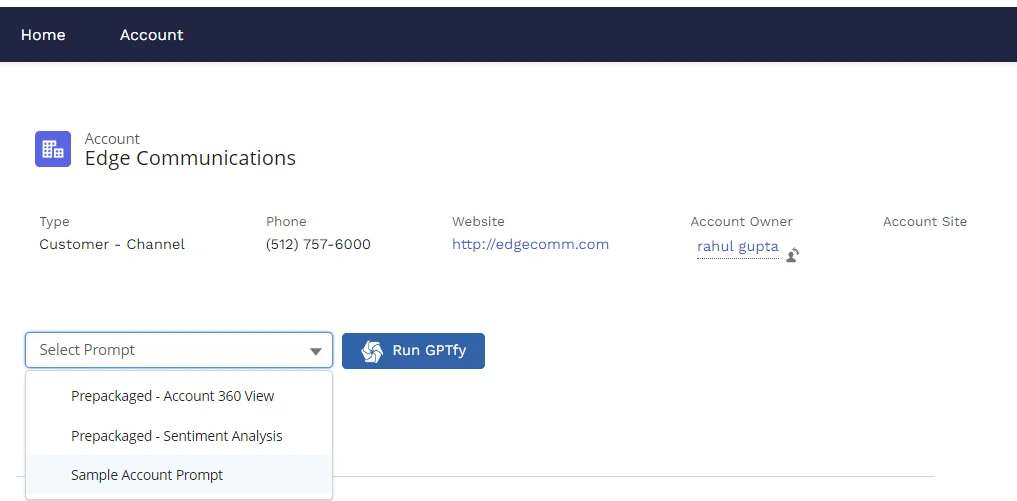
- The response from AI will be shown on the console.