Configure Google Chirp and Kensho for GPTfy Voice
Configuring Kensho and Google Chirp for GPTfy Voice ensures seamless integration of advanced voice capabilities into your Salesforce environment. This guide walks you through the essential steps, from setting up connected apps and authentication to activating AI models, enabling efficient voice processing and async functionality.
Kensho (Async) Configuration for GPTfy Voice
Here are the high-level steps to configure Kensho with GPTfy Voice:
-
Create a salesforce-connected app
-
Salesforce Auth. Provider
-
Named credentials
-
Create 2 remote site settings
-
The org’s ‘My Domain’
-
Three AI Models
- Kensho (Async Processing)
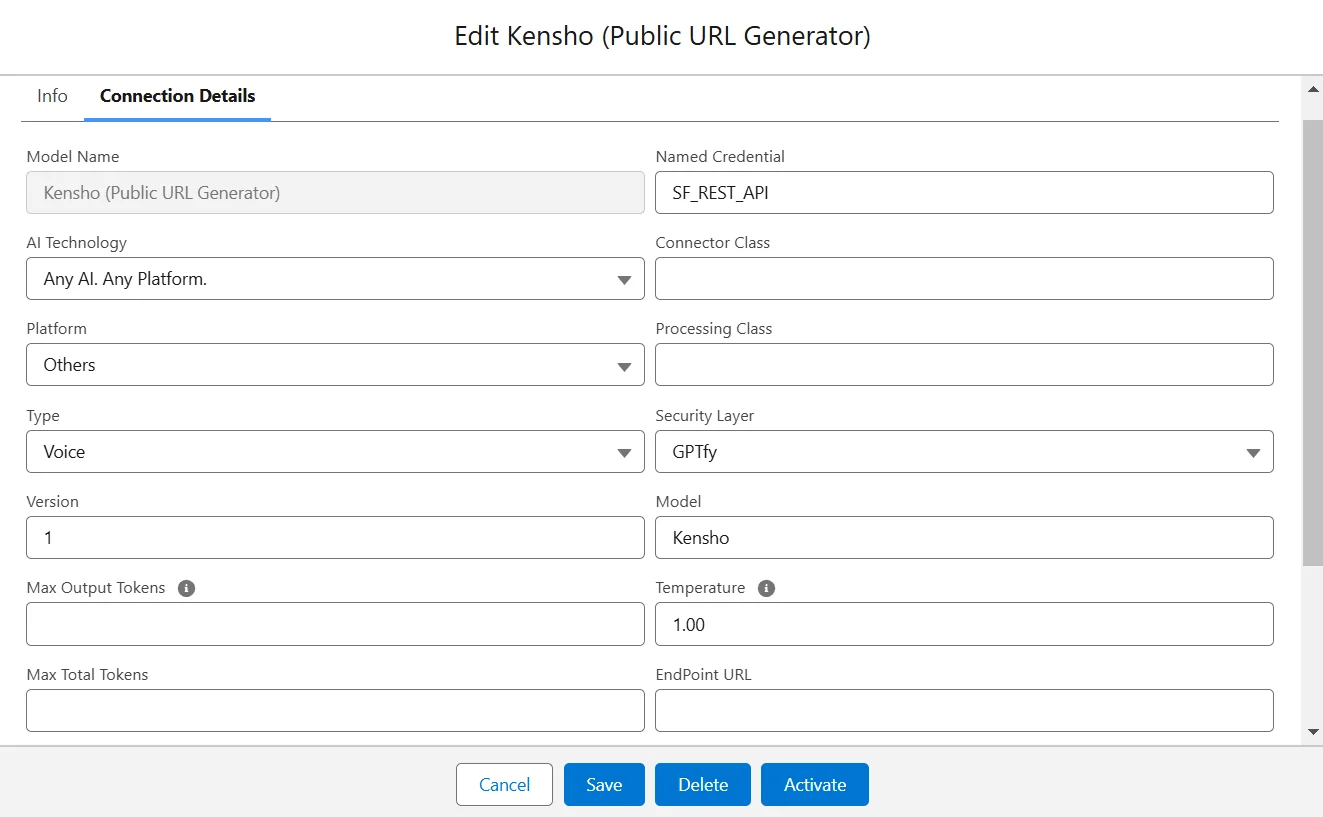
- Kensho (Public URL Generator)
- Kensho (Polling)
Note: For advanced scenarios, use Connector Class for custom authentication logic or Processing Class to integrate third-party or custom AI models.
-
A file needs to be uploaded whose id acts as a private key.
-
Need to create a public user group and share the private key with the public group
-
Drag and drop the Audio listener component on the record page.
-
Check all the users have given licenses in installed packages → manage licenses.
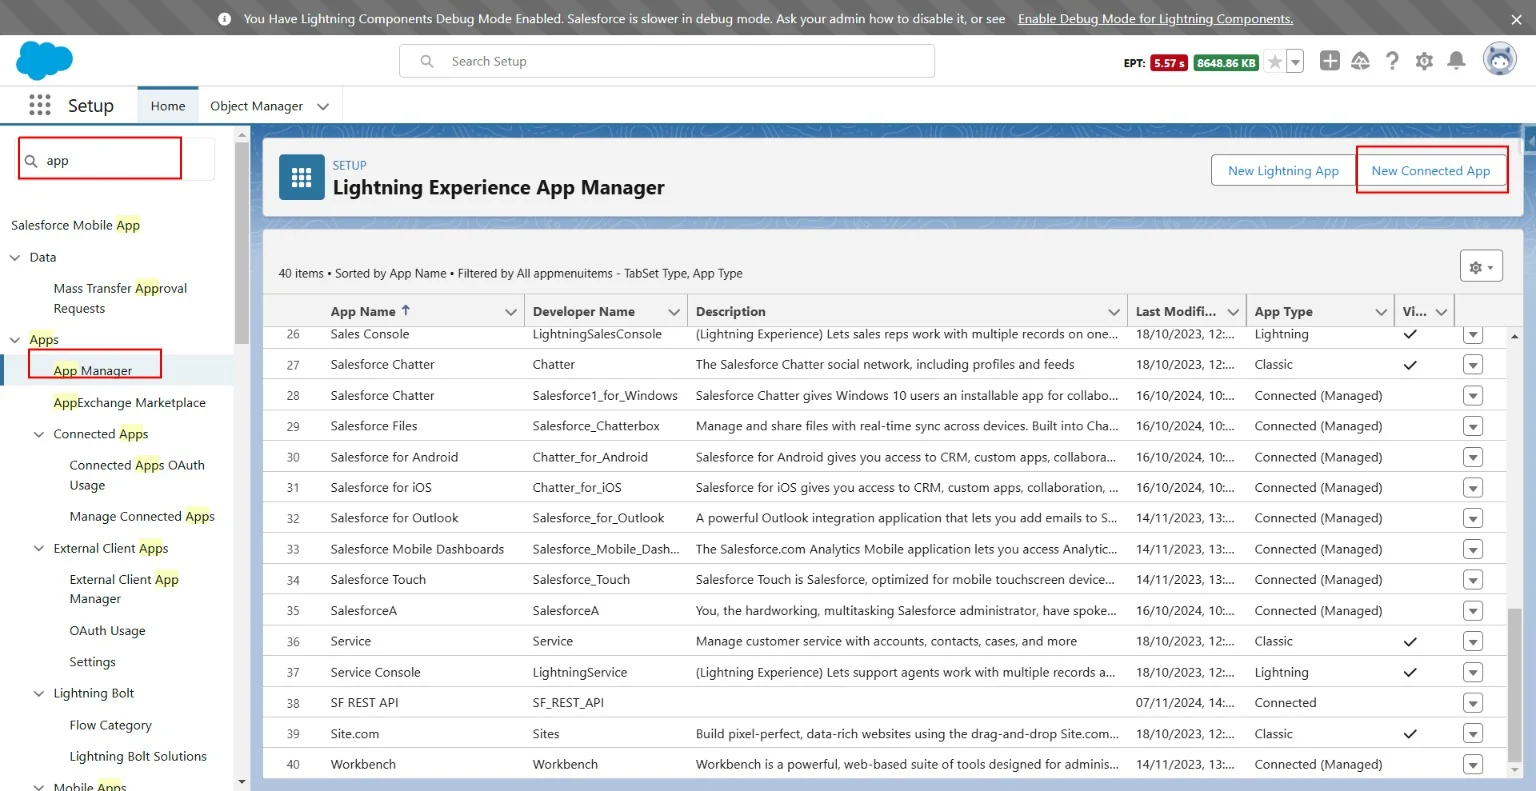
Create a Salesforce Connected app
Go to Setup → App Manager → Click on New connected App → Create a Connected App → Continue.
For the call back URL, we will get that from Auth. Provider.
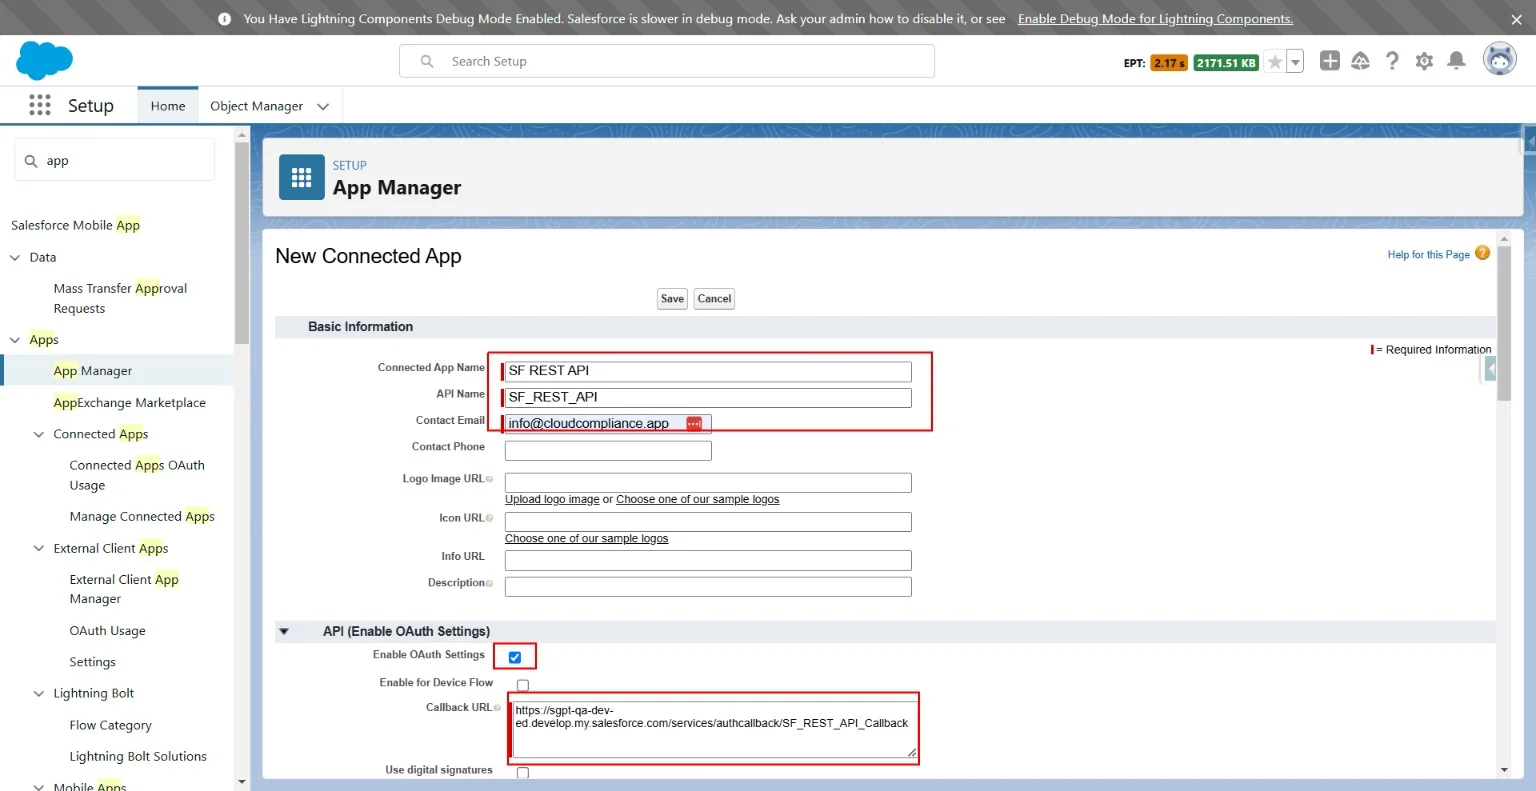
Add the scope
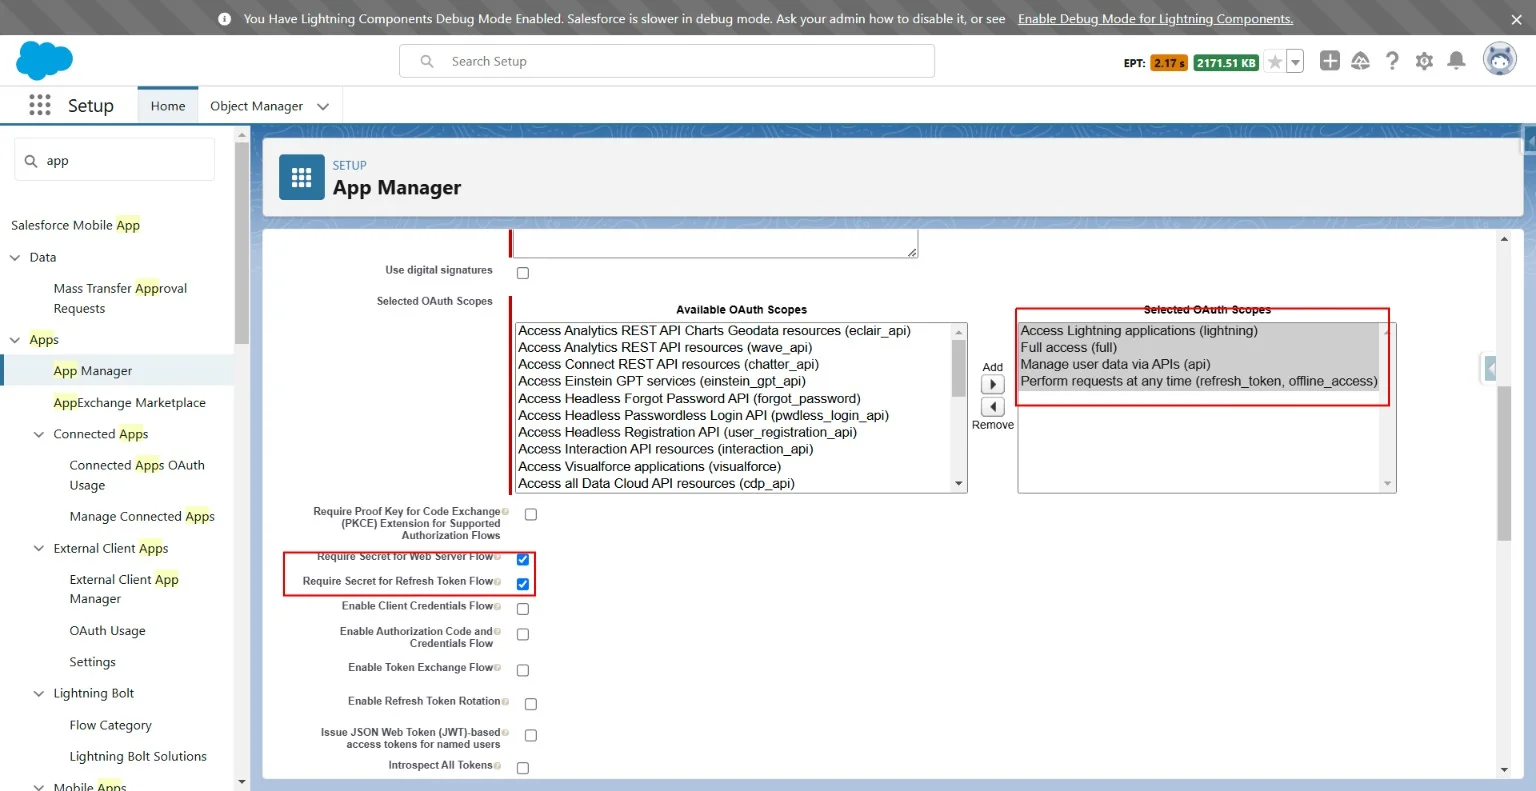
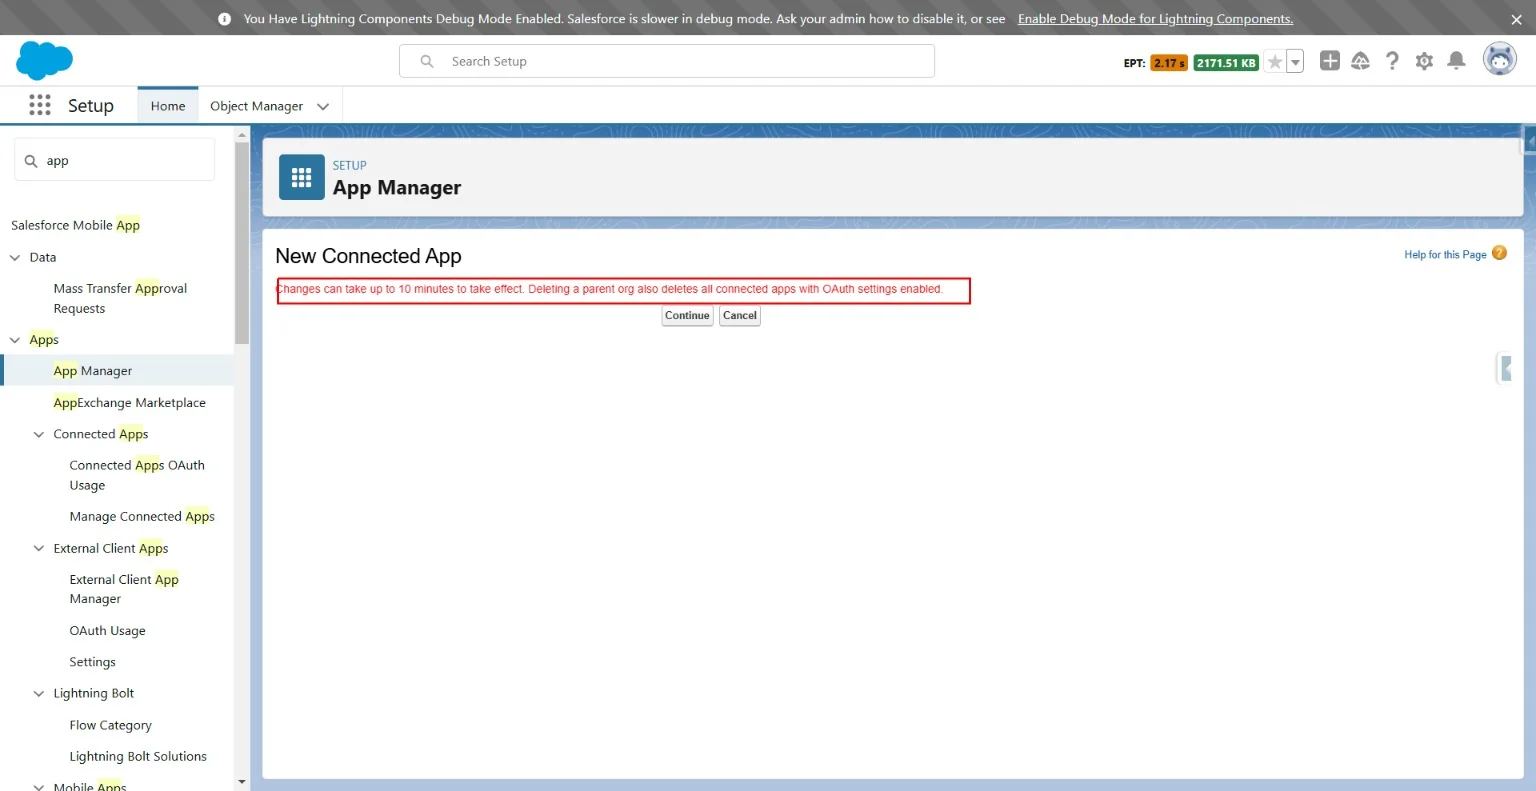
Once done, click save. In the next window, hit Continue and wait for 10 minutes for the app to be created.
Auth. Provider
Create a new Auth. provider.

The values in the consumer key and secret must be changed once the connected app is created.
So first, input some dummy values (you can use the value in the table as dummy values) in these two, and once saved, we will get the Callback URL. Copy that URL and use it to connect app creation.
Once the connected app is created, click on the ‘Manage Consumer Details’ button.
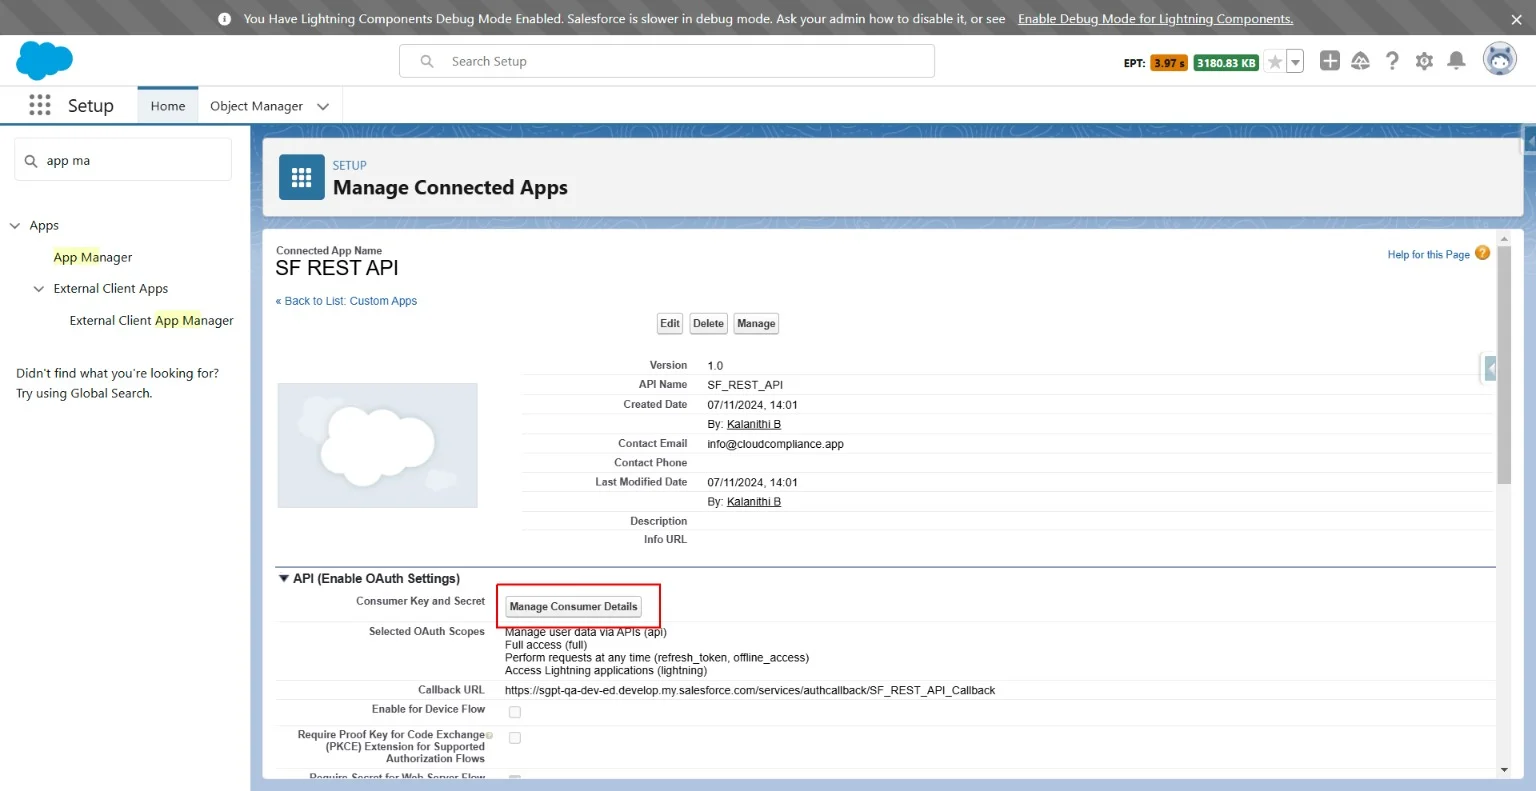
It will take you to the login page, enter the credentials, and sometimes it may ask for a verification code, too.
Once done, it will open a screen with the Consumer key and secret. And the key will be visible there.
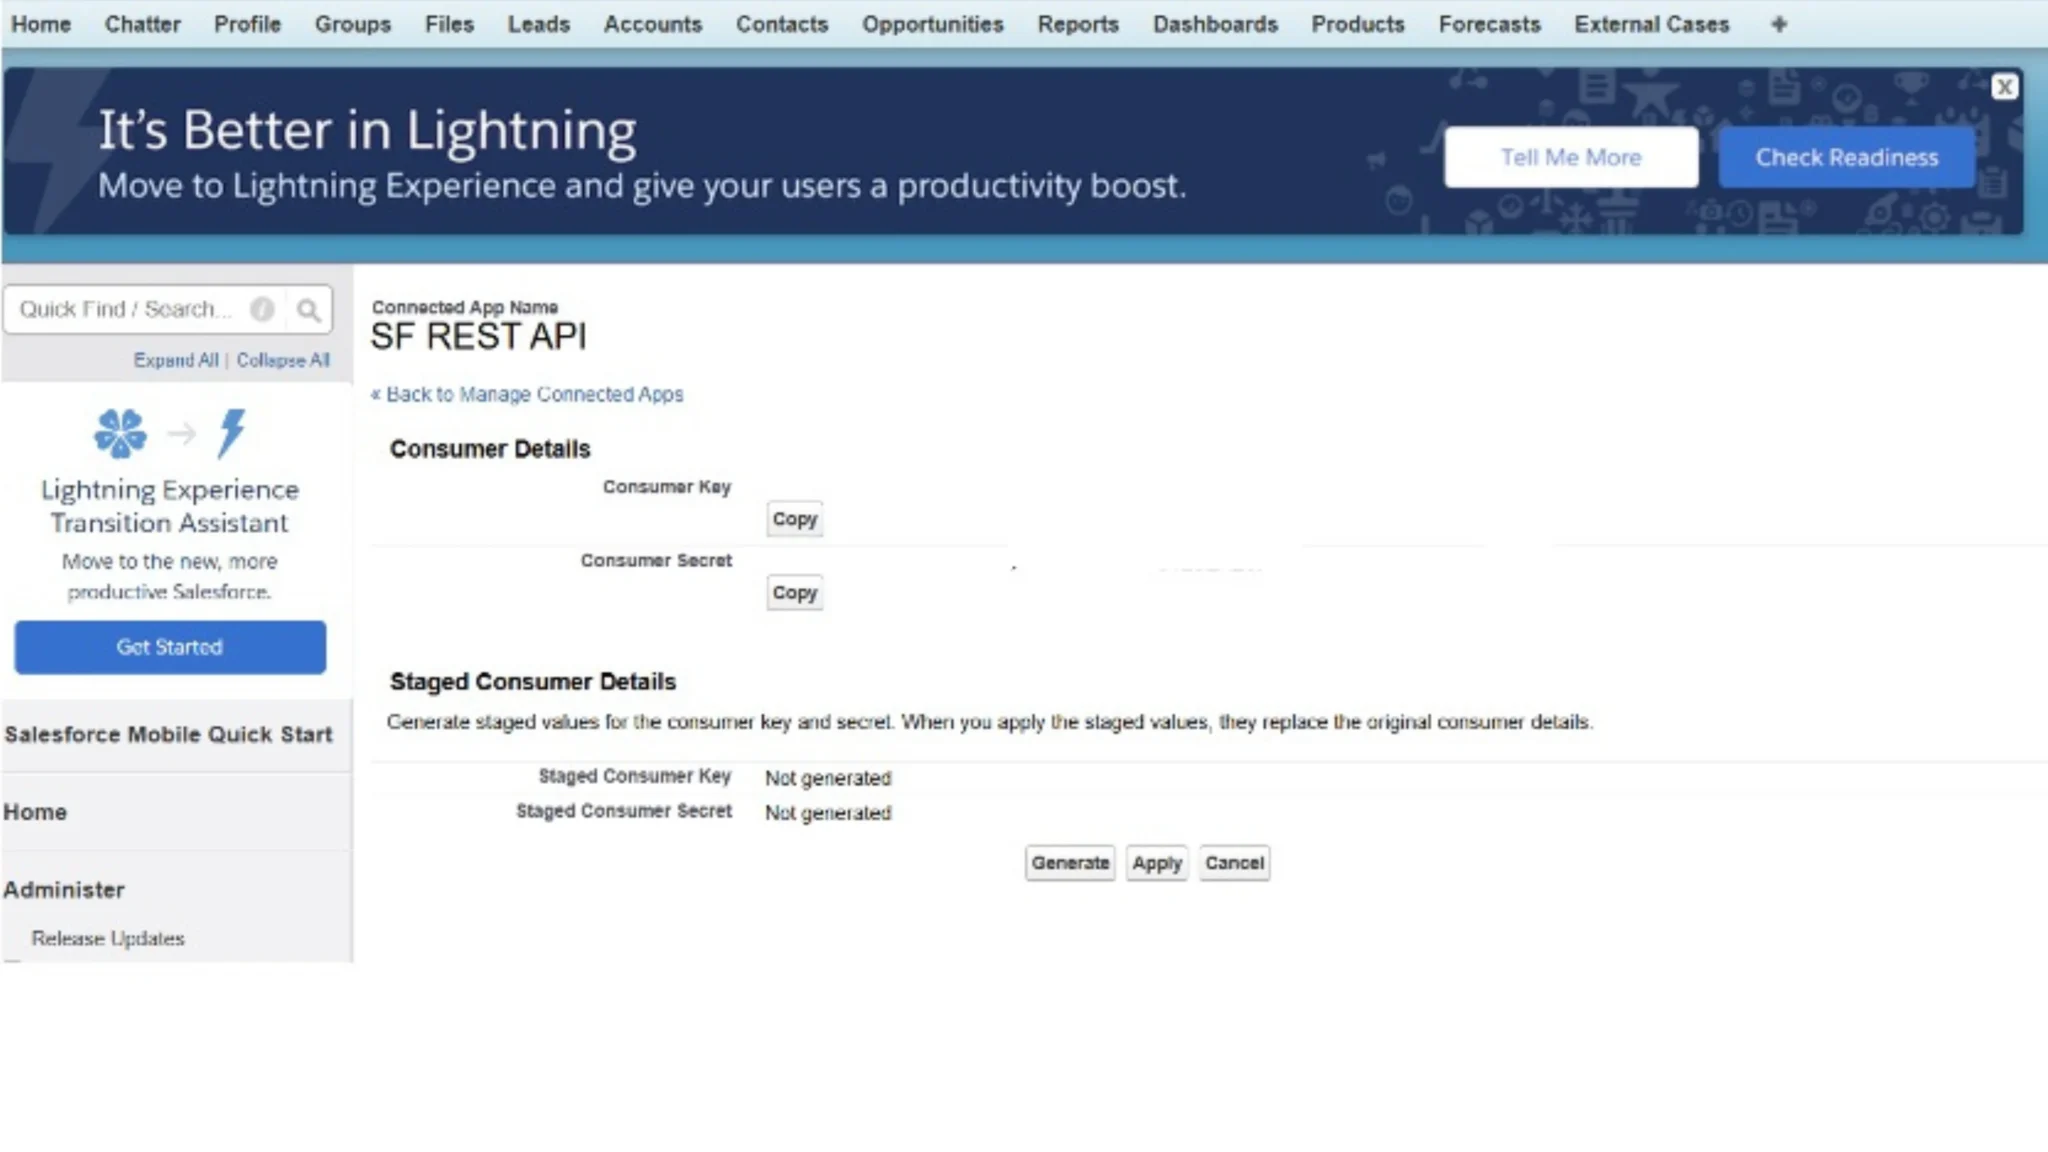
Copy those and update them in the Auth. Provider Created.
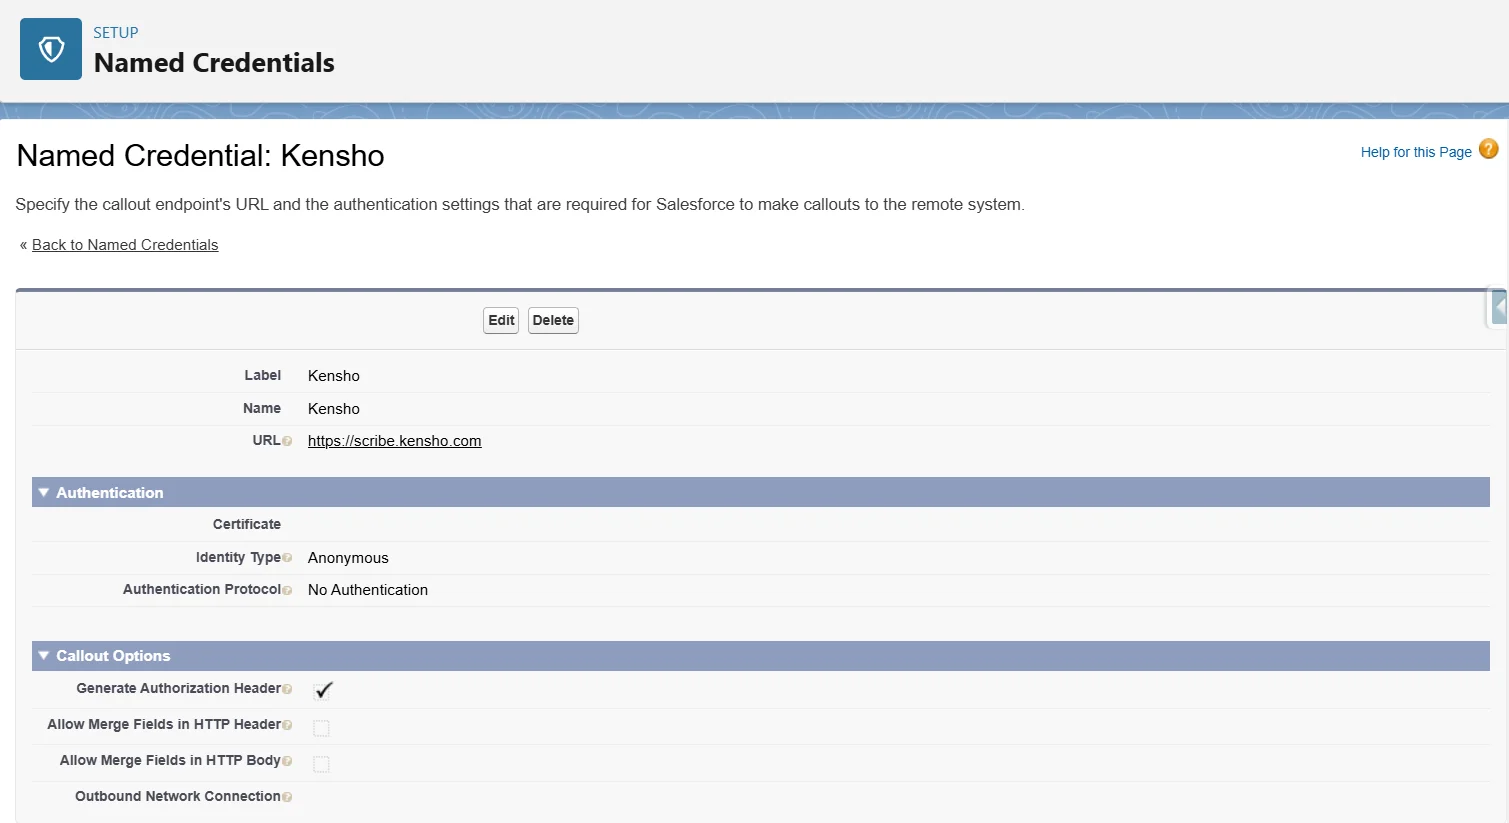
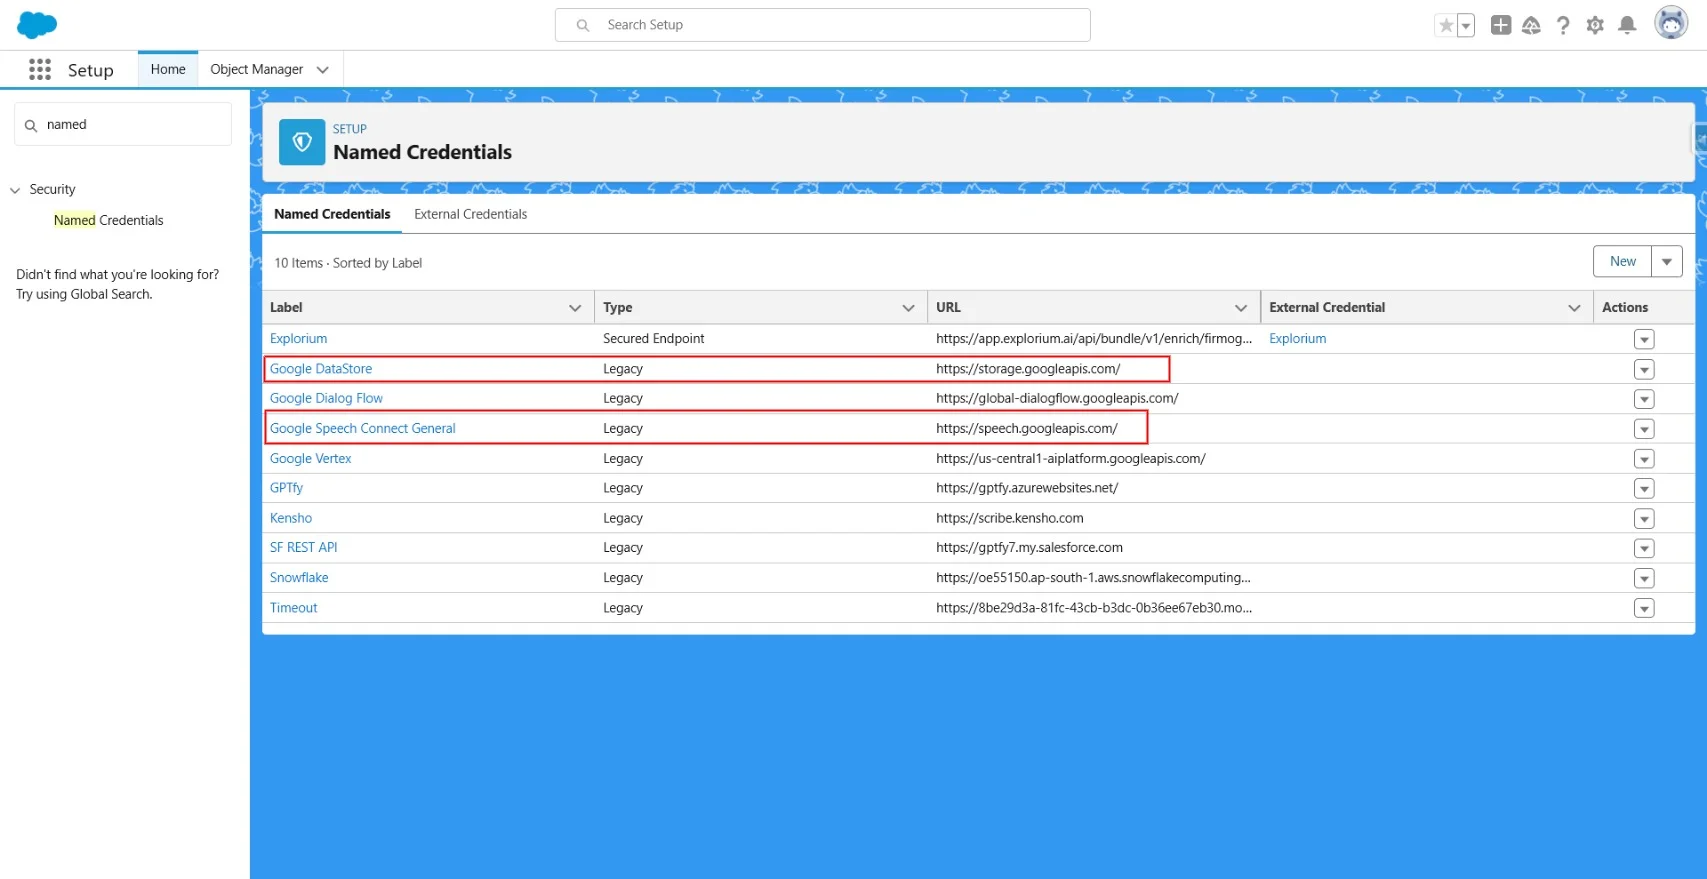
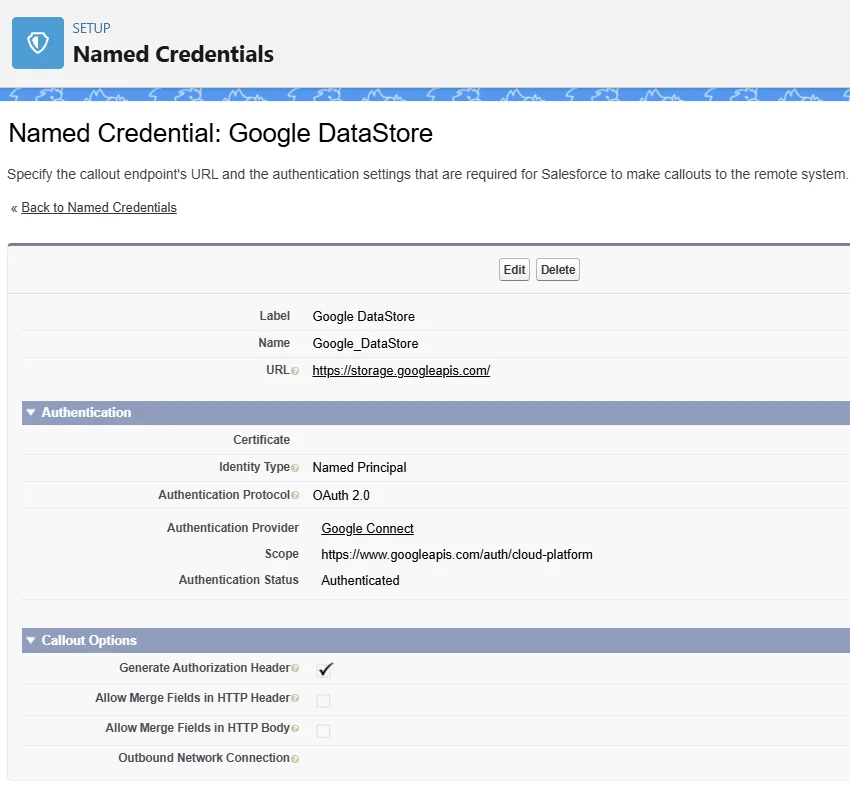
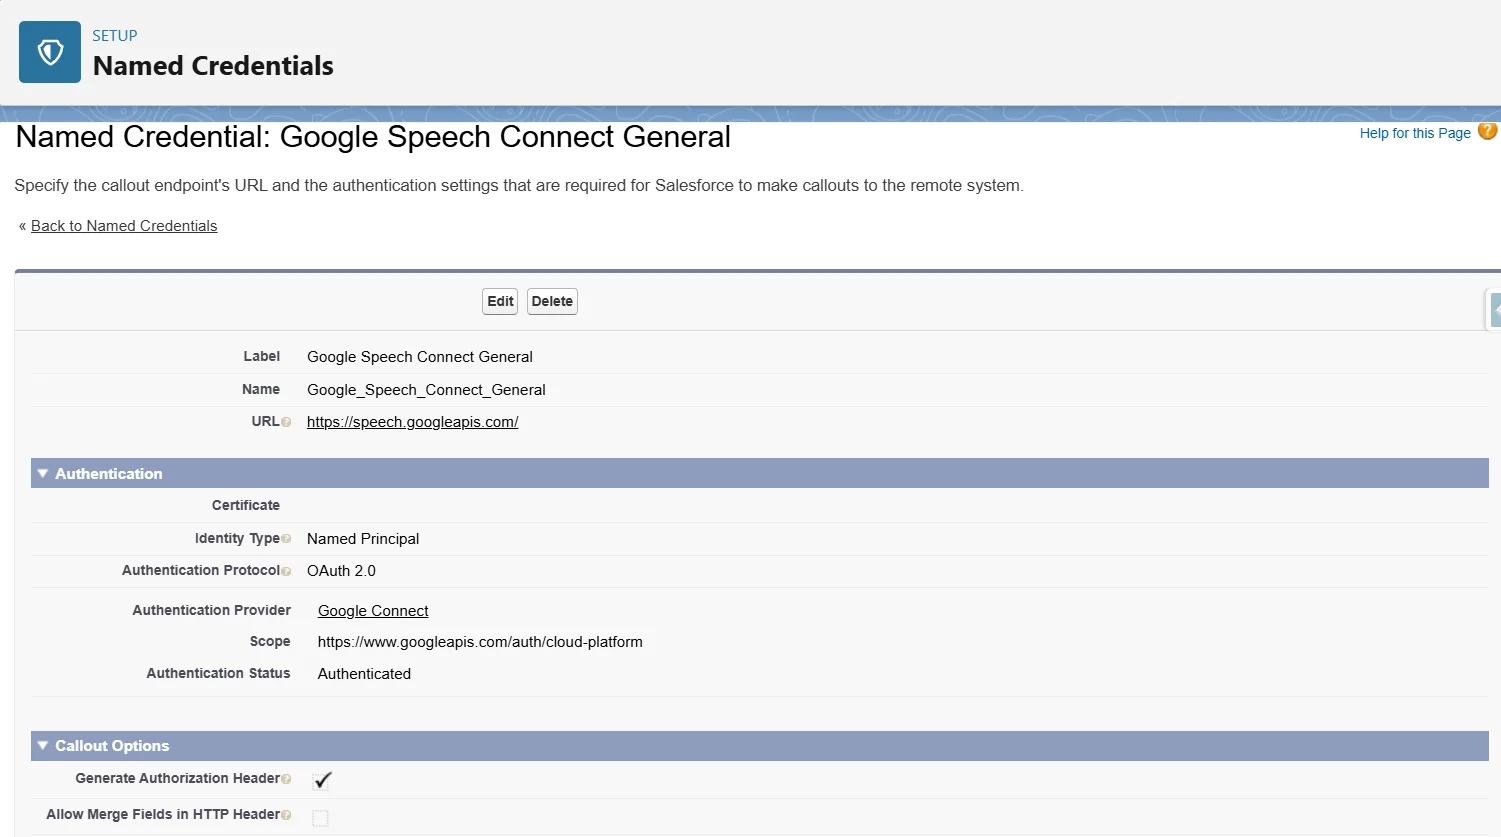
Named Credential
Create a Legacy type Named credential as per the table
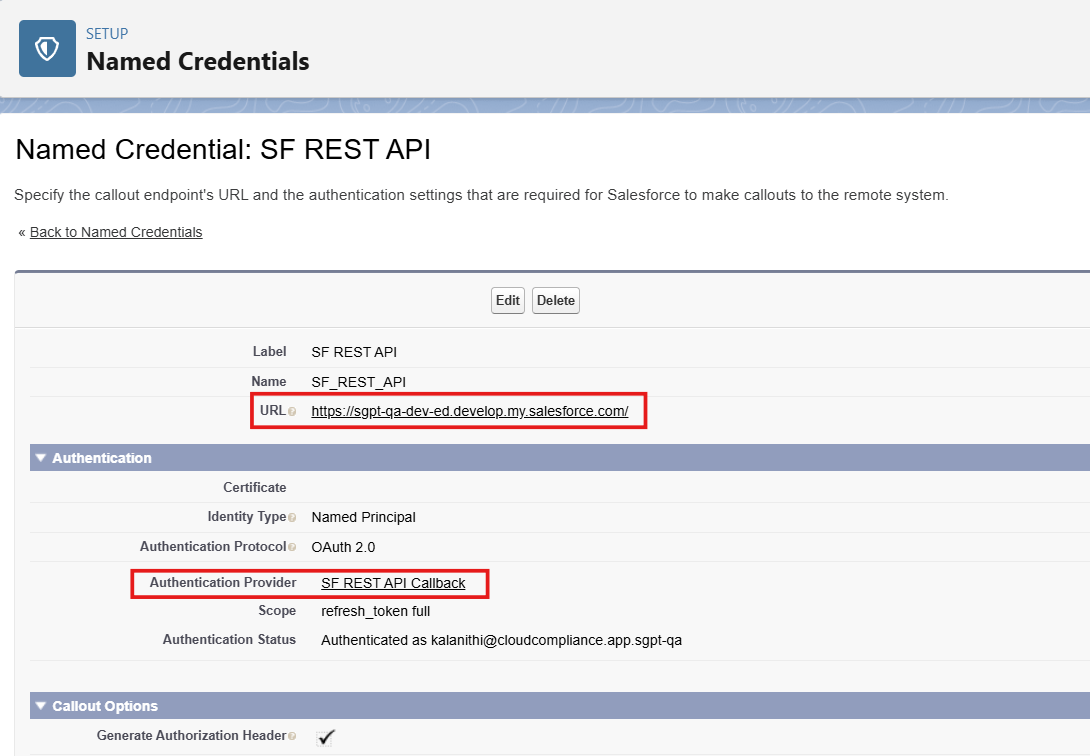
- URL should be from setup → My Domain → copy and paste with ‘https://’ at the front of the URL
- Don’t forget to add ‘/’ at end of the URL. eg – https://sgpt-qa-dev-ed.develop.my.salesforce.com/
- Select the Auth. Provider we created
- Click Save, and it will get authenticated as the user you logged in
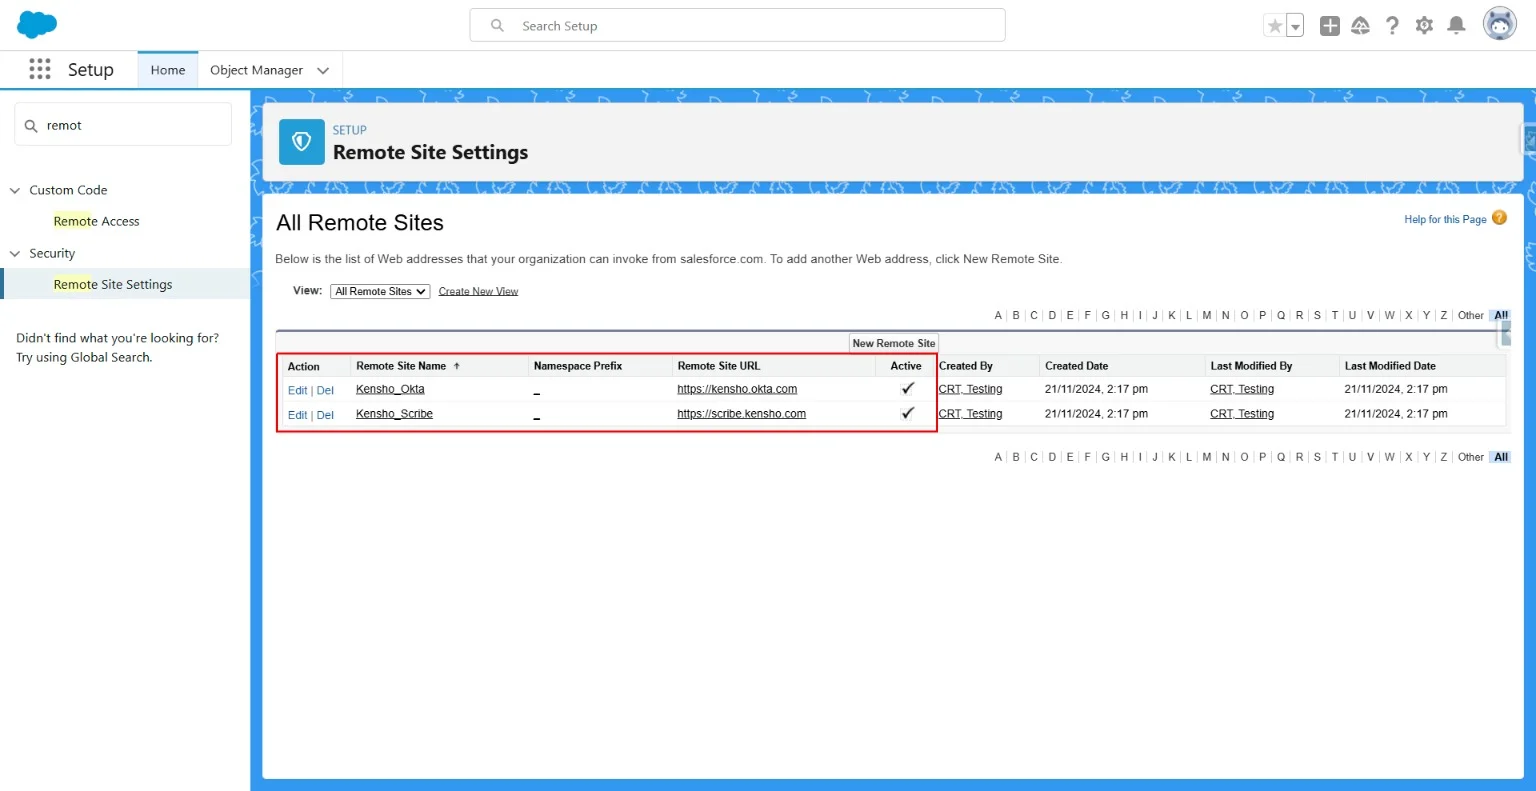
Create 2 Remote Site Settings
Create two remote site settings as per the screen shot.
Kensho0_Okta
Kensho_Scribe
Create 3 AI Models
These models will have different sets of named cred and auth providers.
The model’s card details as shown in the table below
Model’s Connection details
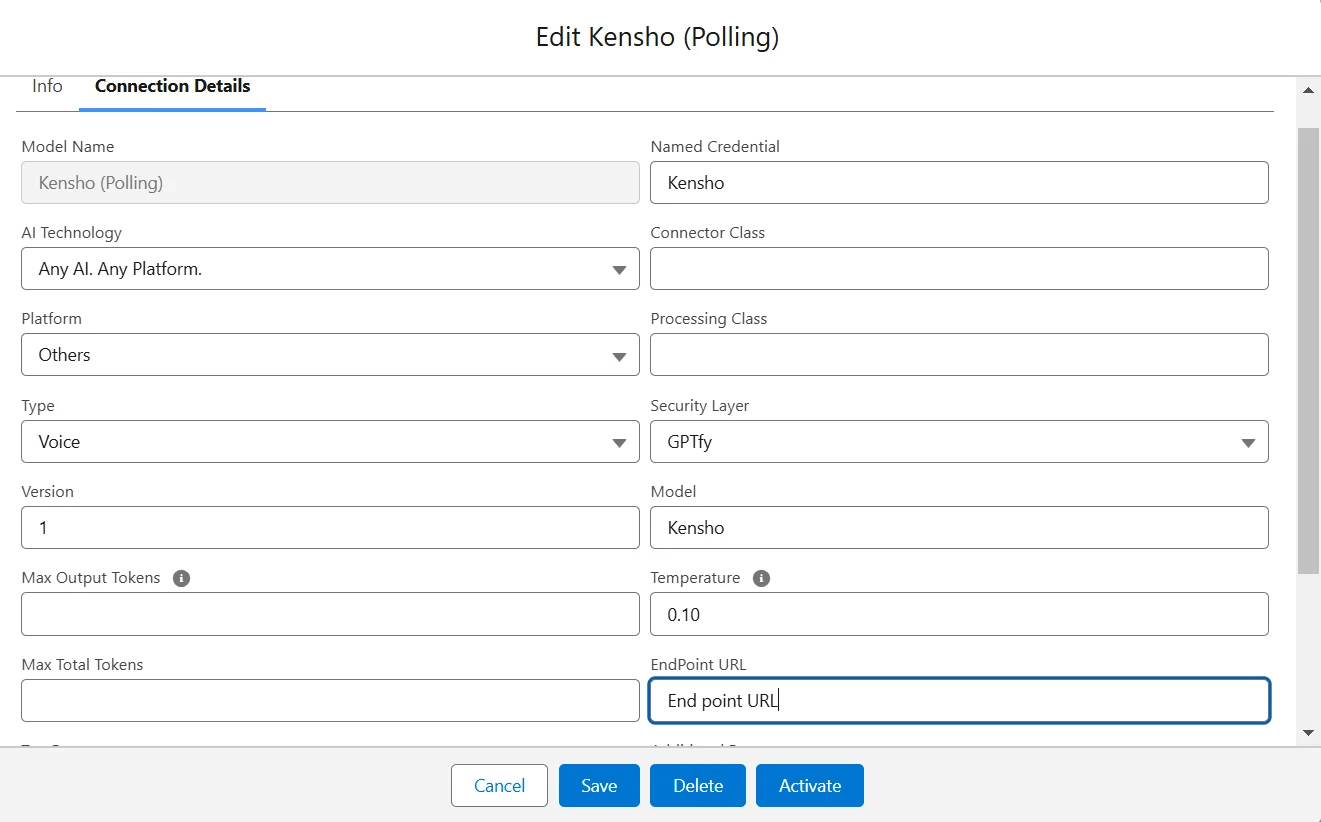
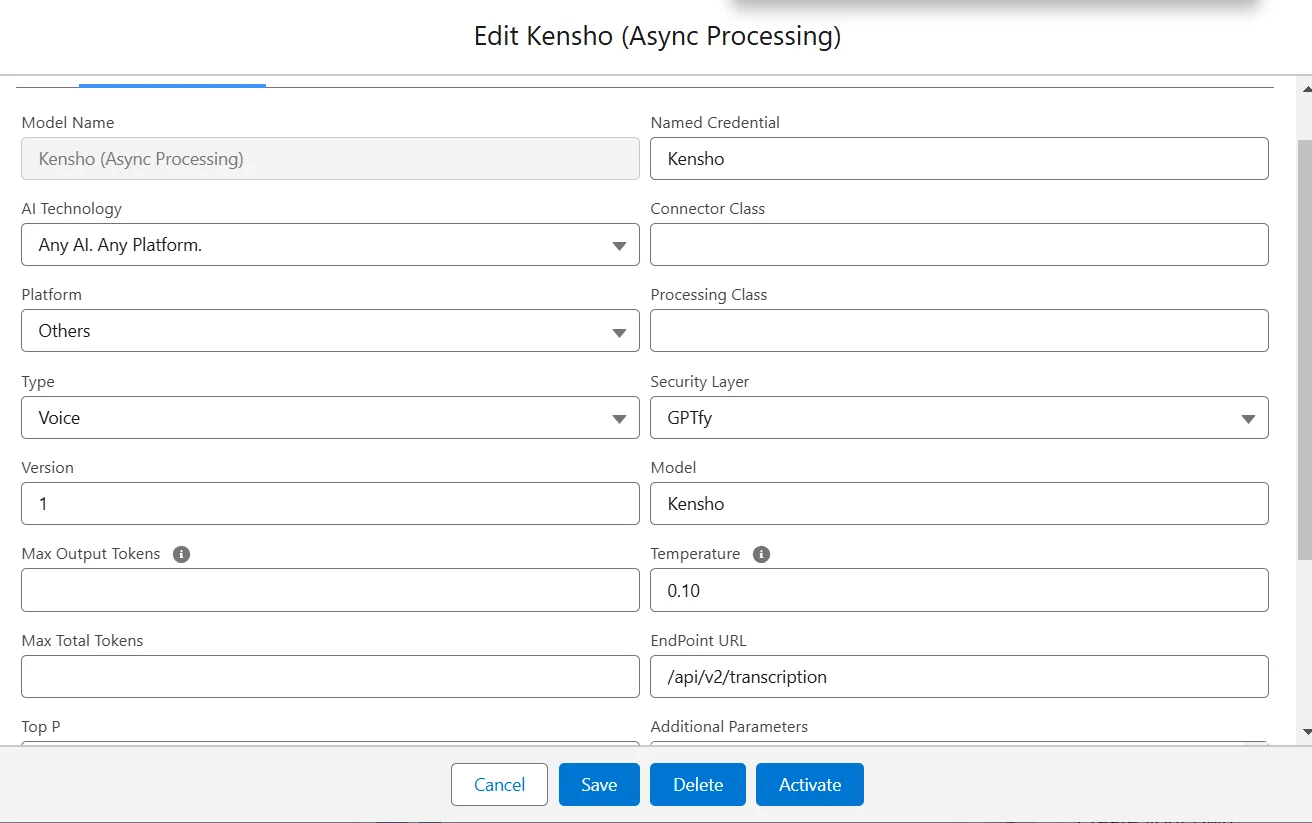
Kensho Async processing will have additional parameters
{
  "privateKeyFileId": " ",
  "clientId": " ",
  "authUrl": "https://kensho.okta.com",
  "tokenUrl": "https://kensho.okta.com/oauth2/default/v1/token"
}
Model’s Named Credentials - legacy type
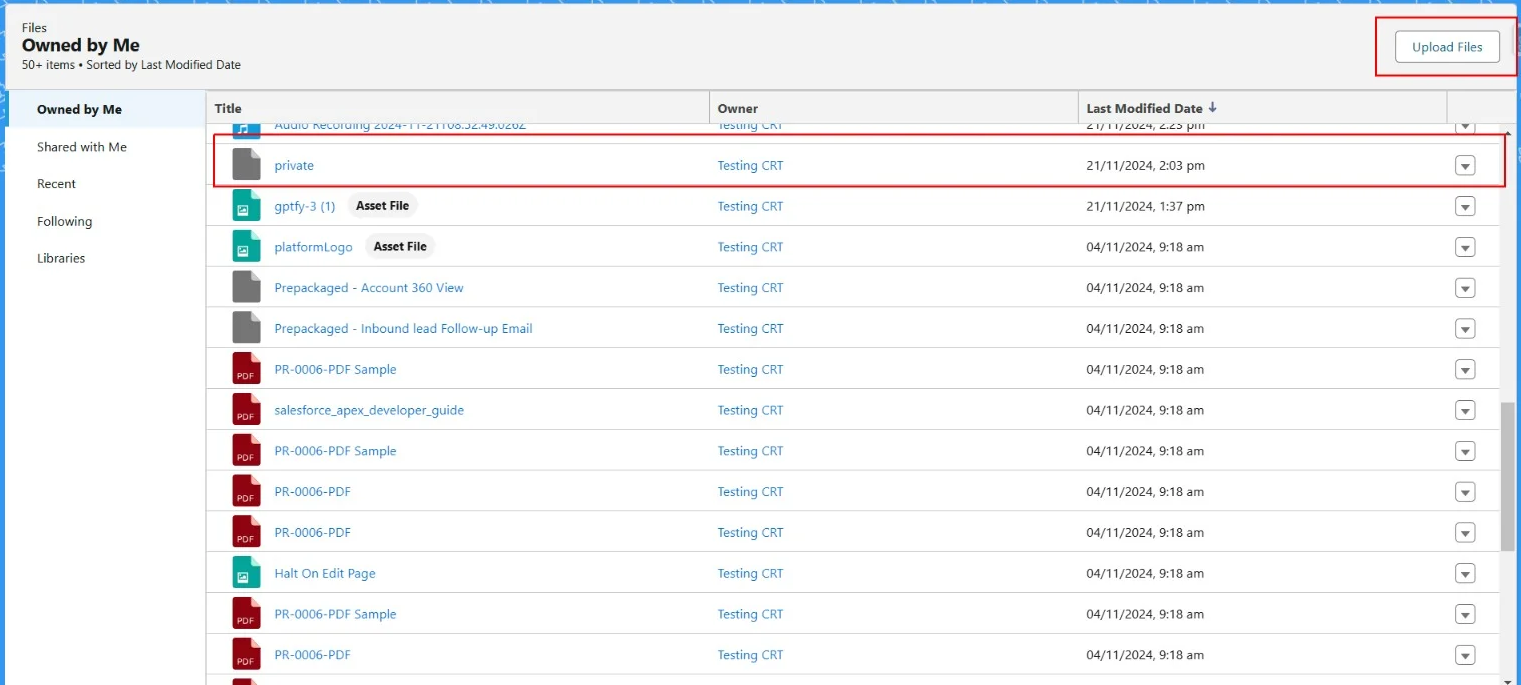
Upload private files by searching files in the app launcher (9 dots).
We are adding this file whose id acts as a private key.
private.pem (upload your key file in the app)
Need to create public user group and share the private key to the public group.
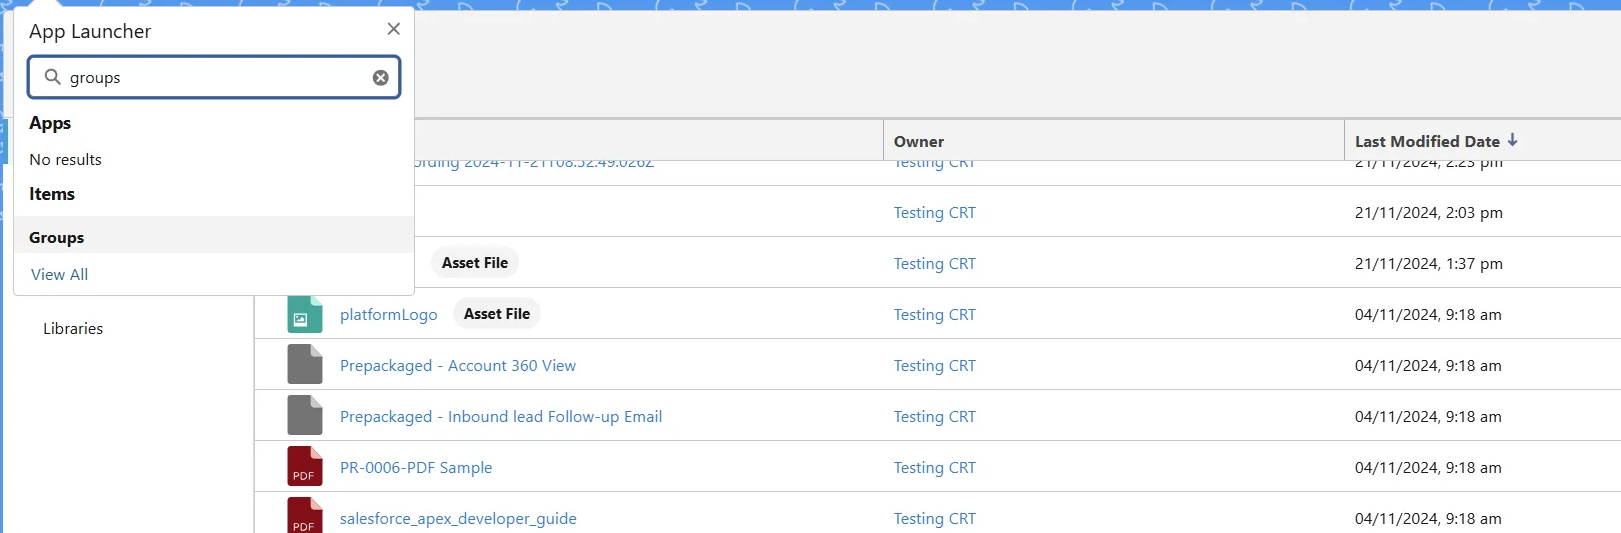
- Create a public group by searching groups in the app launcher (9 dots)
- Click on new to create a new group and add a name to the group
- Make the access type public and save

Go to the private key and share the file to this group.

Copy the private key file’s record id and paste it inside the additional parameters of the model – Kensho (Async Processing) as below.
{
  "privateKeyFileId": "069dN00001ThfjQAS",
  "clientId": " ",
  "authUrl": "https://kensho.okta.com",
  "tokenUrl": "https://kensho.okta.com/oauth2/default/v1/token"
}
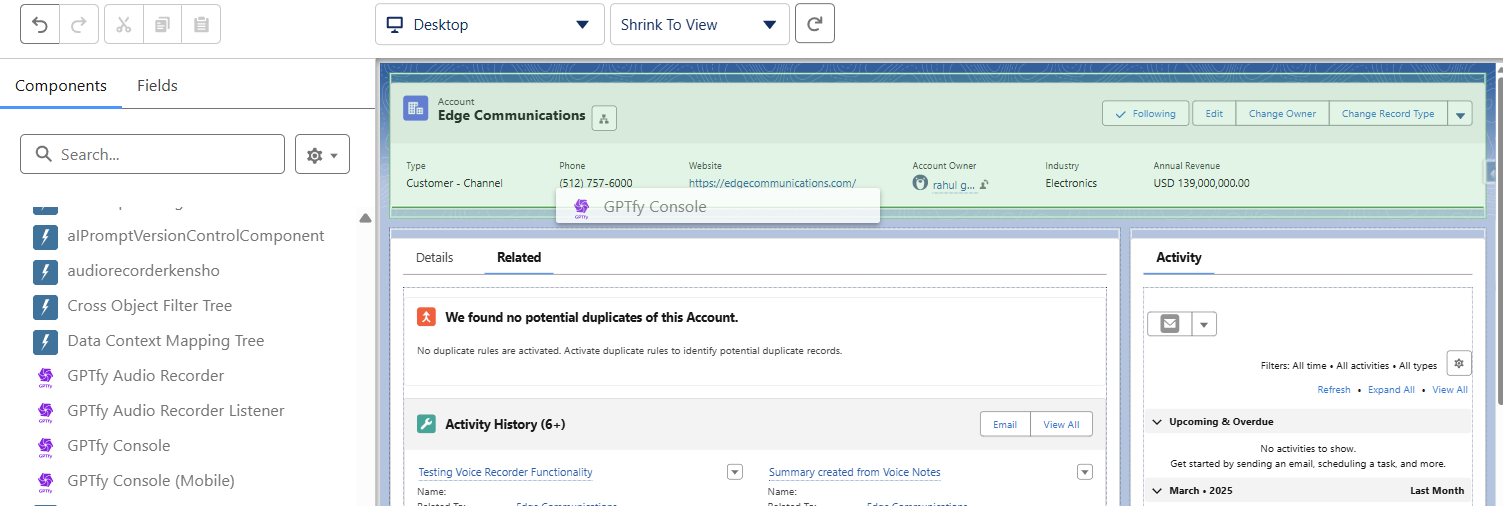
Drag and Drop Components
Drag and drop the audio recorder and audio listener component on the record page where the voice recorder wants to be configured.
Check all the users have been given licenses in installed packages. Go to Manage Licenses.
Check in setup → installed packages → secure gpt → click on manage licenses.
We need to be sure that all users using the voice record (be an admin, be a std user) have to be given a license here.
Google Chirp (Sync) Configuration for GPTfy Voice
To use the Google Chirp model for Voice functionality, below are the steps to be followed:
- Named credentials should be created
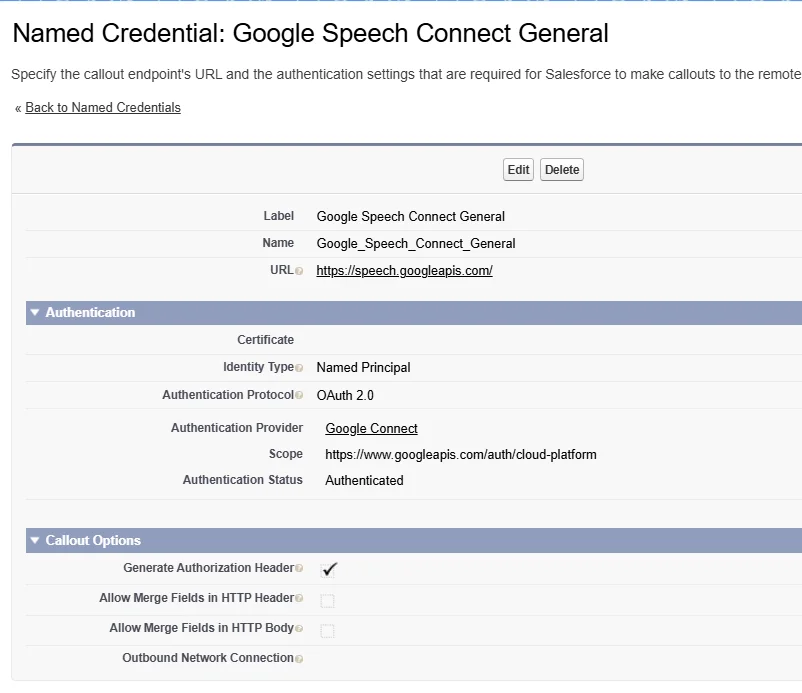
- A new Auth provider is created will all the required detail as shown below in the screen shot

- Add details in the Google Chirp card connection details tab.
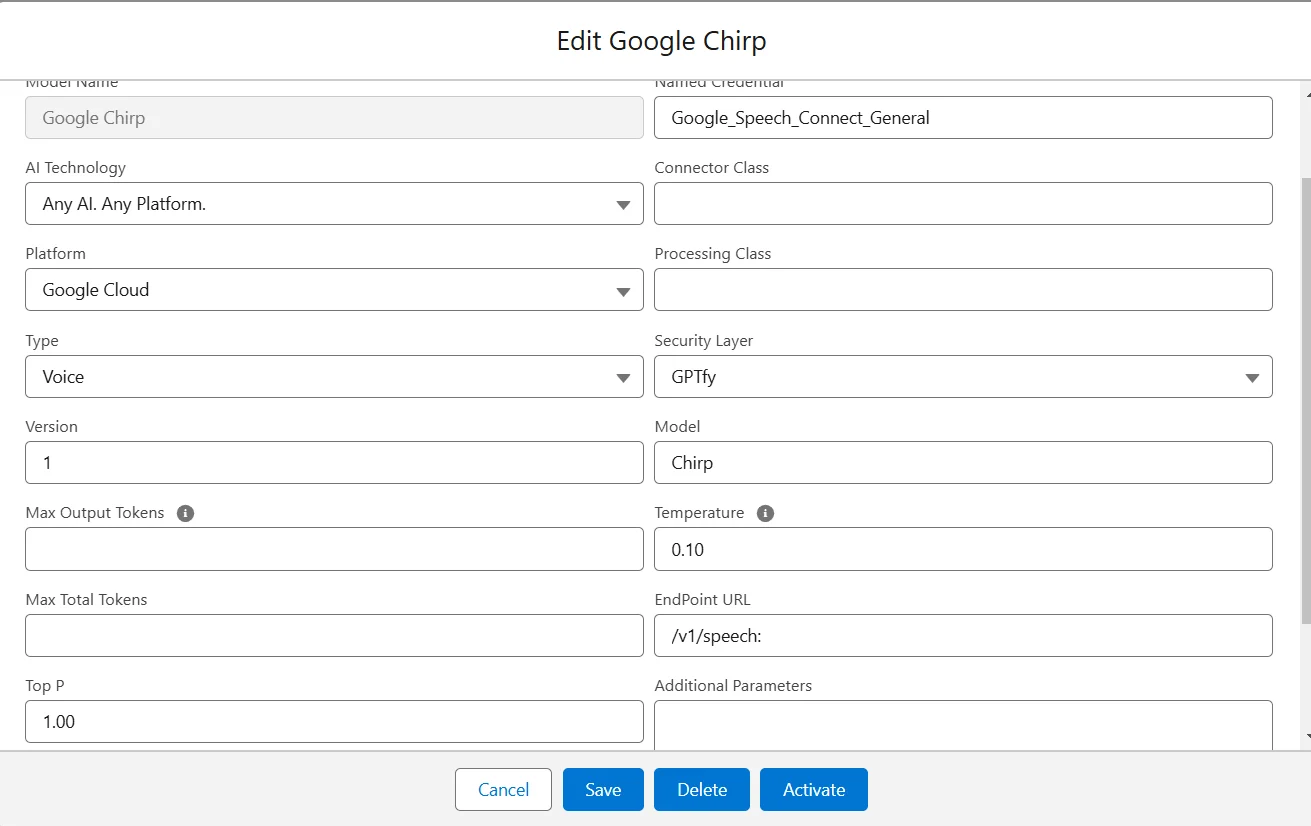
- Click on save and then activate the model.
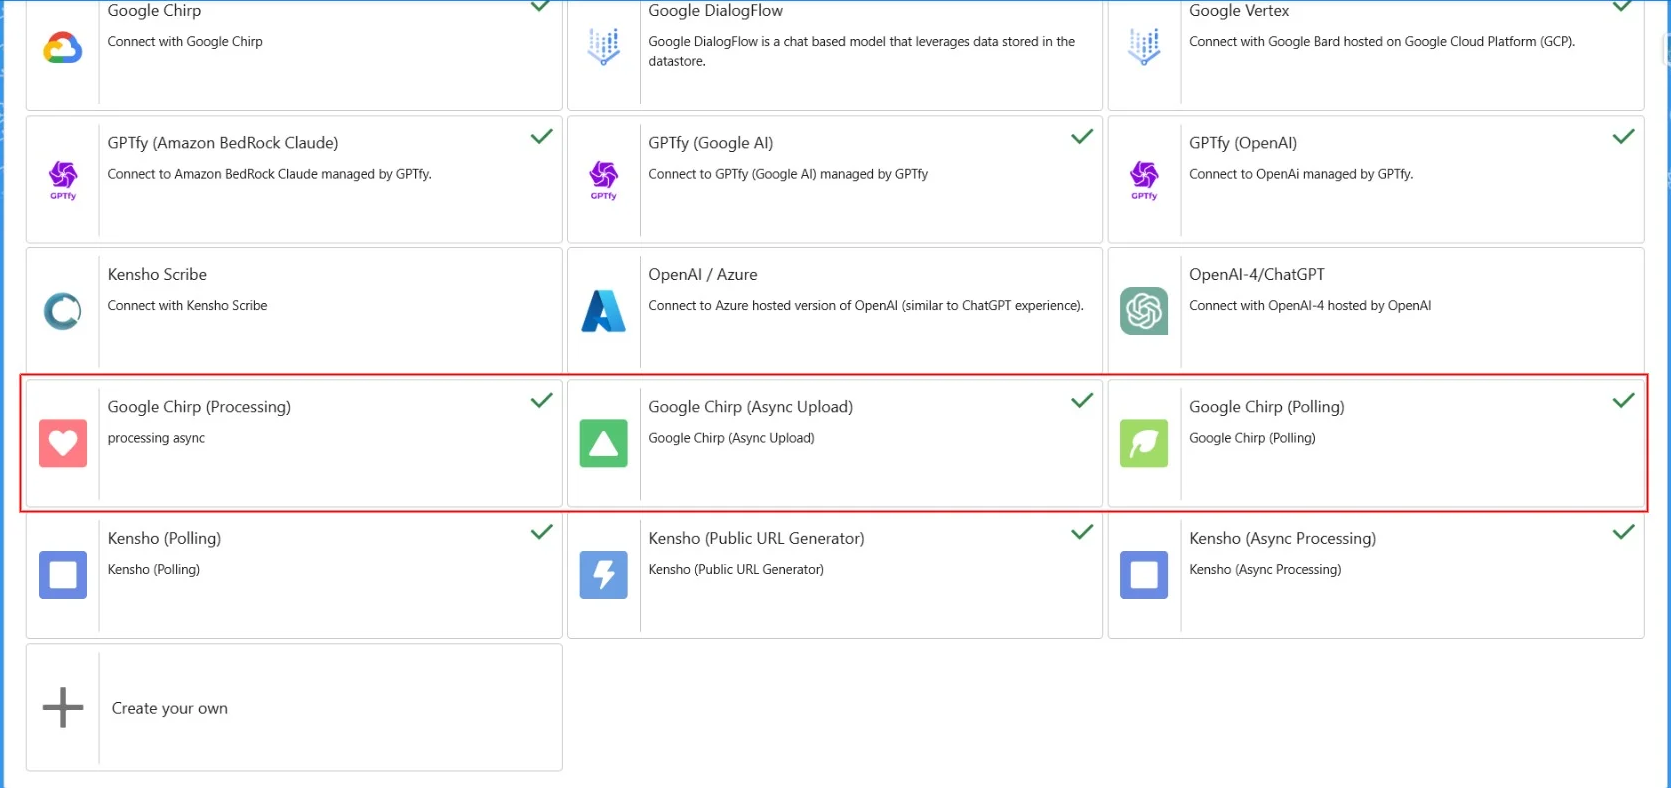
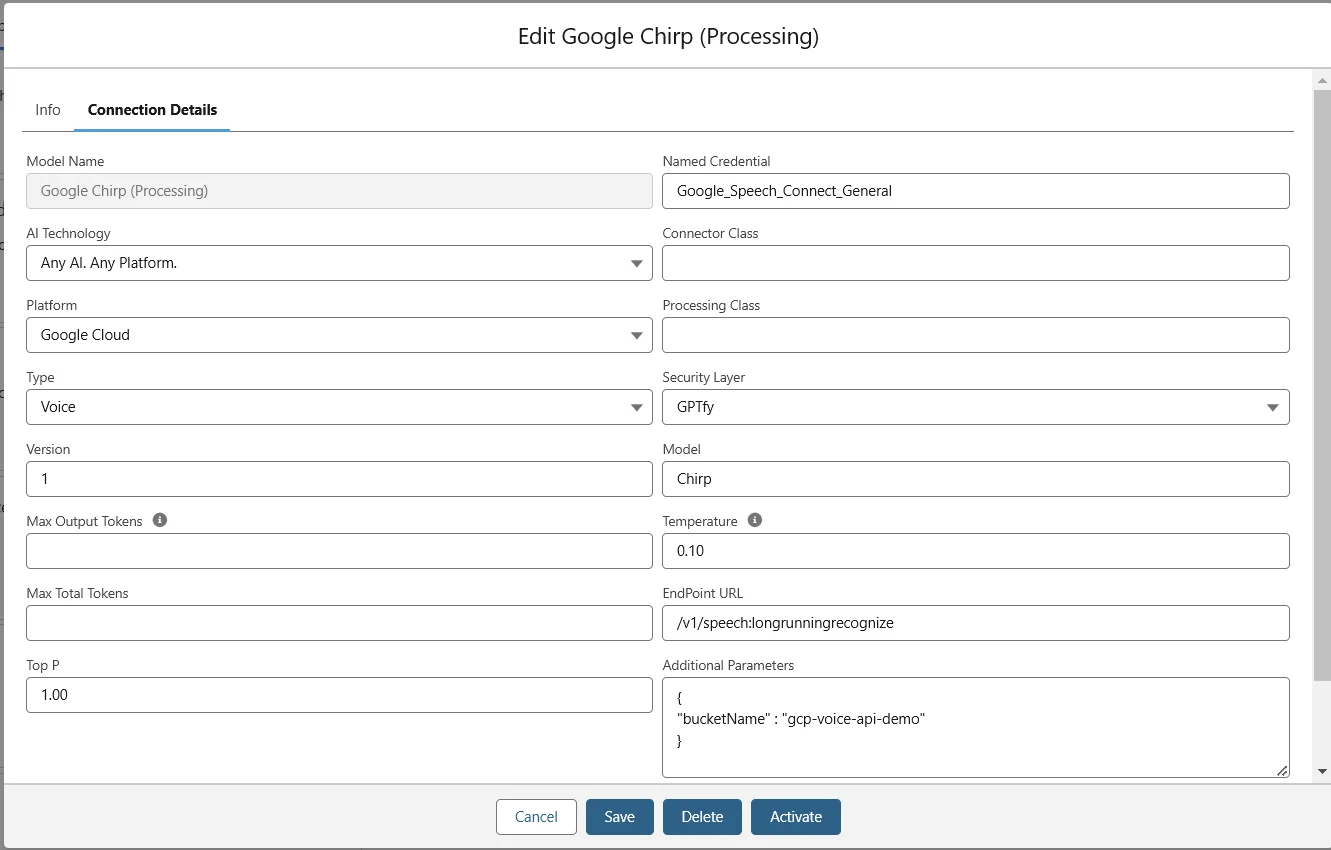
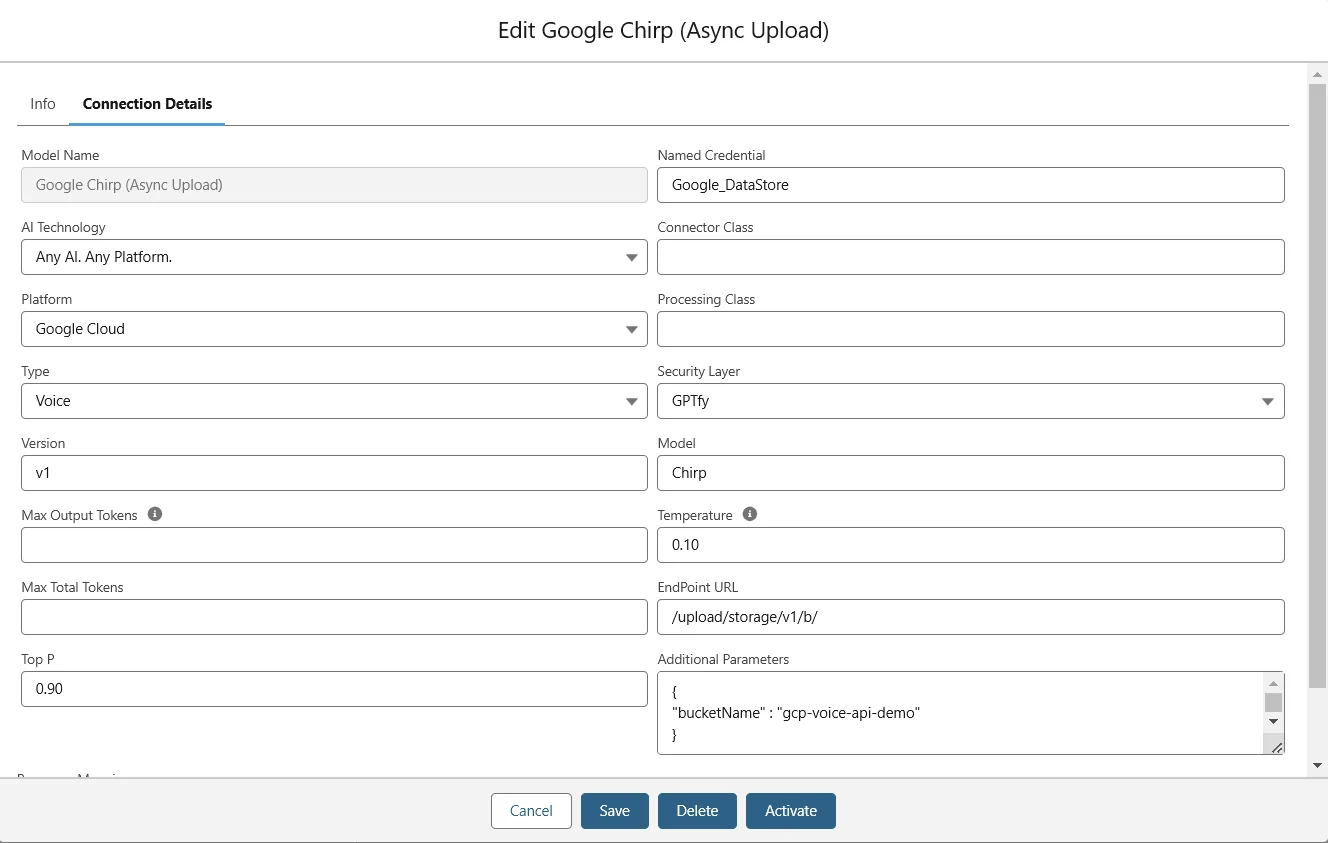
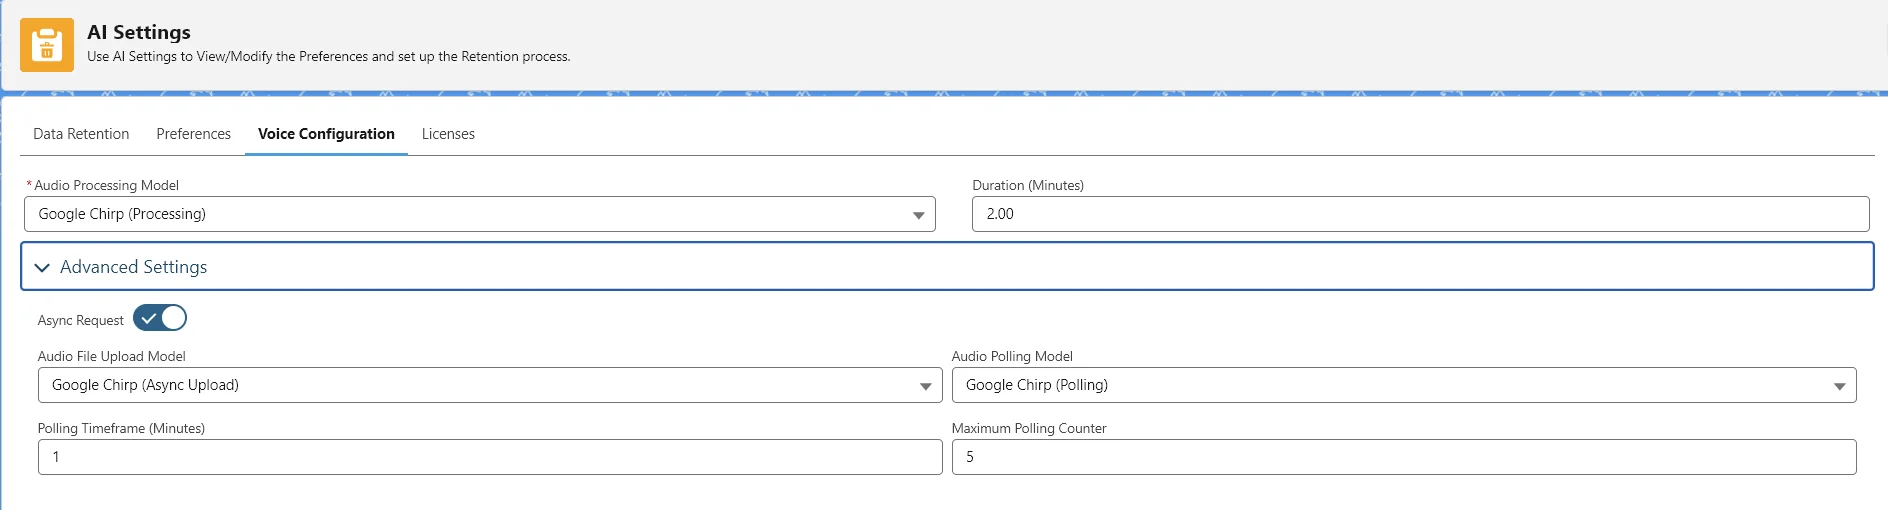
Google Chirp (Async) Configuration for GPTfy Voice
To use the Google Chirp Async model for Voice functionality, below are the steps to be followed:
- Named credential should be created
- A new Auth provider is created with all the required details, as shown in the screenshot below.

Google Chirp(Processing), Google Chirp(Async), Google Chirp(Polling) AI Models are required to be activated with all the connection details inside.