GPTfy Voice Recorder Setup Guide
Overview
The GPTfy Voice Recorder makes it easy for your sales team to record voice notes directly from Salesforce. These recordings are automatically transcribed using AI and logged to the relevant record saving time and reducing manual effort.
This guide walks you through setting up the Voice Recorder feature, configuring AI models, and enabling event-based notifications.
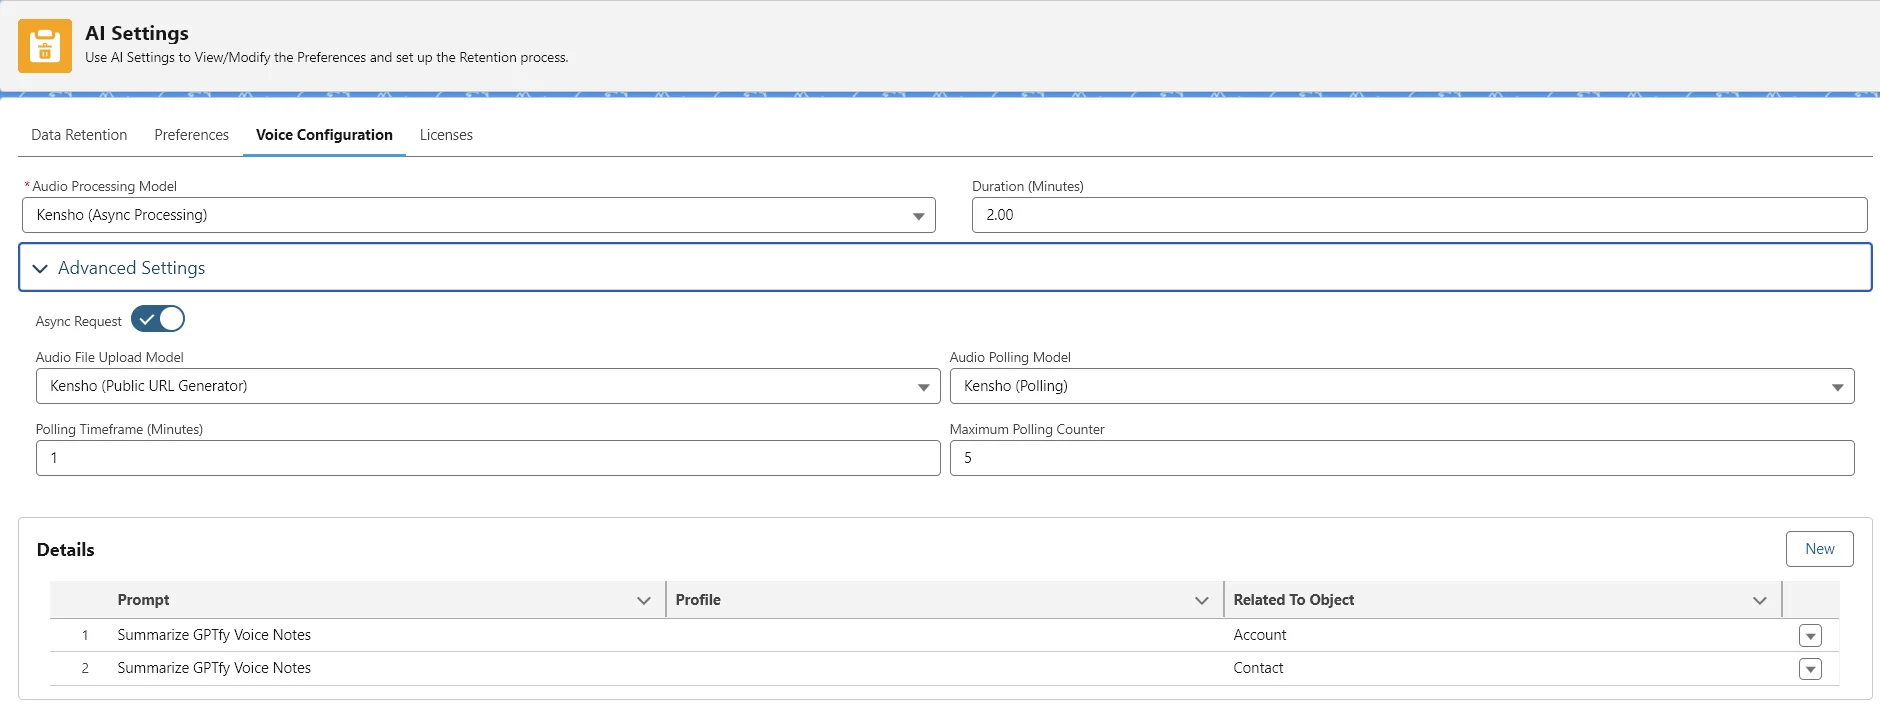
To ensure this solution works properly, the following settings must be enabled within the AI Settings under the Voice Configuration tab.
Prerequisites for Voice Recorder Solution
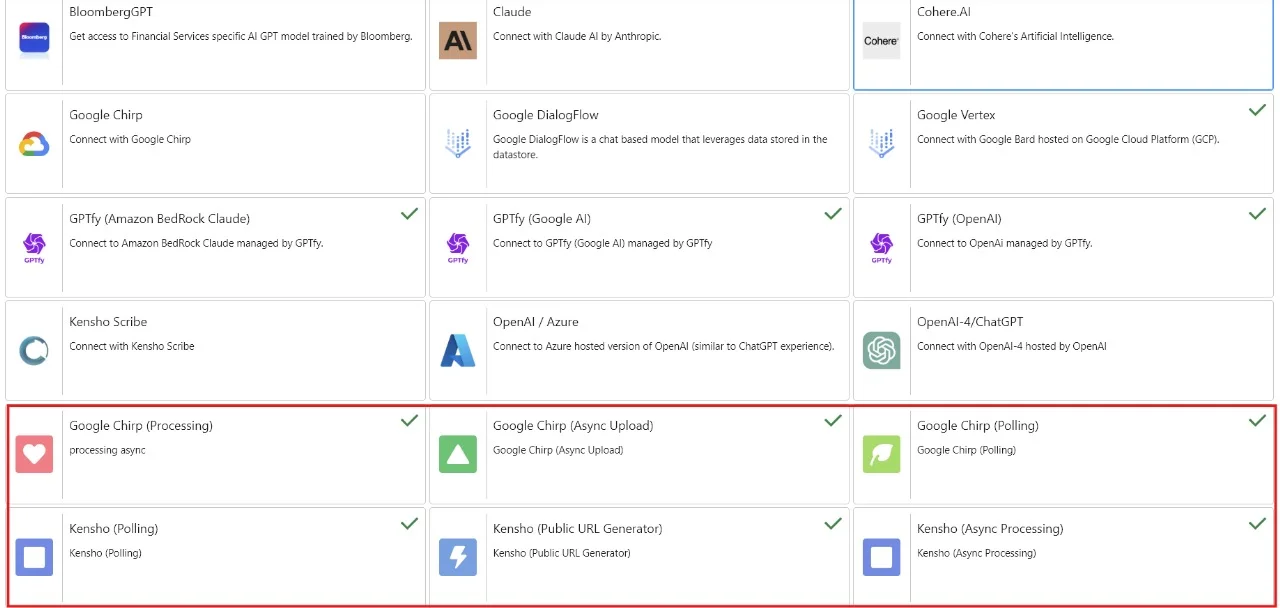
The following ai models can we used for GPTfy voice functionality:
| Name | Sync | Async | Model |
|---|---|---|---|
| Google chirp | Yes | No | Chirp |
| Google Chirp (Async Upload) | No | Yes | Chirp |
| Google Chirp (Processing) | No | Yes | Chirp |
| Google Chirp (Polling) | No | Yes | Chirp |
| OpenAI Whisper | Yes | No | whisper |
| Kensho (Async Processing) | No | Yes | Kensho |
| Kensho (Public URL Generator) | No | Yes | Kensho |
| Kensho (Polling) | No | Yes | Kensho |
- Google Chirp AI model or Kensho must be activated. Refer to the related article for configurations and settings.
-
Import GPTfy_Notification_Flow.zip using the Workbench.
-
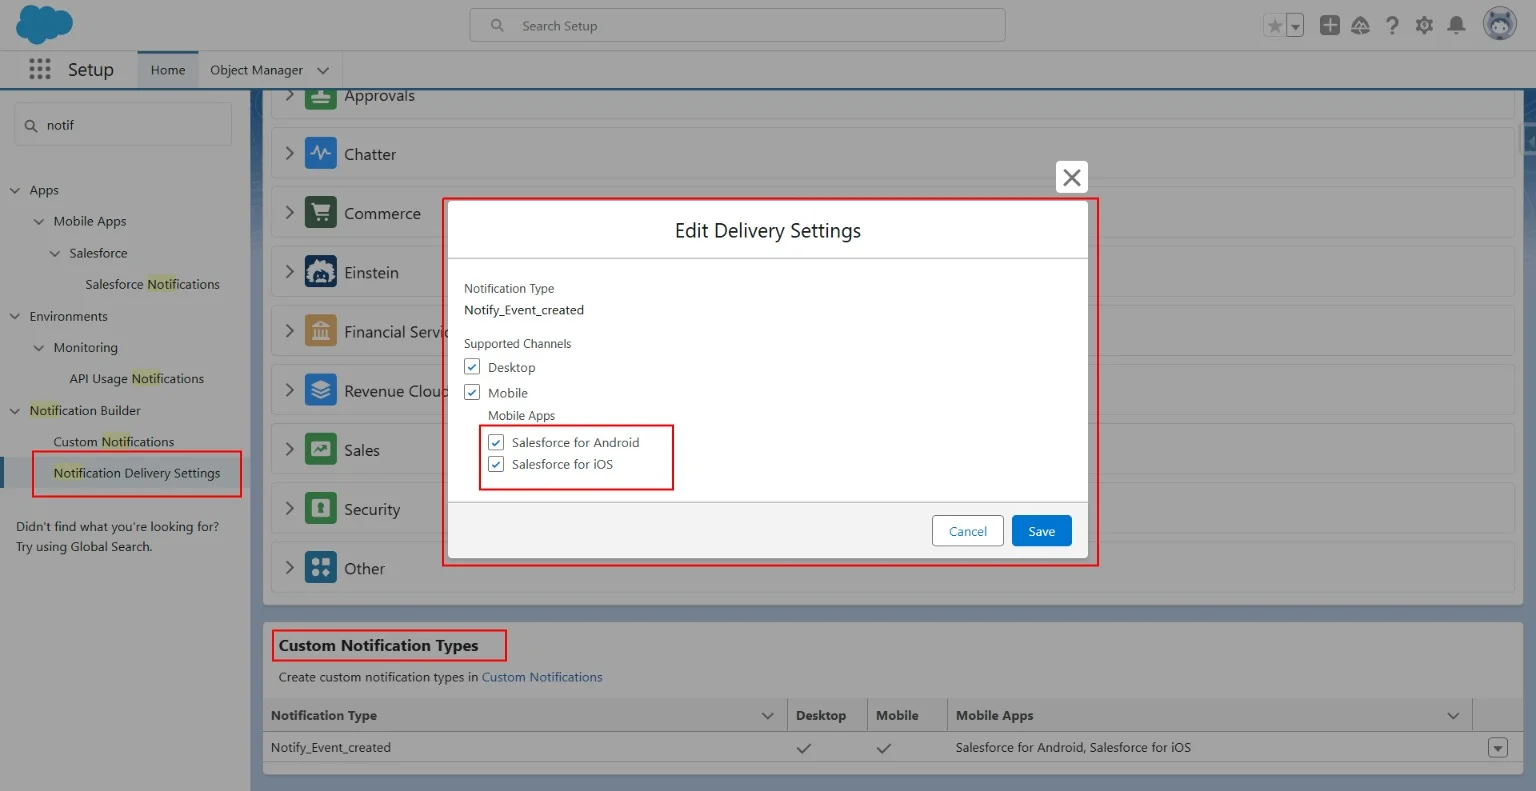
Notification Delivery Settings should be configured as shown below:
Set up the Voice Recorder
To set up the Voice Recorder solution, follow these steps:
-
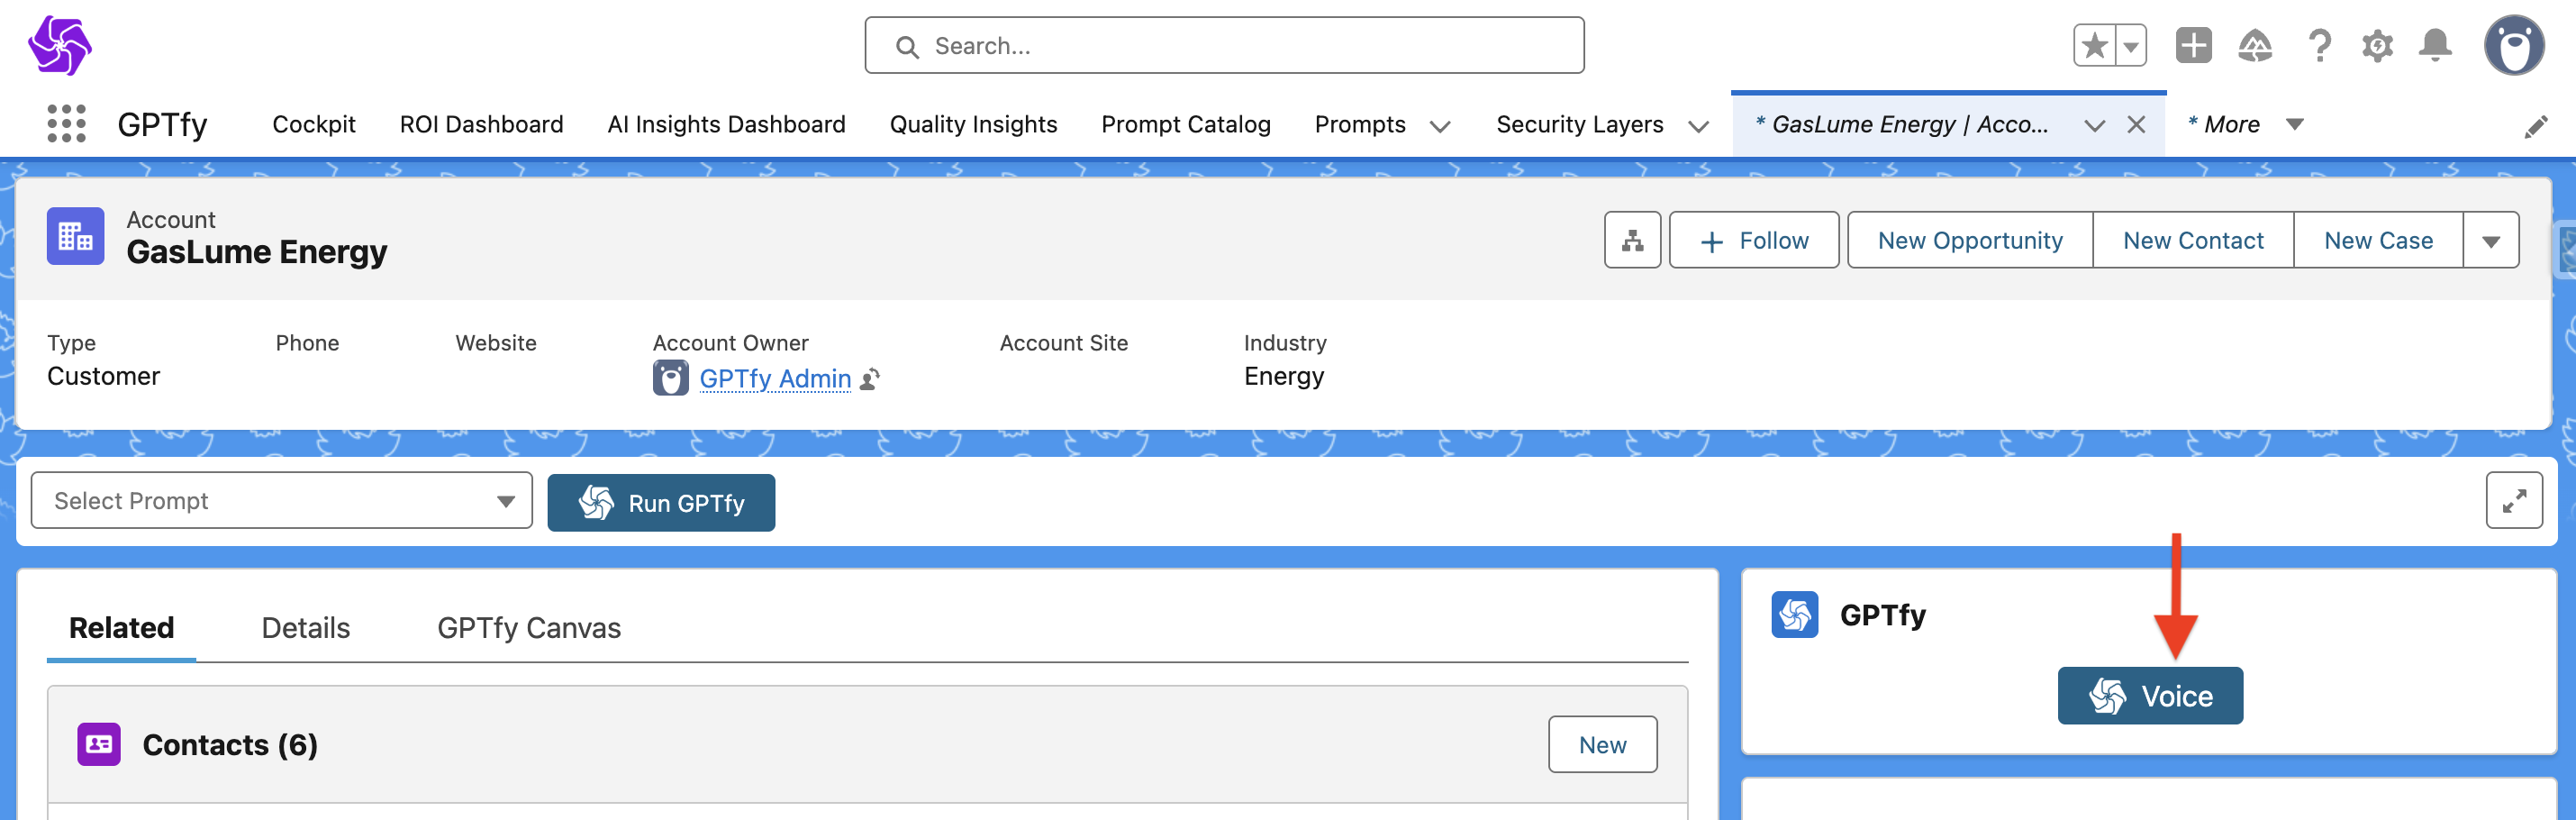
Go to any record where you want to run GPTfy Voice and click on Edit Page.
-
Drag and drop the Voice Recorder Component into the desired location on the Lightning record page.
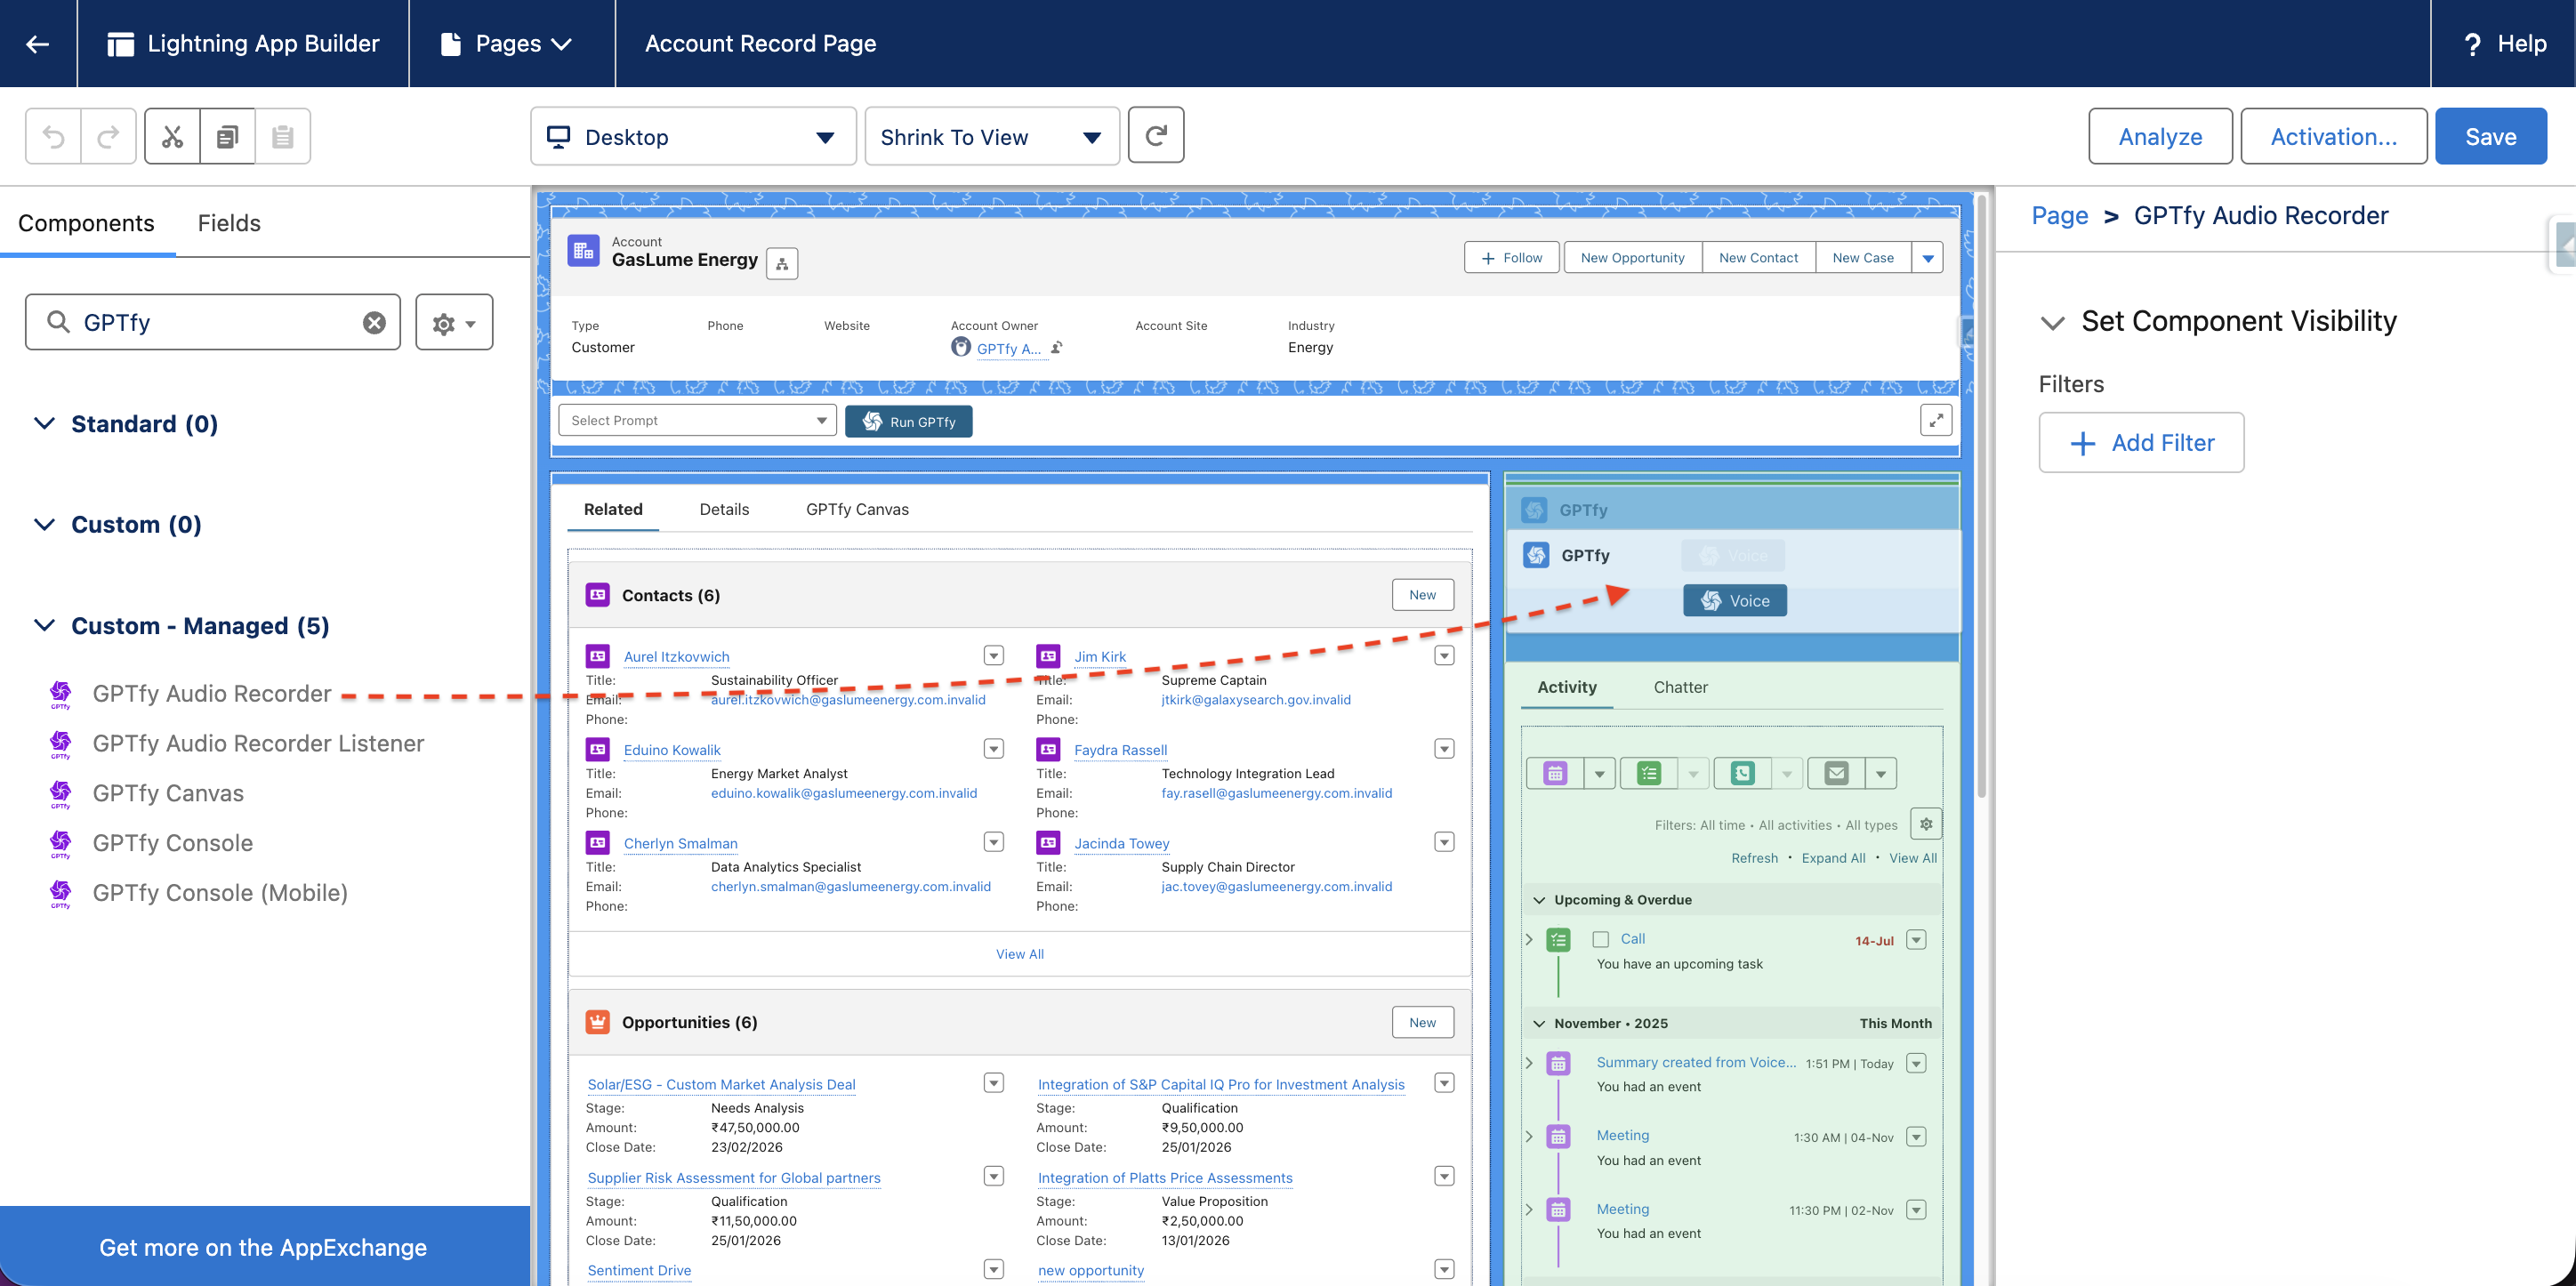
- Add the Audio Listener Component to the page layout.
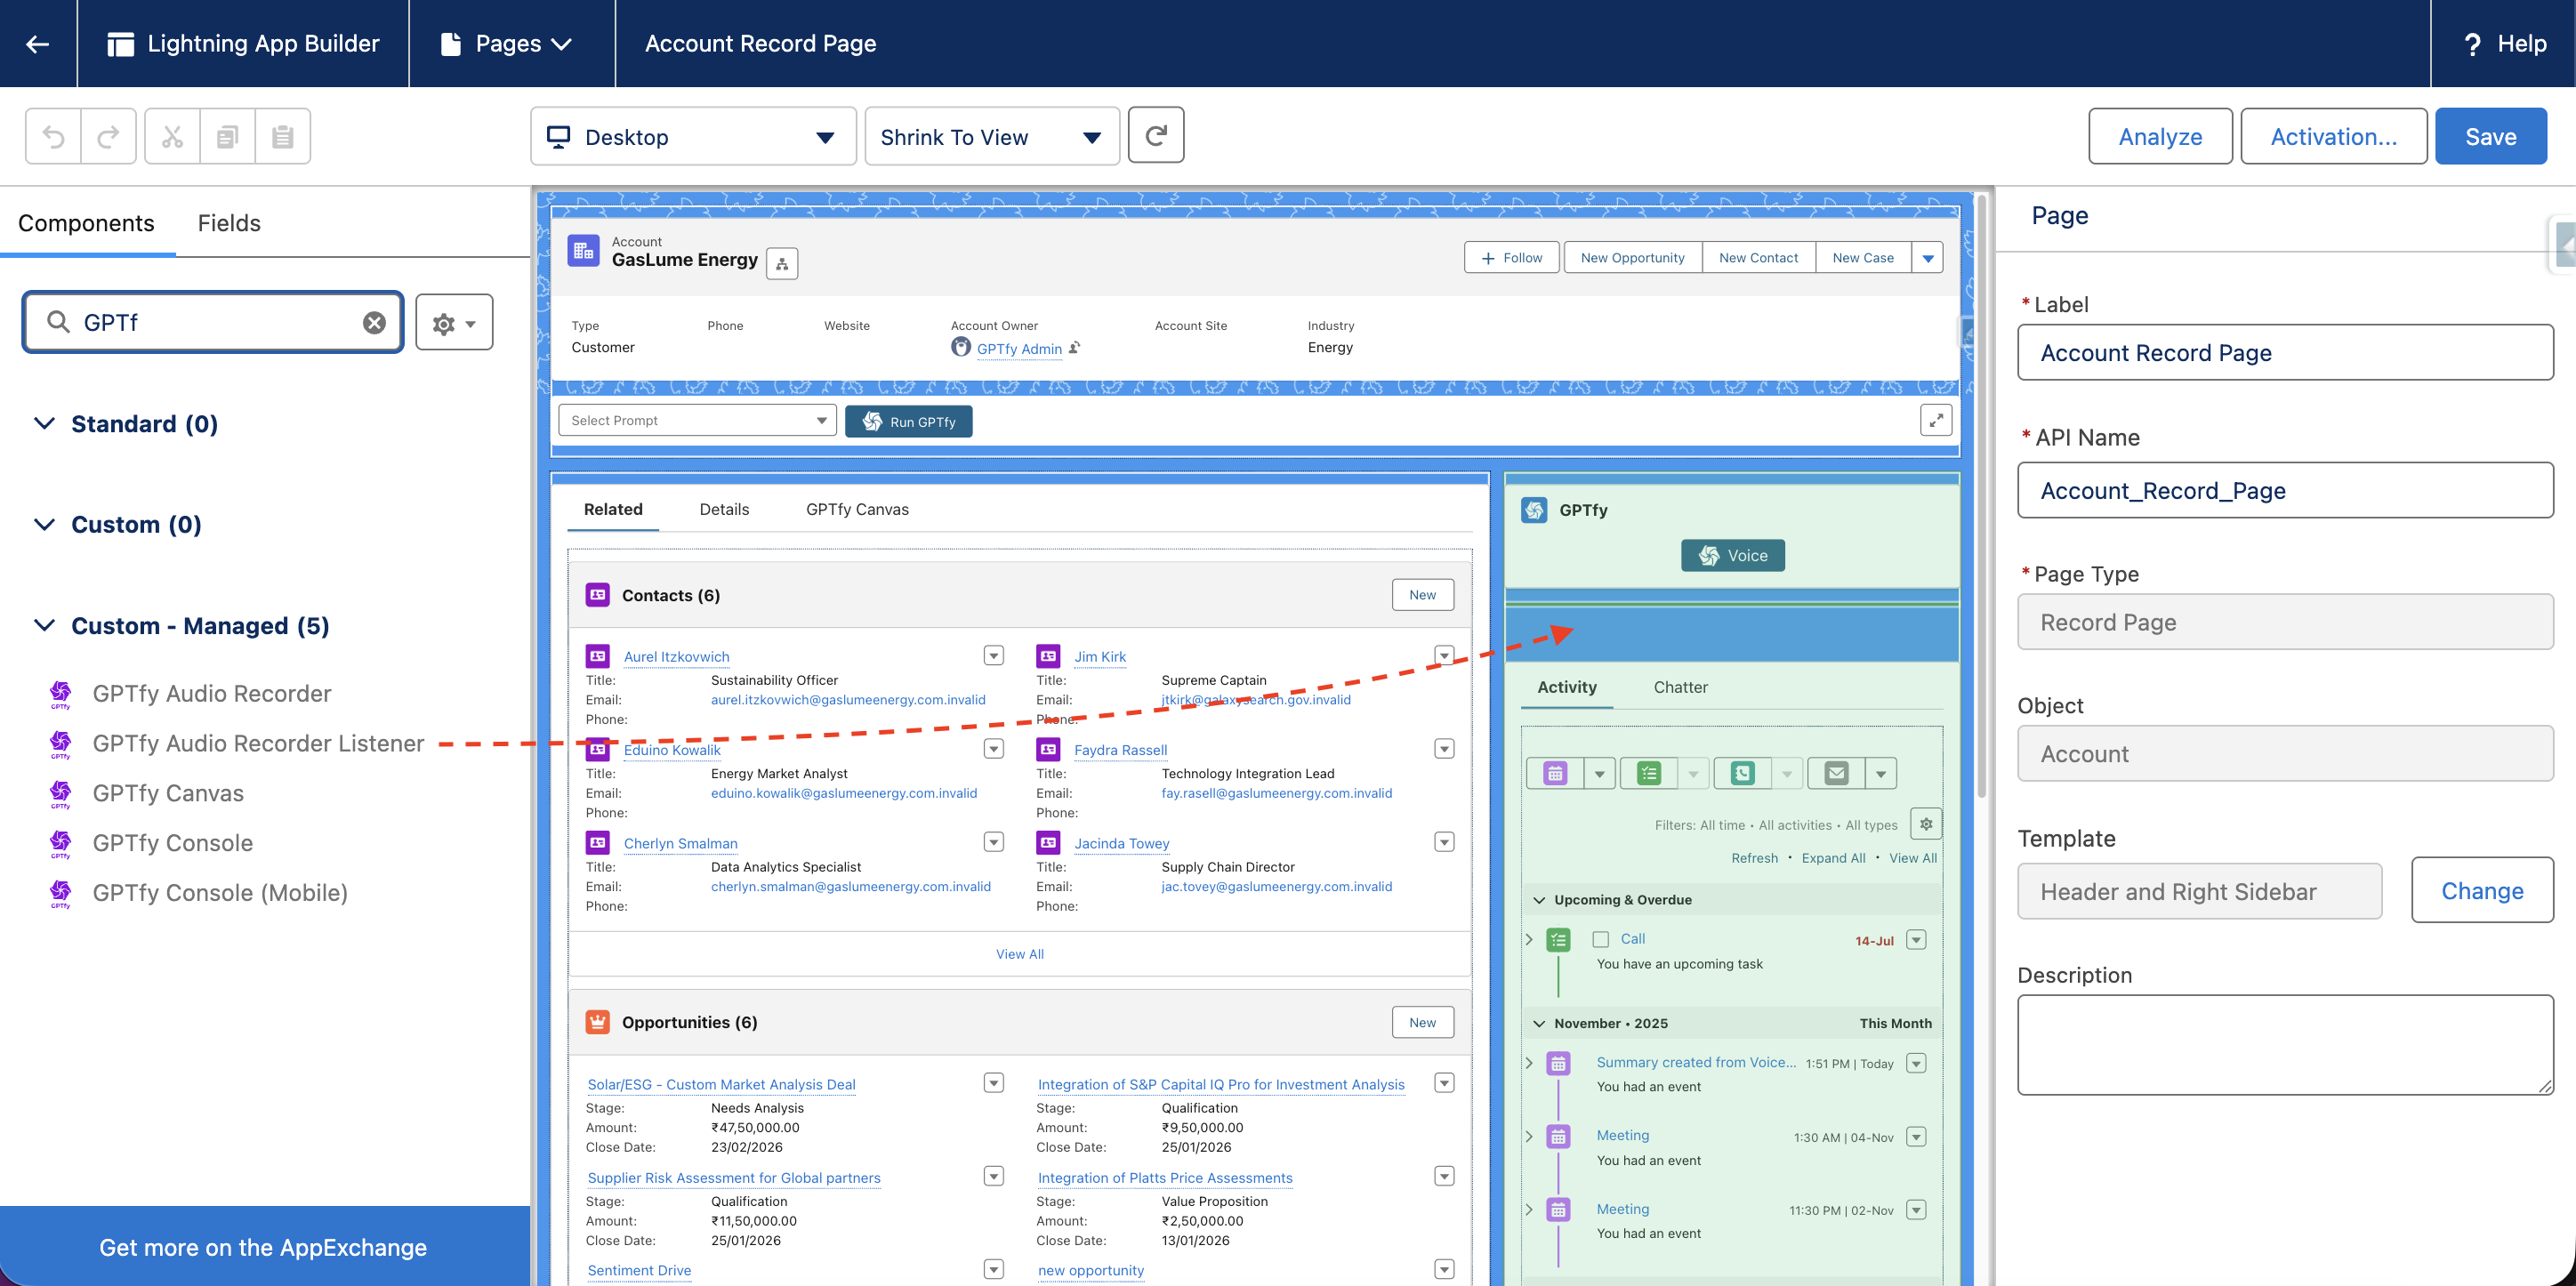
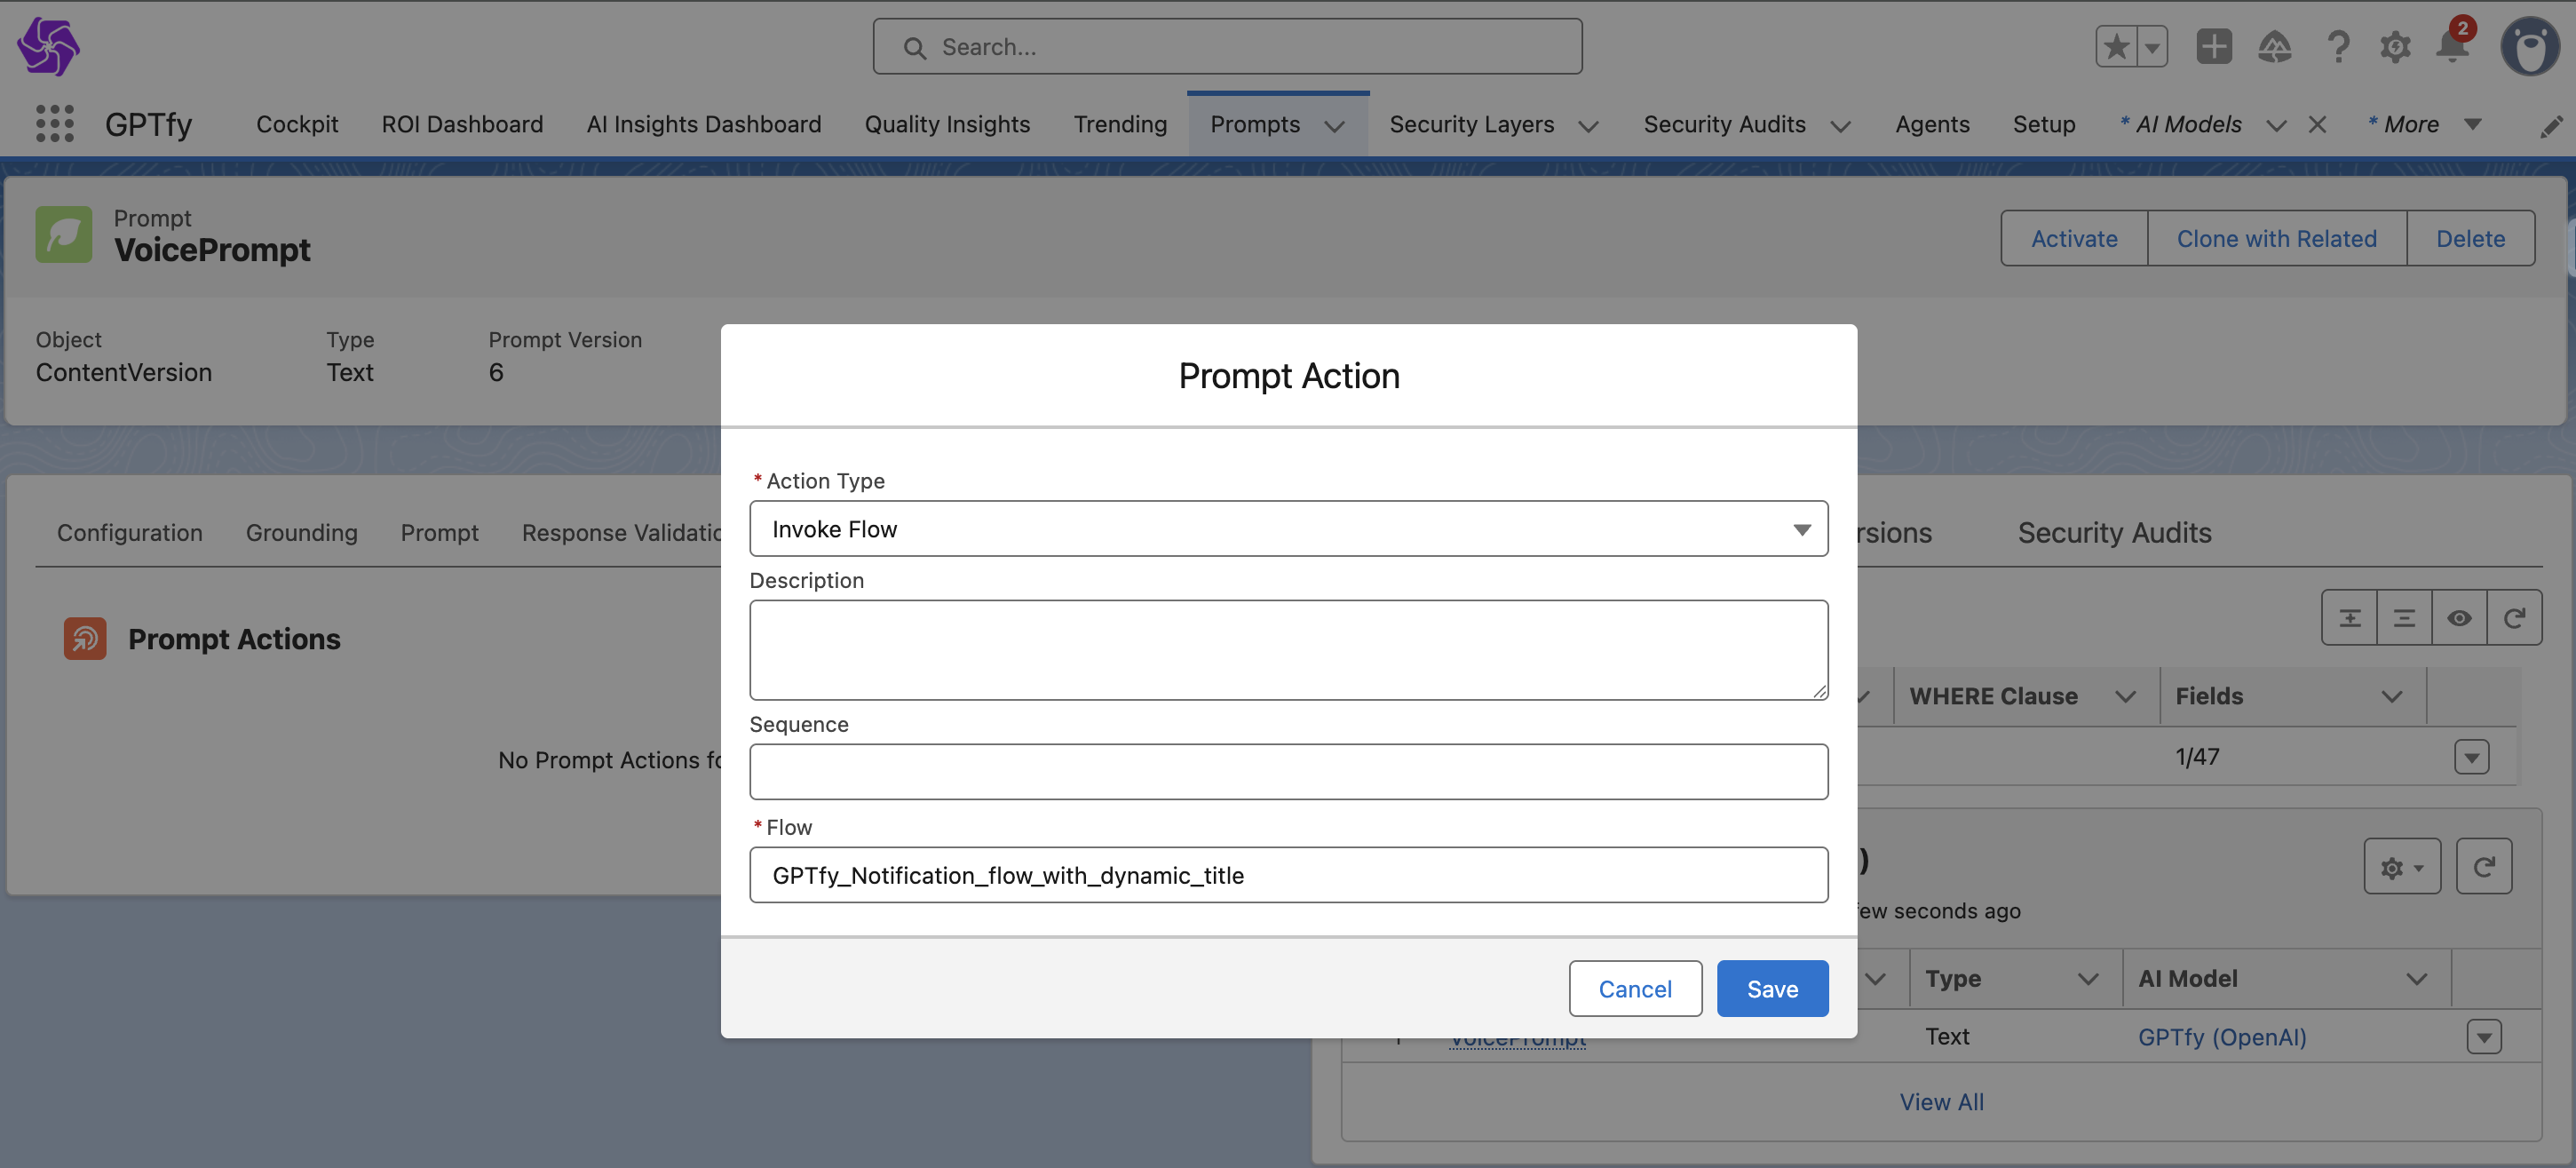
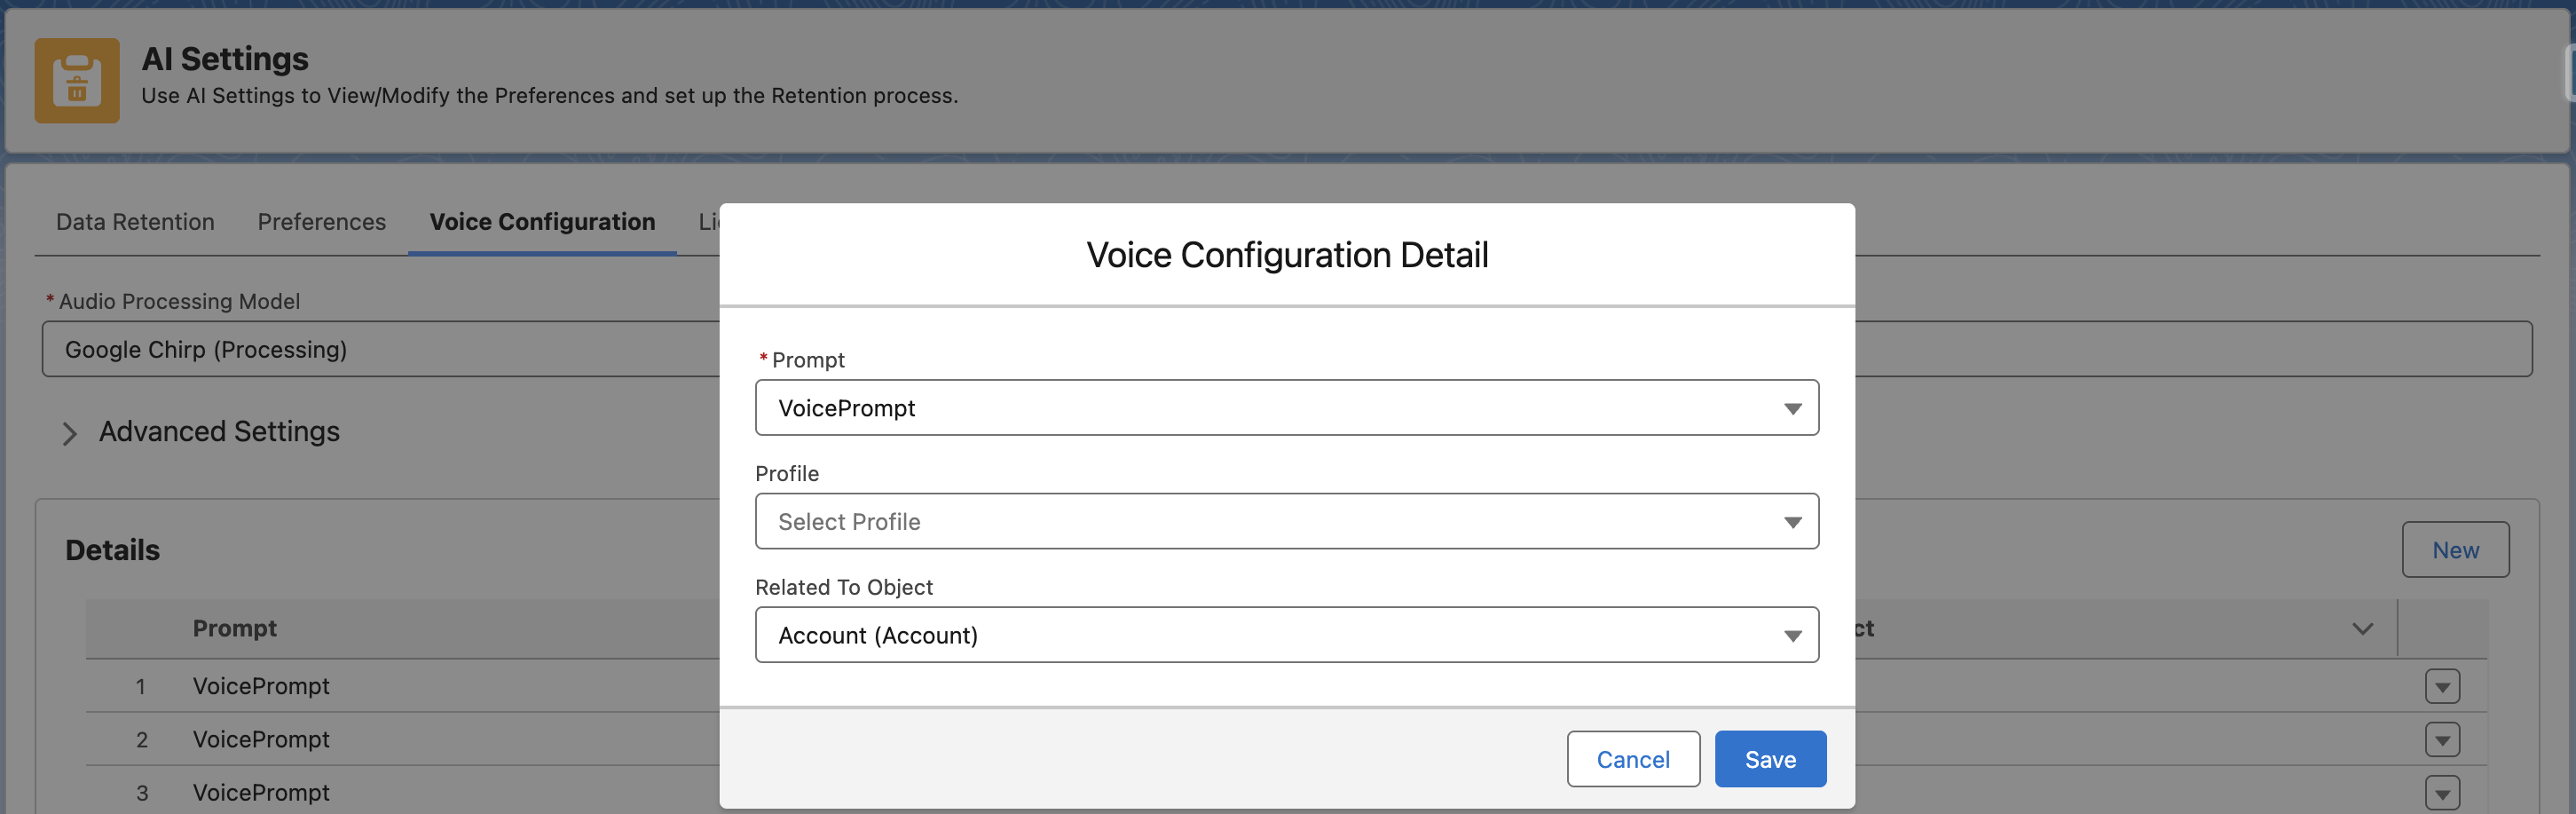
- In AI Settings, navigate to the Voice Configuration tab and add the connection details.
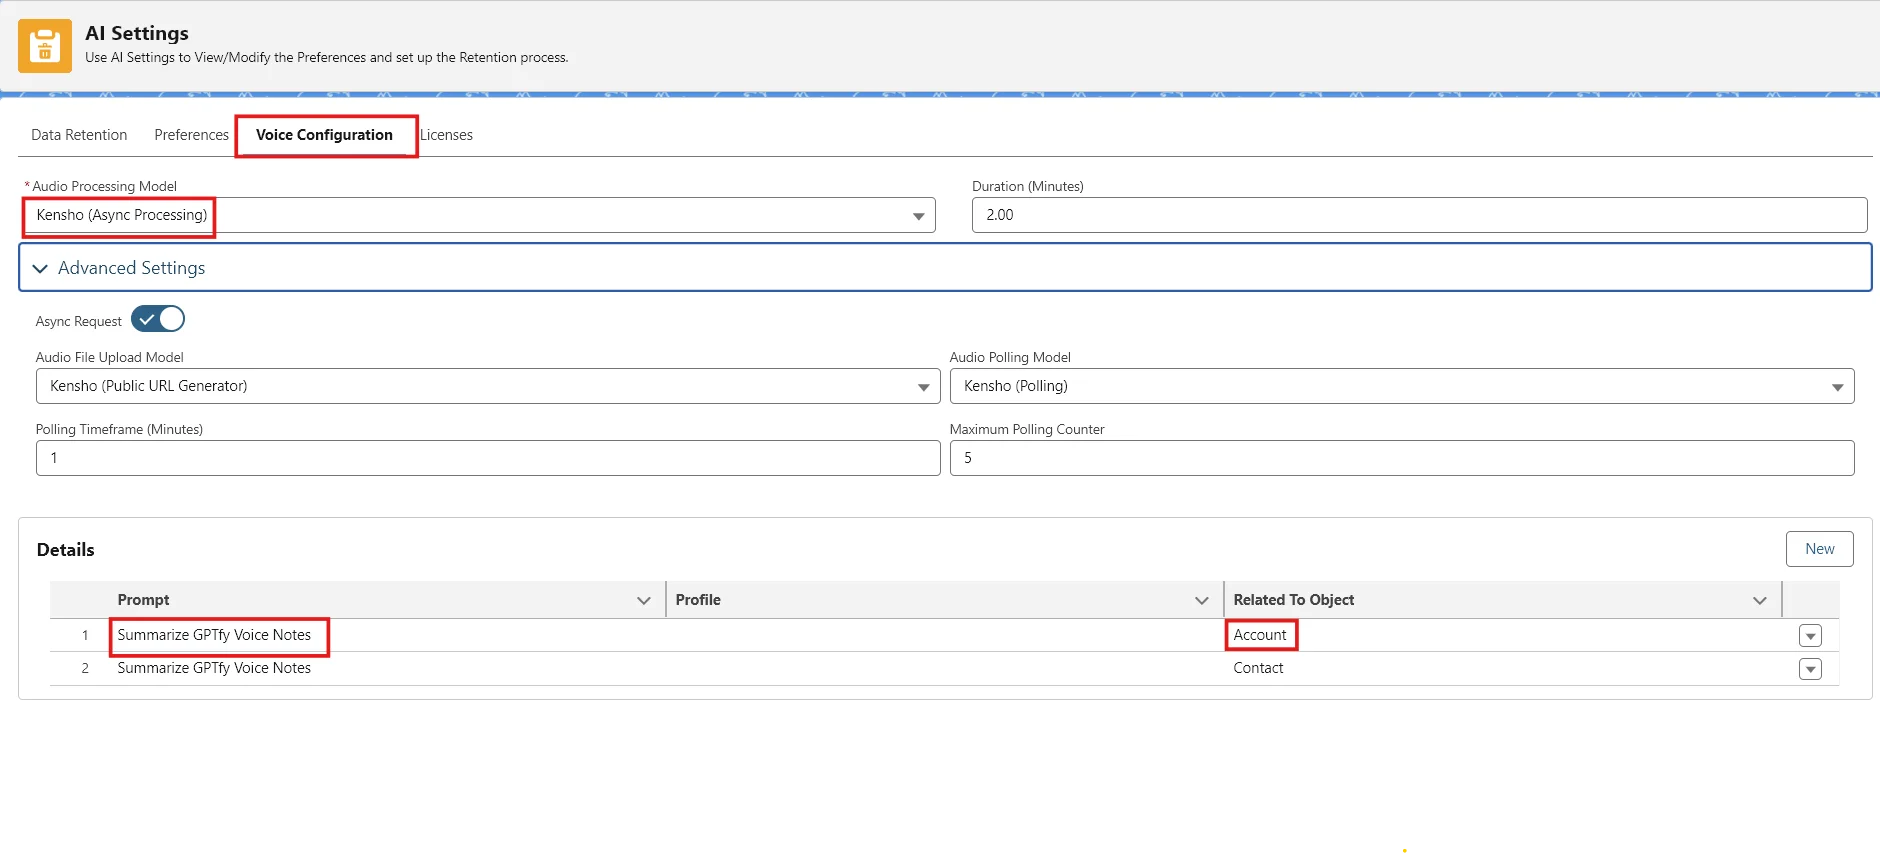
- Once all three Kensho models are activated in the AI Model, add them to the Voice Configuration settings under AI Settings.
AI Setting – Voice Configuration
- Duration (Minutes): Add a value in minutes (maximum: 3). The recorder will function for this duration.
- Audio Processing Model: Choose the available voice model in the Audio File Upload Model.
- Audio Polling Model: Add the related Audio Polling Model.
- Polling Timeframe (Minutes): Time interval between poll attempts. If the transcript fails, it retries after this interval.
- Polling Counter: Defines the maximum number of polling attempts. The process stops when the transcript is generated successfully.
Enable the Solution
- Create a Prompt on the
ContentVersionobject with theTranscriptfield selected in Field Mapping.
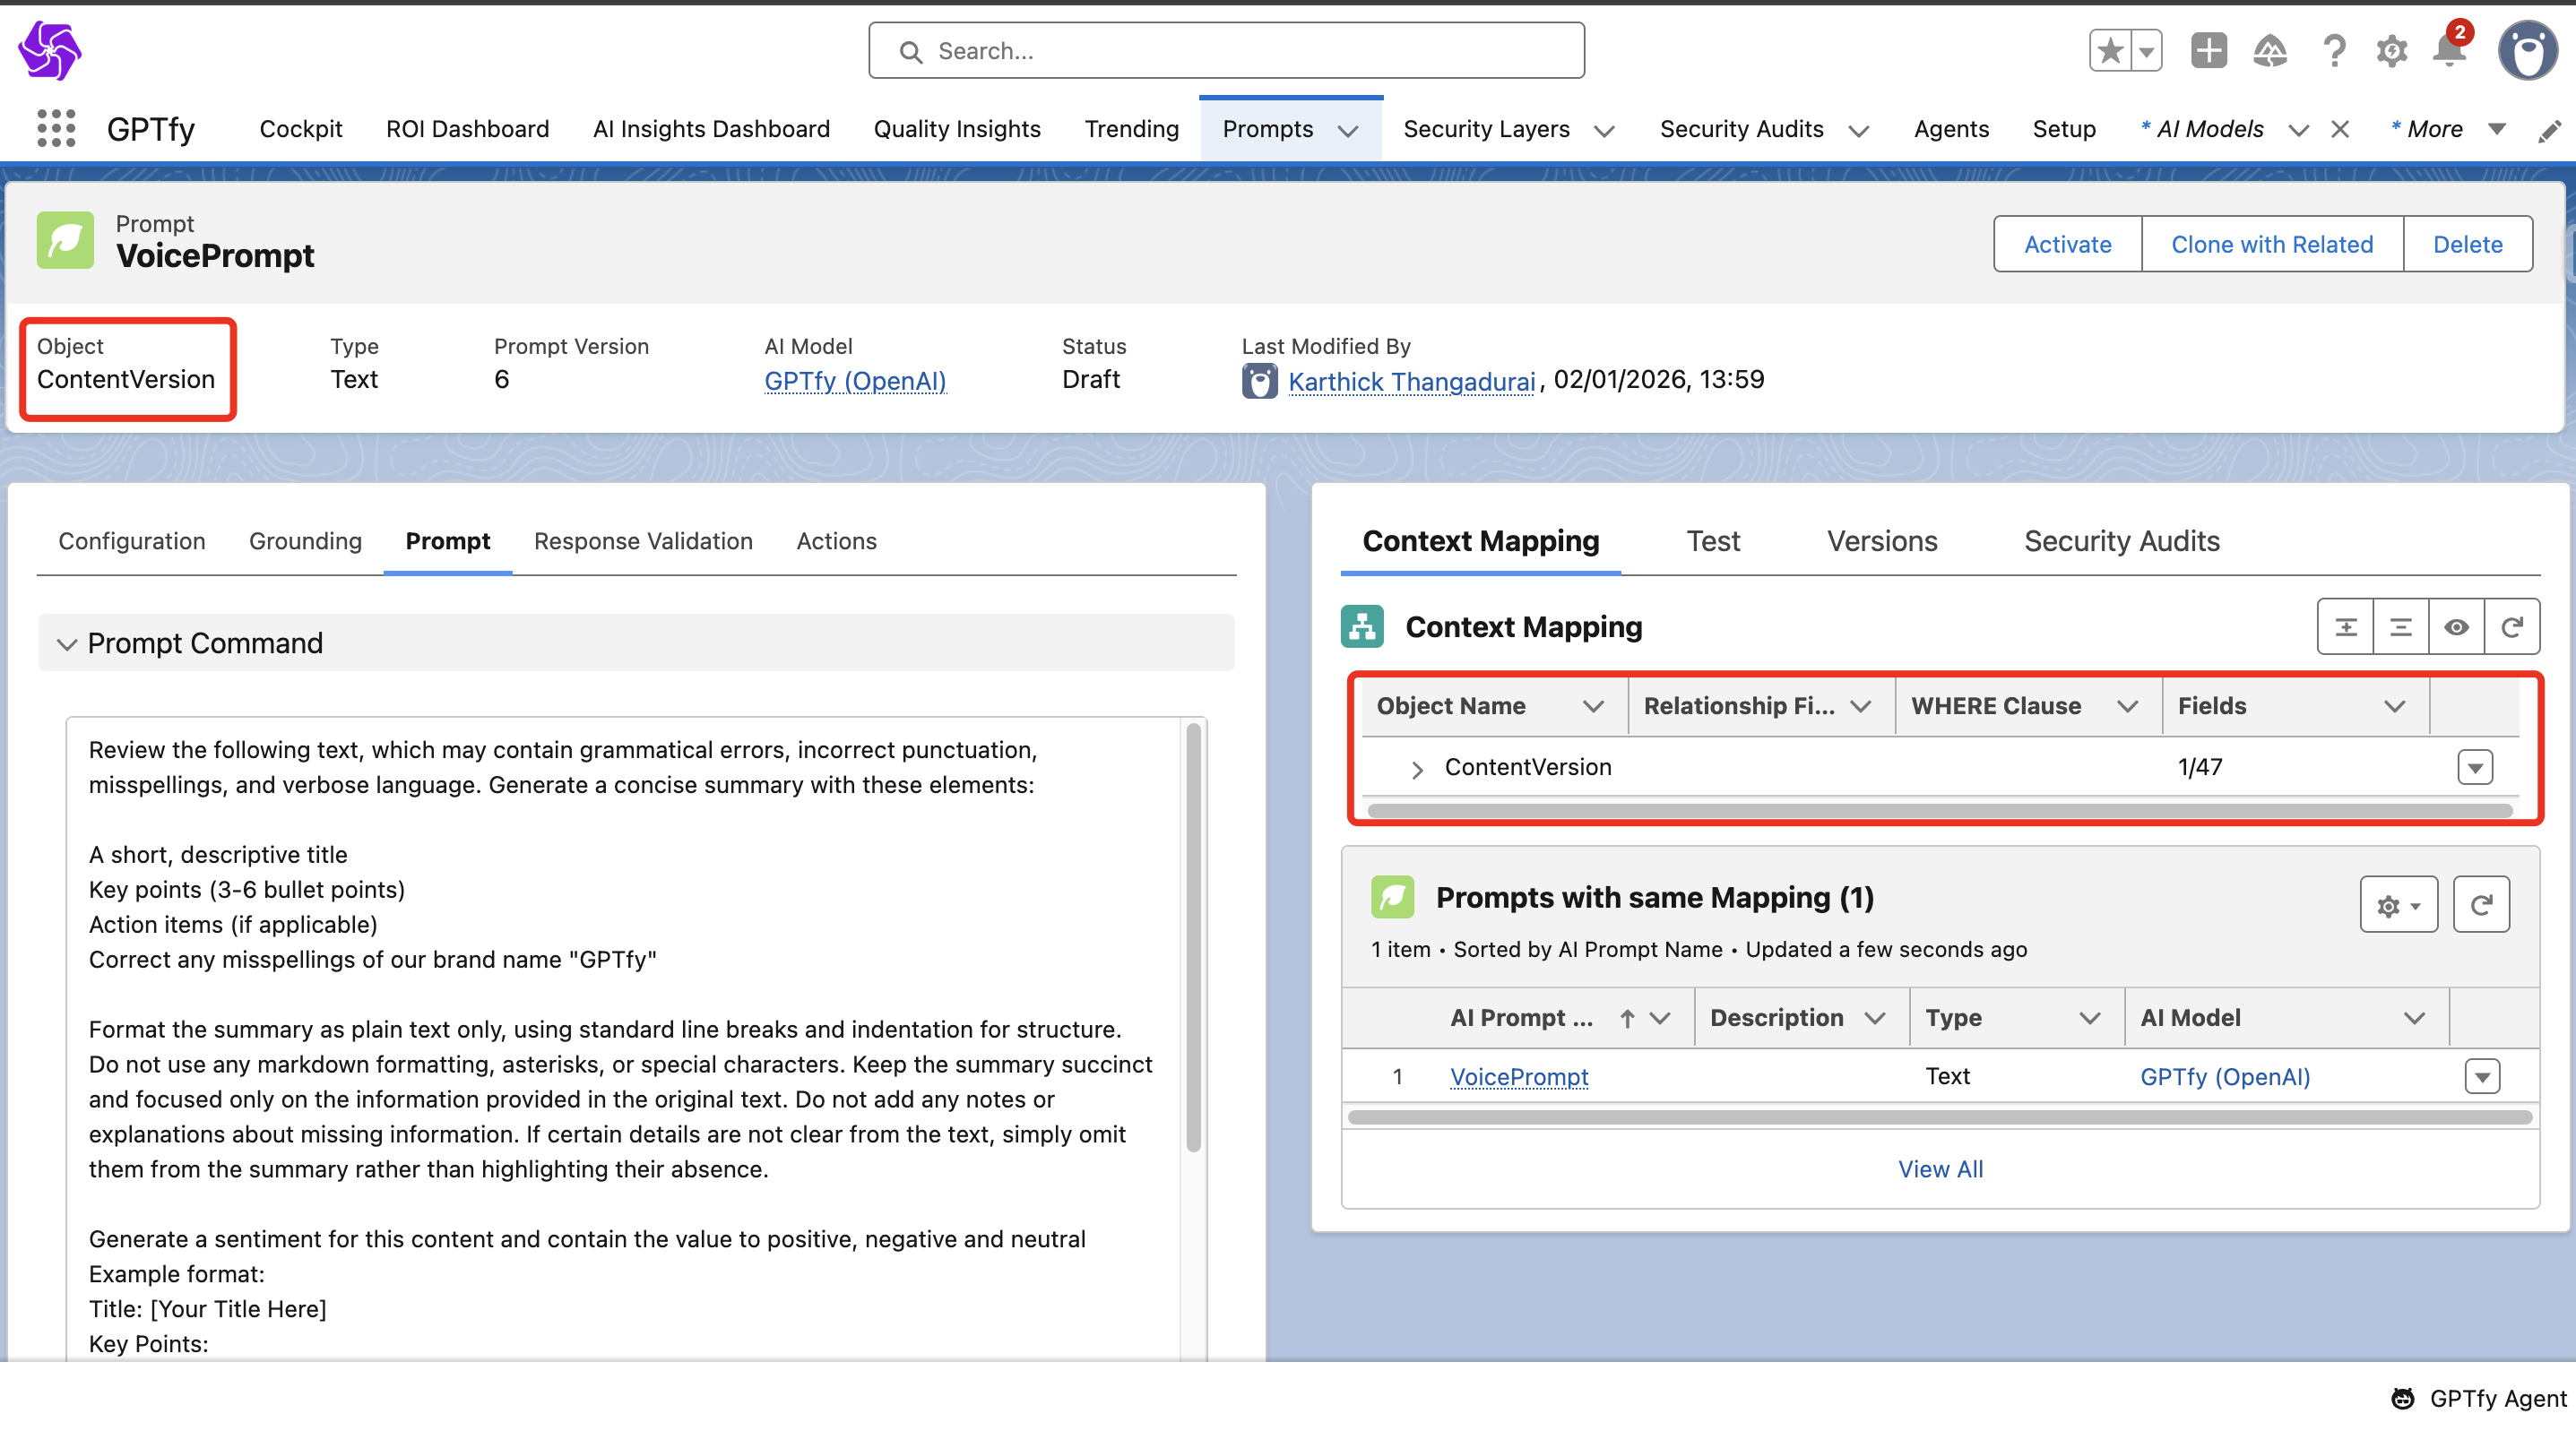
- Add Action Type as
Invoke Flowin Prompt Actions, with a flow namedGPTfy Notification Flow.
Note:
GPTfy Notification Flowshould be present in the org for notifications and event creation.
- Watch the Flow Creation video for more details.
- Click Save and Activate the Prompt.
- Add this Prompt in the Voice Configuration Details section and select the Related To Object field from the picklist.
Using the Recorder
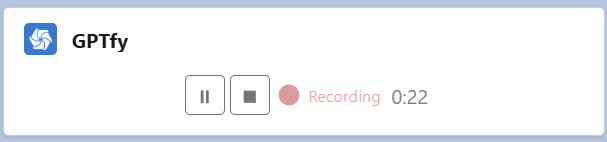
Once setup is complete:
-
Users can record their voice for the configured time limit.
-
After recording, users can either Delete or Upload the recording.

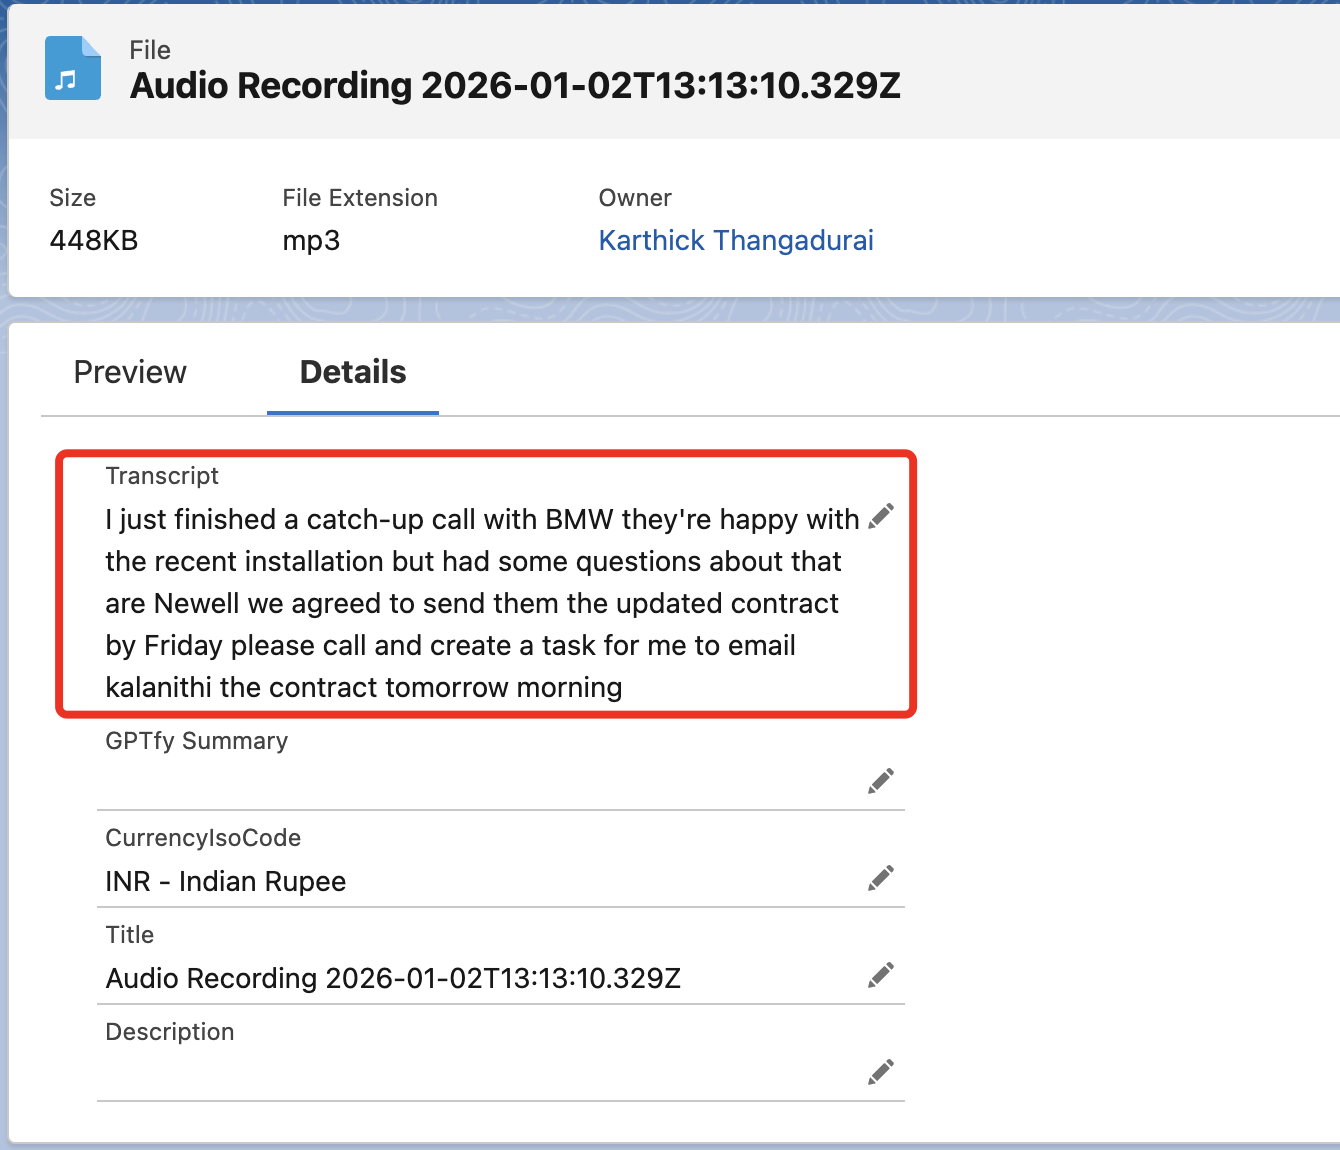
- Upon clicking Upload, the audio is transcribed into text and populated in the transcript field.
- An MP3 audio file is created and attached to the record where the Voice Recorder was used.
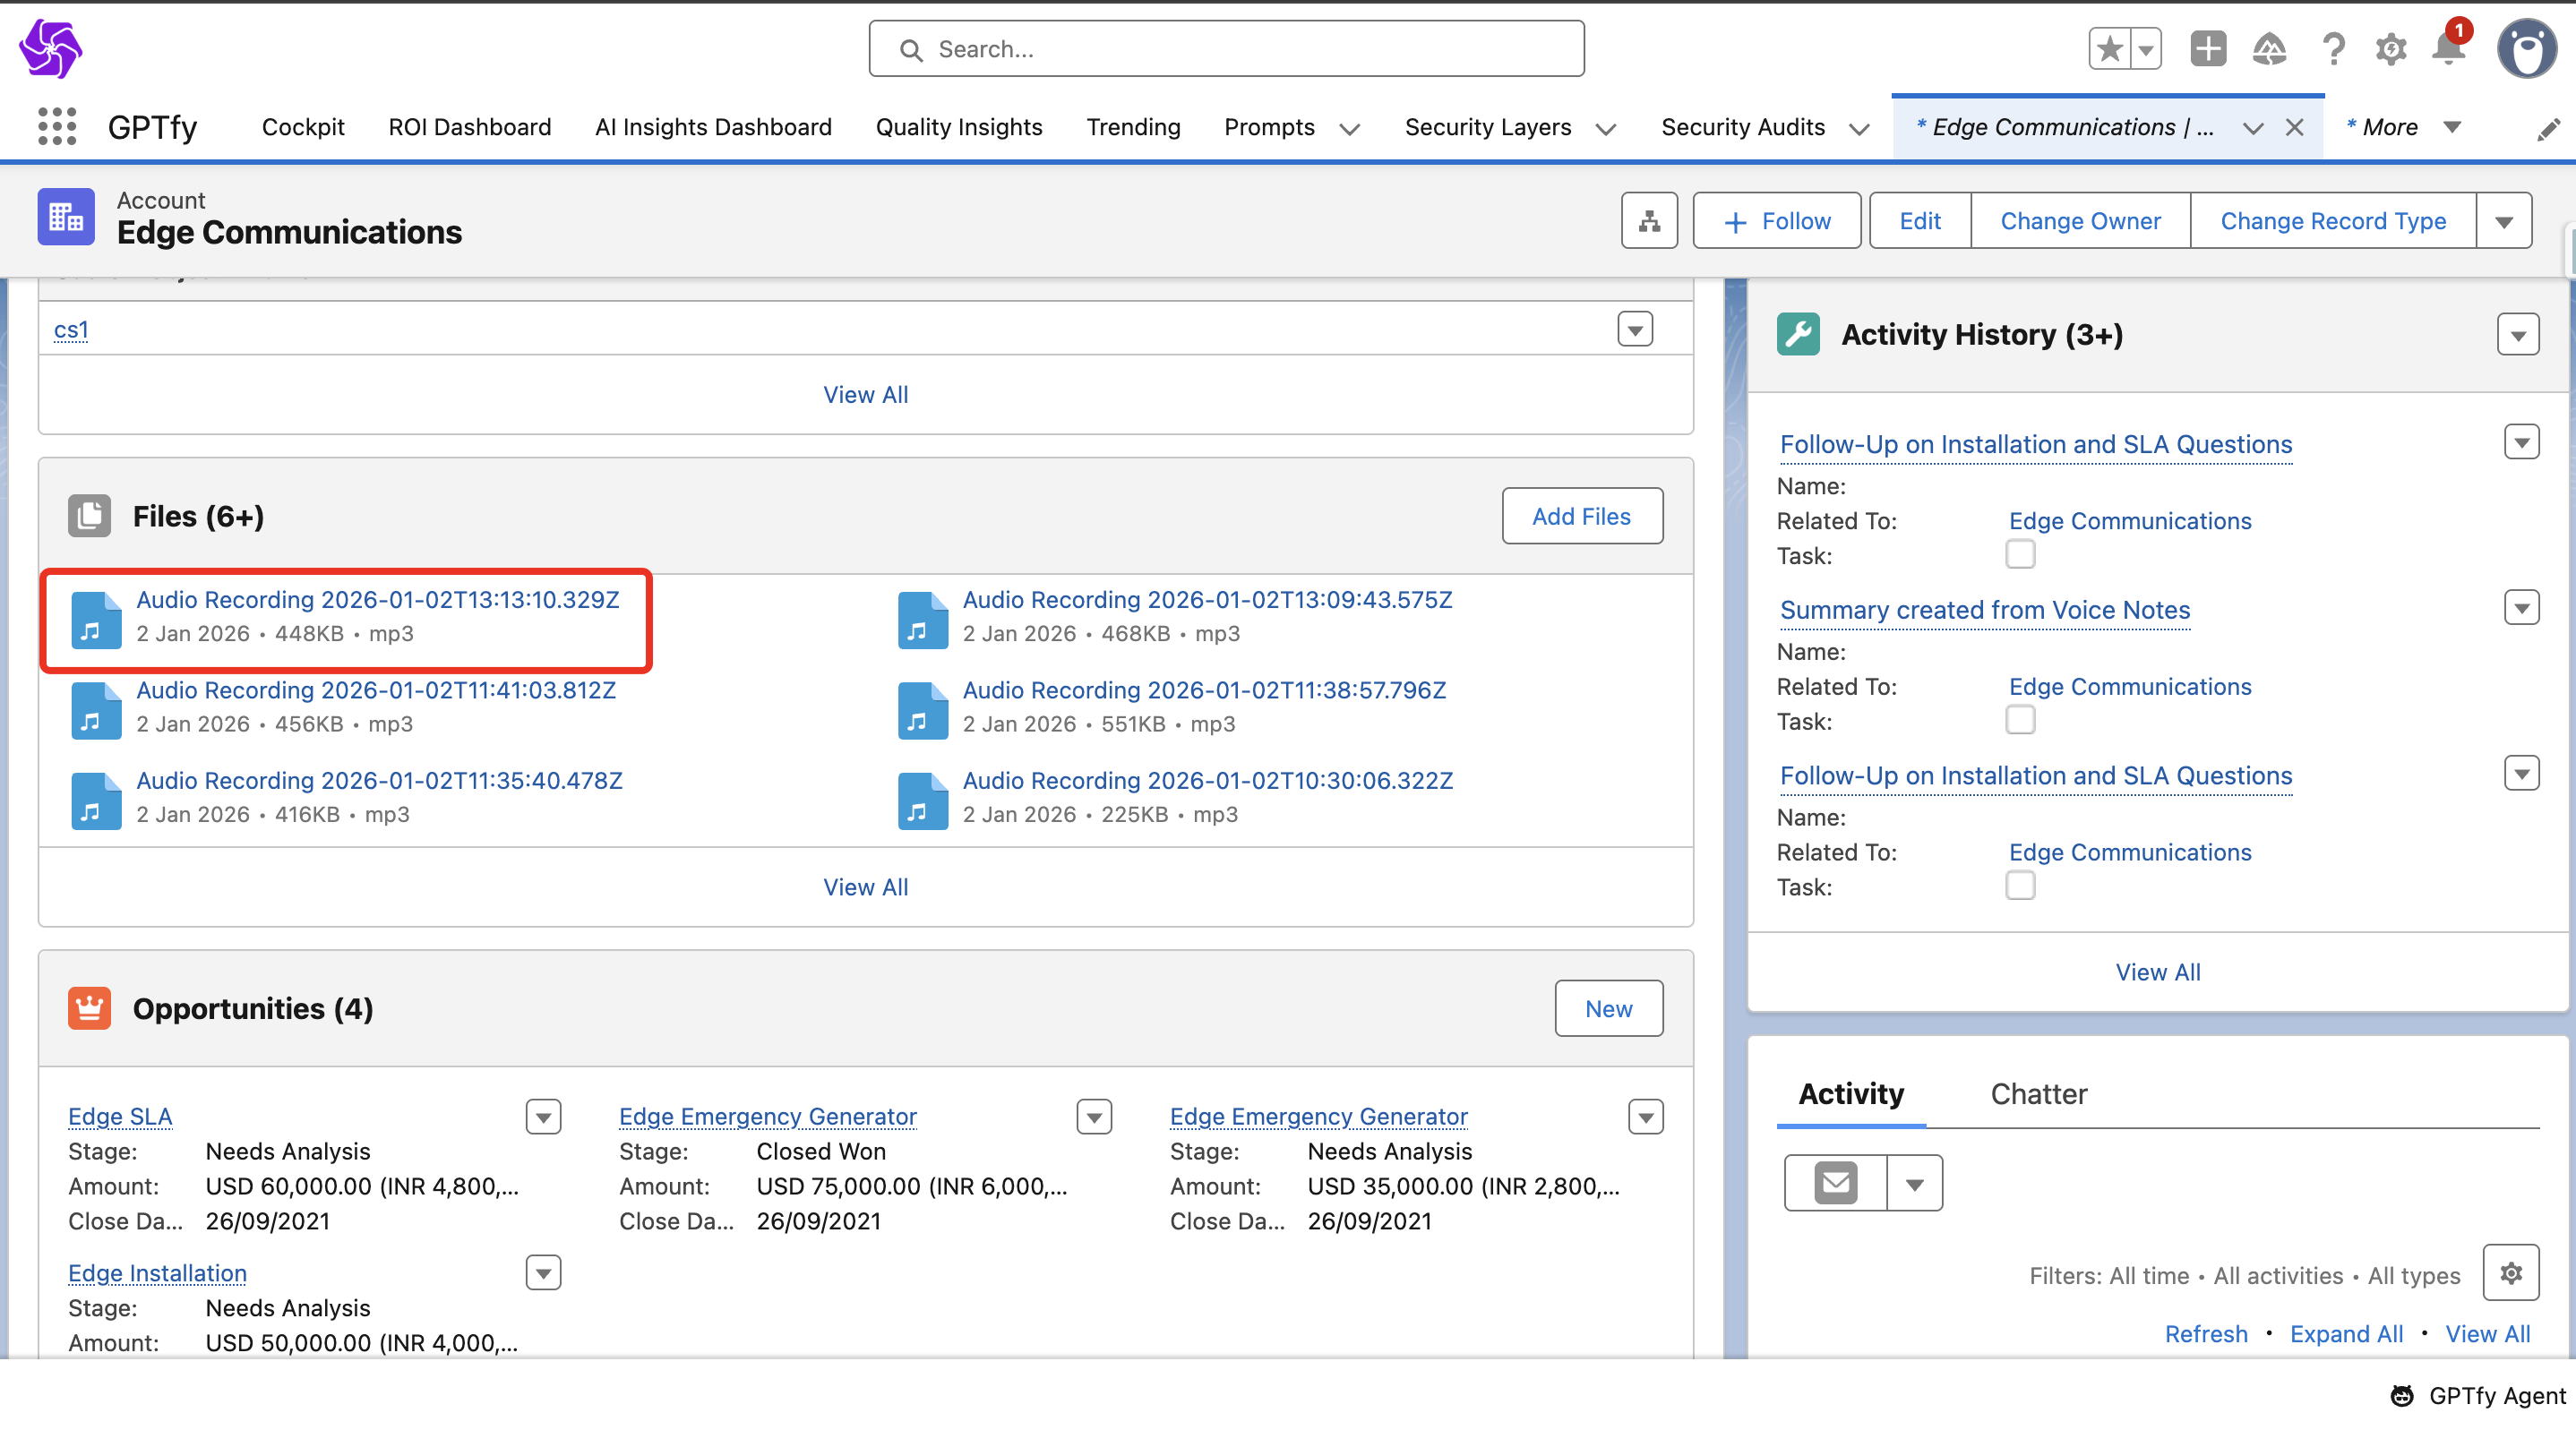
- Ensure the Transcript field is added to the
ContentVersionpage layout.
Notifications and Events
- When the transcript is created, users receive a notification (desktop/mobile).
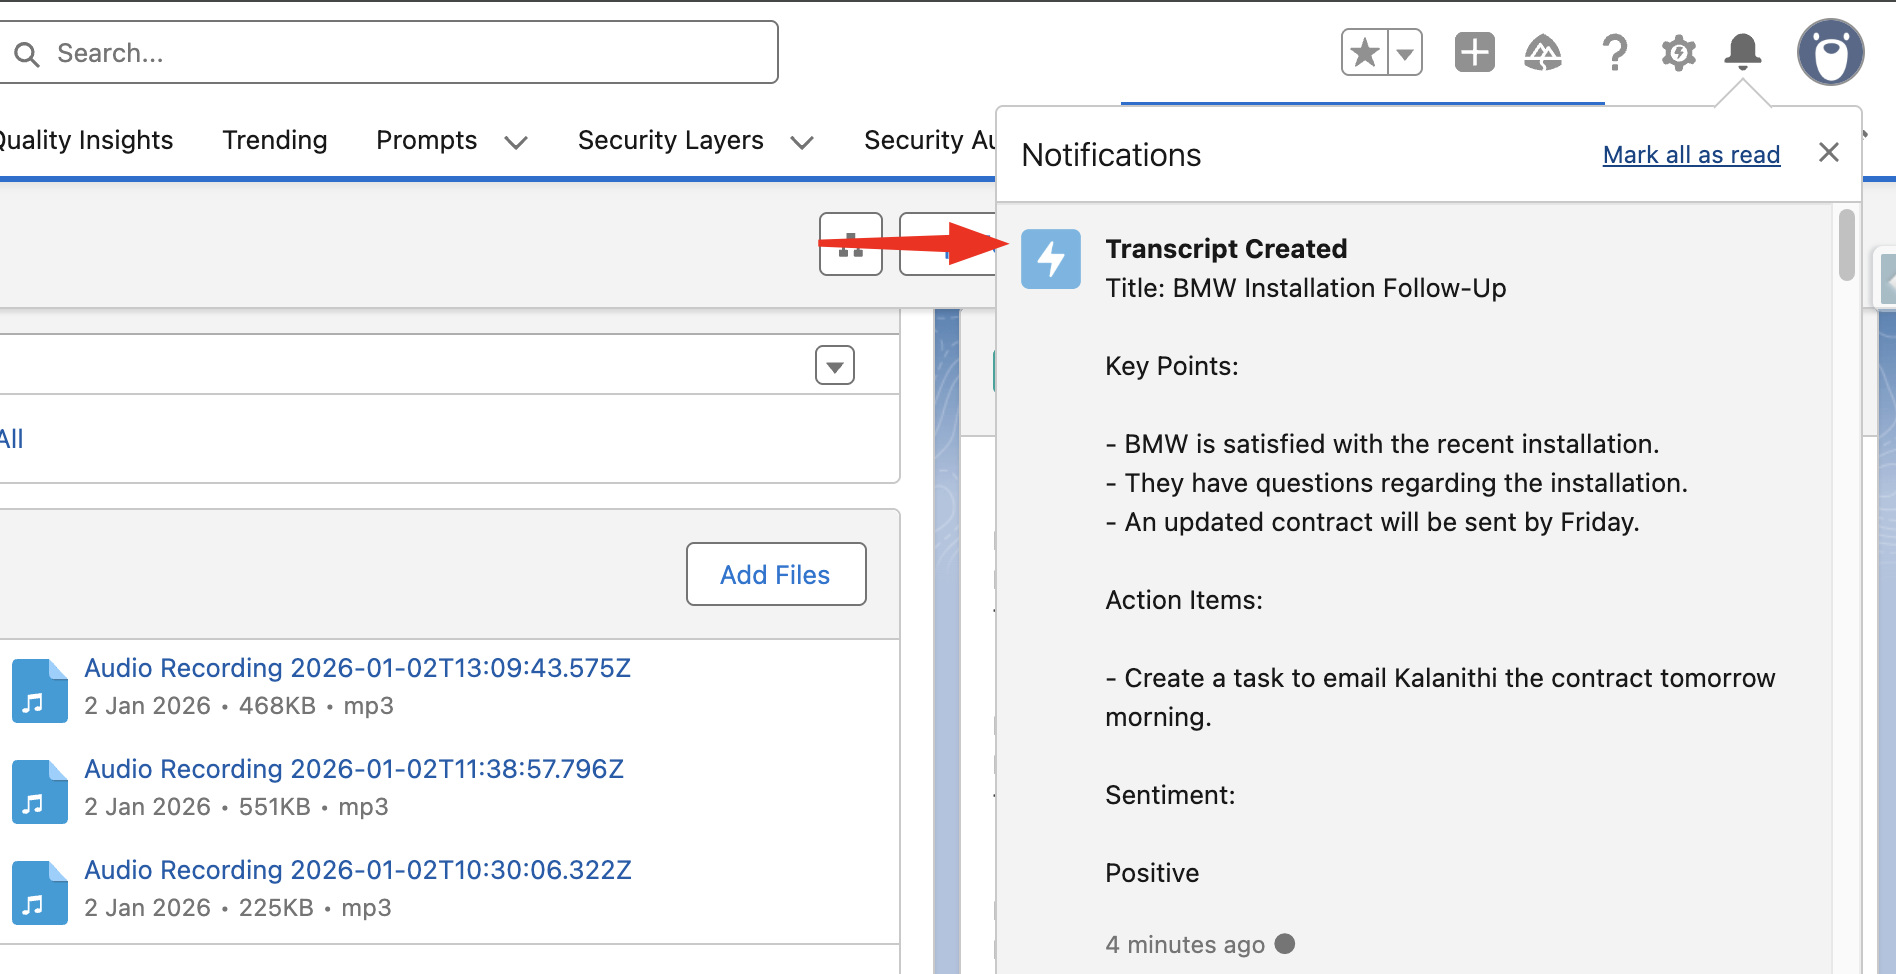
- Clicking the notification redirects the user to the Event Page on the record where the voice was recorded.
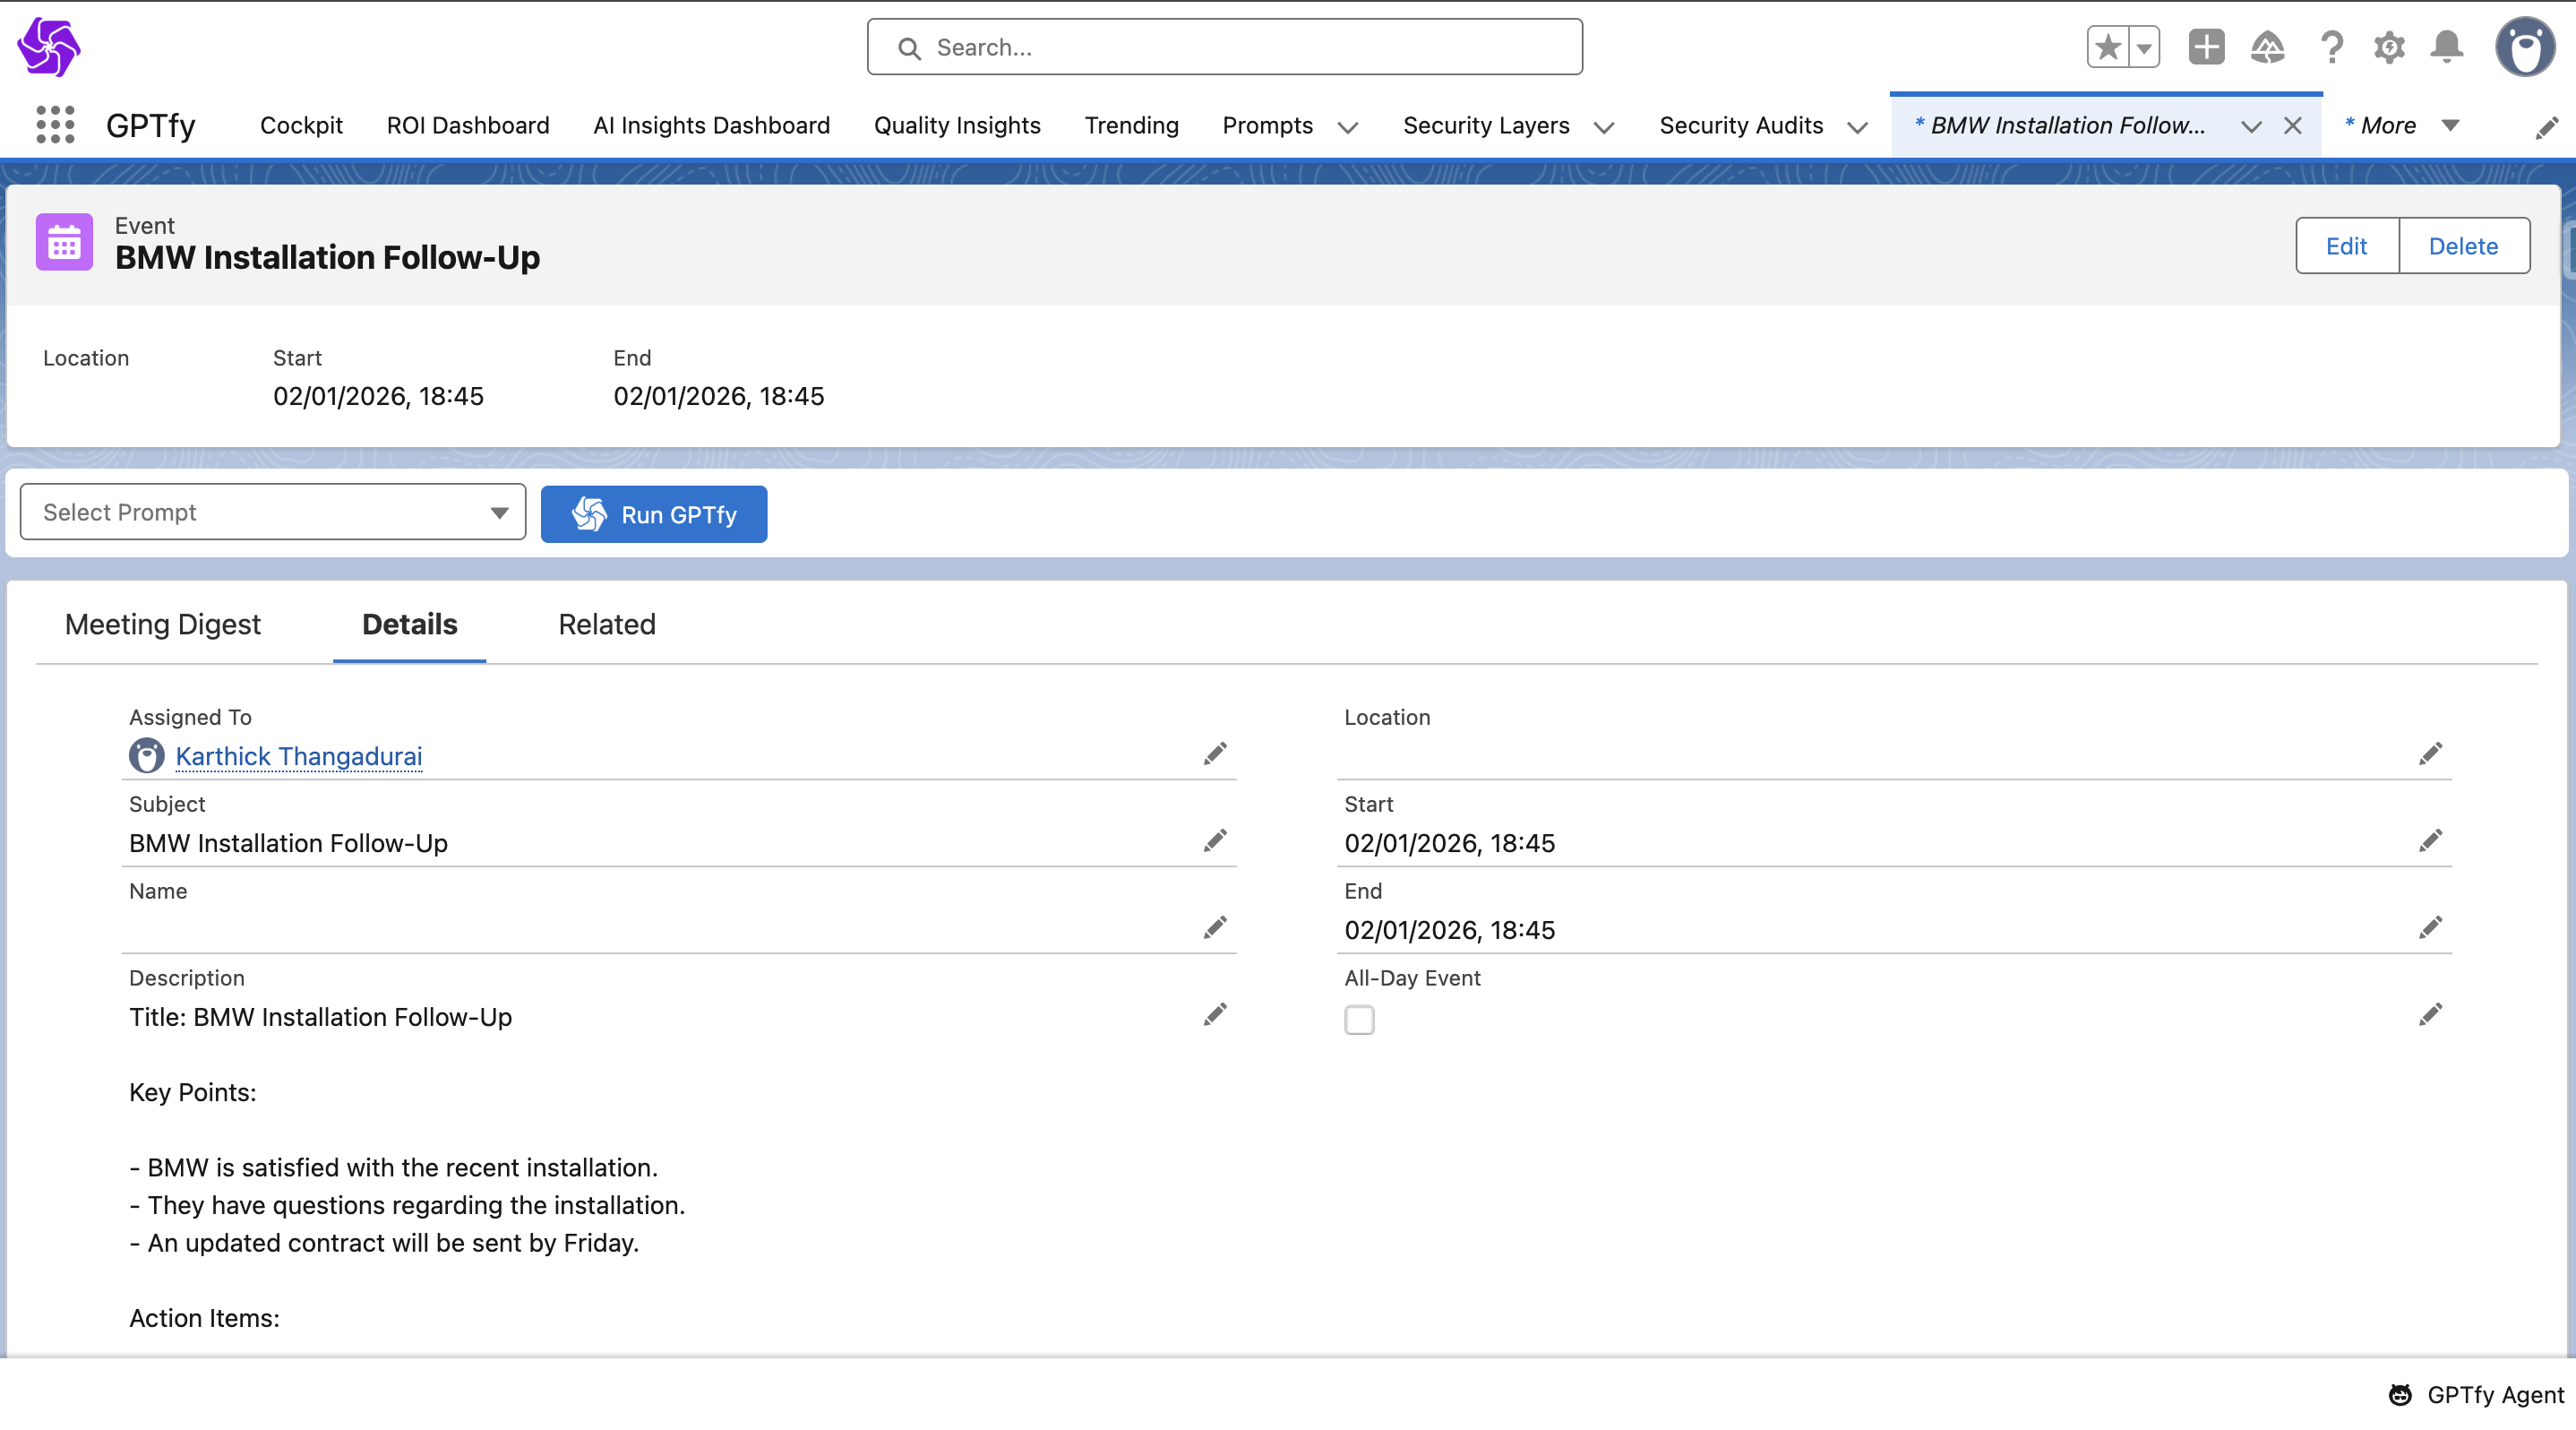
- This Event contains all details, including the Transcript in the Description field.
Conclusion
The GPTfy Voice Recorder transforms how your sales and service teams document meetings, calls, or field interactions. By combining voice input with AI-driven transcription and automation, this feature eliminates manual effort and ensures that key details are always captured in Salesforce. With prompt-based workflows and intelligent event creation, GPTfy Voice empowers your team to focus on selling and supporting—while GPTfy takes care of the grunt work.