Invoking AI Prompts from Apex
You can now invoke AI prompts directly from Apex classes perfect for automating tasks like summarizing activity history, generating follow-up tasks, or analyzing account details. This guide walks you through how to trigger AI using Apex code inside Salesforce.
When to Use This
Use Apex to invoke AI when you want to:
- Automate tasks after a record update or process completion
- Generate summaries, insights, or actions on-demand via code
- Integrate GPTfy's AI responses into your custom logic or batch processes
Solution Steps
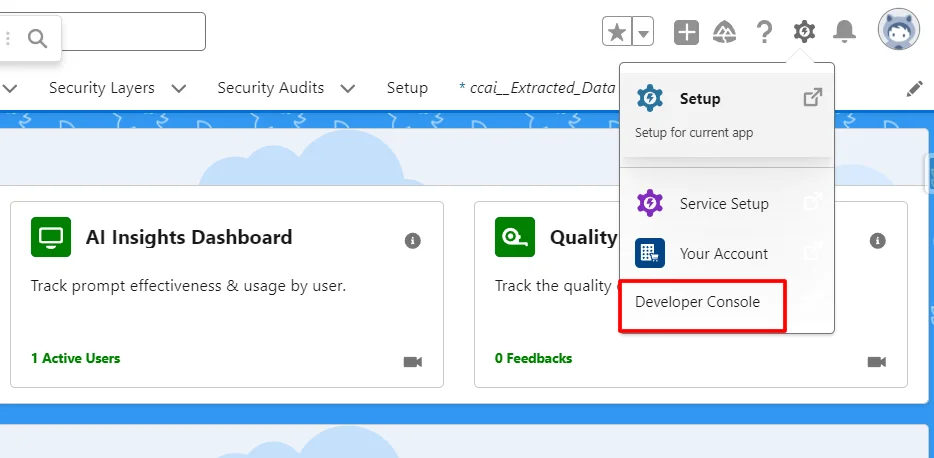
Step 1: Open Developer Console
- In Salesforce Setup, click the gear icon.
- Select Developer Console.
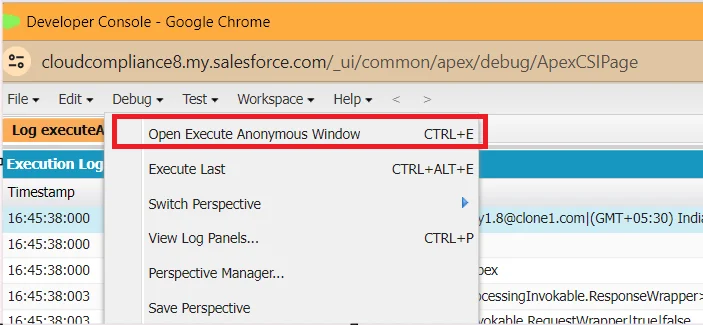
Step 2: Launch Execute Anonymous Window
- In the Developer Console, go to Debug > Open Execute Anonymous Window.
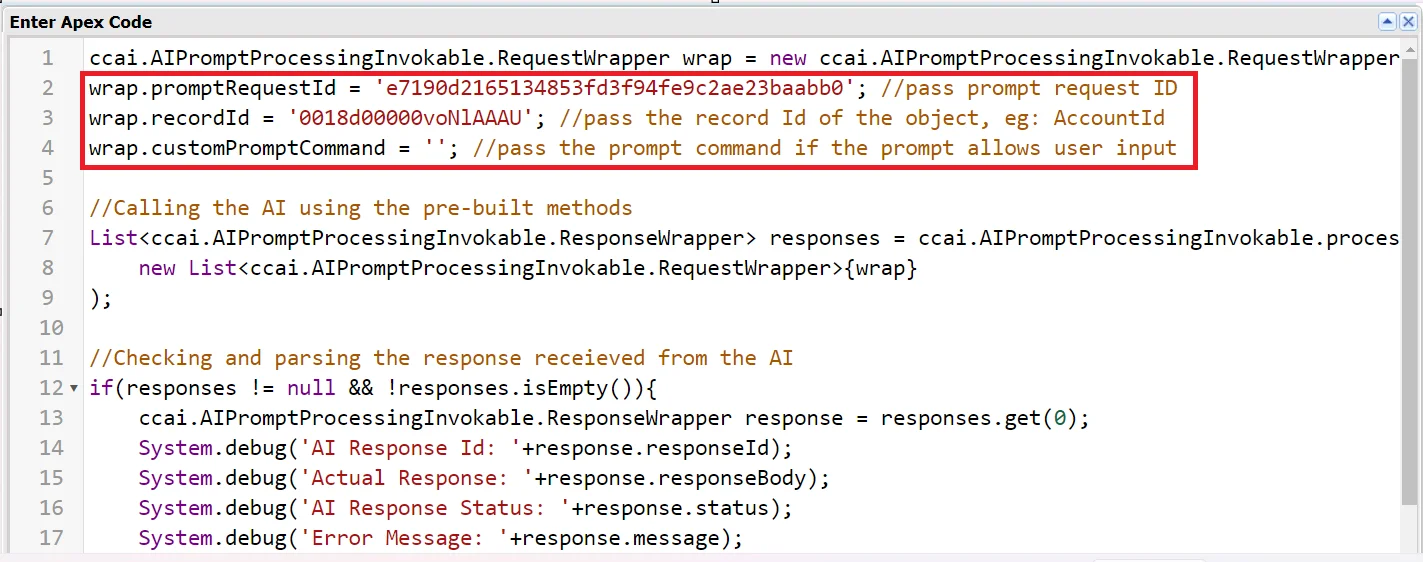
Step 3: Paste AI Invocation Code
ccai.AIPromptProcessingInvokable.RequestWrapper wrap = new ccai.AIPromptProcessingInvokable.RequestWrapper();
wrap.promptRequestId = 'e7190d2165134853fd3f94fe9c2ae23baabb0'; //pass prompt request ID
wrap.recordId = '0018d00000voNlAAAU'; //pass the record Id of the object, eg: AccountId
wrap.customPromptCommand = ''; //pass the prompt command if the prompt allows user input

//Calling the AI using the pre-built methods
List<ccai.AIPromptProcessingInvokable.ResponseWrapper> responses =
    ccai.AIPromptProcessingInvokable.processRequest(
        new List<ccai.AIPromptProcessingInvokable.RequestWrapper>{wrap}
    );

//Checking and parsing the response received from the AI
if(responses != null && !responses.isEmpty()){
    ccai.AIPromptProcessingInvokable.ResponseWrapper response = responses.get(0);
    System.debug('AI Response Id: '+response.responseId);
    System.debug('Actual Response: '+response.responseBody);
    System.debug('AI Response Status: '+response.status);
    System.debug('Error Message: '+response.message);
}
Step 4: Configure Prompt and Record IDs
Replace and add the desired Prompt Request Id and Record Id, as shown below. If the prompt is created with ‘Allow User Input,’ the user can add the prompt command to the code before running it.
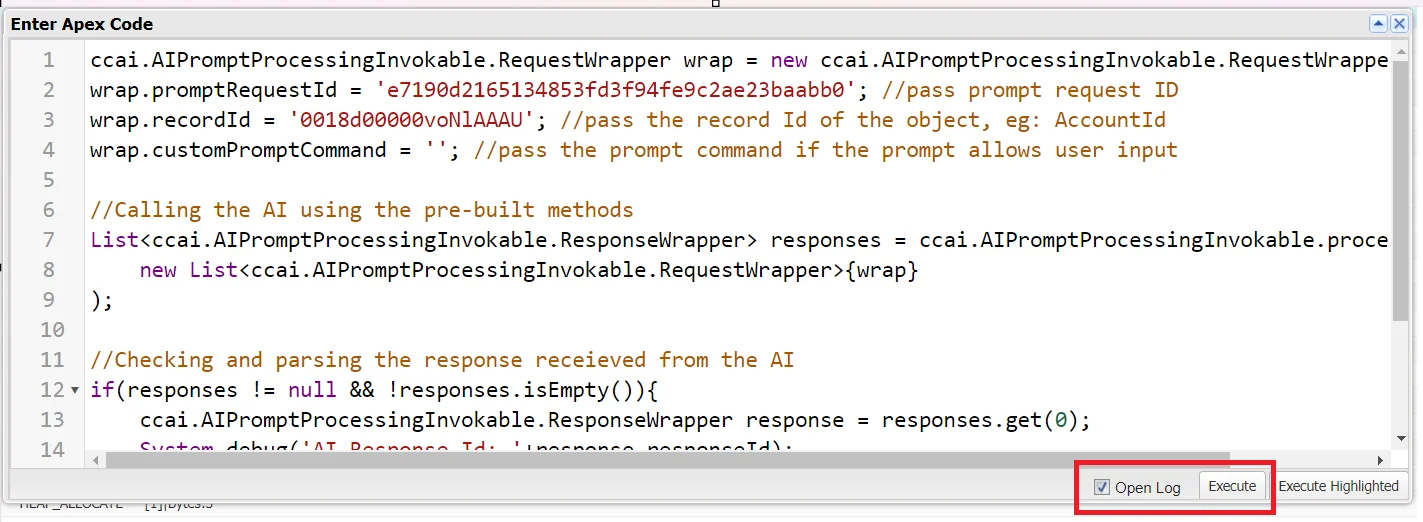
Step 5: Execute Code with Logging
Check the checkbox ‘Open Logs’ and click on the Execute button.
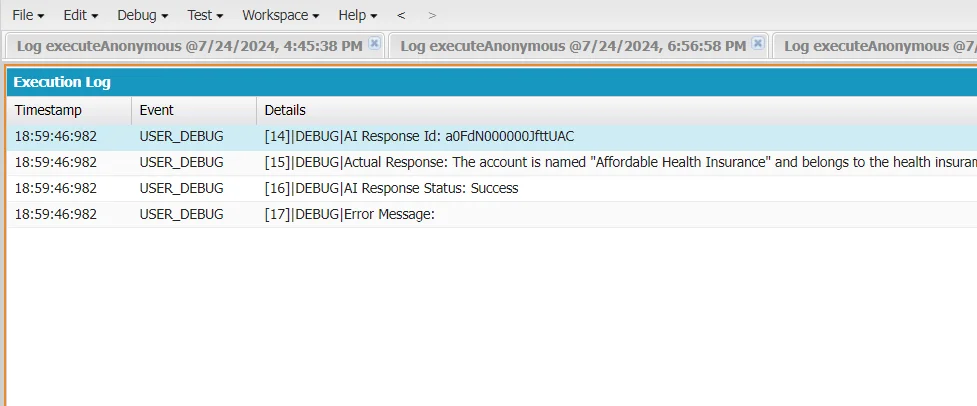
Step 6: Review Debug Logs
After execution, click the Debug Only checkbox, and the user will see the four logs with details.
- AI Response ID: Displays the ID of the Security Audit record created after execution.
- Actual Response: This shows the AI response after running the prompt.
- AI Response Status: Indicates the status after execution, whether a Success or an Error.
- Error Message: Displays the error message if any issue arises during the operation.
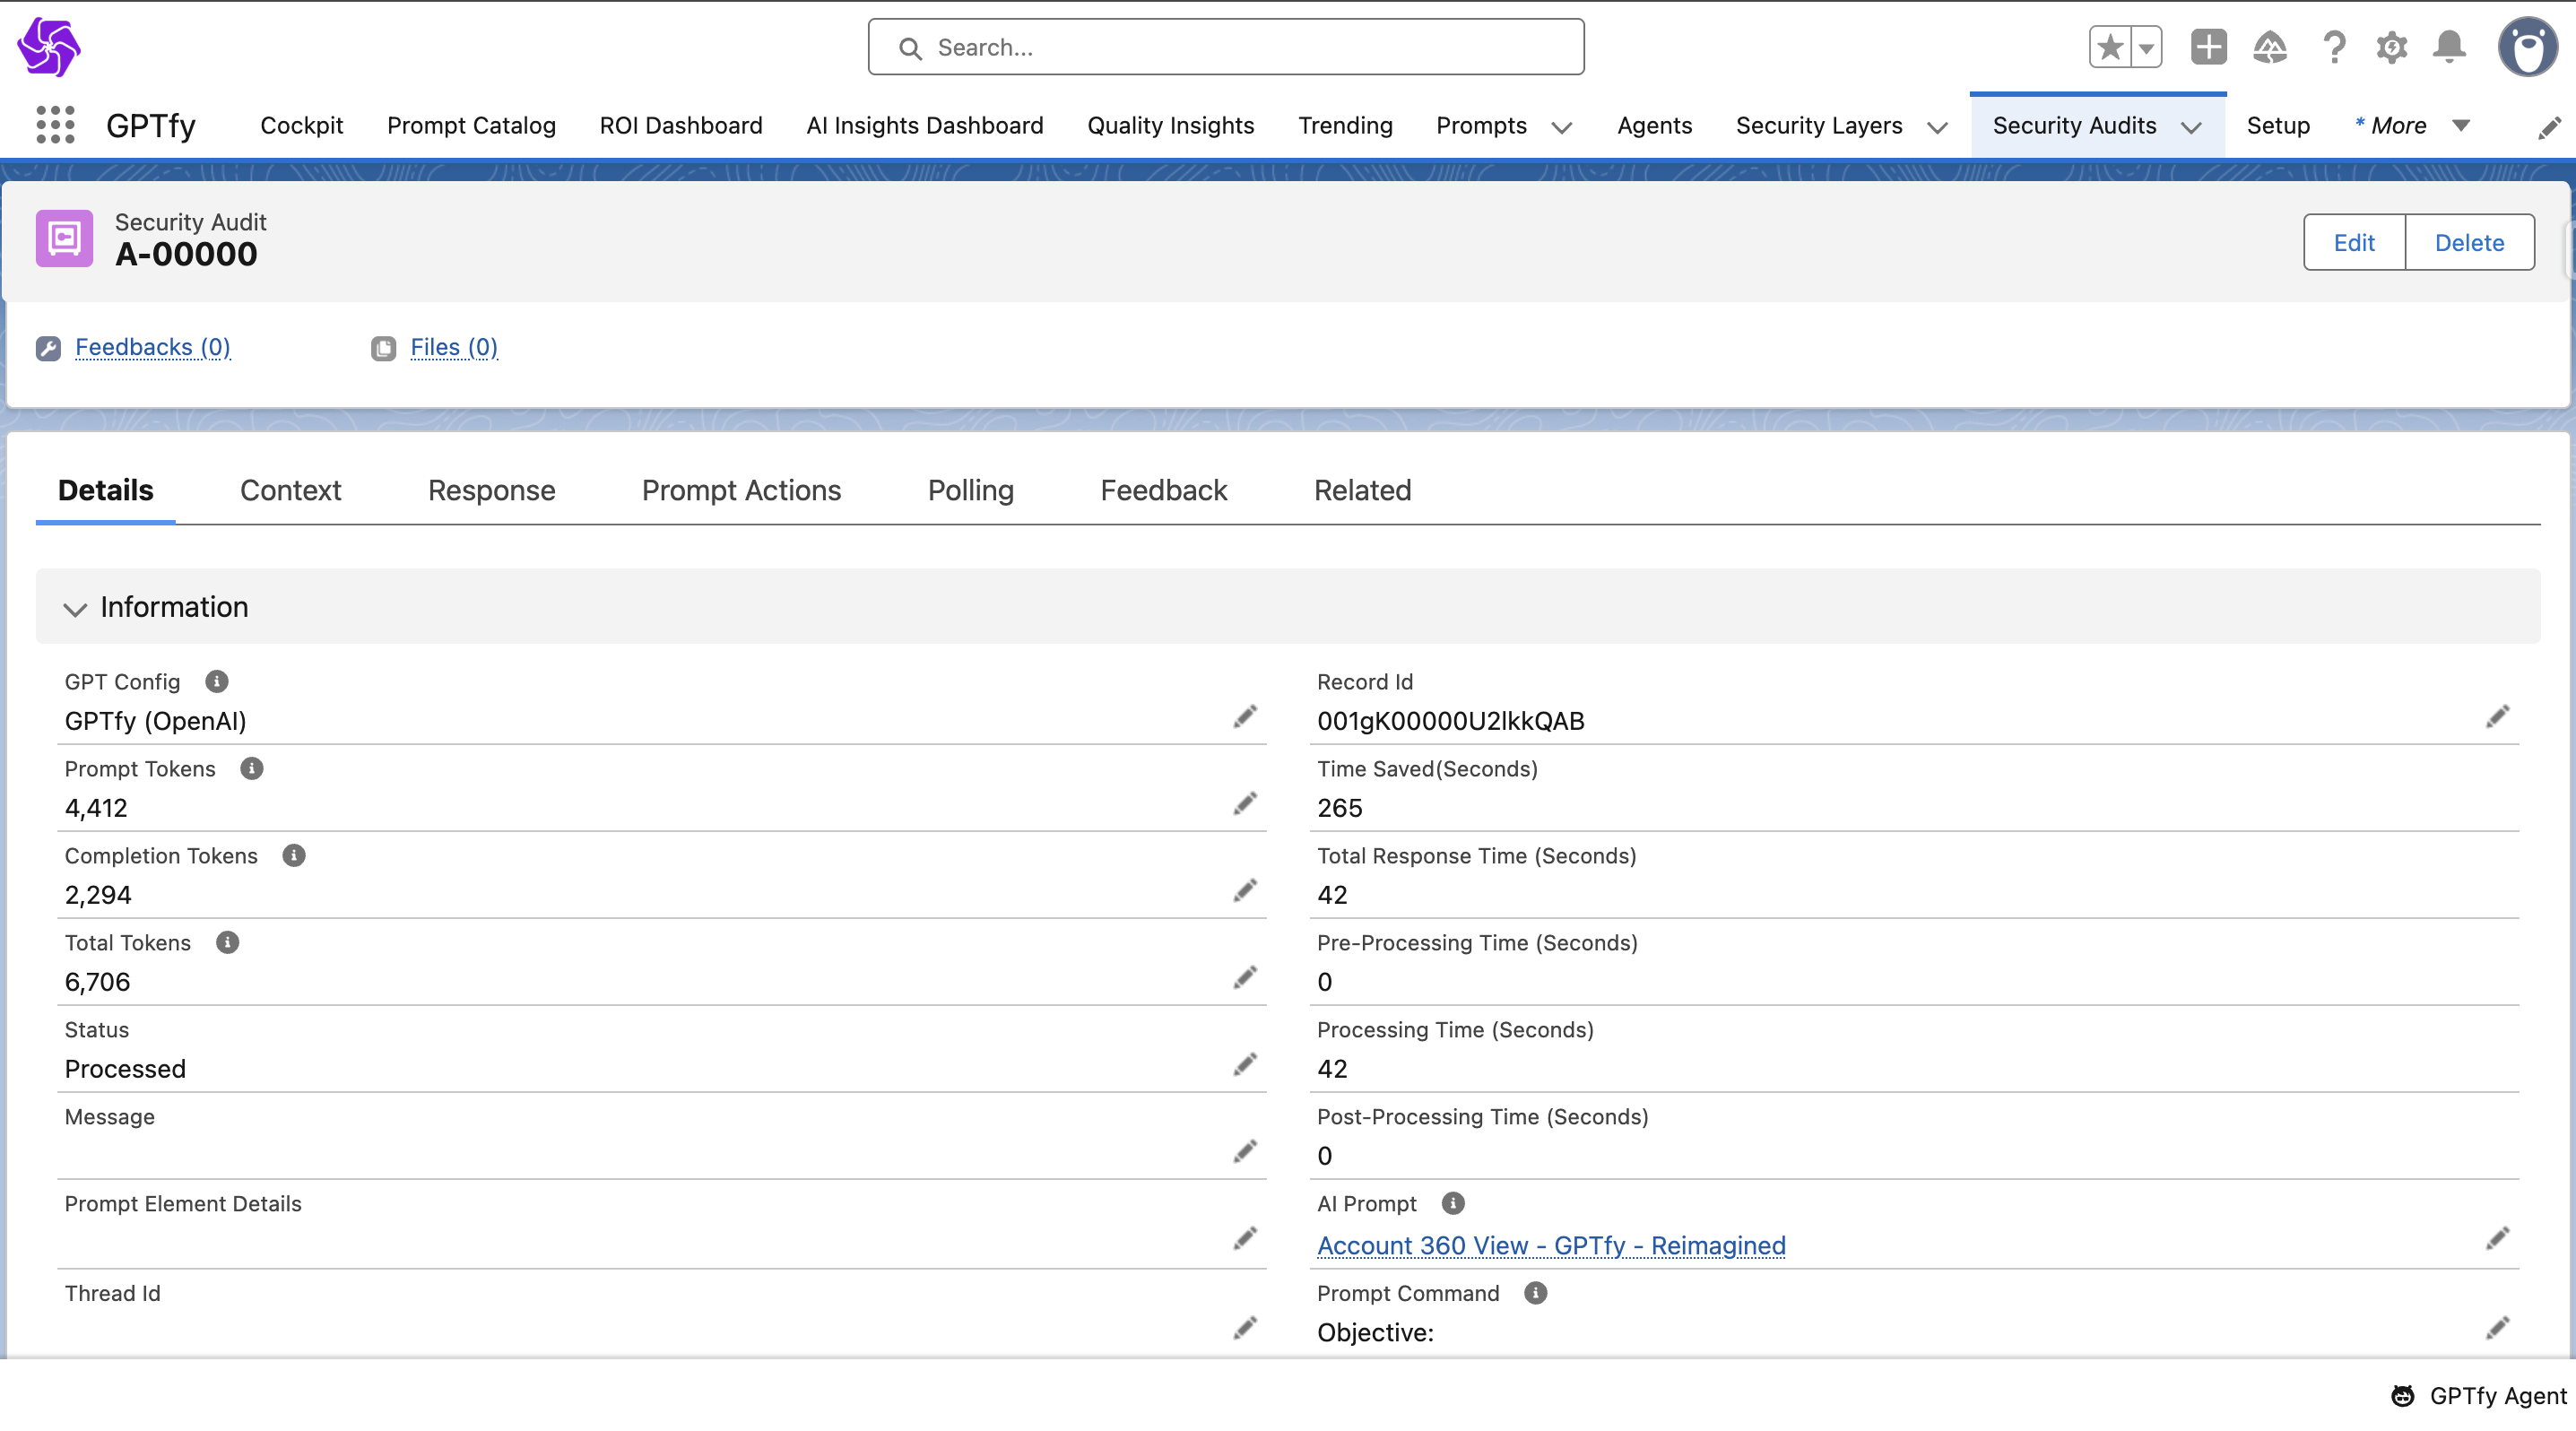
Step 7: Check the GPTfy App for Audit Record
Now, you can check in the GPTfy App for the security audit record created to see the detailed information.
Conclusion
Now, you can successfully use AI with Apex Class and set up automation for various tasks.
Facing issues while setting it up? Please mail us at support@gptfy.ai or raise a ticket. Let me know if you need any adjustments or additional sections!