Trigger GPTfy Prompts Inside Salesforce Flows
Use this guide to trigger GPTfy prompts inside Salesforce Flows. Whether you want to process a record after creation or chain multiple prompt actions, this walkthrough helps you integrate GPTfy seamlessly using Flow Action components and Platform Events.
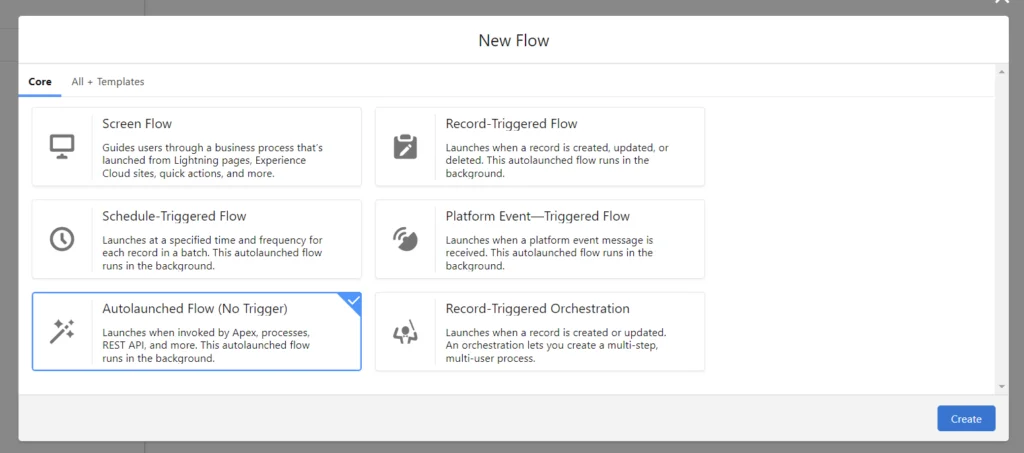
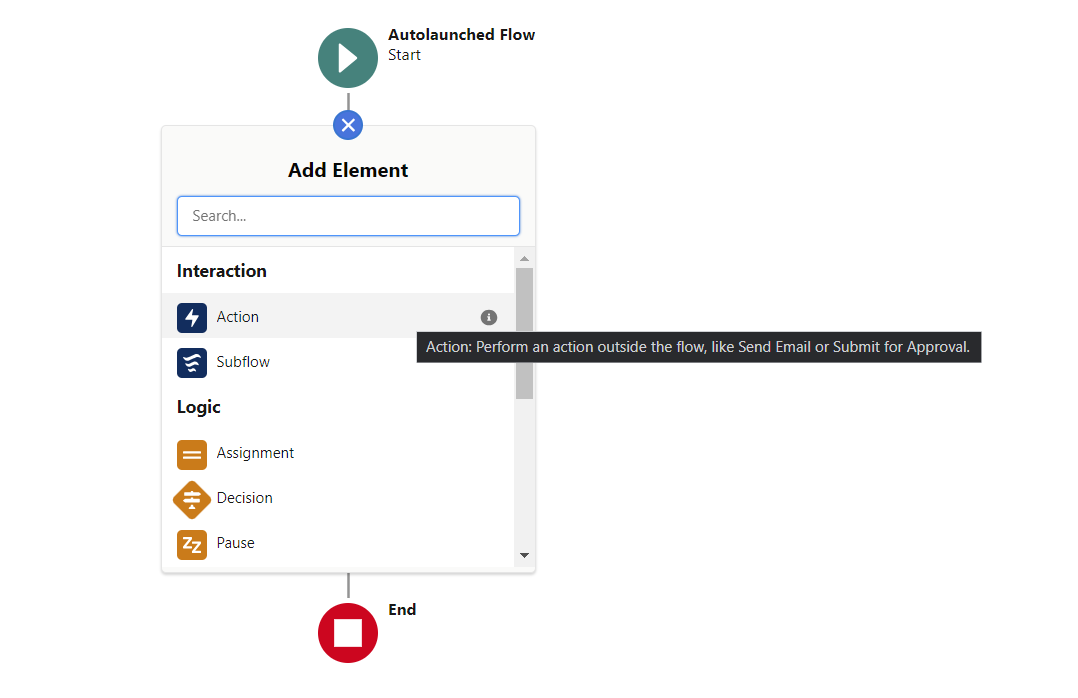
Step 1: Create a New Flow
- Go to Setup in Salesforce.
- In the Quick Find box, search for Flows.
- Click New Flow.
- Select Auto-launched Flow (No Trigger) and click Create.
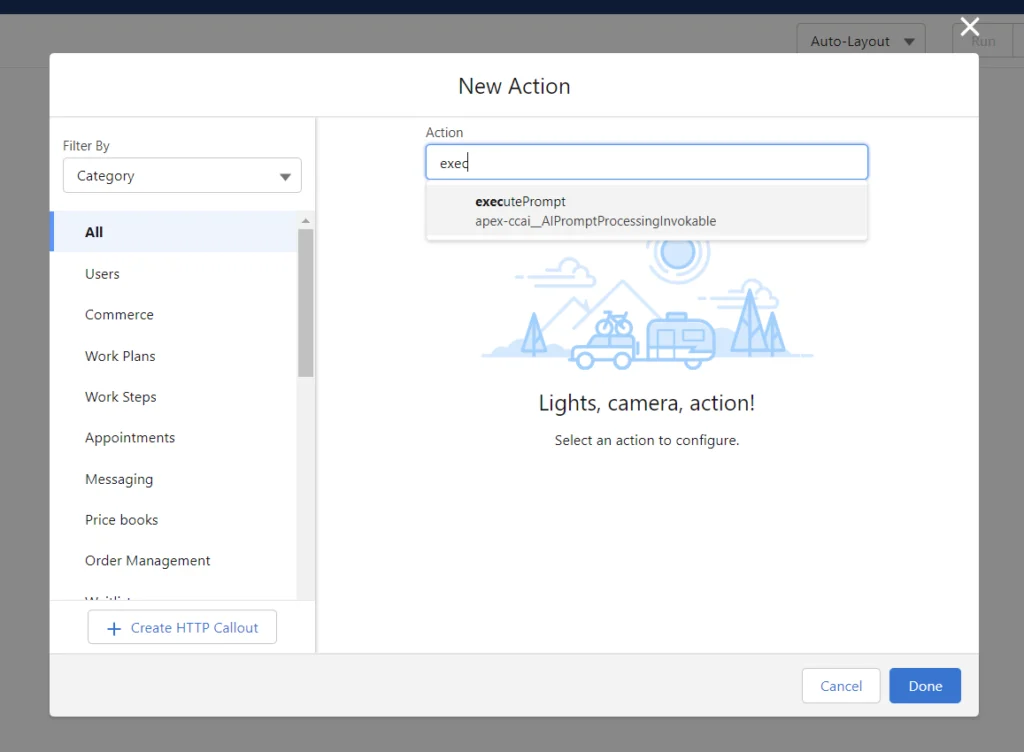
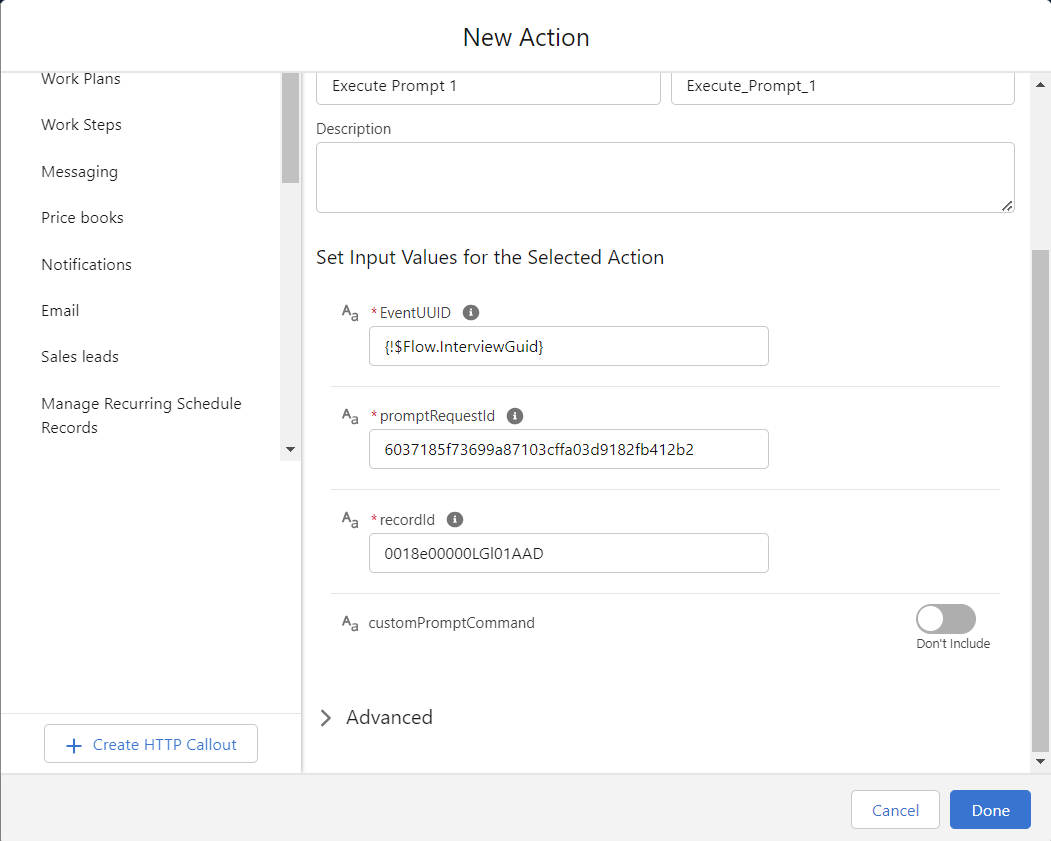
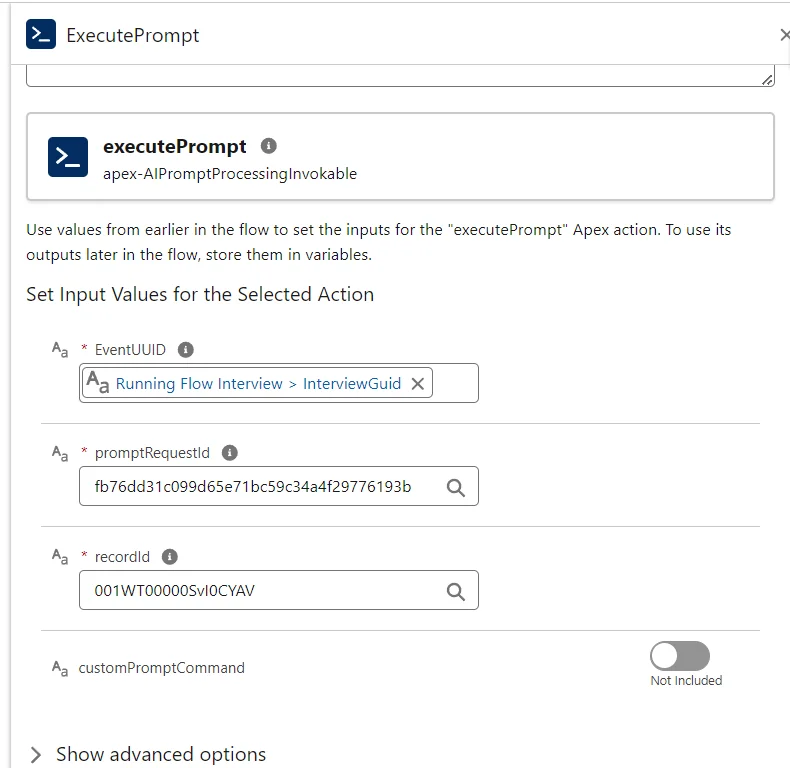
Step 2: Create an Action Component to Execute Prompt
- Within the flow, click the plus icon to add a new element.
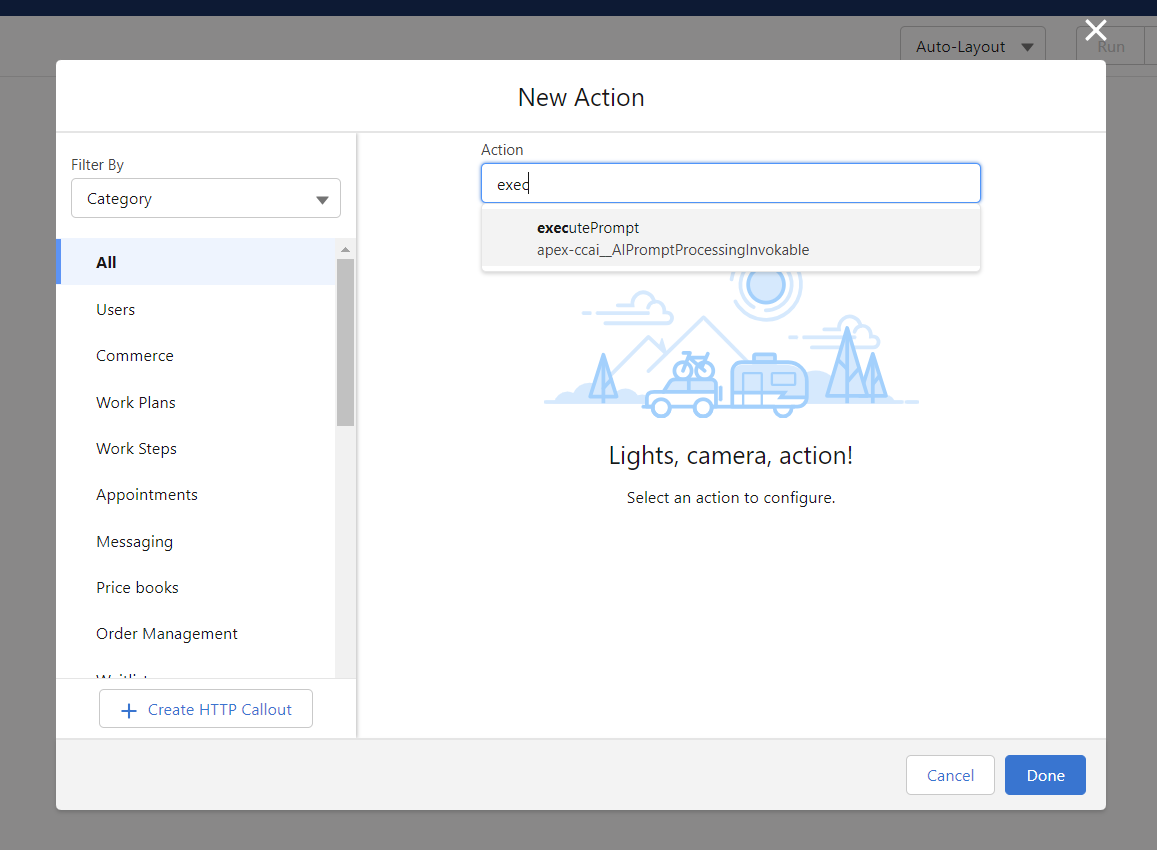
- Select the Action component.
- In the pop-up window, search for and select
executePrompt. - Provide a Label for the action component.
- Specify the EventUUID (Flow’s interview ID) to prevent interference with other events.
- Enter the Prompt Request ID, which is generated when a prompt is created.
- Input the Record ID of the record on which the prompt should be executed.
- Click Done and save the action component.

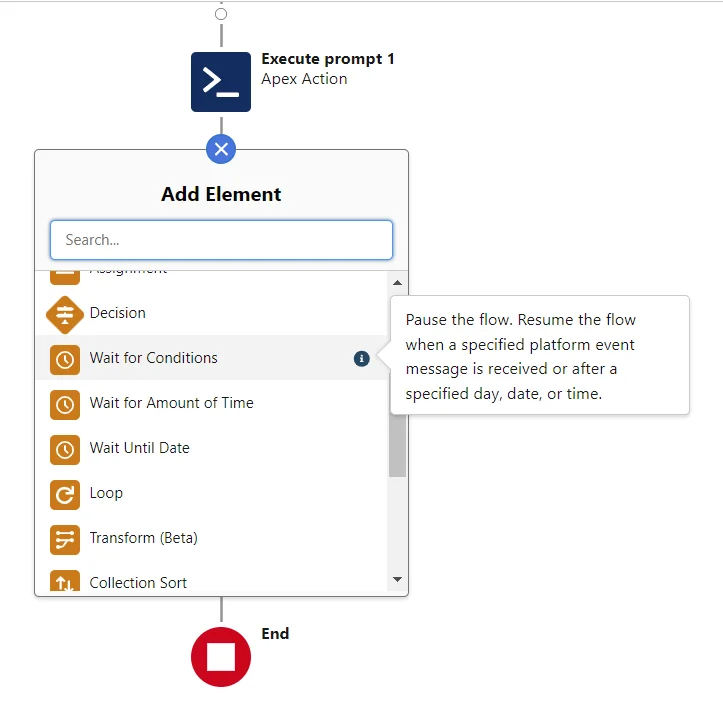
Step 3: Add a Pause Element
This helps eliminate the uncommitted work pending issue. Callouts are not allowed when there is an uncommitted transaction pending. We split the transaction into two separate Ajax processes: the first inserts the record, and the second performs the callout and updates the newly inserted record.
- In the flow, click the plus icon to add another element.
- Select the Wait for Conditions element.
- Assign a Label.
- Configure the element:
- Select Resume the flow option.
- Under Resume event, choose A Platform Event Message is Received.
- Enter
Execute promptas the input in the Platform event. - Select All conditions are met.
- Add conditions:
- Field:
EventUUID__c, Value:Flow.InterviewGUID - Field:
Executed__c, Value:True
- Field:
- Click Done.

Step 4: Create Another Action Component for a Second Prompt
- Within the flow, click the plus icon to add a new element.
- Select the Action component.
- In the pop-up window, search for and select
executePrompt. - Provide a Label for the action component.
- Specify the EventUUID (Flow’s interview ID).
- Enter the Prompt Request ID.
- Input the Record ID.
- Click Done and save the action component.
Step 5: Save Flow
- Enter a Flow Label.
- Click Save.
- Click Activate.
- Debug the flow.
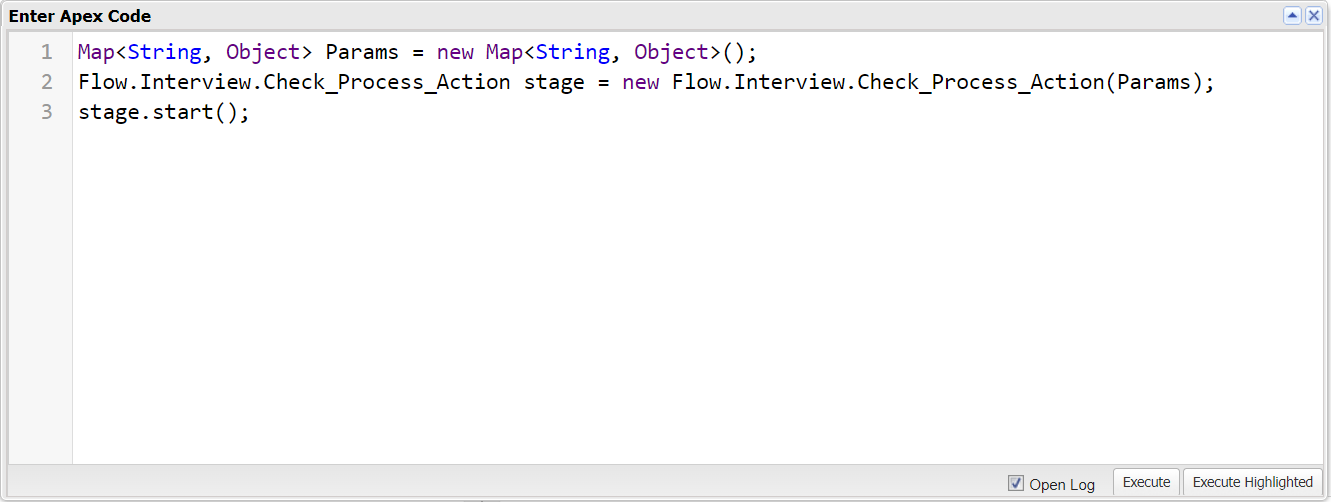
Step 6: Run the Flow Using Developer Console
- Open the Salesforce Developer Console.
- Access the Anonymous window.
- Add the following code snippet:
Map<String, Object> Params = new Map<String, Object>();
Flow.Interview.Flow_API_Name stage = new Flow.Interview.Flow_API_Name(Params);
stage.start();