AI Mass Processing with GPTfy
Use GPTfy’s AI Mass Processing to run prompt based automation across a large set of records on a schedule or on demand. This guide walks you through configuring schedulers, setting up filters, and executing batch runs.
Step 1: Create an AI Mass Processing Scheduler
Start by creating a new scheduler that controls when and how your prompts run.
How to create it:
- From the Cockpit, select the Advanced → AI Mass Processing tile.
- Click the New button to begin.
- In the setup screen, fill in the details:
- Name: A unique, descriptive name for your scheduler
- Scheduling Frequency: Choose how often the scheduler should run (e.g., daily, weekly)
- Schedule Time: Pick the time you want it to trigger
- Note- As you configure these options, GPTfy automatically generates a Cron expression based on your selected frequency and time.
- Retry Count: The Retry Count determines how many times the system should automatically attempt to re-process a specific record if the initial AI prompt execution fails.
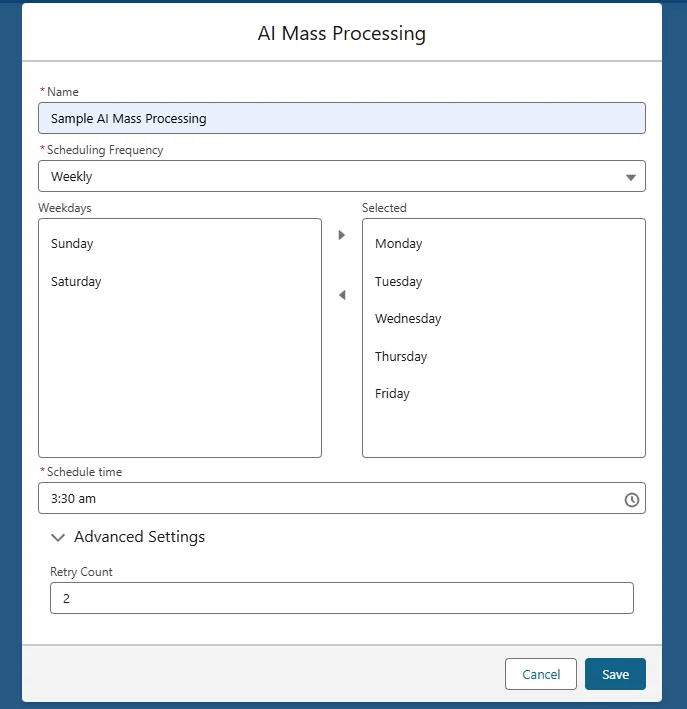
Note: As you configure these options, GPTfy automatically generates a Cron expression based on your selected frequency and time.
Step 2: Define Prompt Scheduler and Filtering Logic
Each AI Mass Processing record contains one or more prompt schedulers. These define which records to process and what prompts to run.
To create a prompt scheduler:
- Click New to add a prompt scheduler under your AI Mass Processing record.
- Provide the following details:
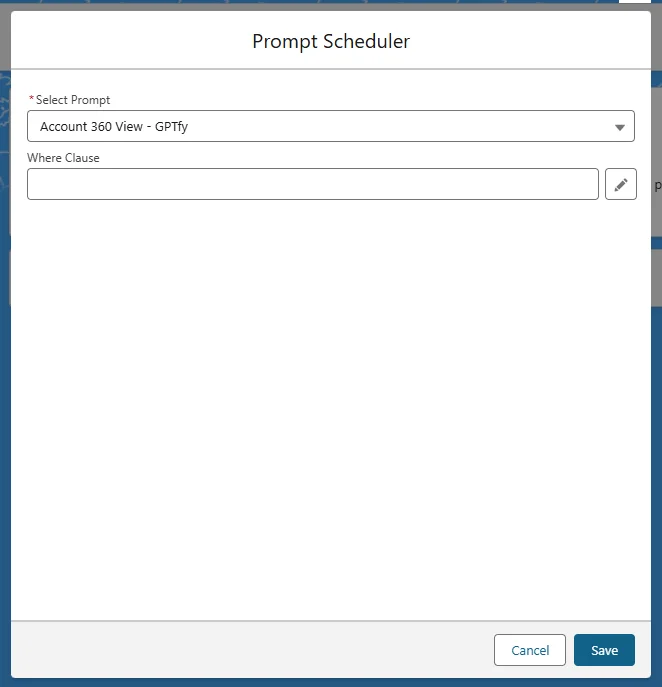
Basic Filtering
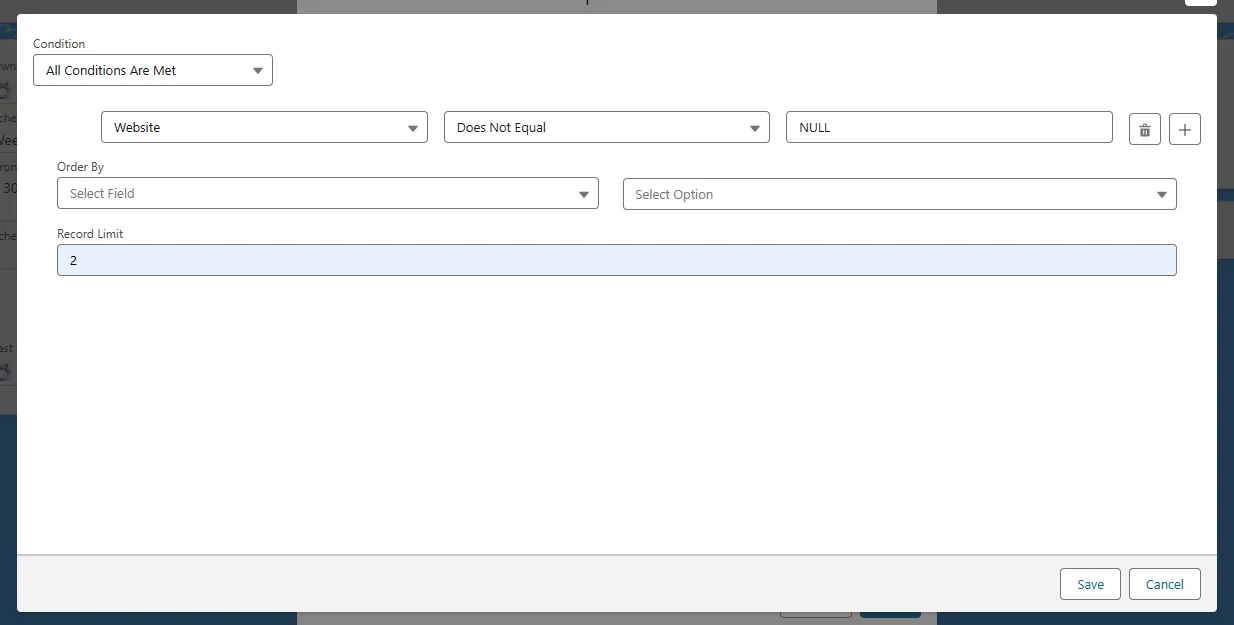
- Where Clause: Apply conditions to narrow down records (e.g.,
Status = 'Open'). You can use the Query Builder (pencil icon) to create this without writing SOQL. - Record Limit: Default is
2— controls how many records run per batch.
Cross Object Filters (COFi)
COFi filters qualify parent records based on conditions in related child records.
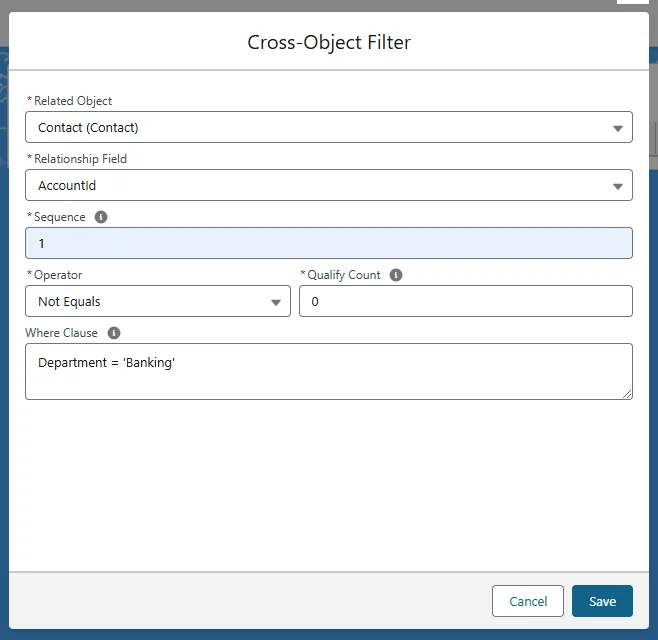
Example: To process an Account only if it has a related Contact with Department = 'Banking', define a COFi filter on Contact.
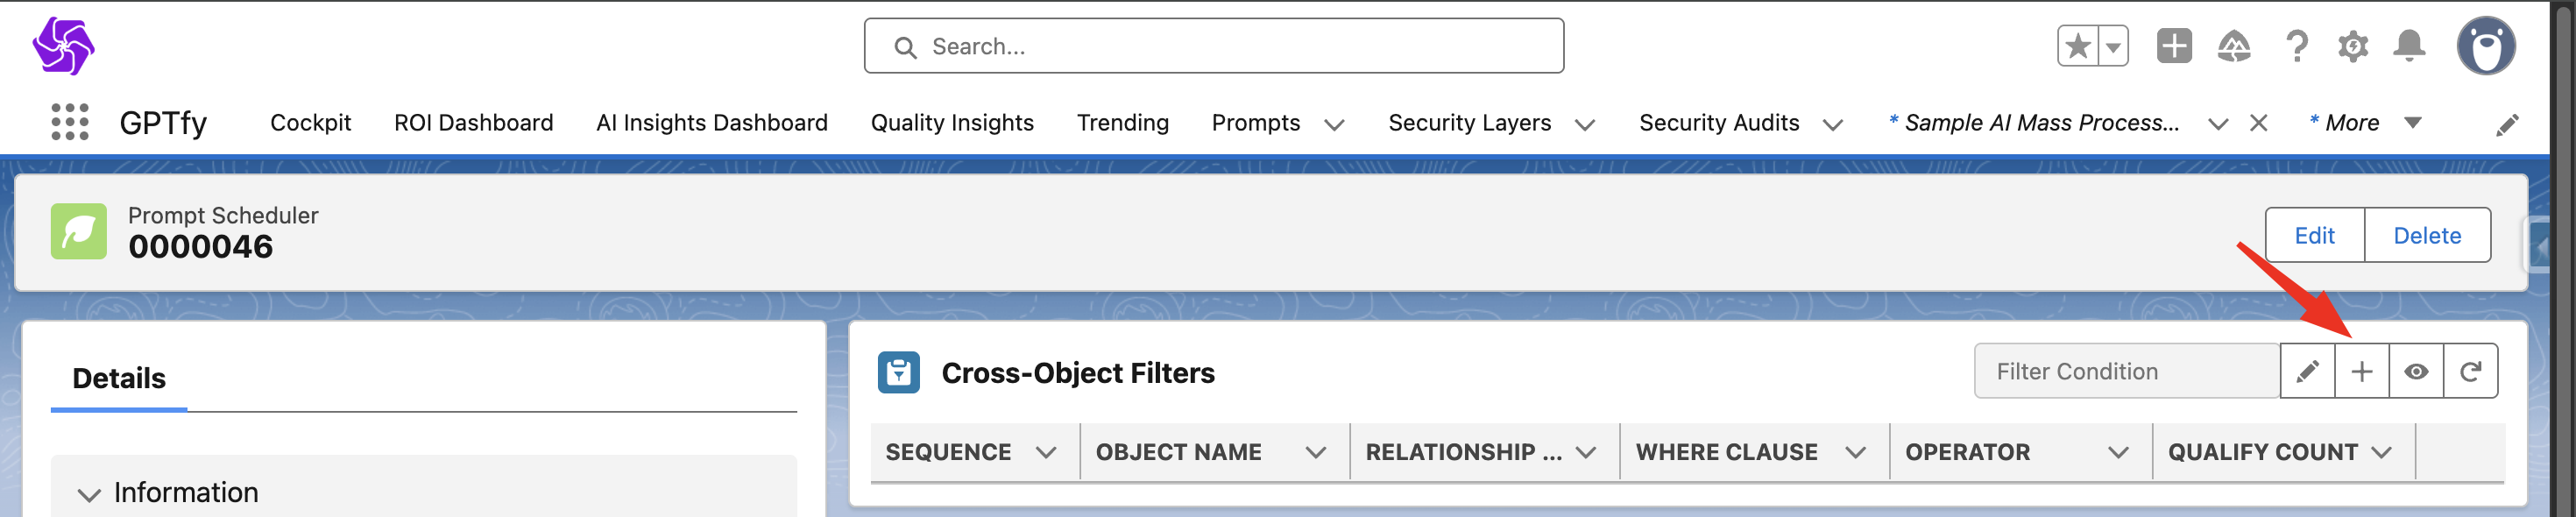
To add Cross-Object Filters:
- Navigate to the AI Mass Processing record you created

- Under the Prompts section, click on the prompt you added
- In the Cross-Object Filters section, click the + (plus) icon to add a new filter
Each COFi filter includes:
- Sequence: Determines the order filters run (lower numbers run first)
- Operator: Defines the logical operator (e.g., AND, OR)
- Qualify Count: Minimum number of conditions that must pass
- Where Clause: Filtering logic for the child object
Note: COFi filters act like guardrails — only qualifying parent records where child data matches your criteria.

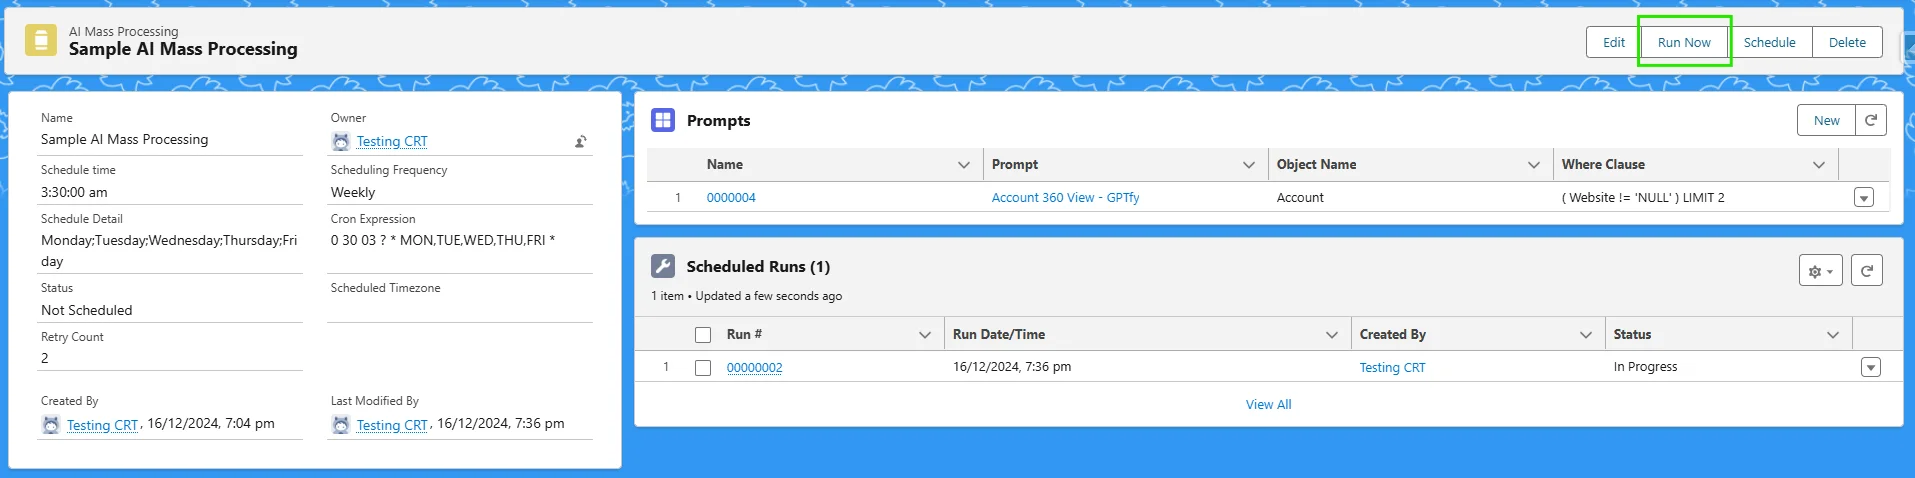
Step 3: Run or Schedule the Batch Process
Once everything is set up, you can either run the process immediately or let it follow the scheduled time.
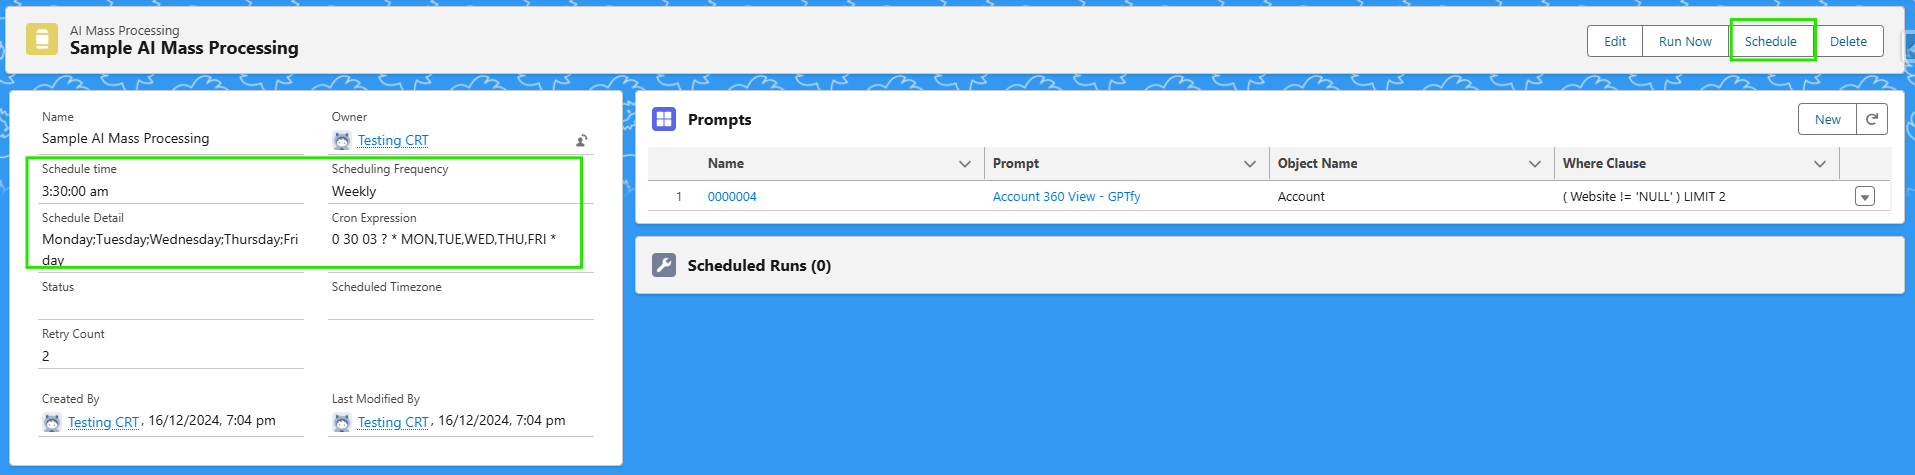
Available actions:
-
Run Now: Click this to trigger the batch process instantly
-
Schedule: Activates your scheduler based on the configured frequency
-
Unschedule: Cancels the scheduler if you no longer want it running
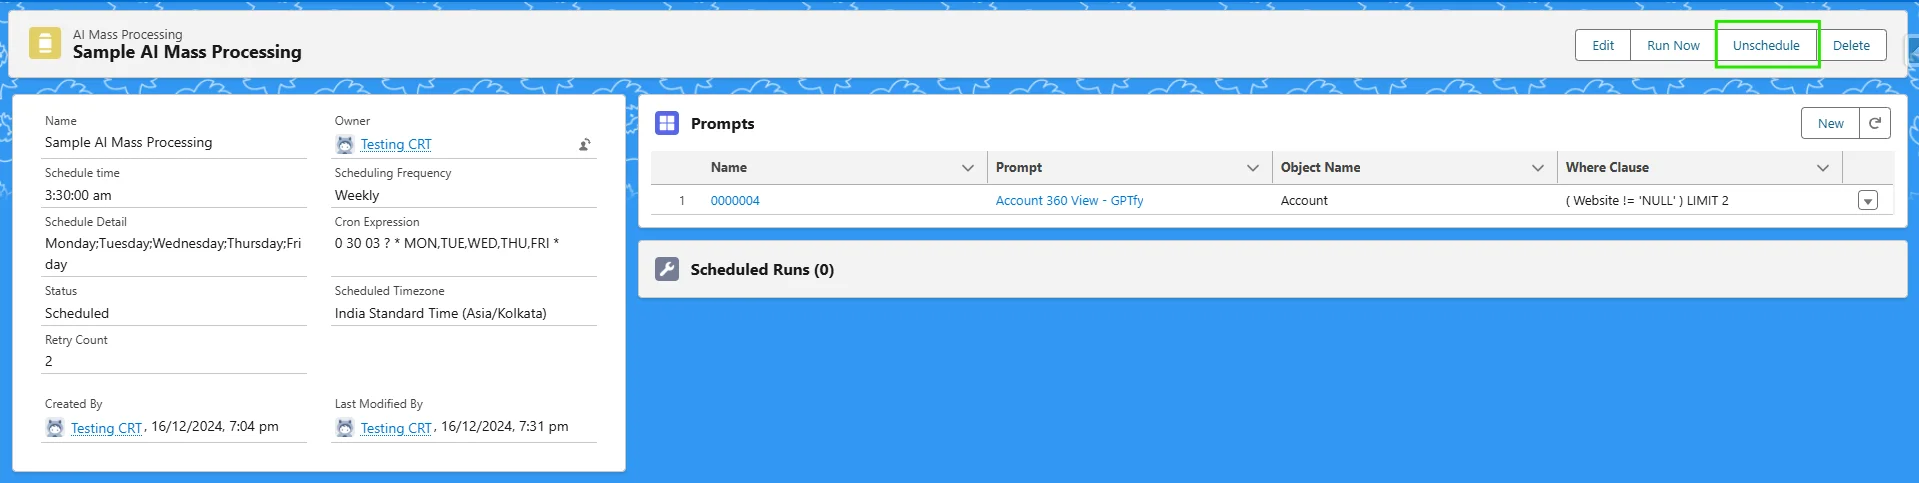
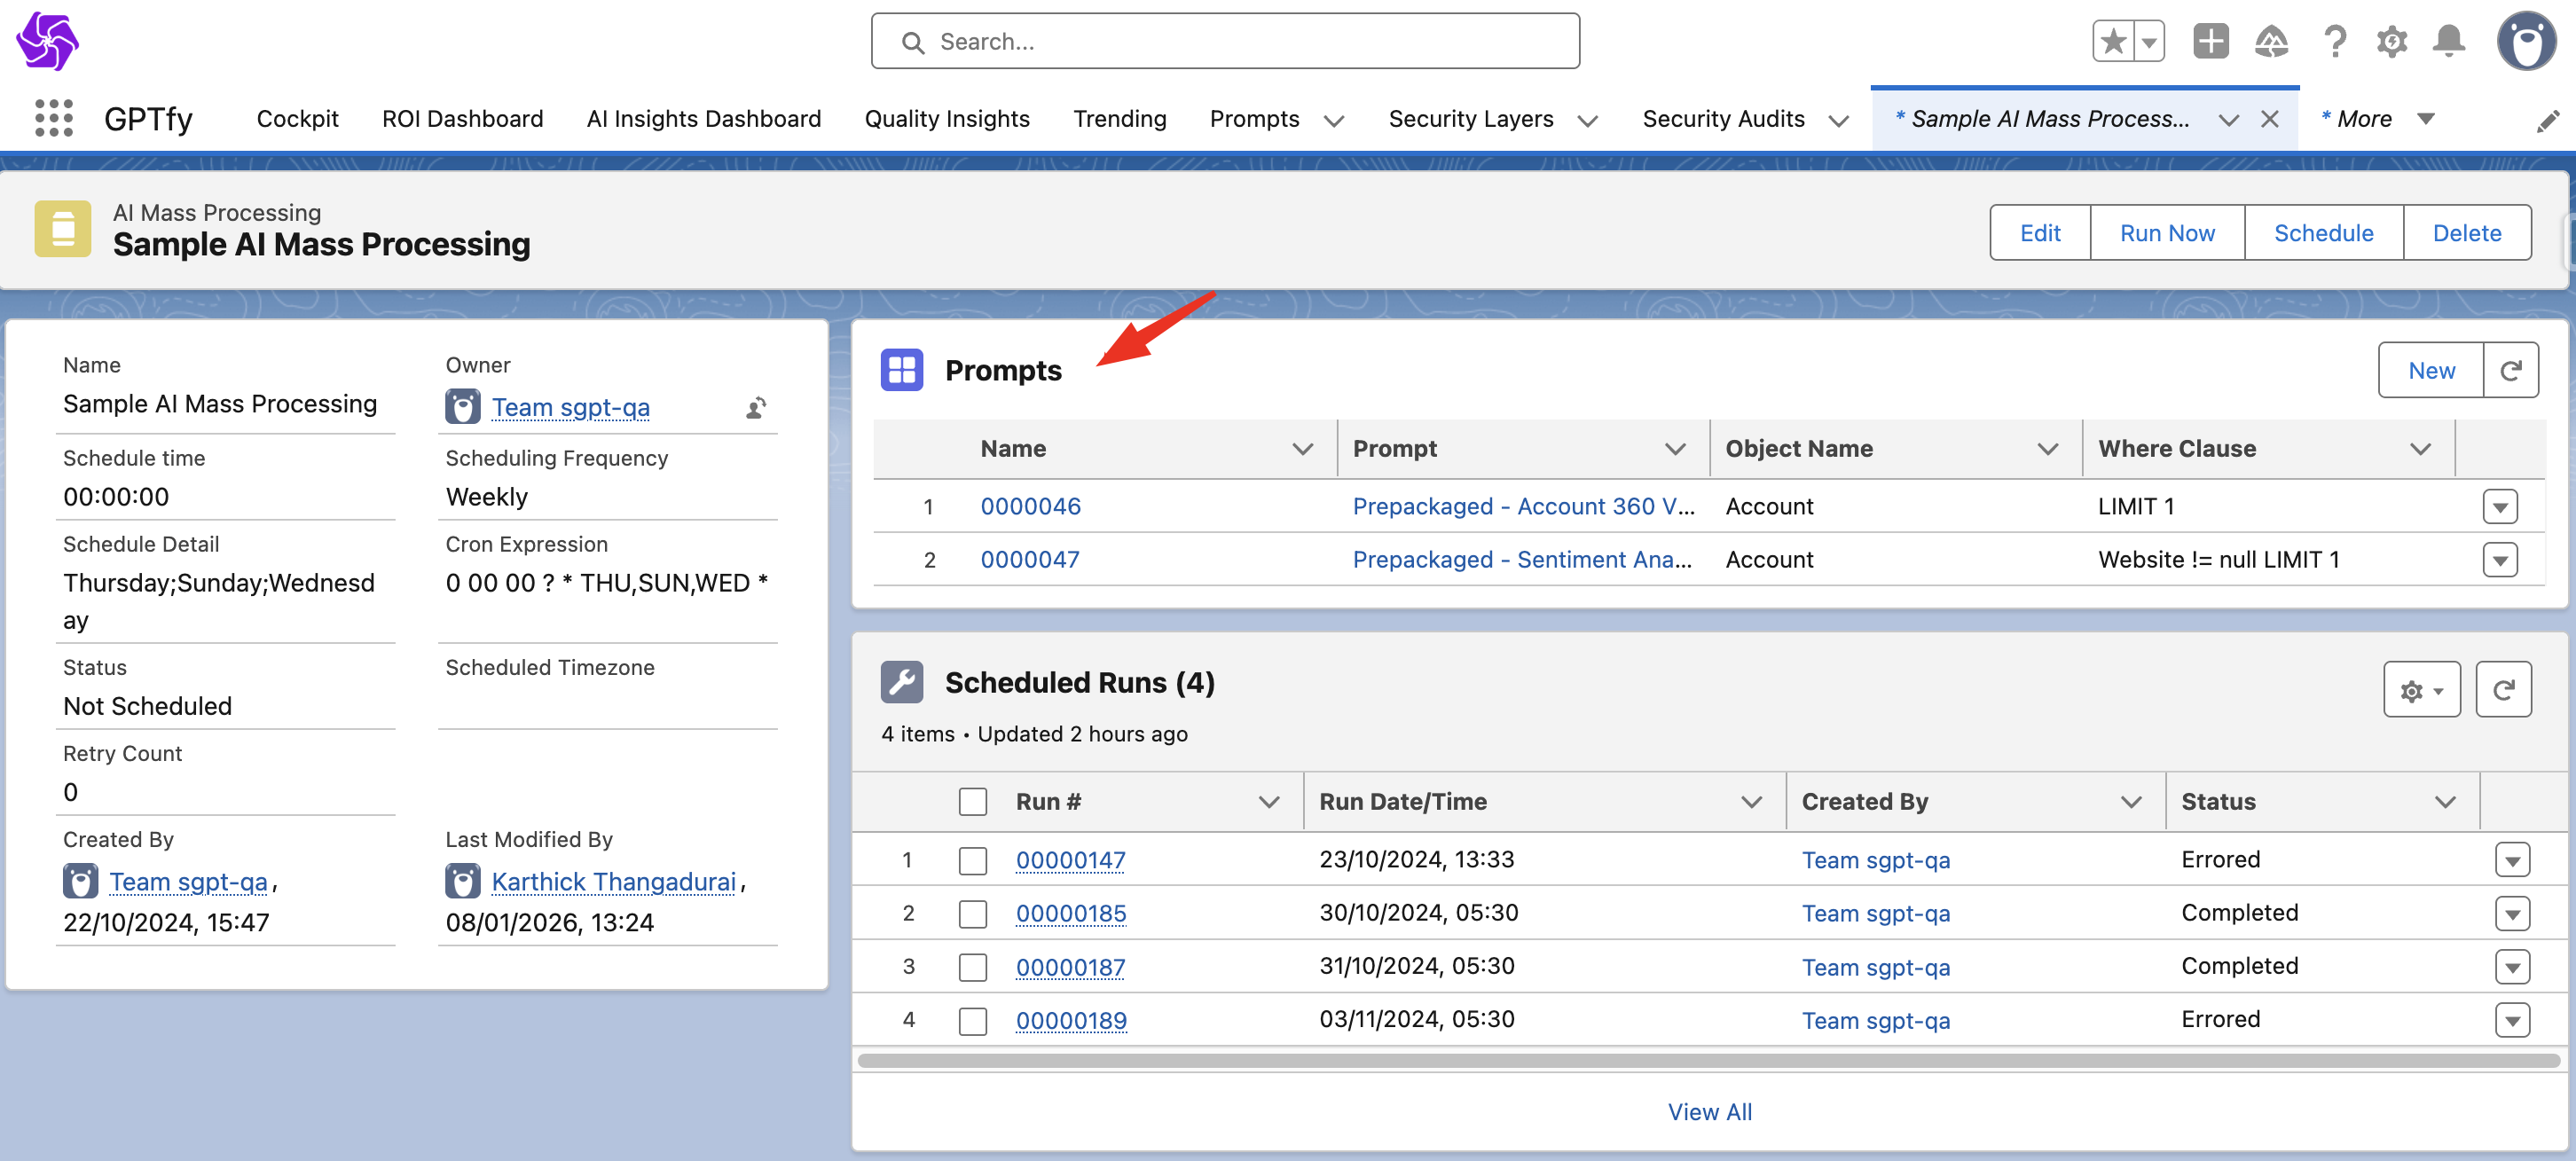
Running a batch will trigger an Apex job, which creates a Scheduled Run Record linked to your prompt scheduler.
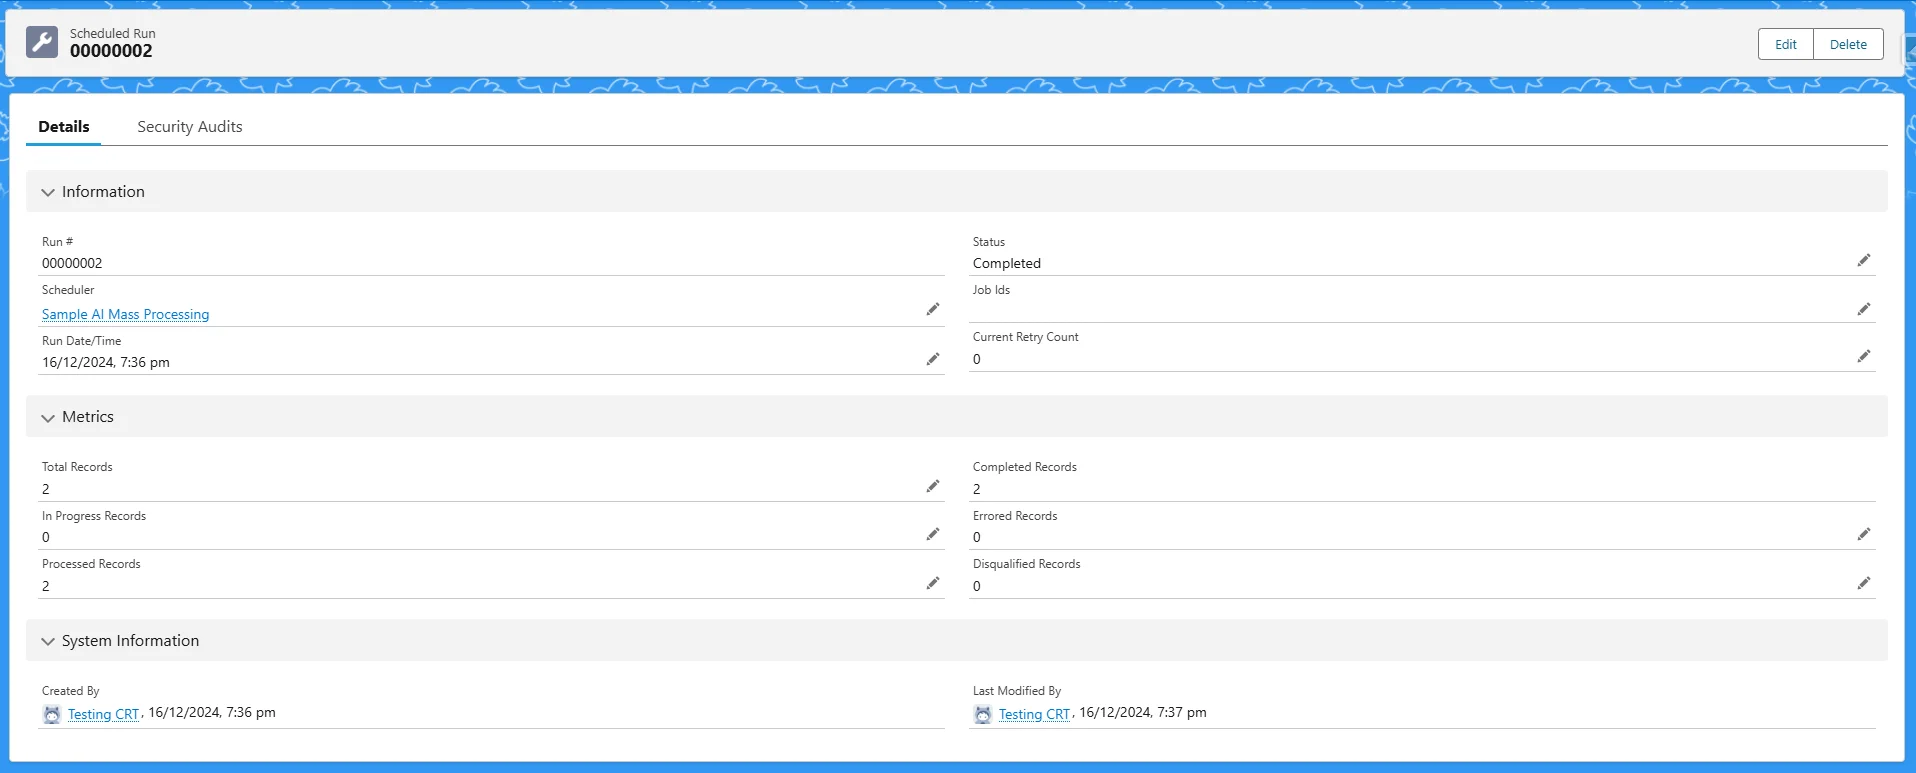
Monitor Run Metrics
Each scheduled run includes detailed metrics on what happened during processing.
To view them, go to the Scheduled Run record’s Details tab.
Metrics available:
- Total Records – Total number of records qualified
- In Progress Records – Records currently being processed
- Completed Records – Successfully processed records
- Errored Records – Records that failed (e.g., due to token limit)
- Disqualified Records – Records blocked by visibility rules or filters
- Processed Records – Sum of completed and disqualified records

Handling Errors with Retry Logic
Records that fail during processing are marked as Errored.
GPTfy automatically retries errored records based on your configured Retry Count.
Once a retry succeeds, the error status is cleared.
Example: If a record failed due to exceeding token limits, it will be reprocessed during the next attempt — as long as retry attempts remain.