What is BYOM?
BYOM (Bring Your Own Model) is a GPTfy feature that lets your organization connect AI models of your choice either prepackaged options like Azure OpenAI, Amazon Bedrock, and Google Vertex, or custom models you’ve purchased or host internally—directly within Salesforce.
With BYOM, you can leverage existing AI investments while benefiting from GPTfy’s seamless Salesforce integration capabilities.
Why is BYOM Important?
BYOM is important for several reasons:
- Flexibility: Organizations can use AI models they’ve already invested in or have specific expertise with.
- Customization: Companies can use specialized models that may be trained on industry-specific data or optimized for particular use cases.
- Data Security: Organizations with strict compliance requirements can maintain control over their AI infrastructure while still leveraging GPTfy’s integration capabilities.
- Cost Management: Companies that already have licenses for specific AI models can avoid duplicate costs.
- Future-Proofing: As new AI models emerge, organizations can adopt them without waiting for GPTfy to include them in their package.
How is it integrated?
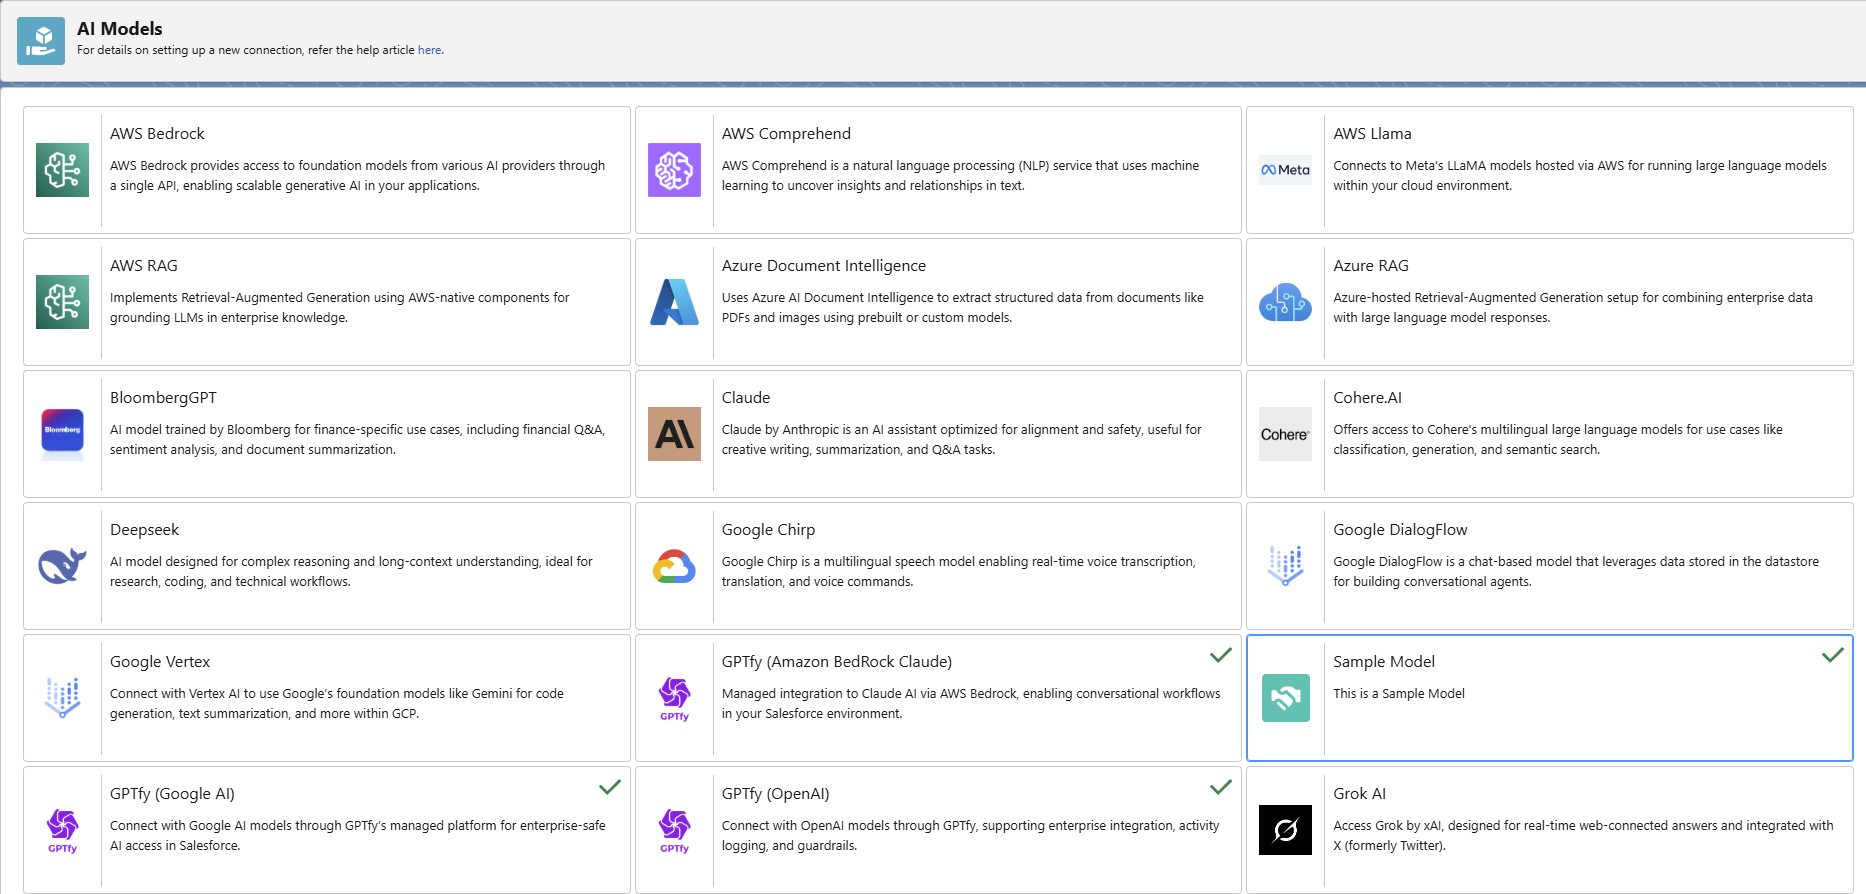
The AI Model record specifies the type of AI that GPTfy will invoke for generating responses. The creation of this AI Model record is a one-time activity.
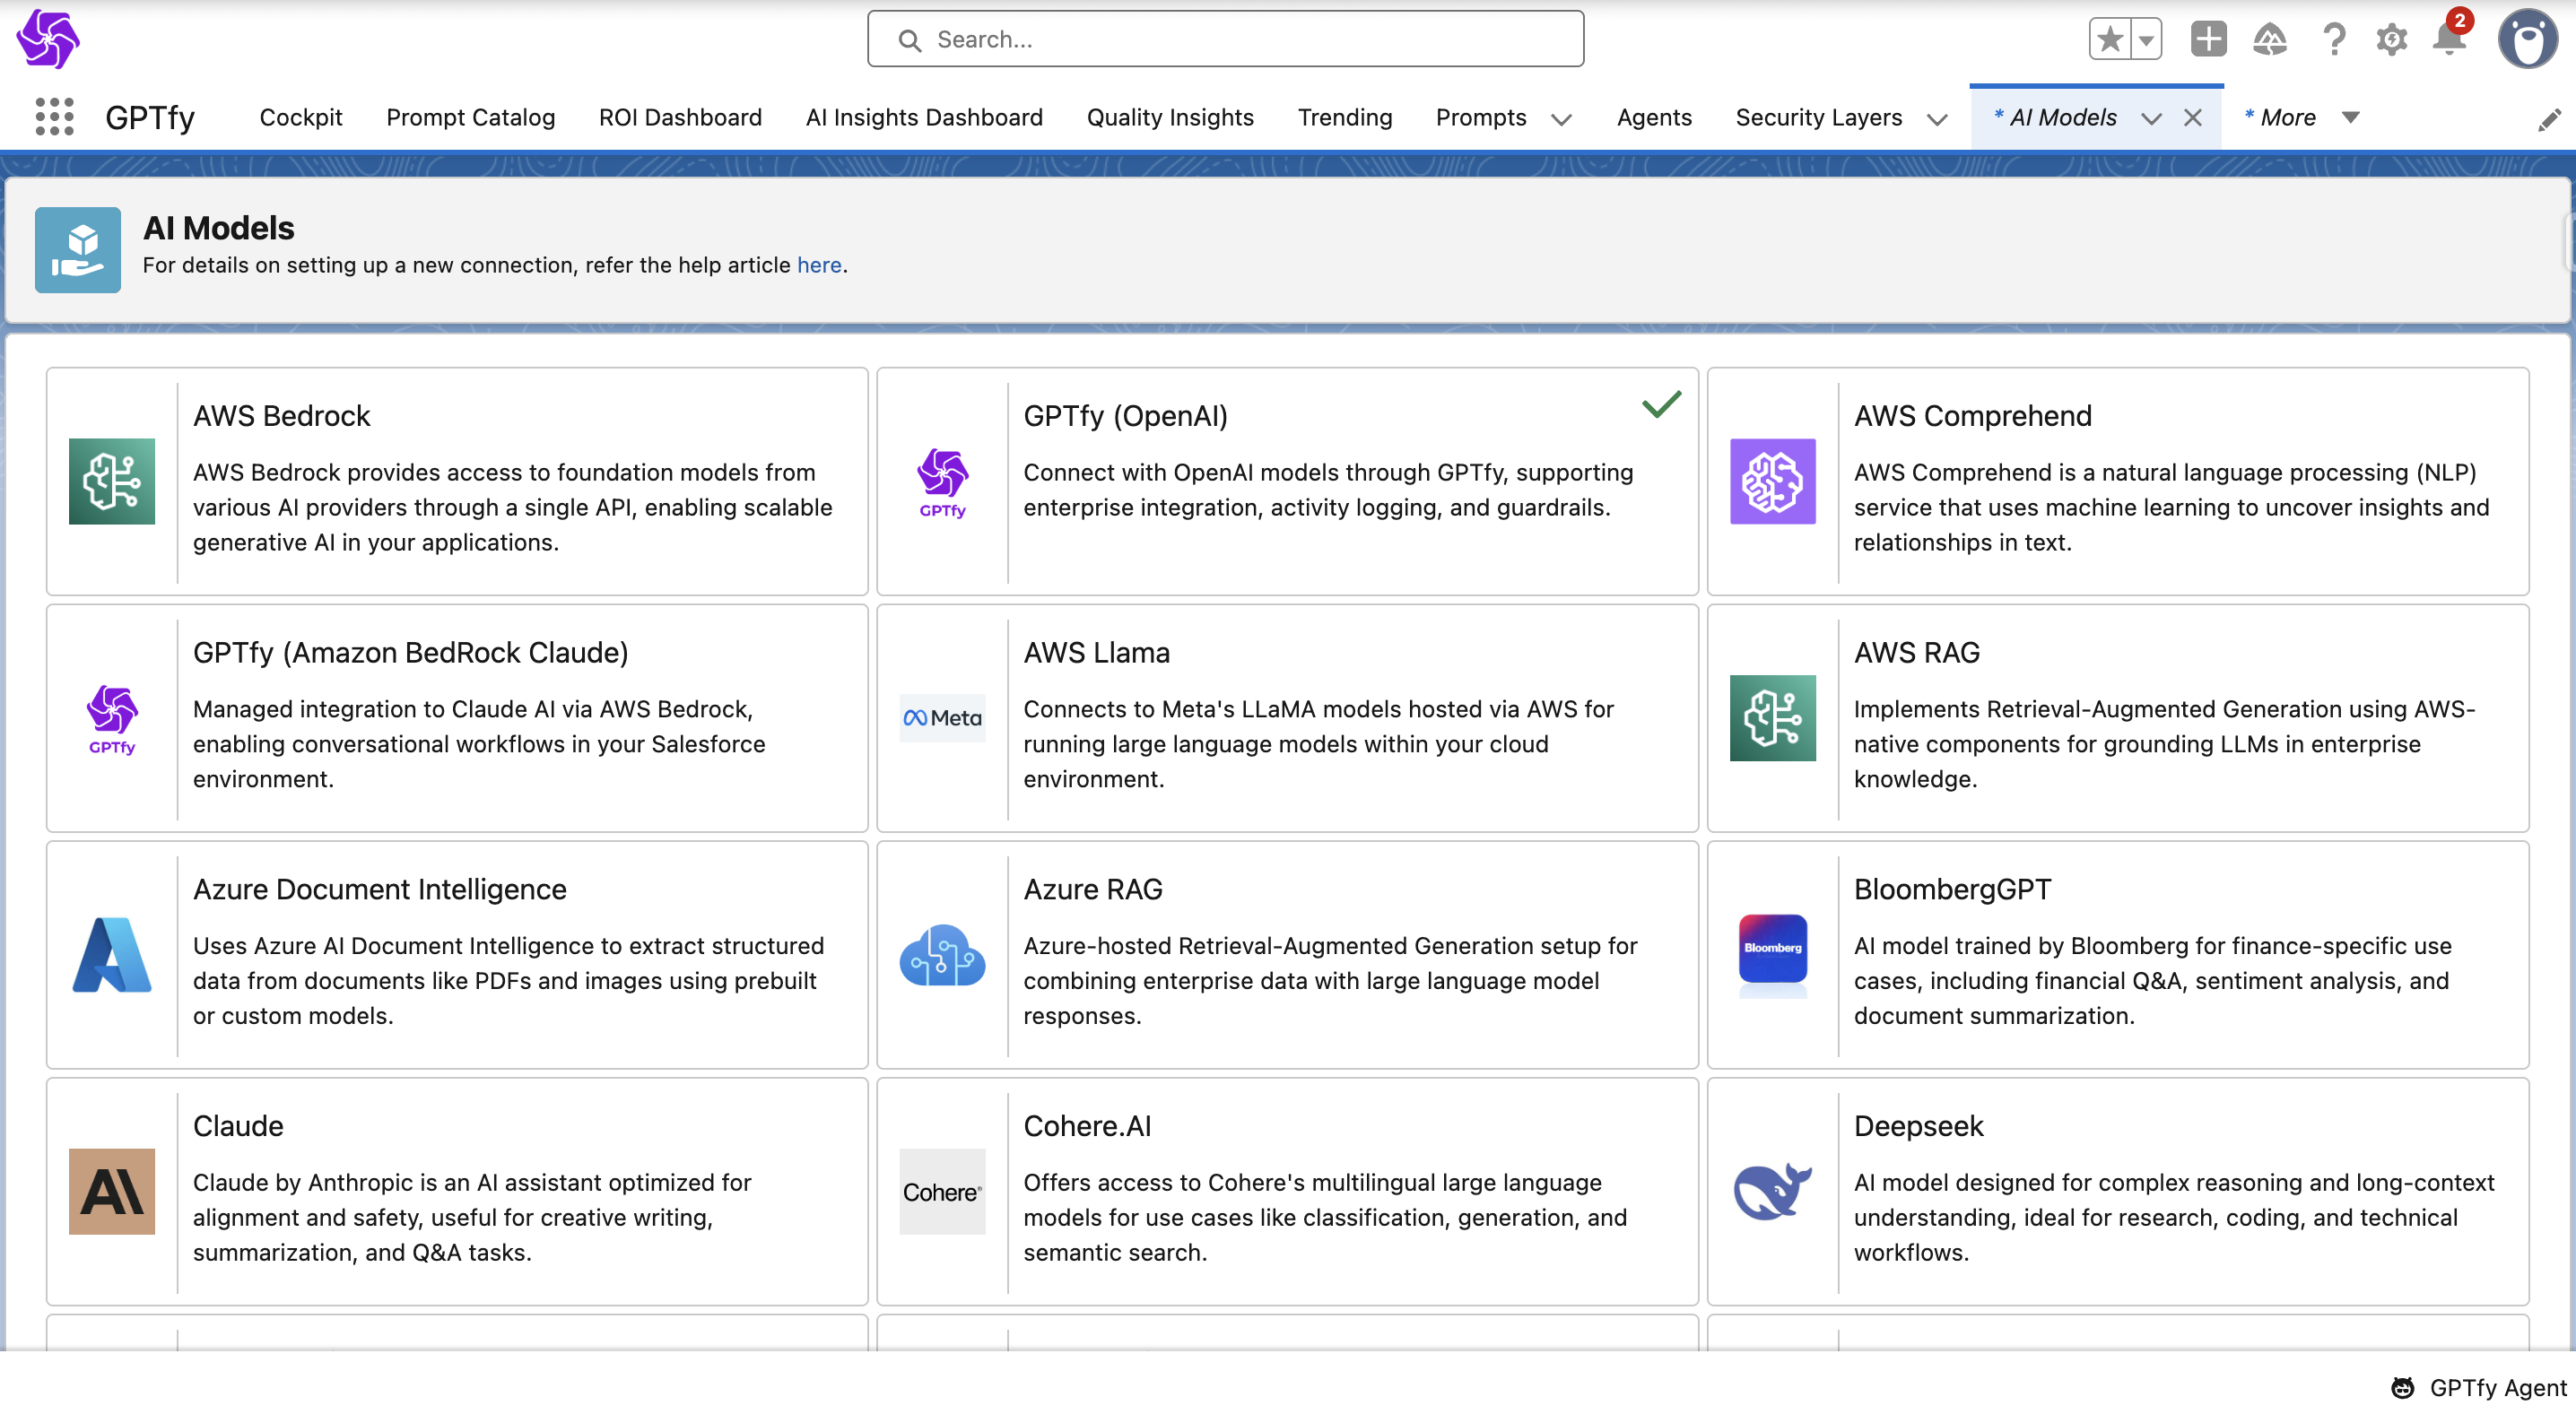
Step 1: Navigate to the AI Model Section
- Open the Cockpit in GPTfy.
- Navigate to the Advanced tab and click on the AI Model tile.
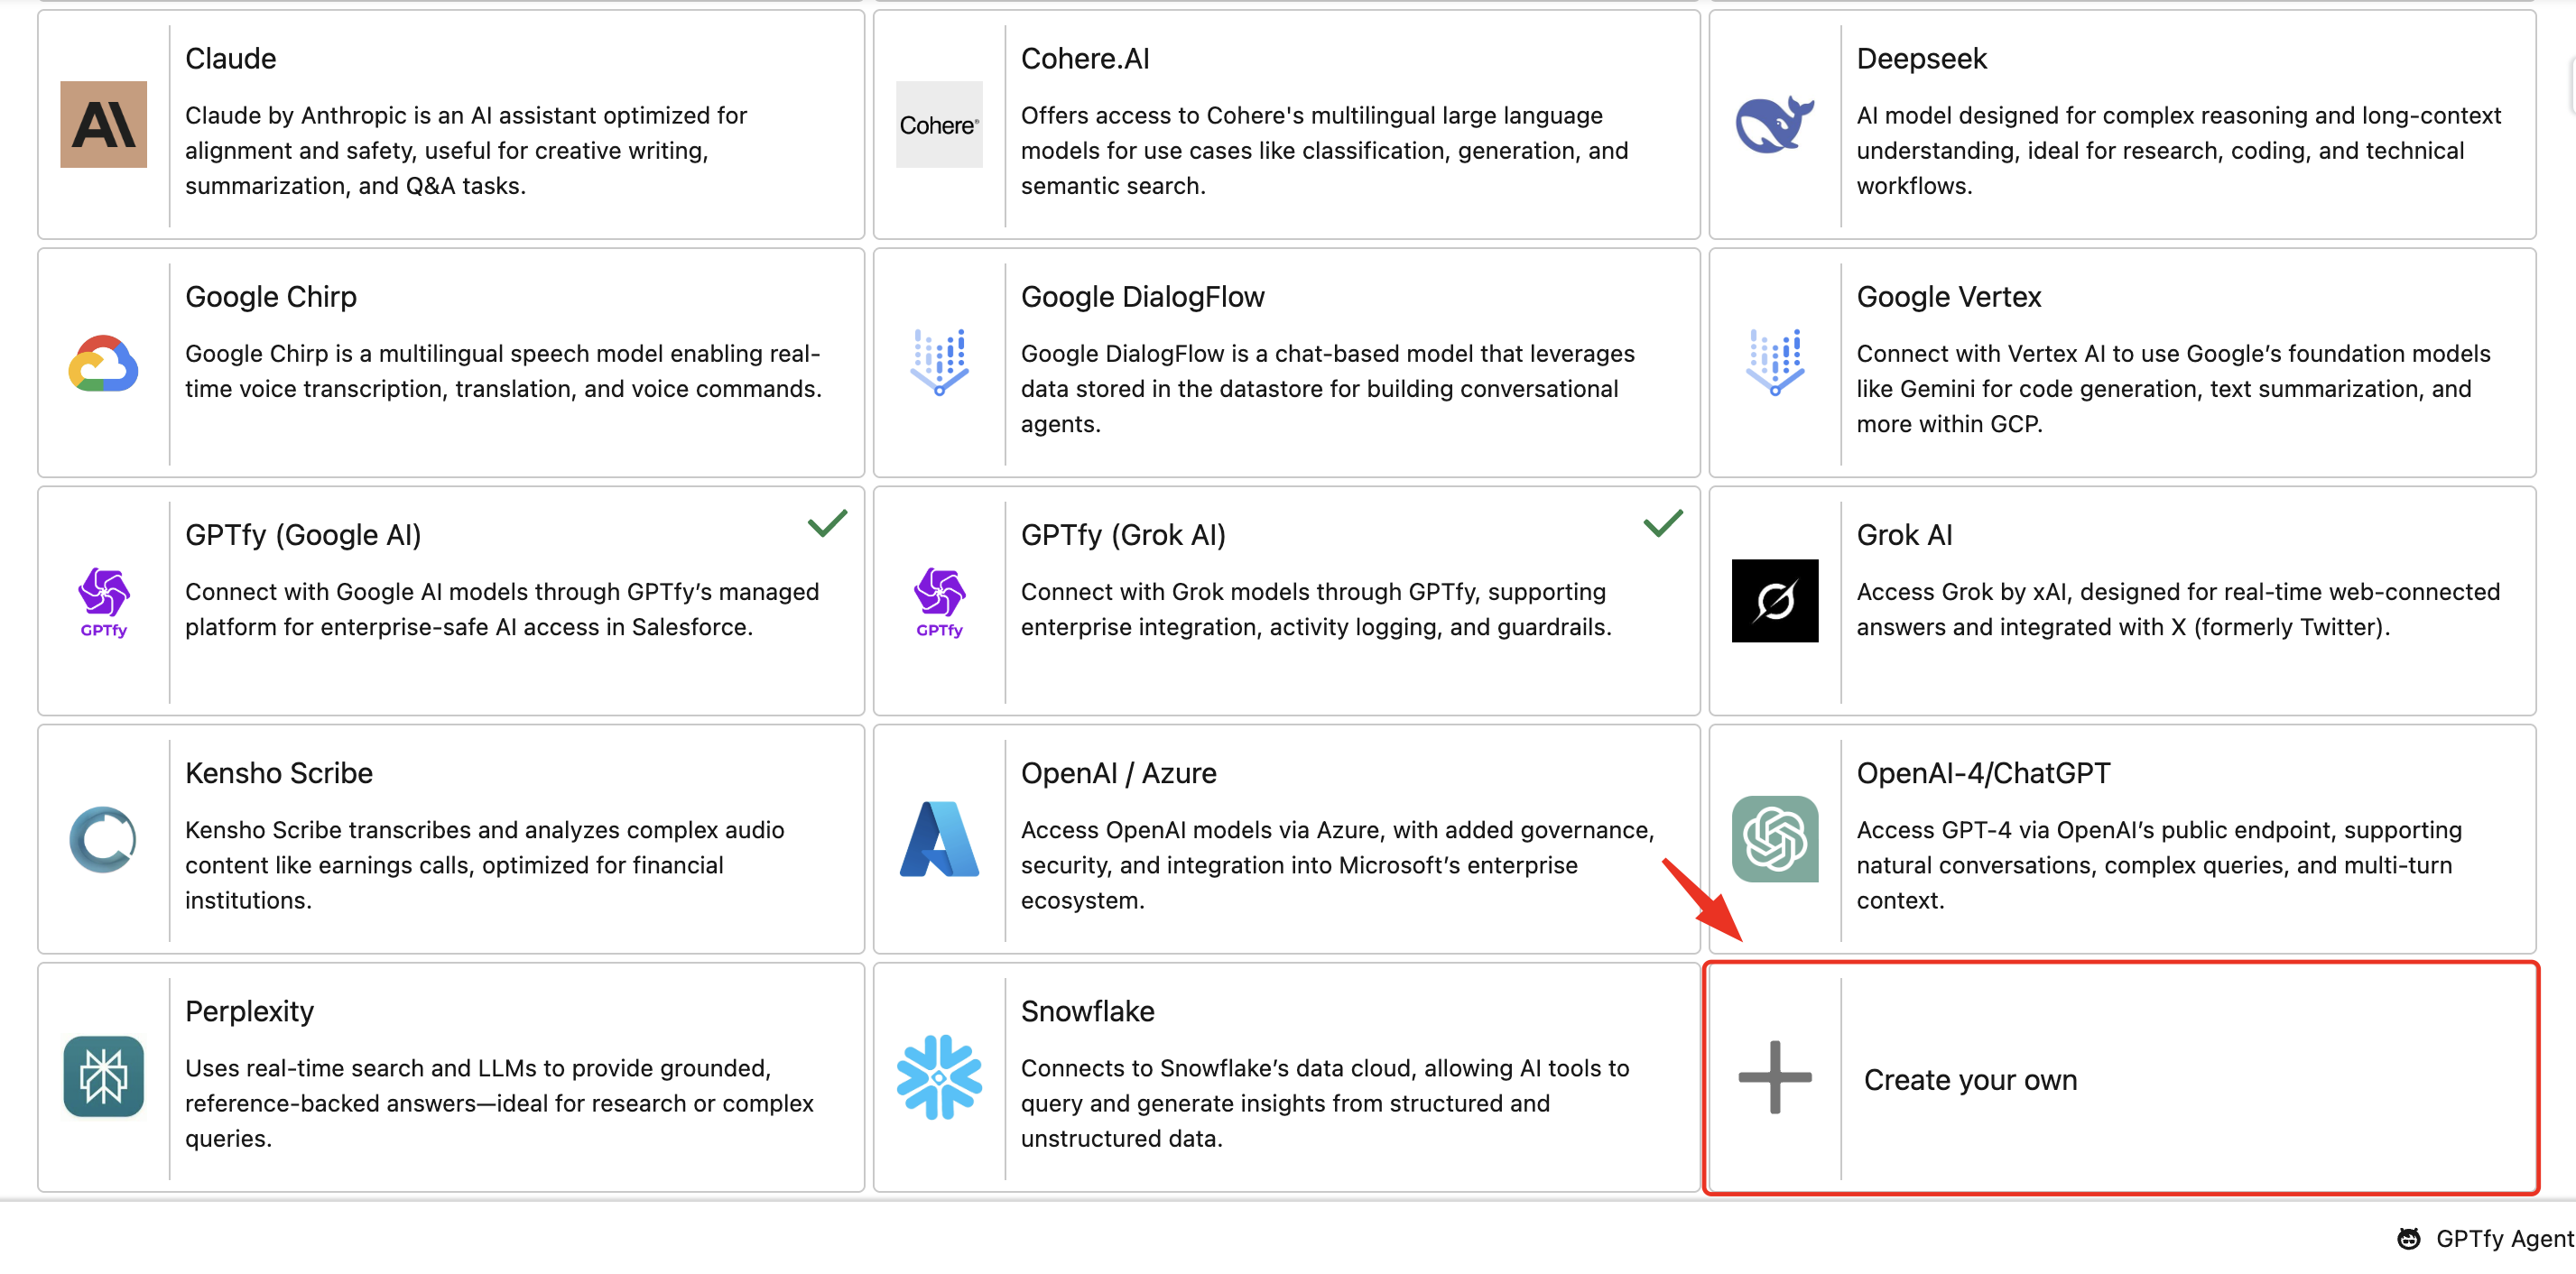
- Select the Create your own tile from the list of available models.
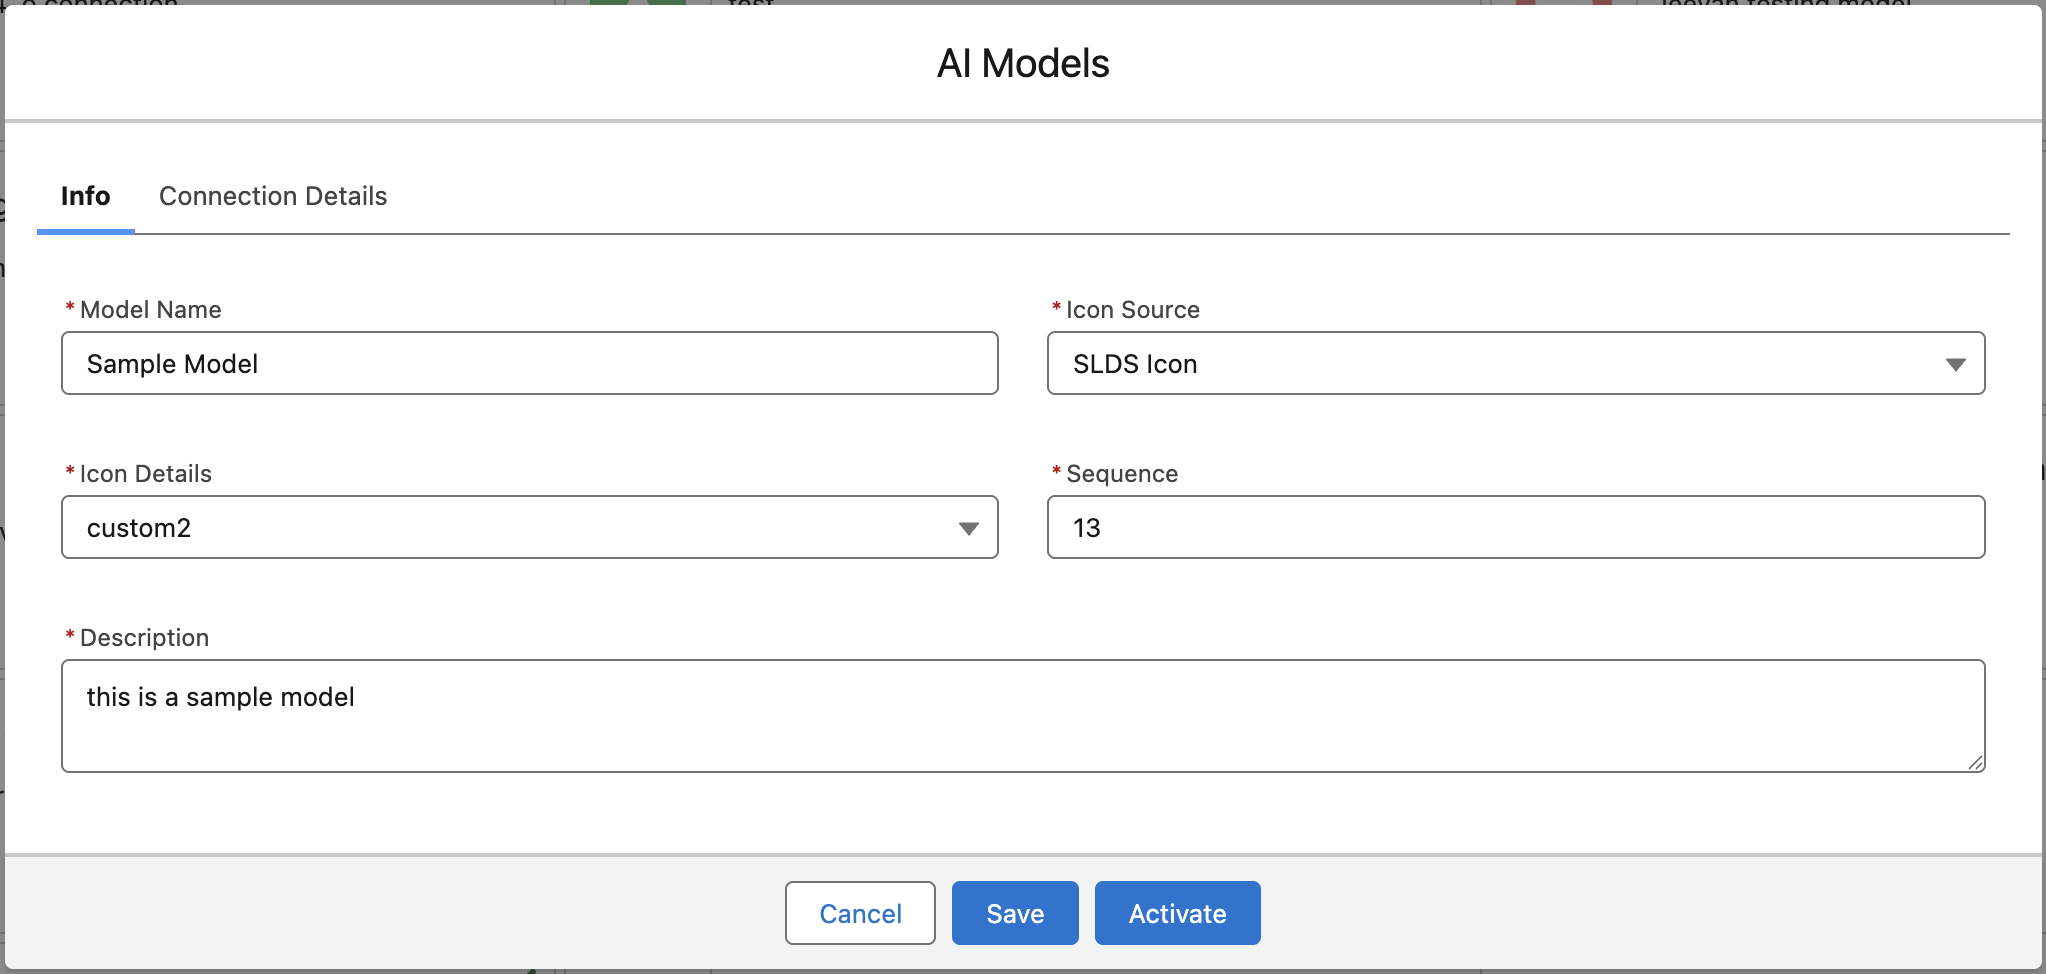
Step 2: Fill in your AI Model Details
Once you have selected the ‘Create your own’ card, a window will appear, prompting you to add details of the new Model. Fill in the required details in the provided fields.
- Label: The name of your AI Model (e.g., “OpenAI GPT-4o”).
- Icon Source and Icon Details: You can choose between two options:
- Static Resource: Upload your model’s logo as a static resource and enter its API name in the Icon Details field.
- SLDS Icon: Select a standard Salesforce Lightning icon from the dropdown.
- Sequence: A number that determines the order in which this tile will appear in the AI Model list.
- Description: A short description that is displayed on the tile (e.g., “Used for generating chat summaries”).
Click Save after entering all required details.
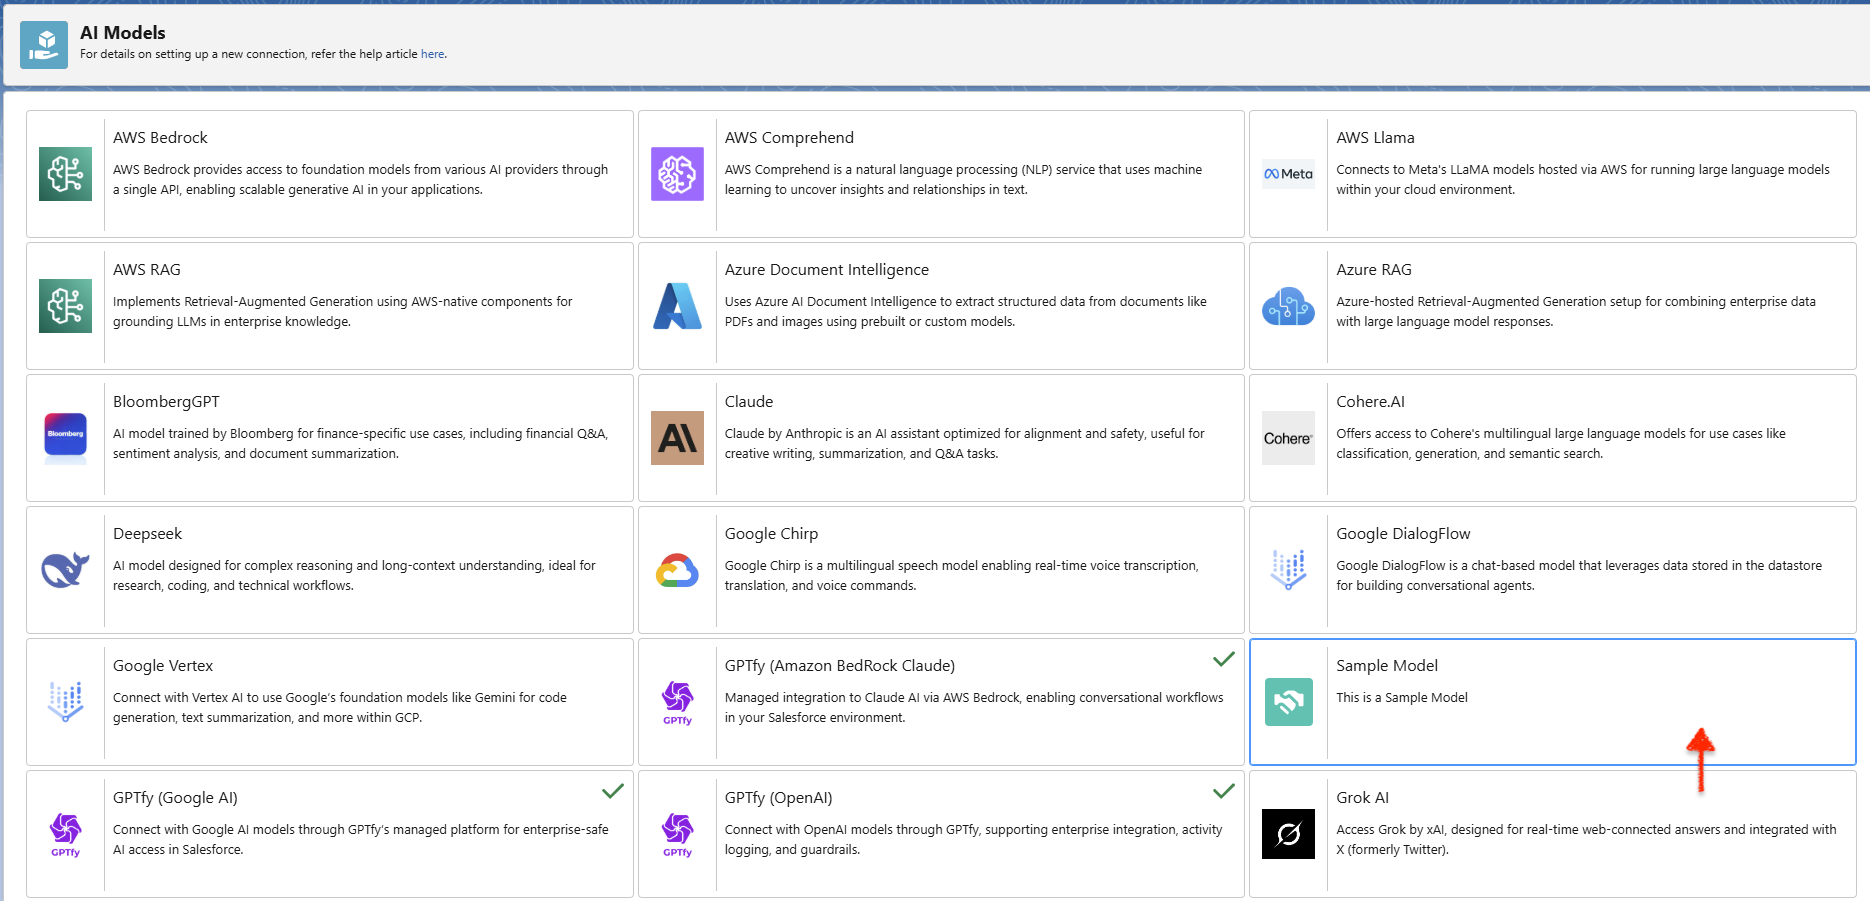
Note: A new AI Model tile will appear in the Cockpit once the page reloads.
Note: A corresponding custom metadata record under GPTfy Card Configurations will also be created, but it will not be active yet.
Step 3: Validate and Save
Click the Save button to validate the entered details.
Once saved:
- A new tile will appear in the AI Model section.
- A new card will get created under card configurations
Ensure the list view is set to AI Model.
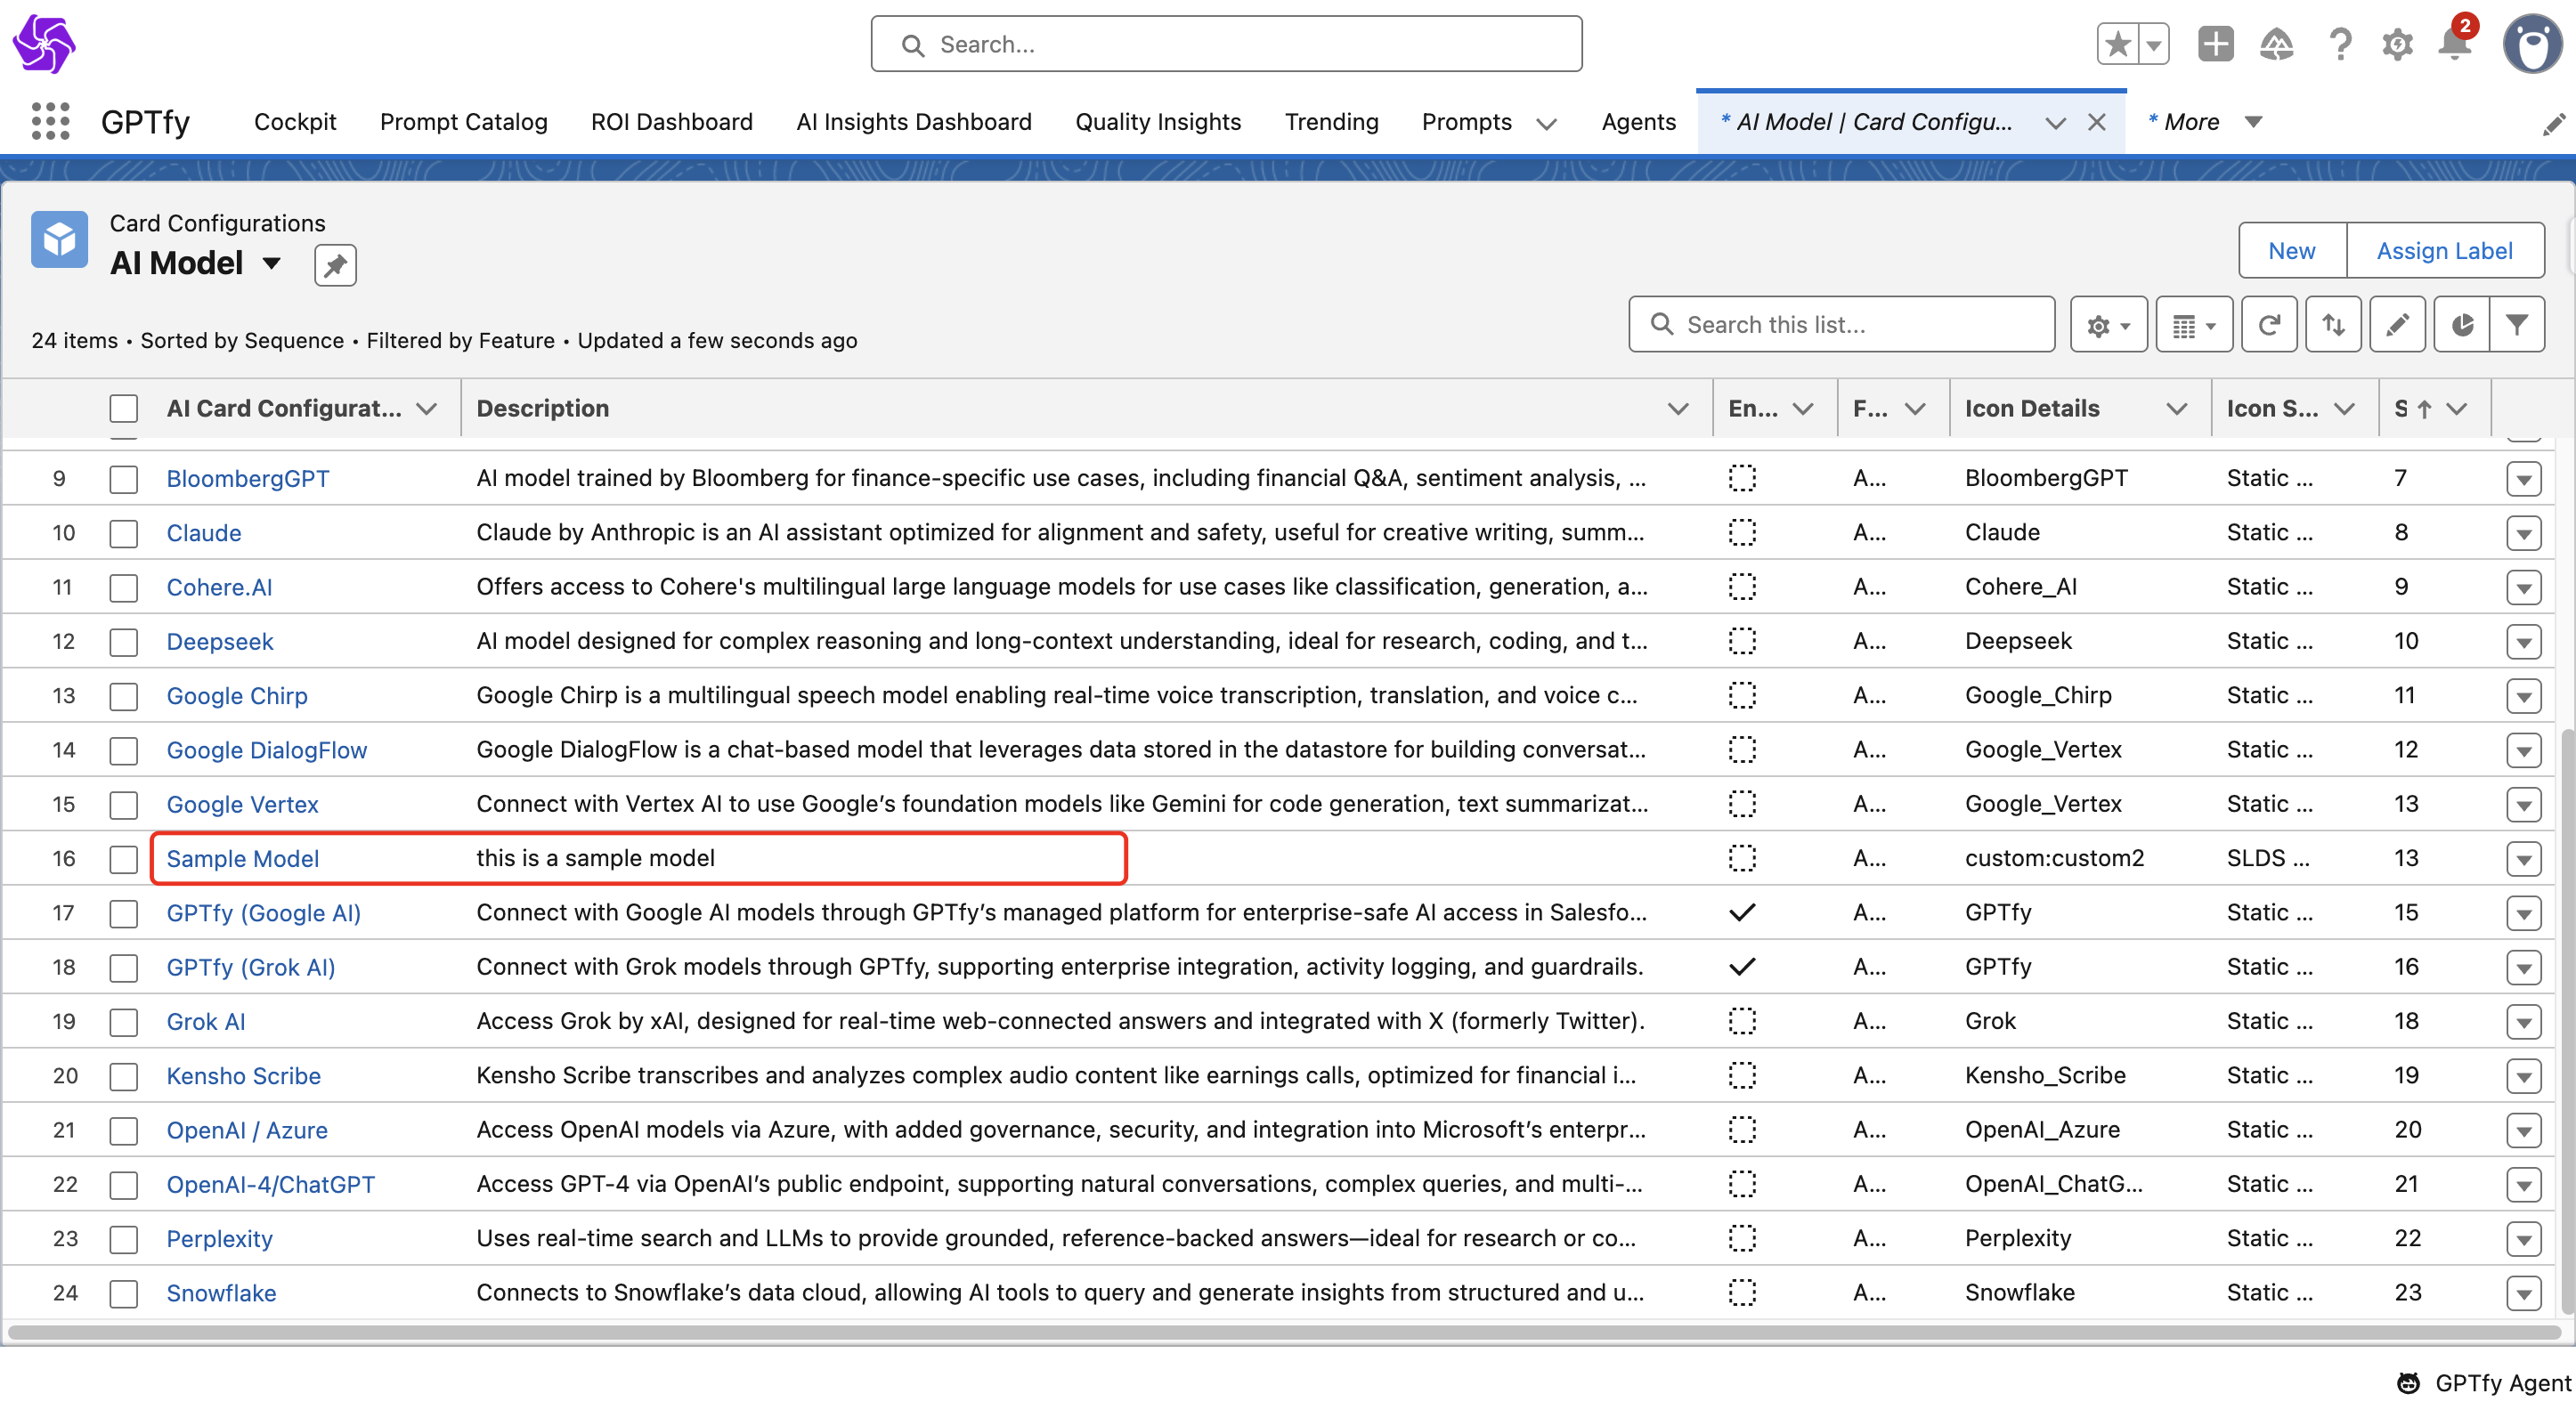
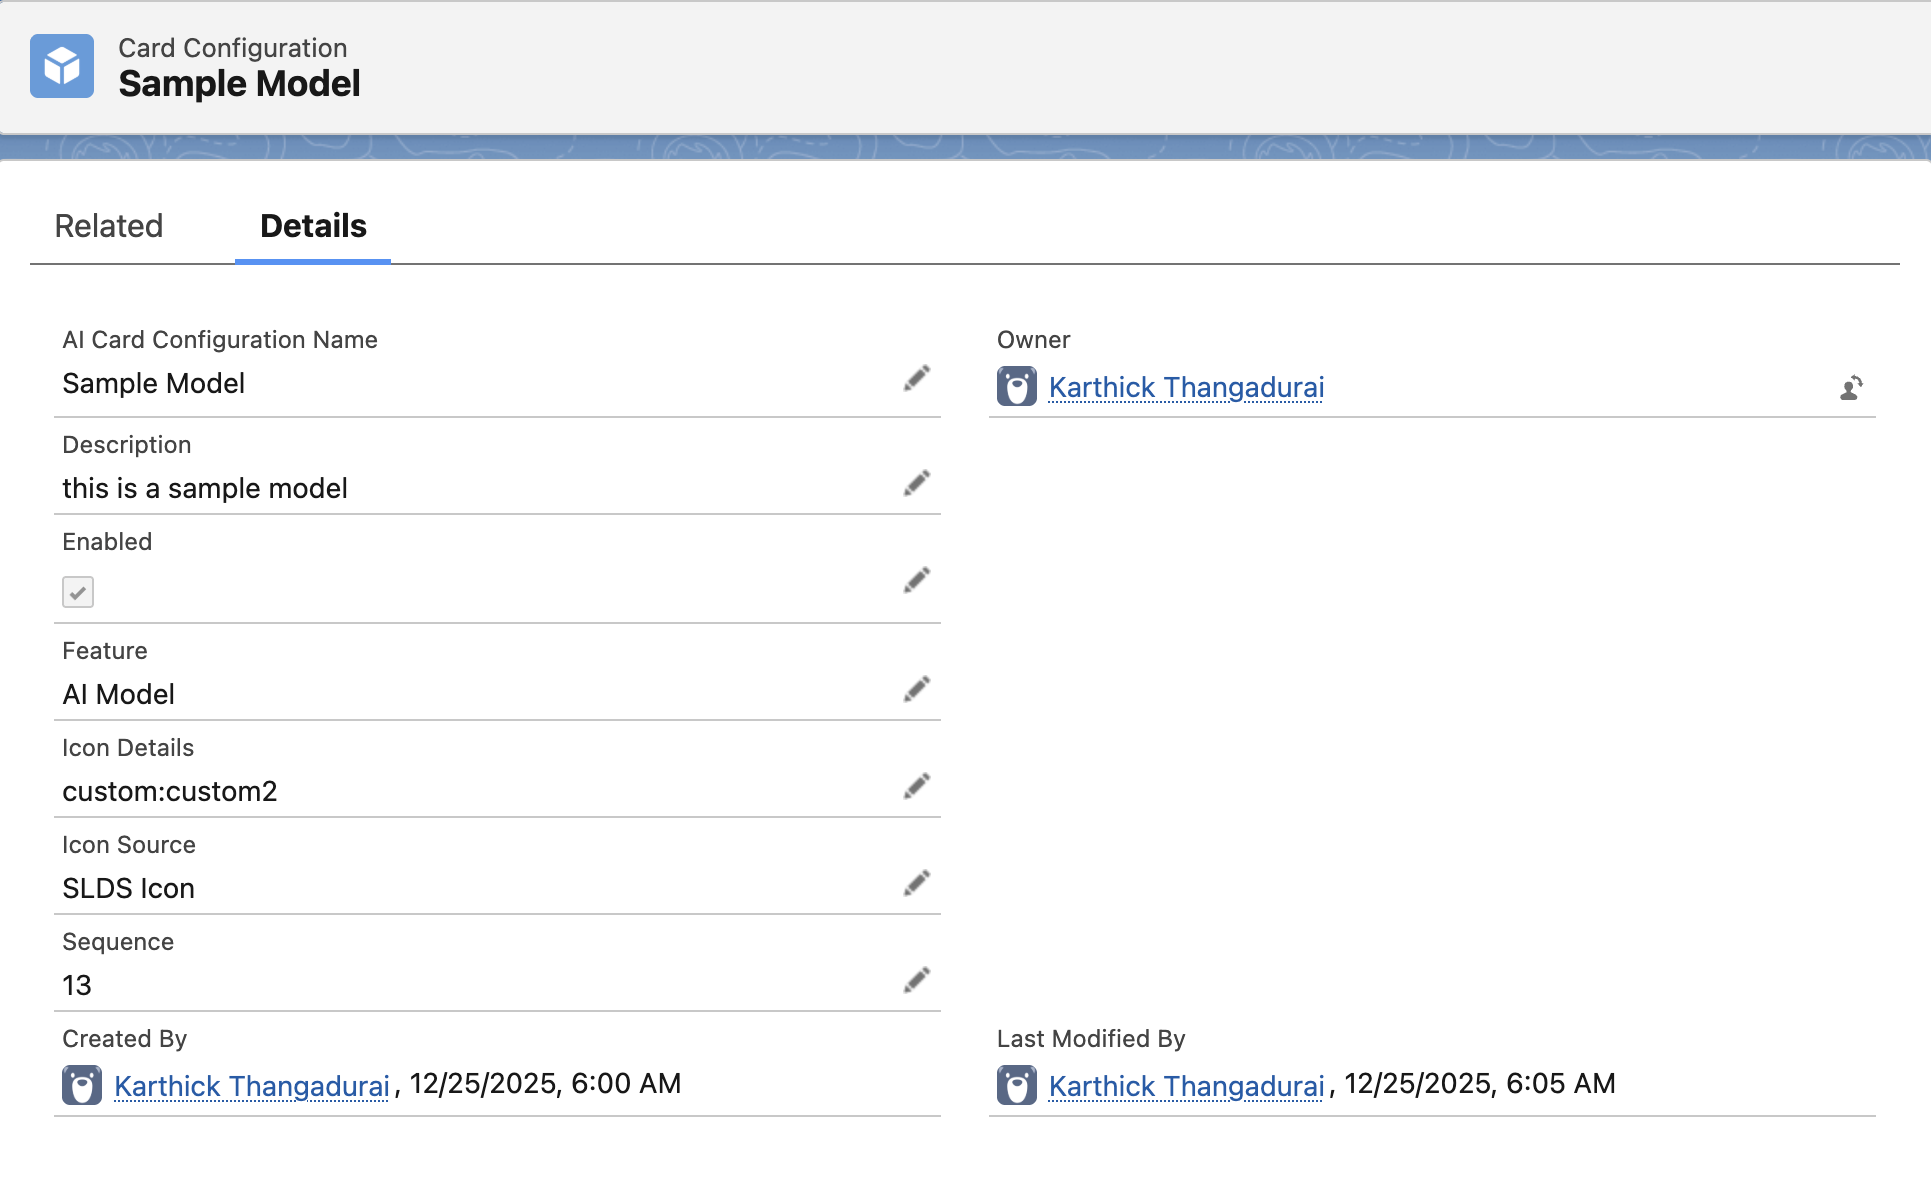
You can see the New Model detail by clicking that model in Card Configurations
Step 4: Activate the Model
To activate the AI Model:
- Click on the newly created model tile.
- Navigate to the Connection Details tab.
- Provide the following information:
| Fields | Description |
|---|---|
| Model Name | Auto-filled by the system. |
| AI Technology | Select the appropriate AI provider. |
| Platform | Picklist field to define the platform the model runs on. |
| Type | Picklist field to specify the model's functionality. Available values include: Chat, Voice, Agentic, File, and RAG Sync. |
| Version | The specific iteration or release number of the model (e.g., 1 or 0613). |
| Max Output Tokens | Limits the number of tokens in each response (e.g., 5000). |
| Max Total Tokens | Limits the number of tokens by combining both the input prompt tokens and output response tokens (e.g., 10000). |
| Top P | Sets the cumulative probability threshold (e.g., 0.75) to control output diversity. |
| Named Credential | Use a secure credential (e.g., GPTfy) included in the GPTfy package. |
| Connector Class | Allows customers to implement custom logic for connections. Supports both Named Credential and Connector Class configurations for authentication flexibility. |
| Processing Class | Enables integration with external AI models not natively supported by GPTfy by calling third-party or custom APIs. |
| Security Layer | Select the GPTfy security layer from the picklist to enable multi-layered anonymization and PII masking. |
| Model | Fill in the appropriate model name as provided by the AI service provider. |
| Temperature | Adjusts response randomness: lower = more focused, higher = more creative. Range is between 0 to 1. |
| EndPoint URL | The destination API address used to route requests to the specific AI model service provider. |
| Additional Parameters | Allows you to add any extra parameters needed for the model in JSON format. These are model-specific settings that can be customized based on your AI provider's requirements. |
| Response Mapping | Allows you to map fields from the AI's JSON response (e.g., "Toxicity Score") to specific fields in Salesforce Security Audit records. |
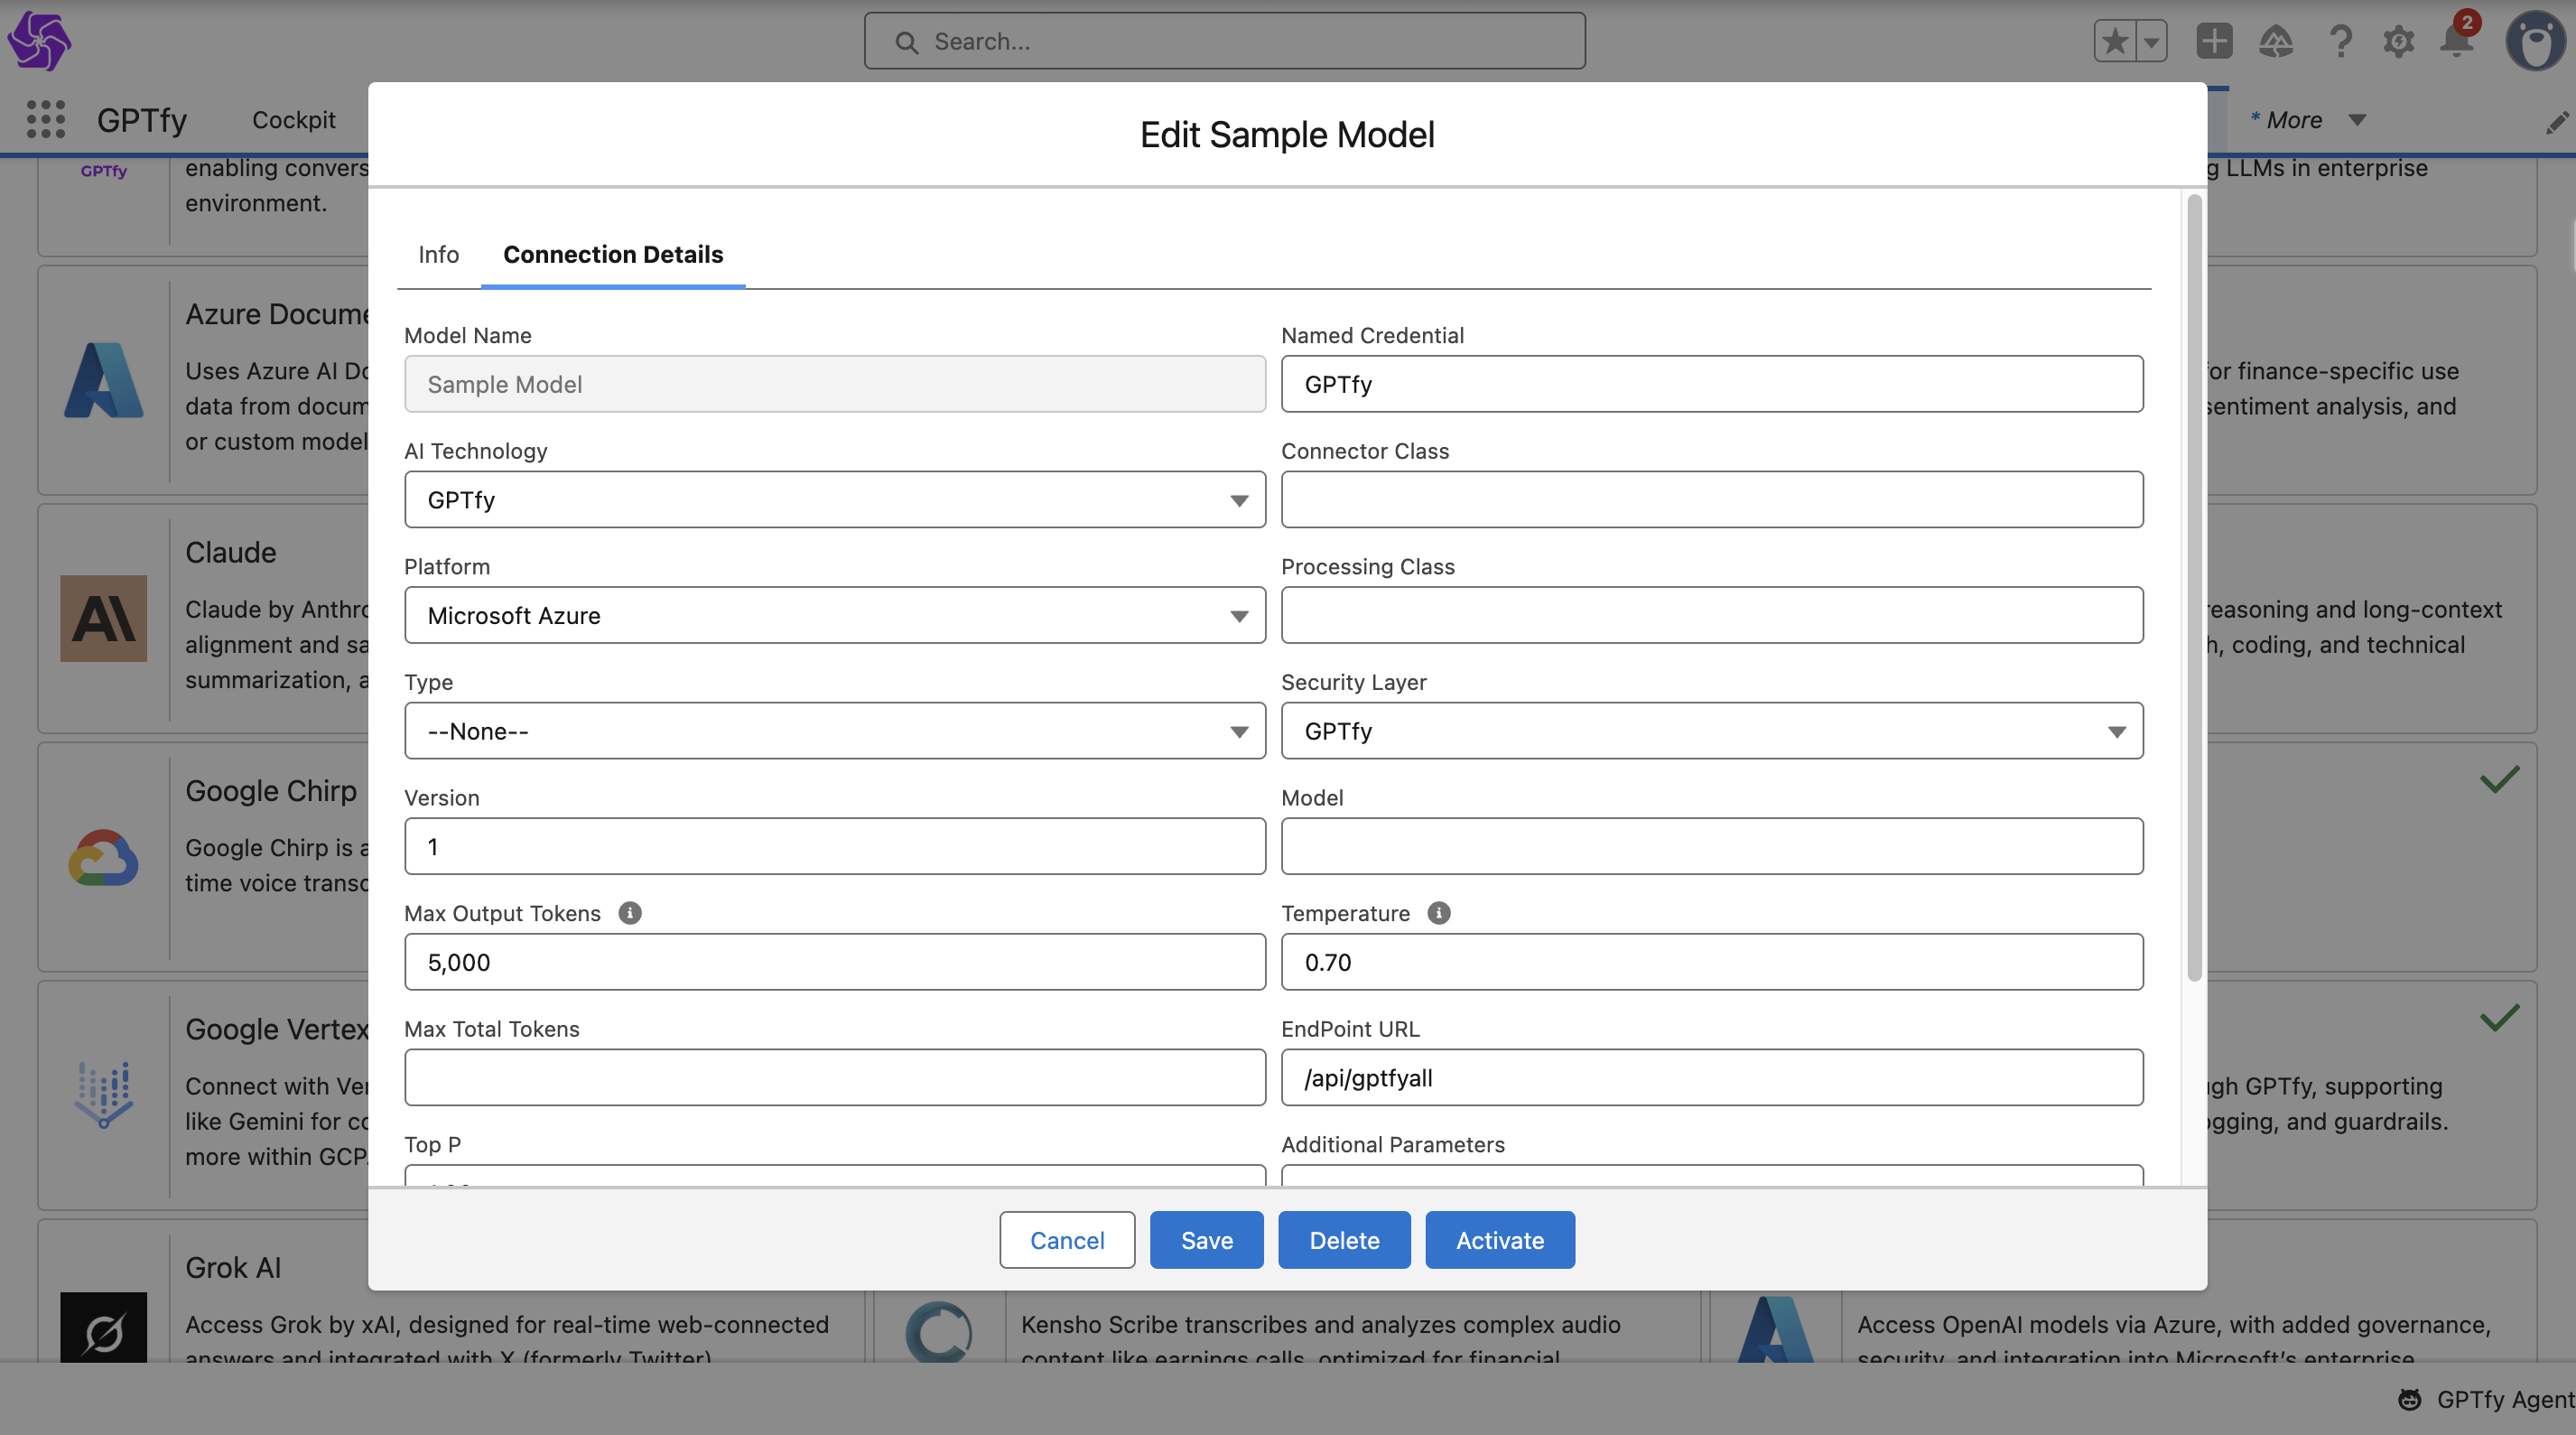
Click Save after entering the details.
Step 5: Save and Activate the Model
After saving:
- Open the model tile again.
- Click Activate.
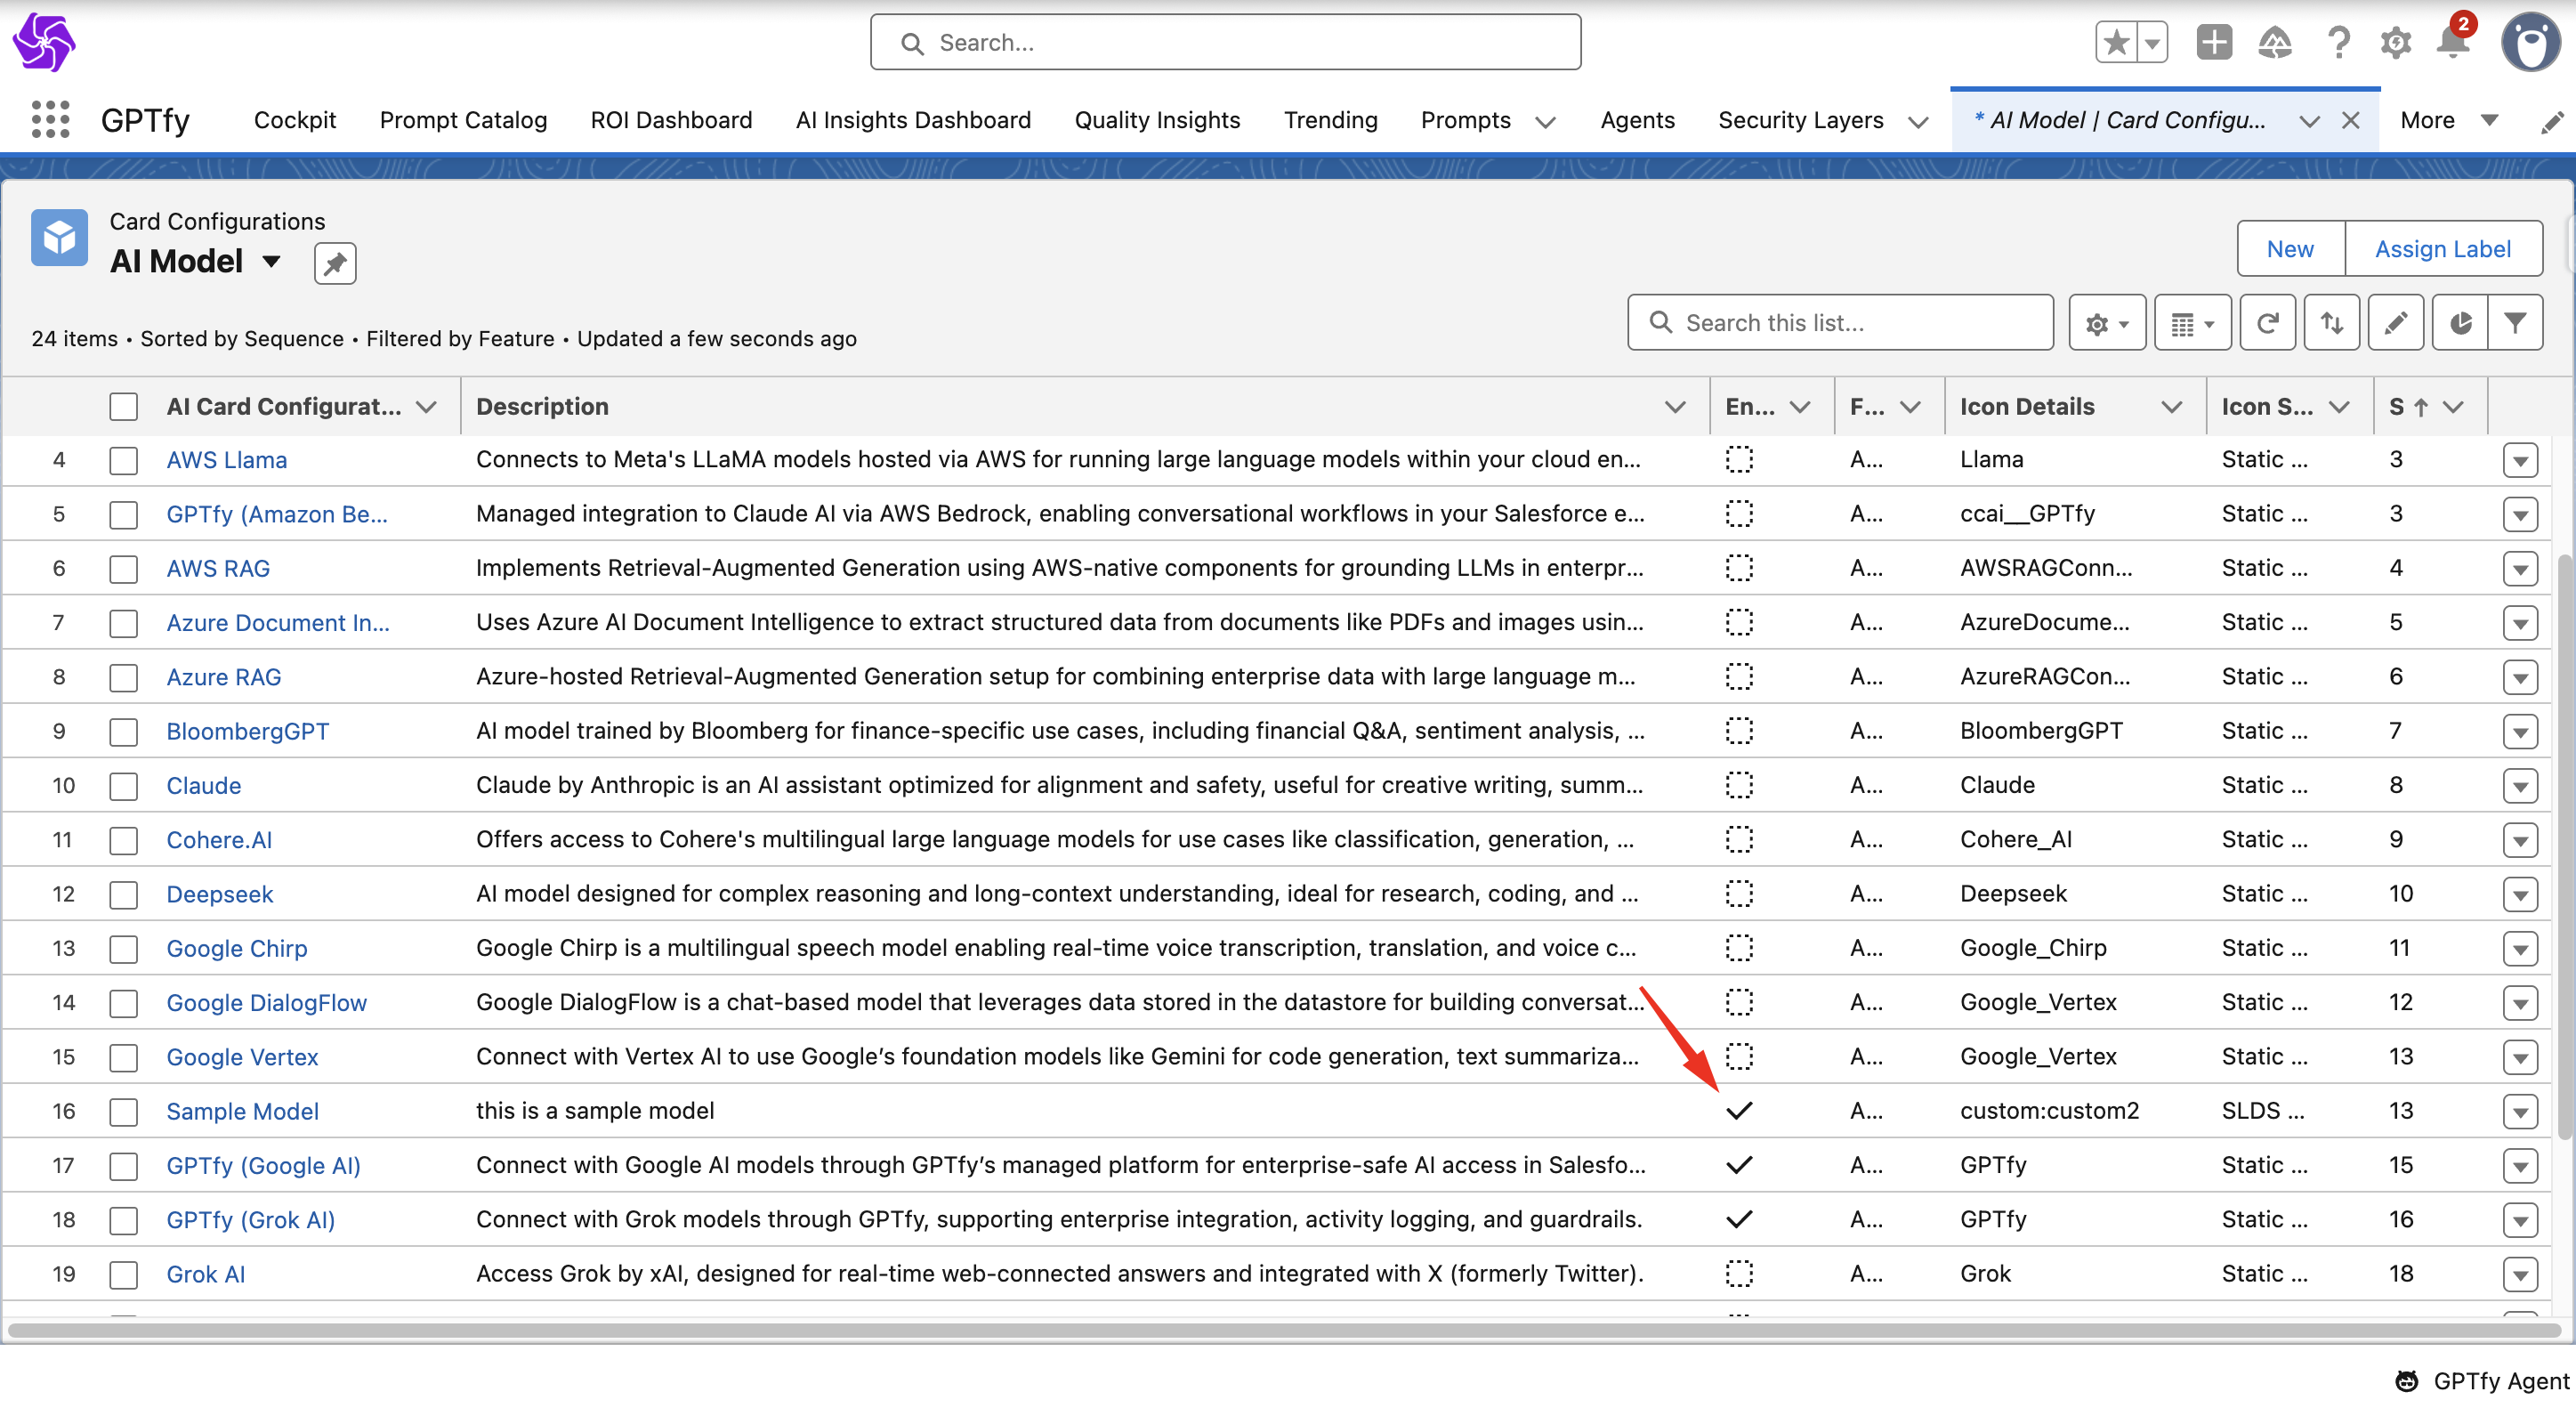
The system will validate your configuration. Once successful:
- The model will be marked as enabled in GPTfy Card Configurations.
- A green tick will appear on the model tile to confirm activation.
By following these steps, you can successfully create an AI Model in GPTfy.
Sample Connector Class
Note: The sample code here is provided ‘as-is’ for reference and informational purposes only. You can refer to this to understand how the model can be authenticated using a connector class.
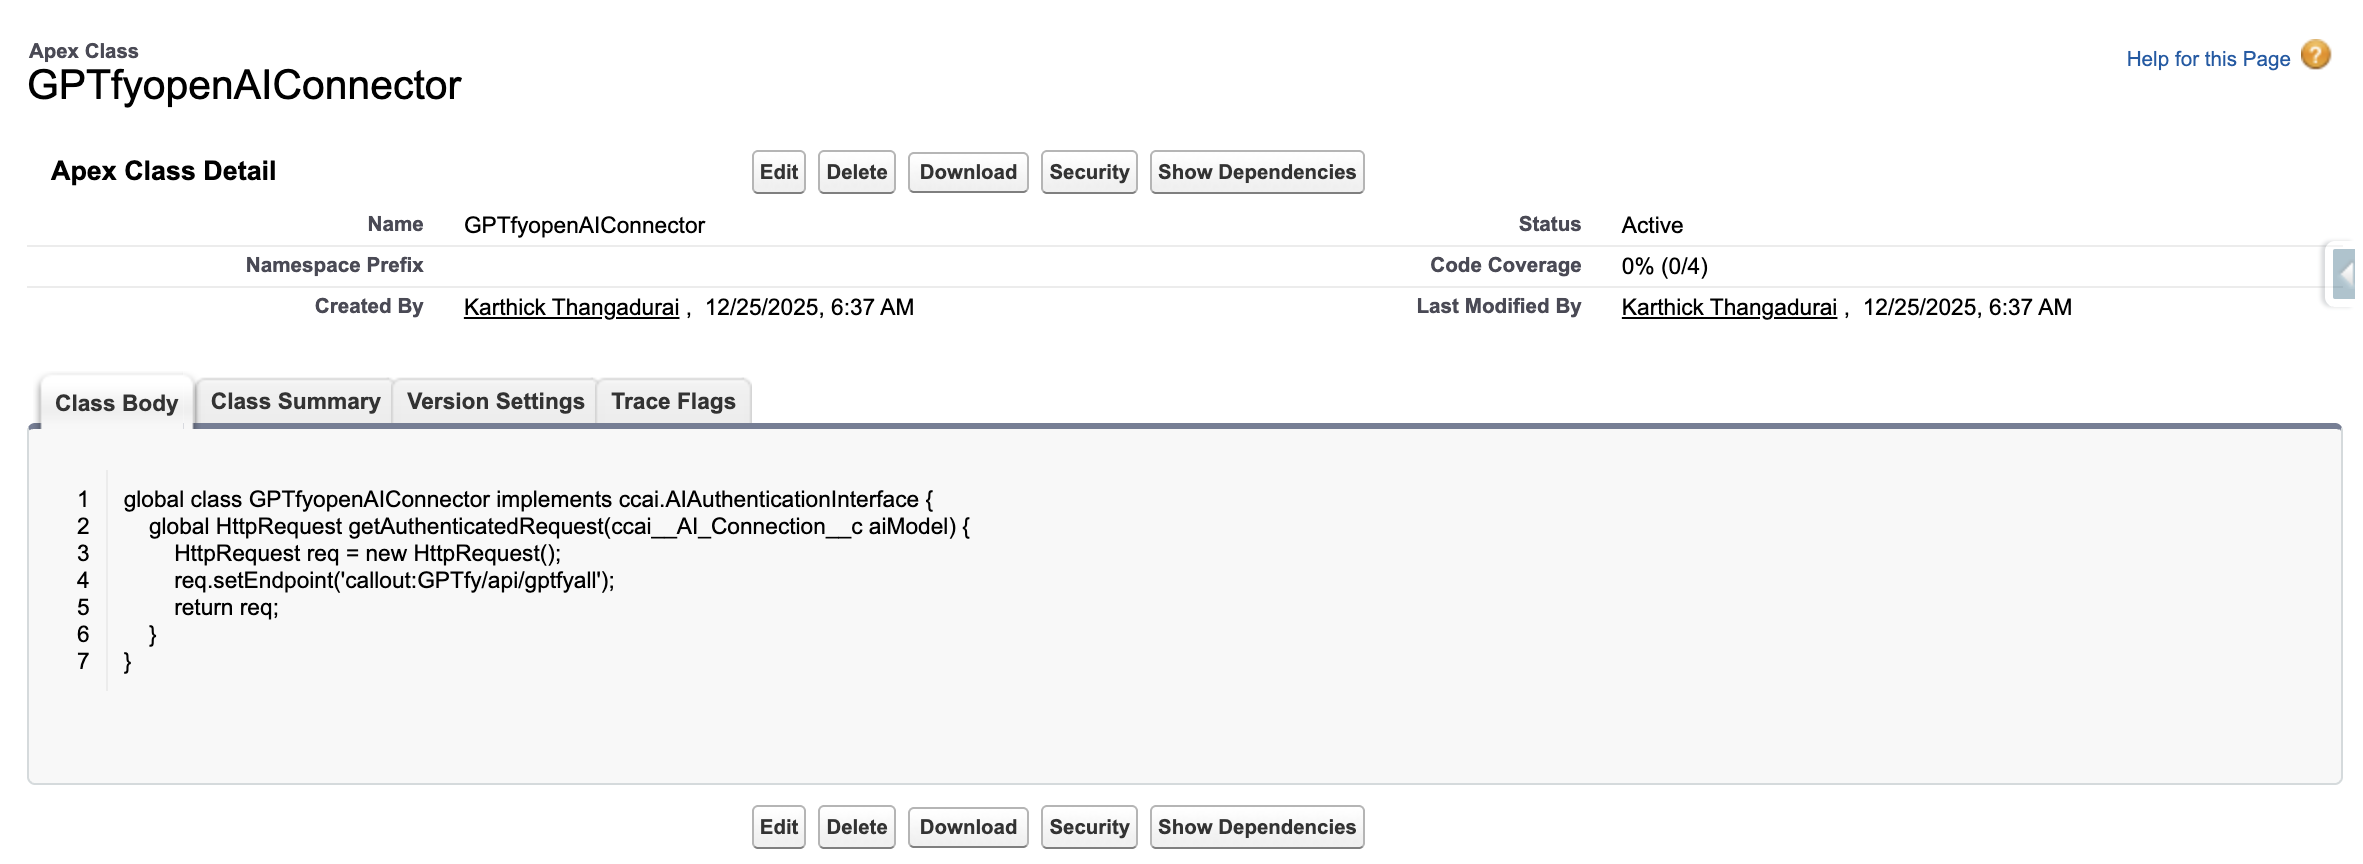
global class GPTfyopenAIConnector implements ccai.AIAuthenticationInterface {
    global HttpRequest getAuthenticatedRequest(ccai__AI_Connection__c aiModel) {
        HttpRequest req = new HttpRequest();
        req.setEndpoint('callout:GPTfy/api/gptfyall');
        return req;
    }
}
Sample Processing Class
Note: The sample code here is provided ‘as-is’ for reference and informational purposes only. You can refer to this to understand how the model can be authenticated using the processing class.
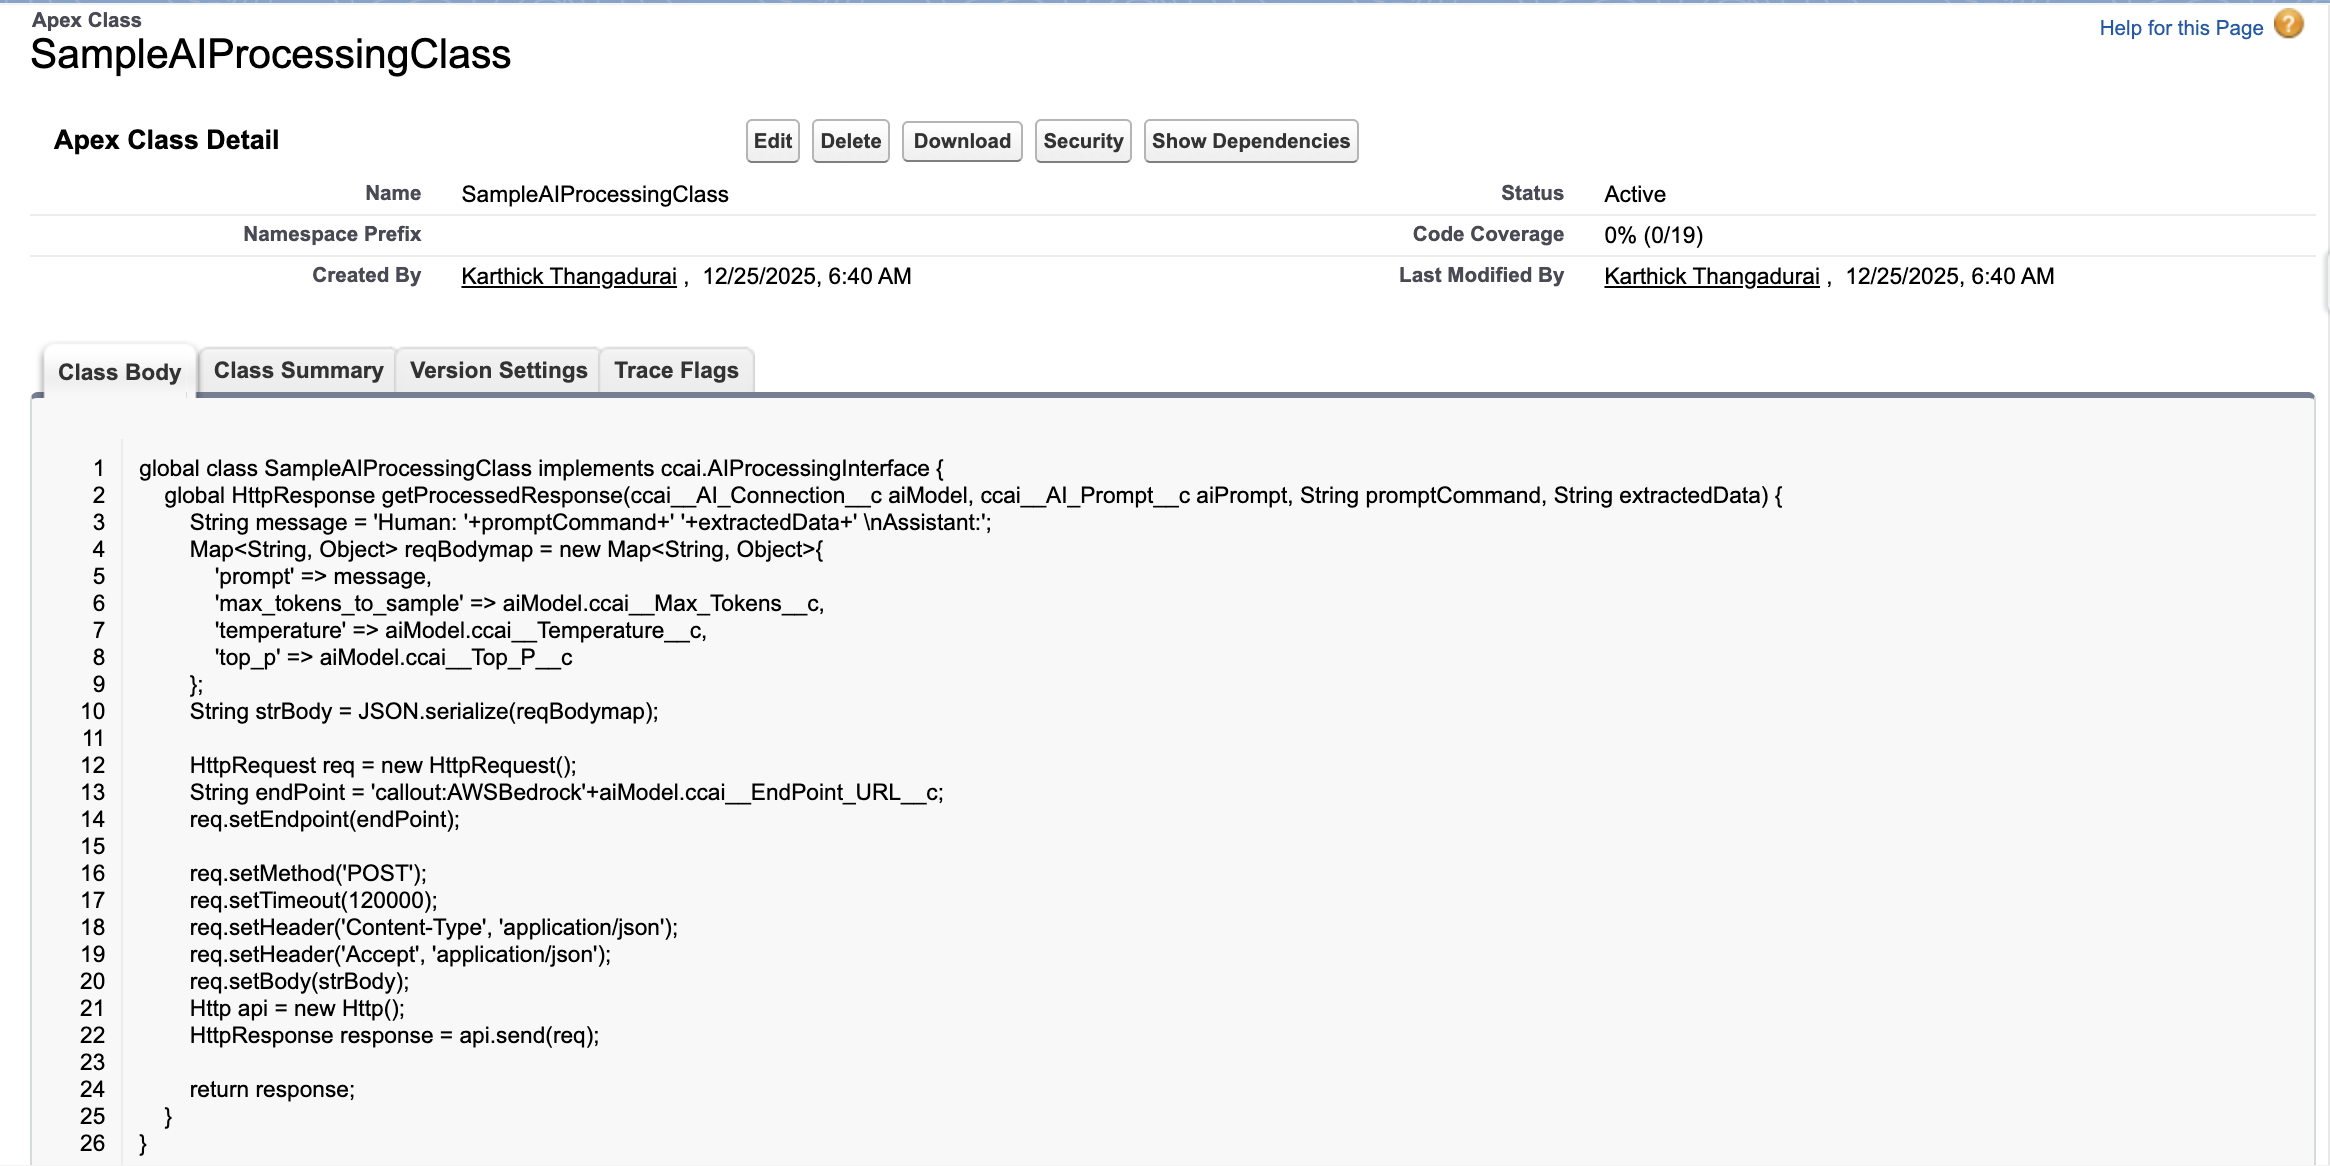
global class SampleAIProcessingClass implements ccai.AIProcessingInterface {
    global HttpResponse getProcessedResponse(ccai__AI_Connection__c aiModel, ccai__AI_Prompt__c aiPrompt, String promptCommand, String extractedData) {
        String message = 'Human: '+promptCommand+' '+extractedData+' \nAssistant:';
        Map<String, Object> reqBodymap = new Map<String, Object>{
            'prompt' => message,
            'max_tokens_to_sample' => aiModel.ccai__Max_Tokens__c,
            'temperature' => aiModel.ccai__Temperature__c,
            'top_p' => aiModel.ccai__Top_P__c
        };
        String strBody = JSON.serialize(reqBodymap);

        HttpRequest req = new HttpRequest();
        String endPoint = 'callout:AWSBedrock'+aiModel.ccai__EndPoint_URL__c;
        req.setEndpoint(endPoint);

        req.setMethod('POST');
        req.setTimeout(120000);
        req.setHeader('Content-Type', 'application/json');
        req.setHeader('Accept', 'application/json');
        req.setBody(strBody);
        Http api = new Http();
        HttpResponse response = api.send(req);

        return response;
    }
}