Connect External API Data Source (Explorium) to GPTfy
Bring richer insights to your AI workflows by connecting external APIs like Explorium to GPTfy. This guide walks you through how to set up and use a custom API Data Source that enriches your Salesforce records with firmographic data based on the website field—and makes it available for AI processing in GPTfy.
Why Use an API Data Source?
Your Salesforce data only tells part of the story. With GPTfy’s API Data Source capability, you can:
- Enrich records with external firmographic or demographic data
- Customize which fields are sent and received
- Feed combined insights into GPTfy prompts and workflows
- Support use cases like whitespace analysis, summarization, and insight generation
What You’ll Need
Before getting started, ensure you have:
- Pro or Enterprise license is required
- An External Credential and Named Credential for the external API (e.g. Explorium)
- A Custom Apex Connector Class that implements
ccai.AIDataSourceInterface - A Salesforce Record (like an Account) that includes a Website field
- Access to the GPTfy Cockpit
High-Level Process Flow
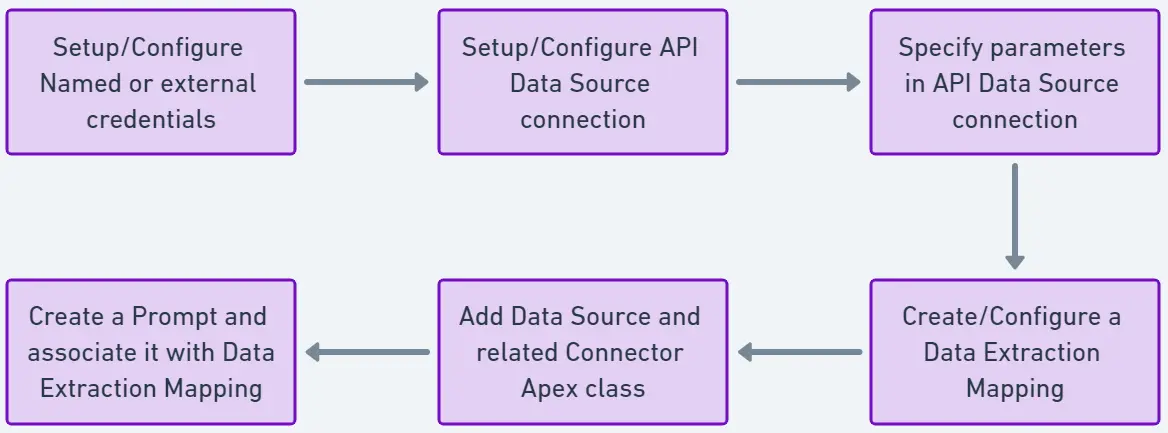
- Configure authentication using Named Credential
- Implement the connector class to call the API
- Activate the API Data Source in GPTfy
- Create context mapping for a Salesforce object (e.g. Account)
- Create a prompt that uses this data
- Test the integration on a sample record
Step-by-Step Guide (Using Explorium)
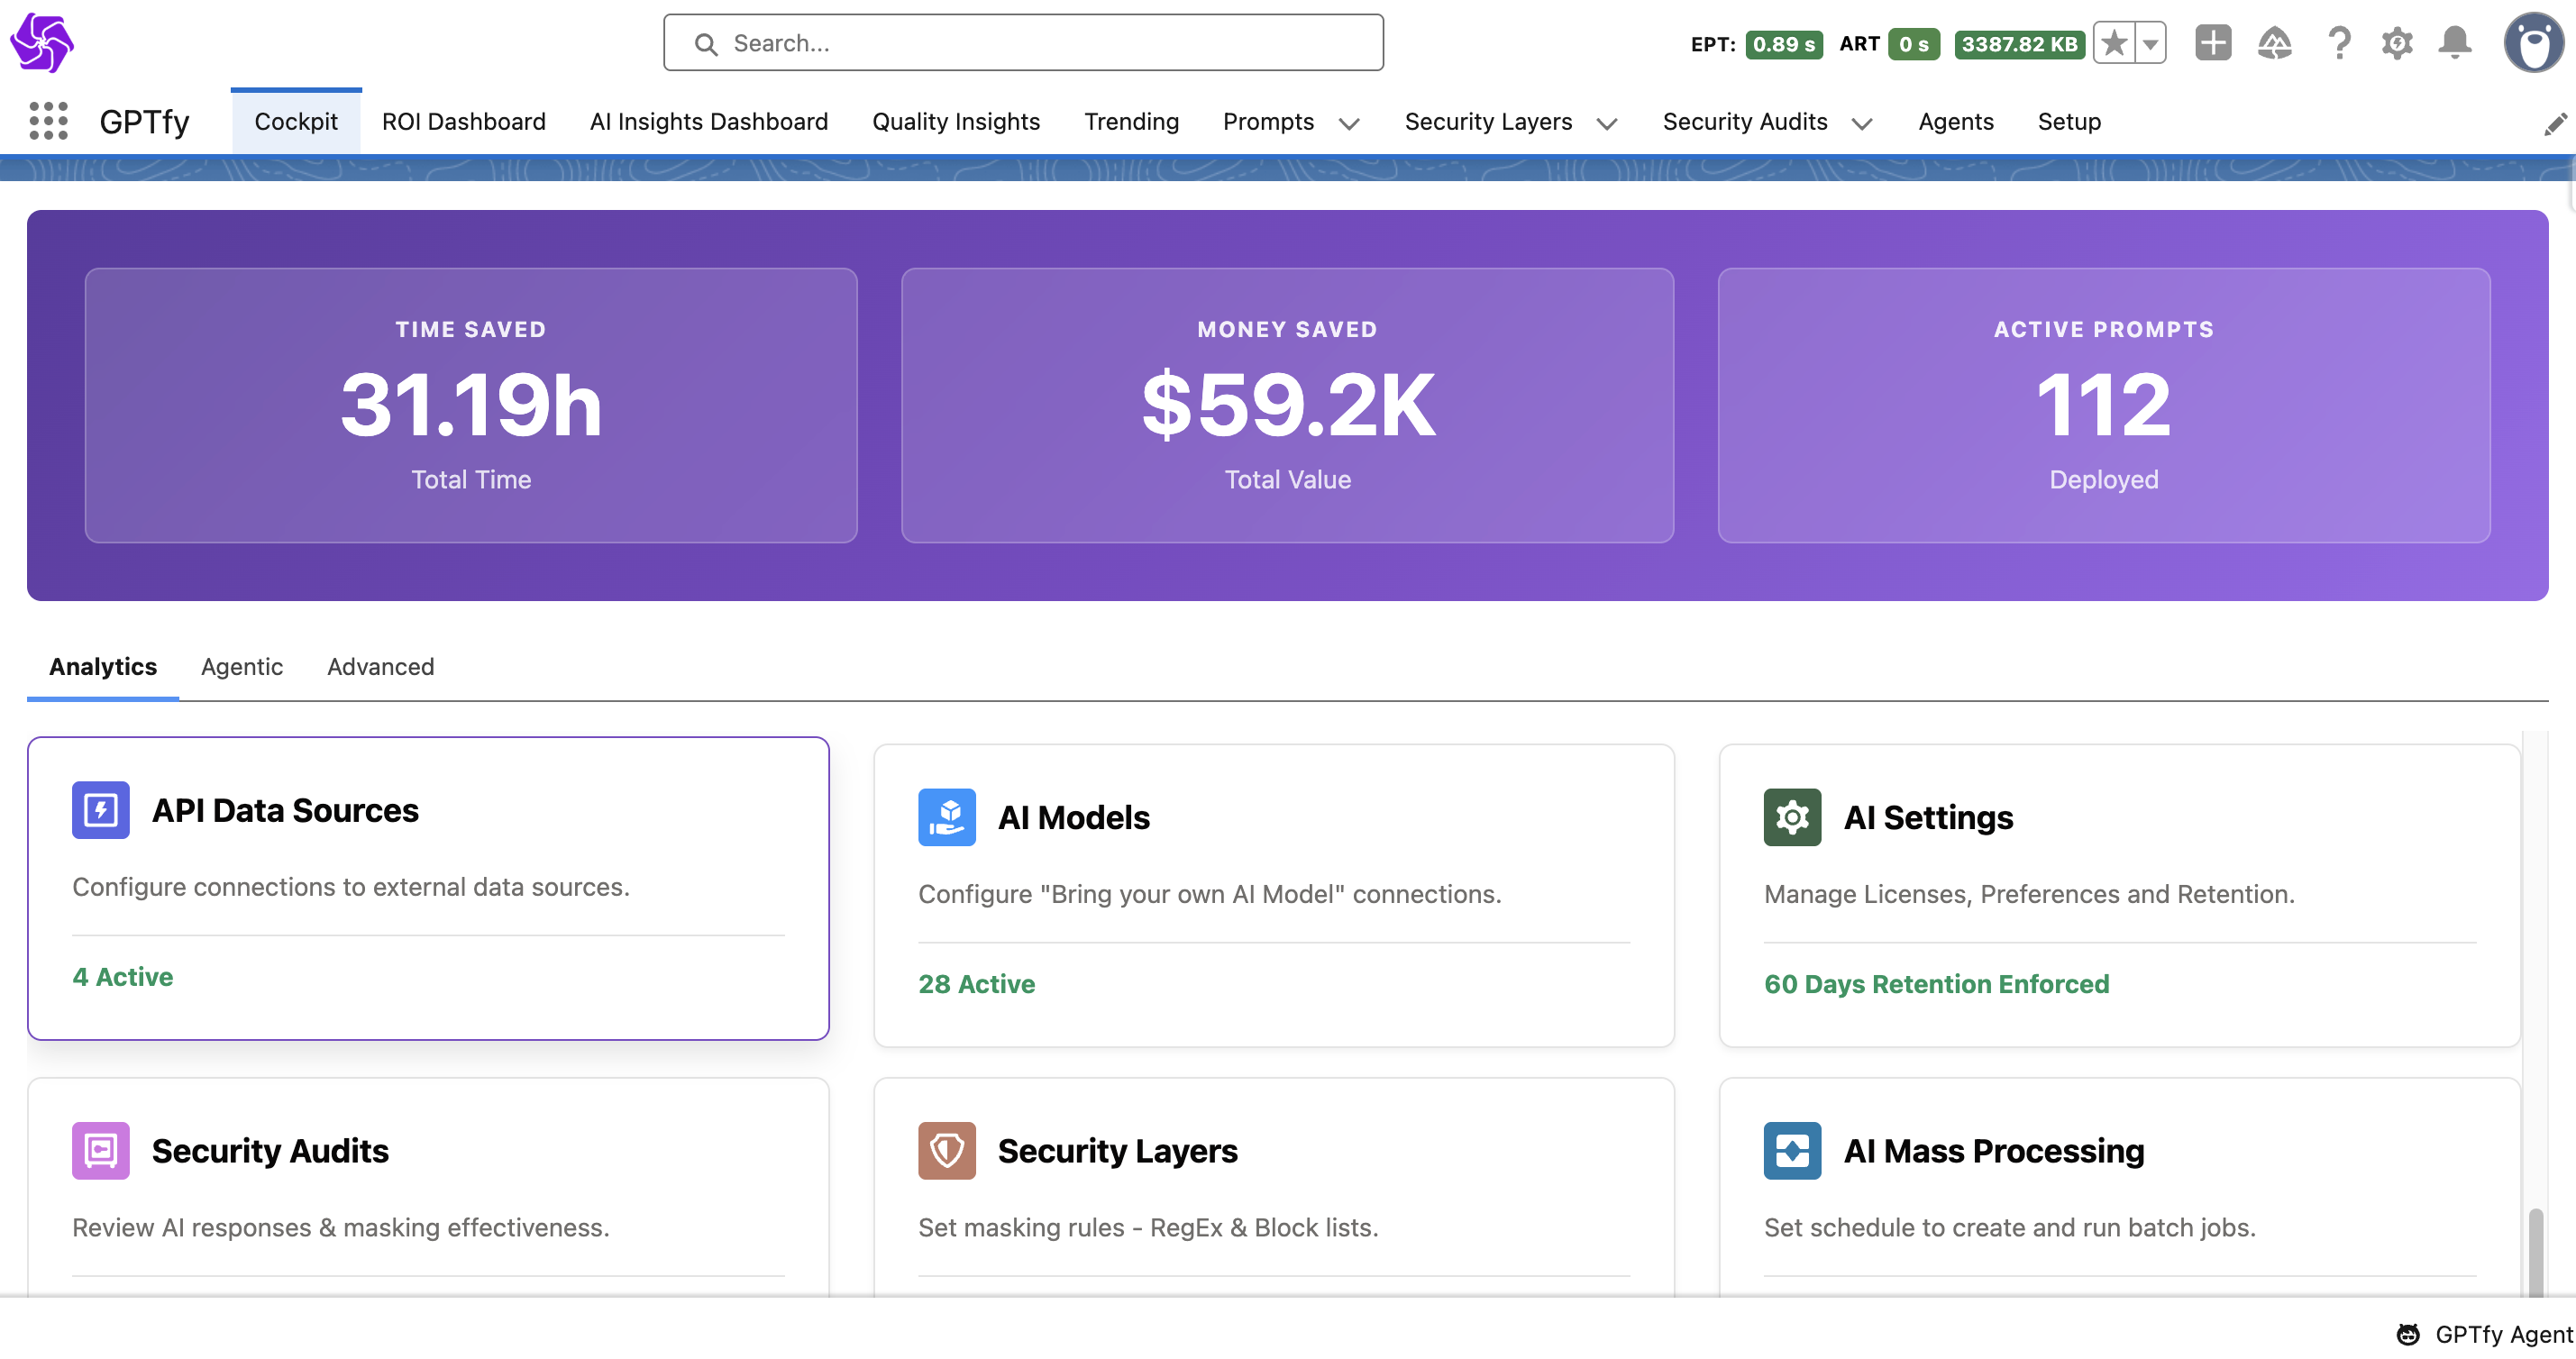
Step 1: Add a API Data Source Card
- Open your GPTfy Cockpit
- Navigate to
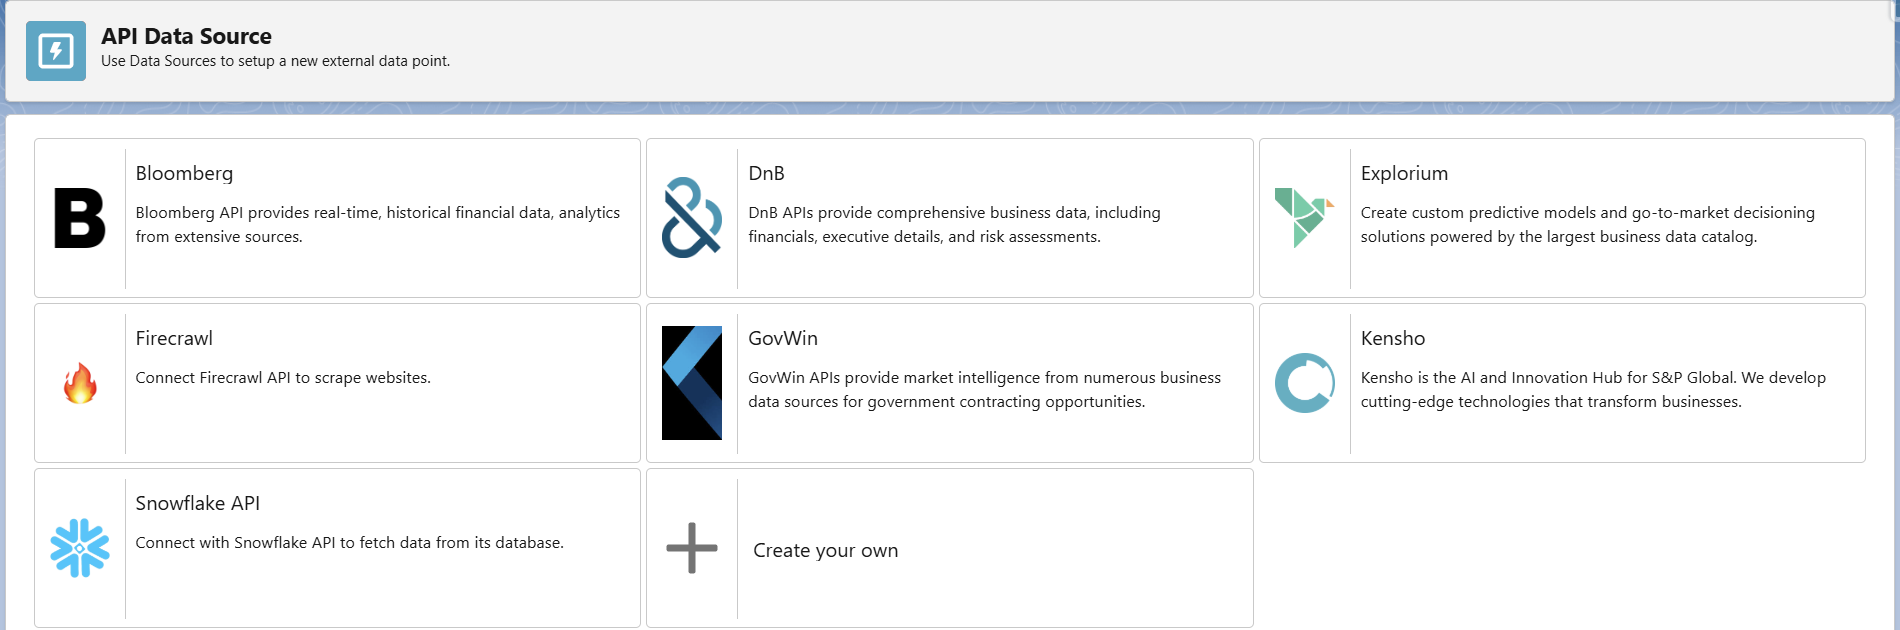
Advanced > API Data Source - Click to Create your own
- Set the name as Explorium
- Choose Explorium as the data source
- Note: To Add a new data source value navigate to Object Manager → Data Source Object → Source Field
- Specify your custom connector cslass name, such as
SampleDataSourceClass
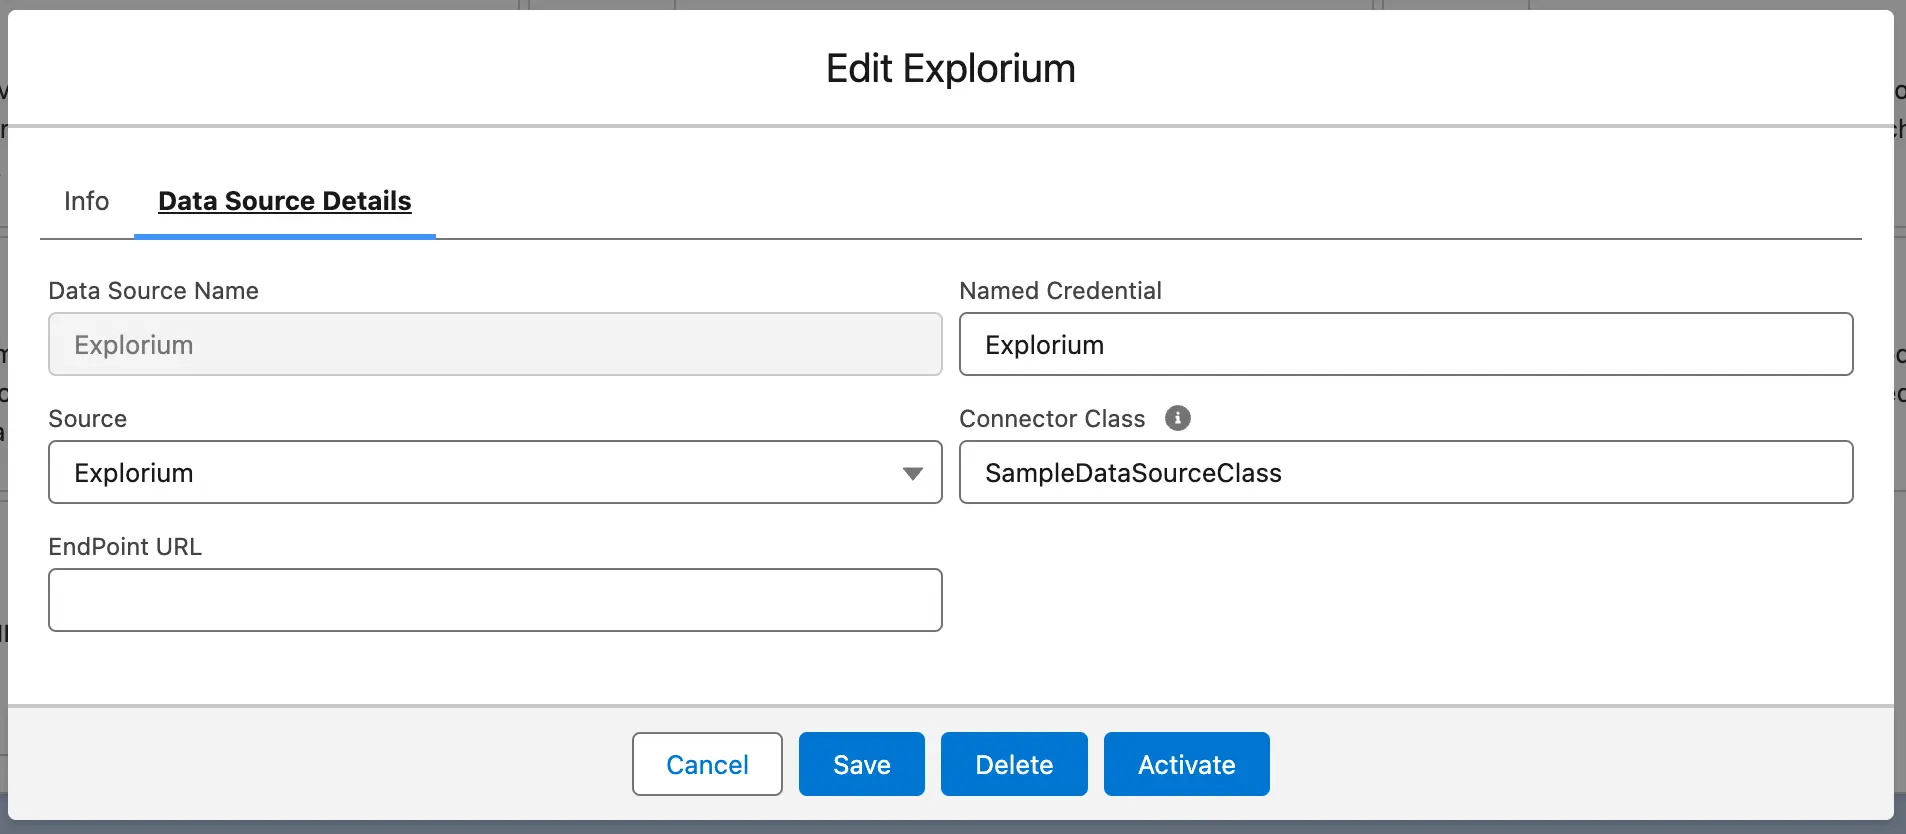
Step 2: Save and Validate
- Click Save
- Refresh the page to ensure your settings and connector class are properly registered
Step 3: Activate the Data Source
- Locate the data source you just added
- Click Activate to enable this connector
Step 4: Set Up Data Context Mapping
- Go to Data Context Mapping
- Choose your target object (e.g.,
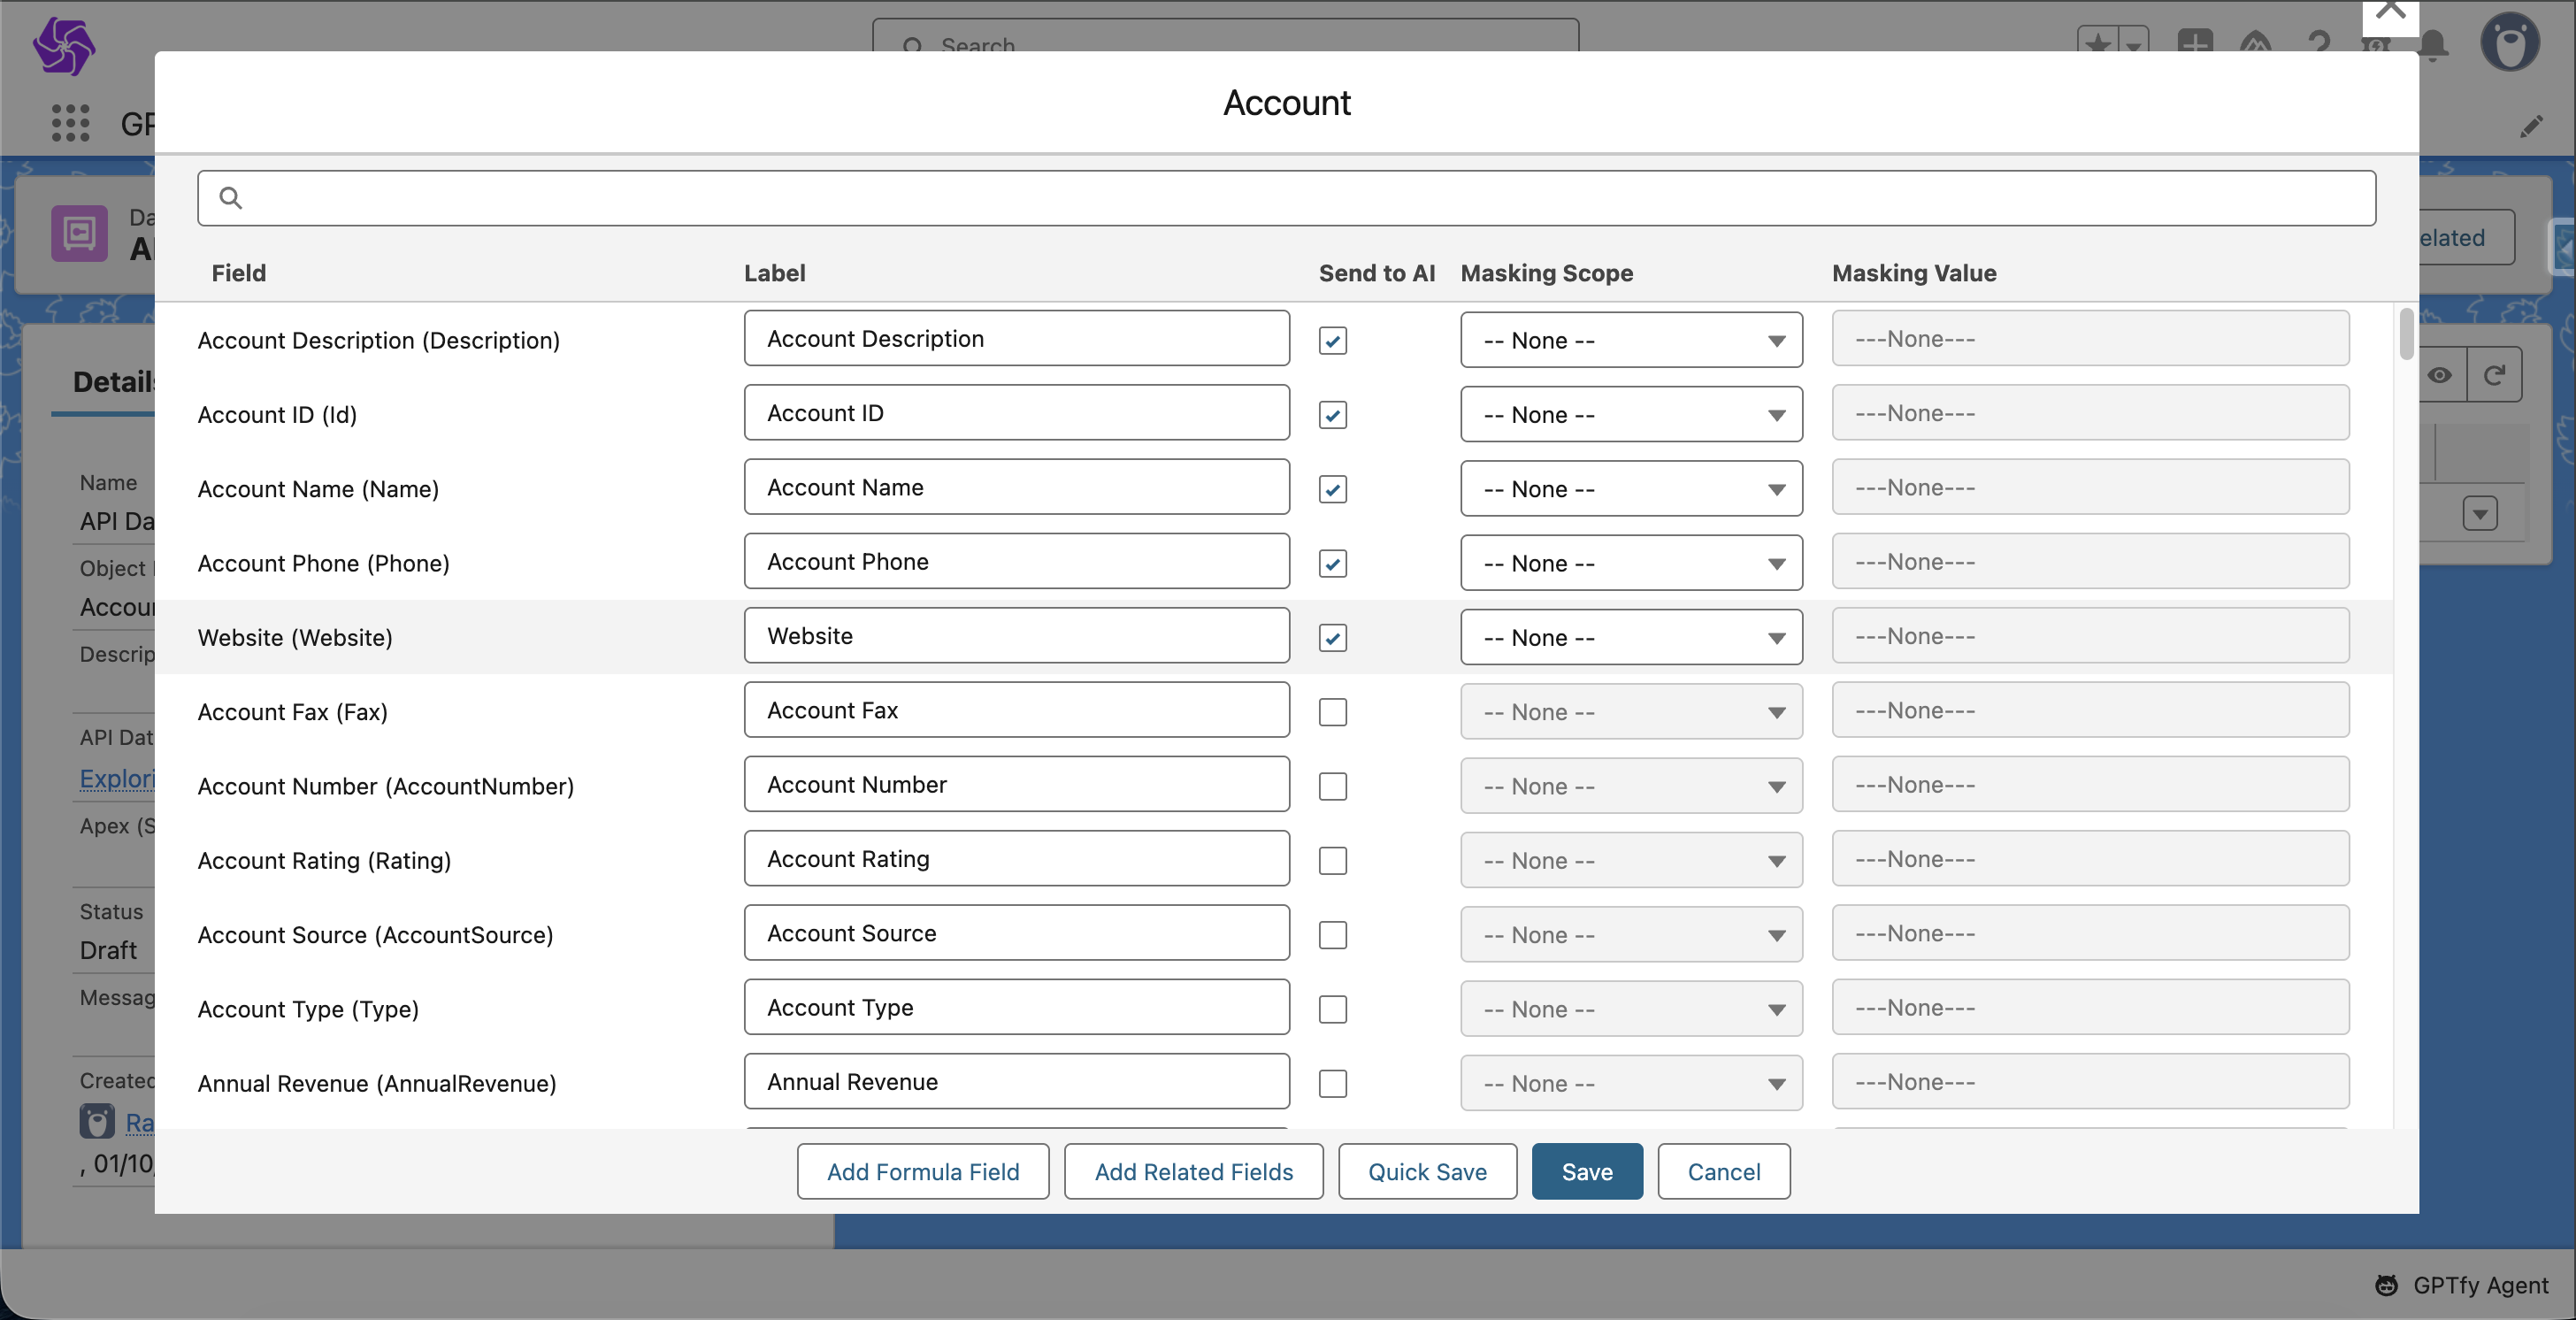
Account) - Add a mapping for the
Websitefield - Select Explorium as the connected API Data Source
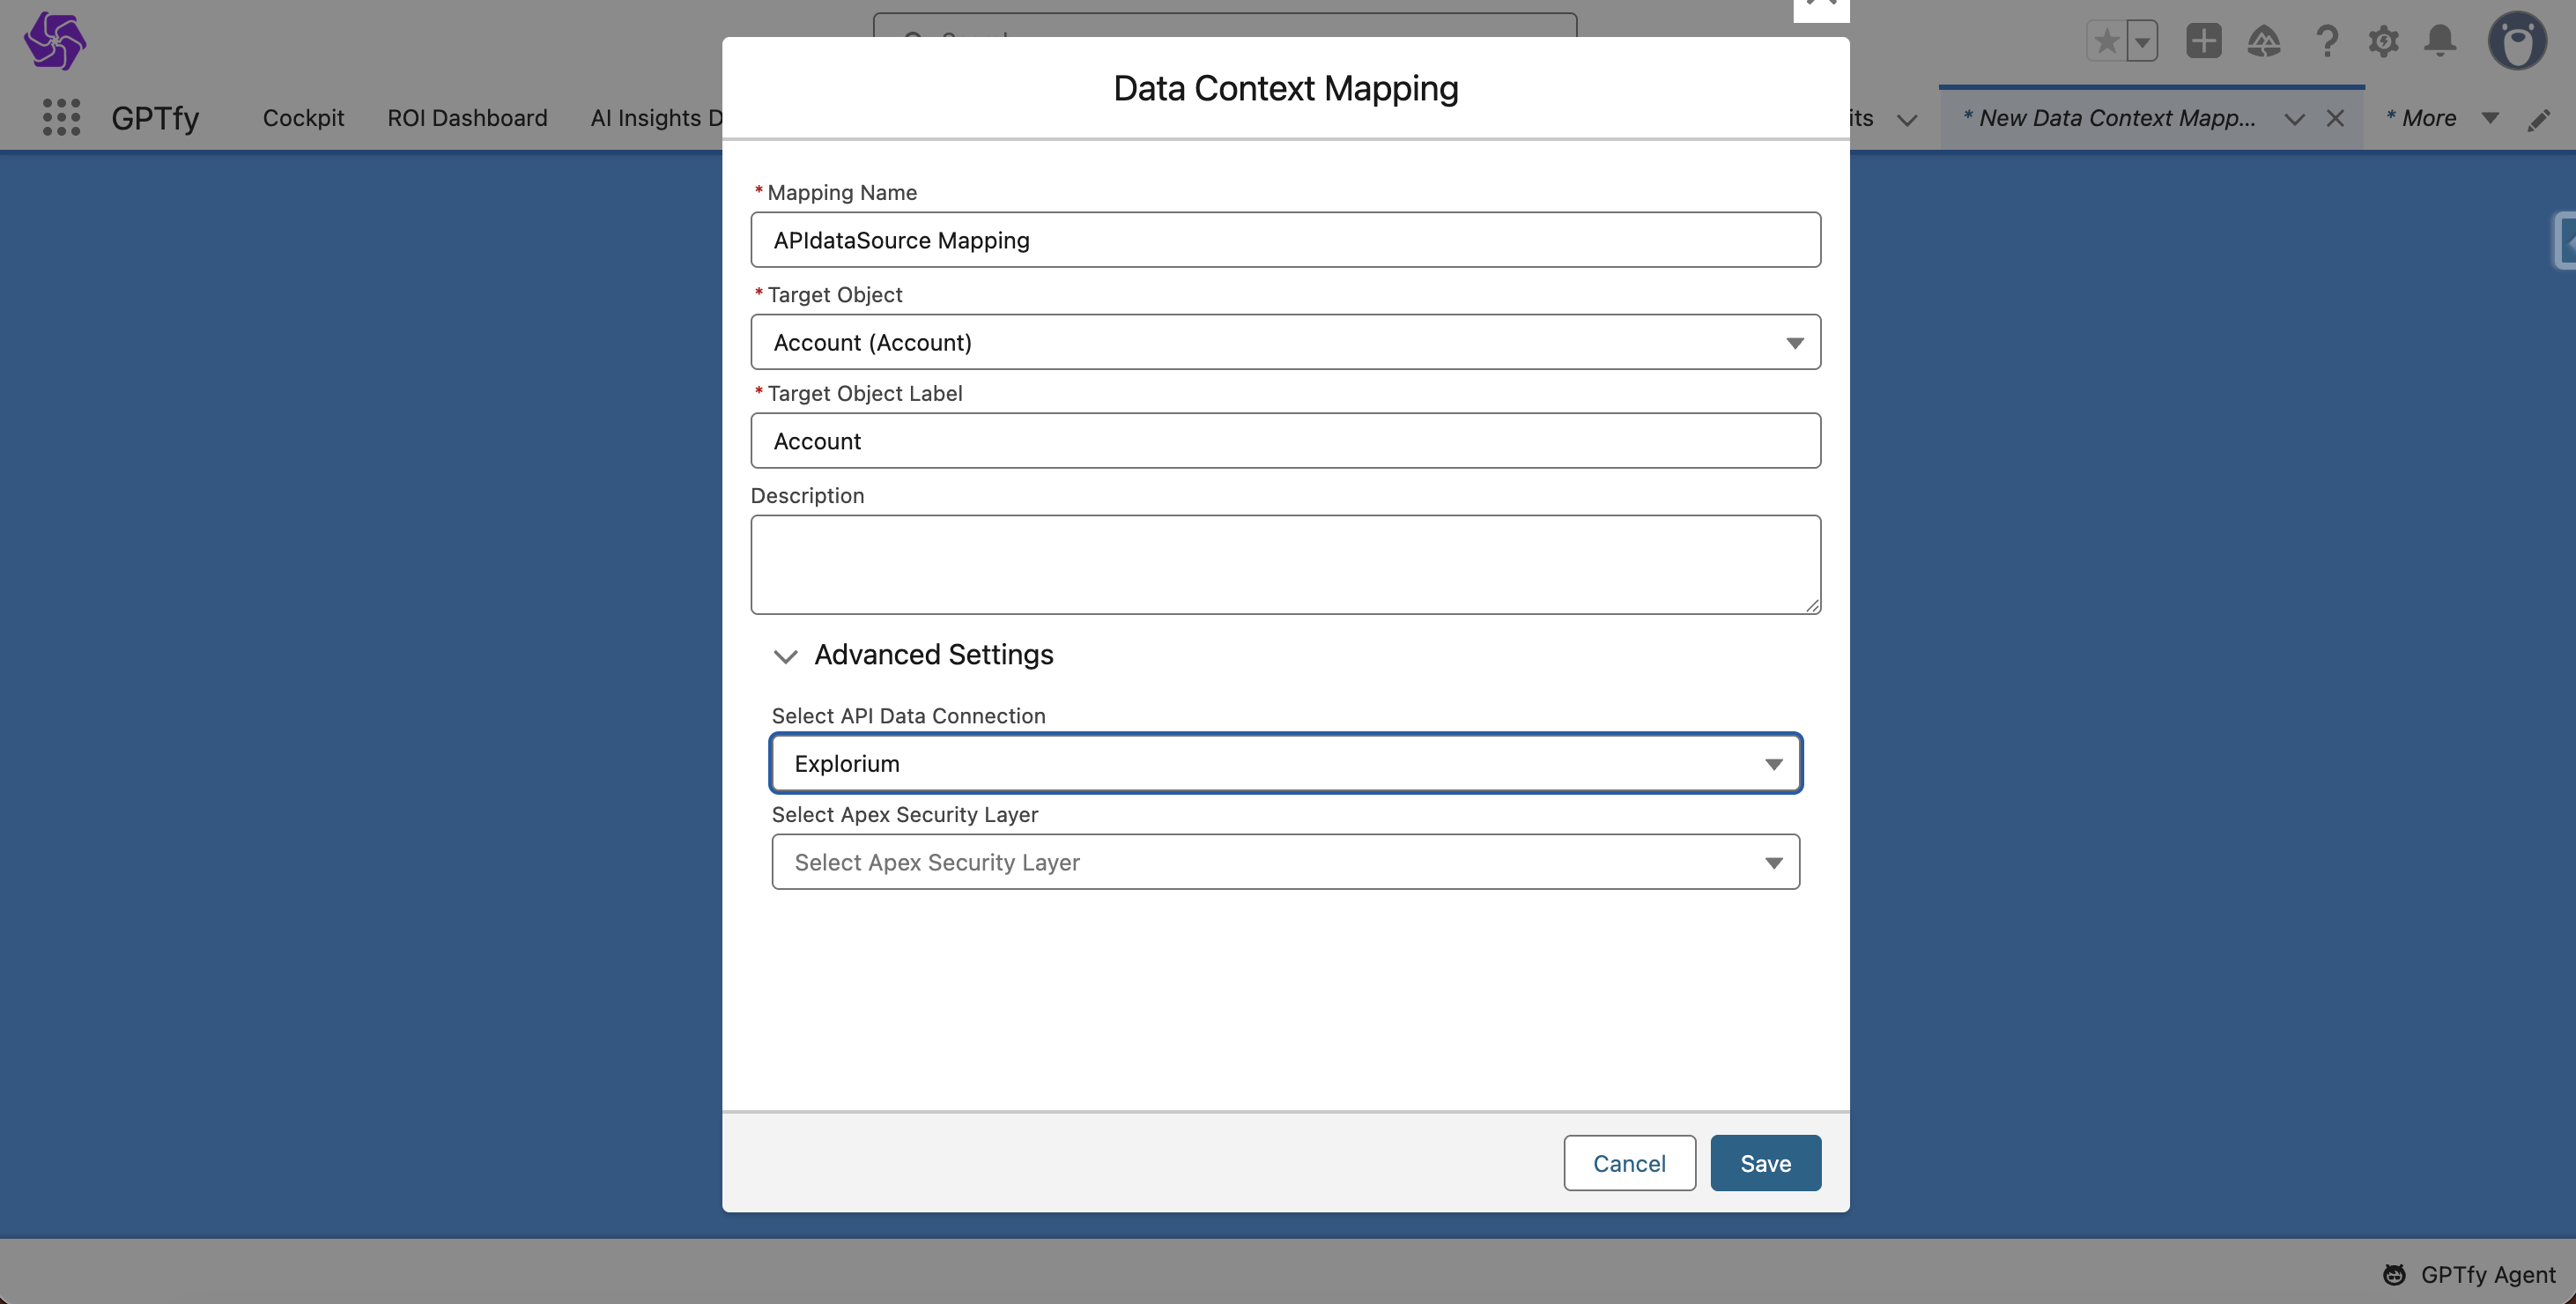
This allows GPTfy to extract the website from the record and use it in your connector class.
Step 5: Create Your Prompt
Now, build a prompt that leverages the enriched data:
- Navigate to Prompt Configuration
- Create a new prompt that references the
Accountobject
When the prompt runs, GPTfy will:
- Fetch the website
- Use Explorium to enrich the data
- Pass the enriched data and prompt to the AI model
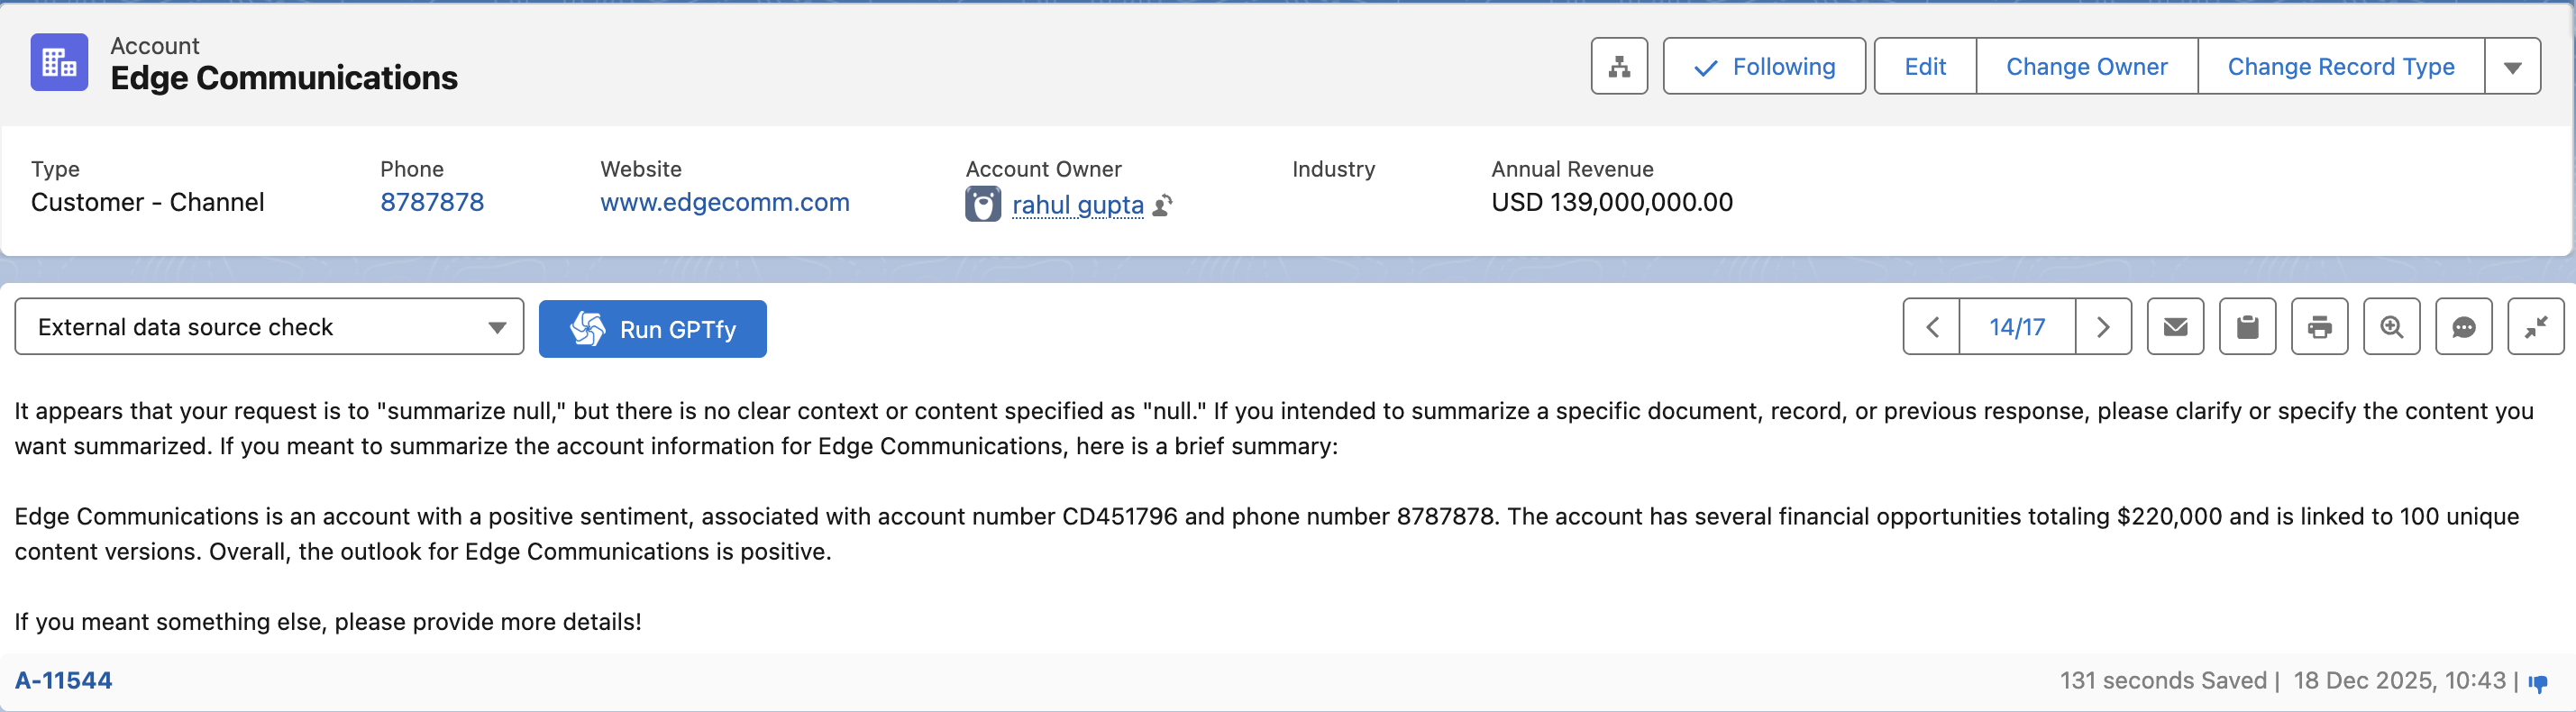
Step 6: Test It on a Record
- Open an
Accountrecord - Add a valid business website (e.g.,
www.nyiax.com) - Run your configured GPTfy prompt
GPTfy fetches enrichment from Explorium and returns AI-driven insights.
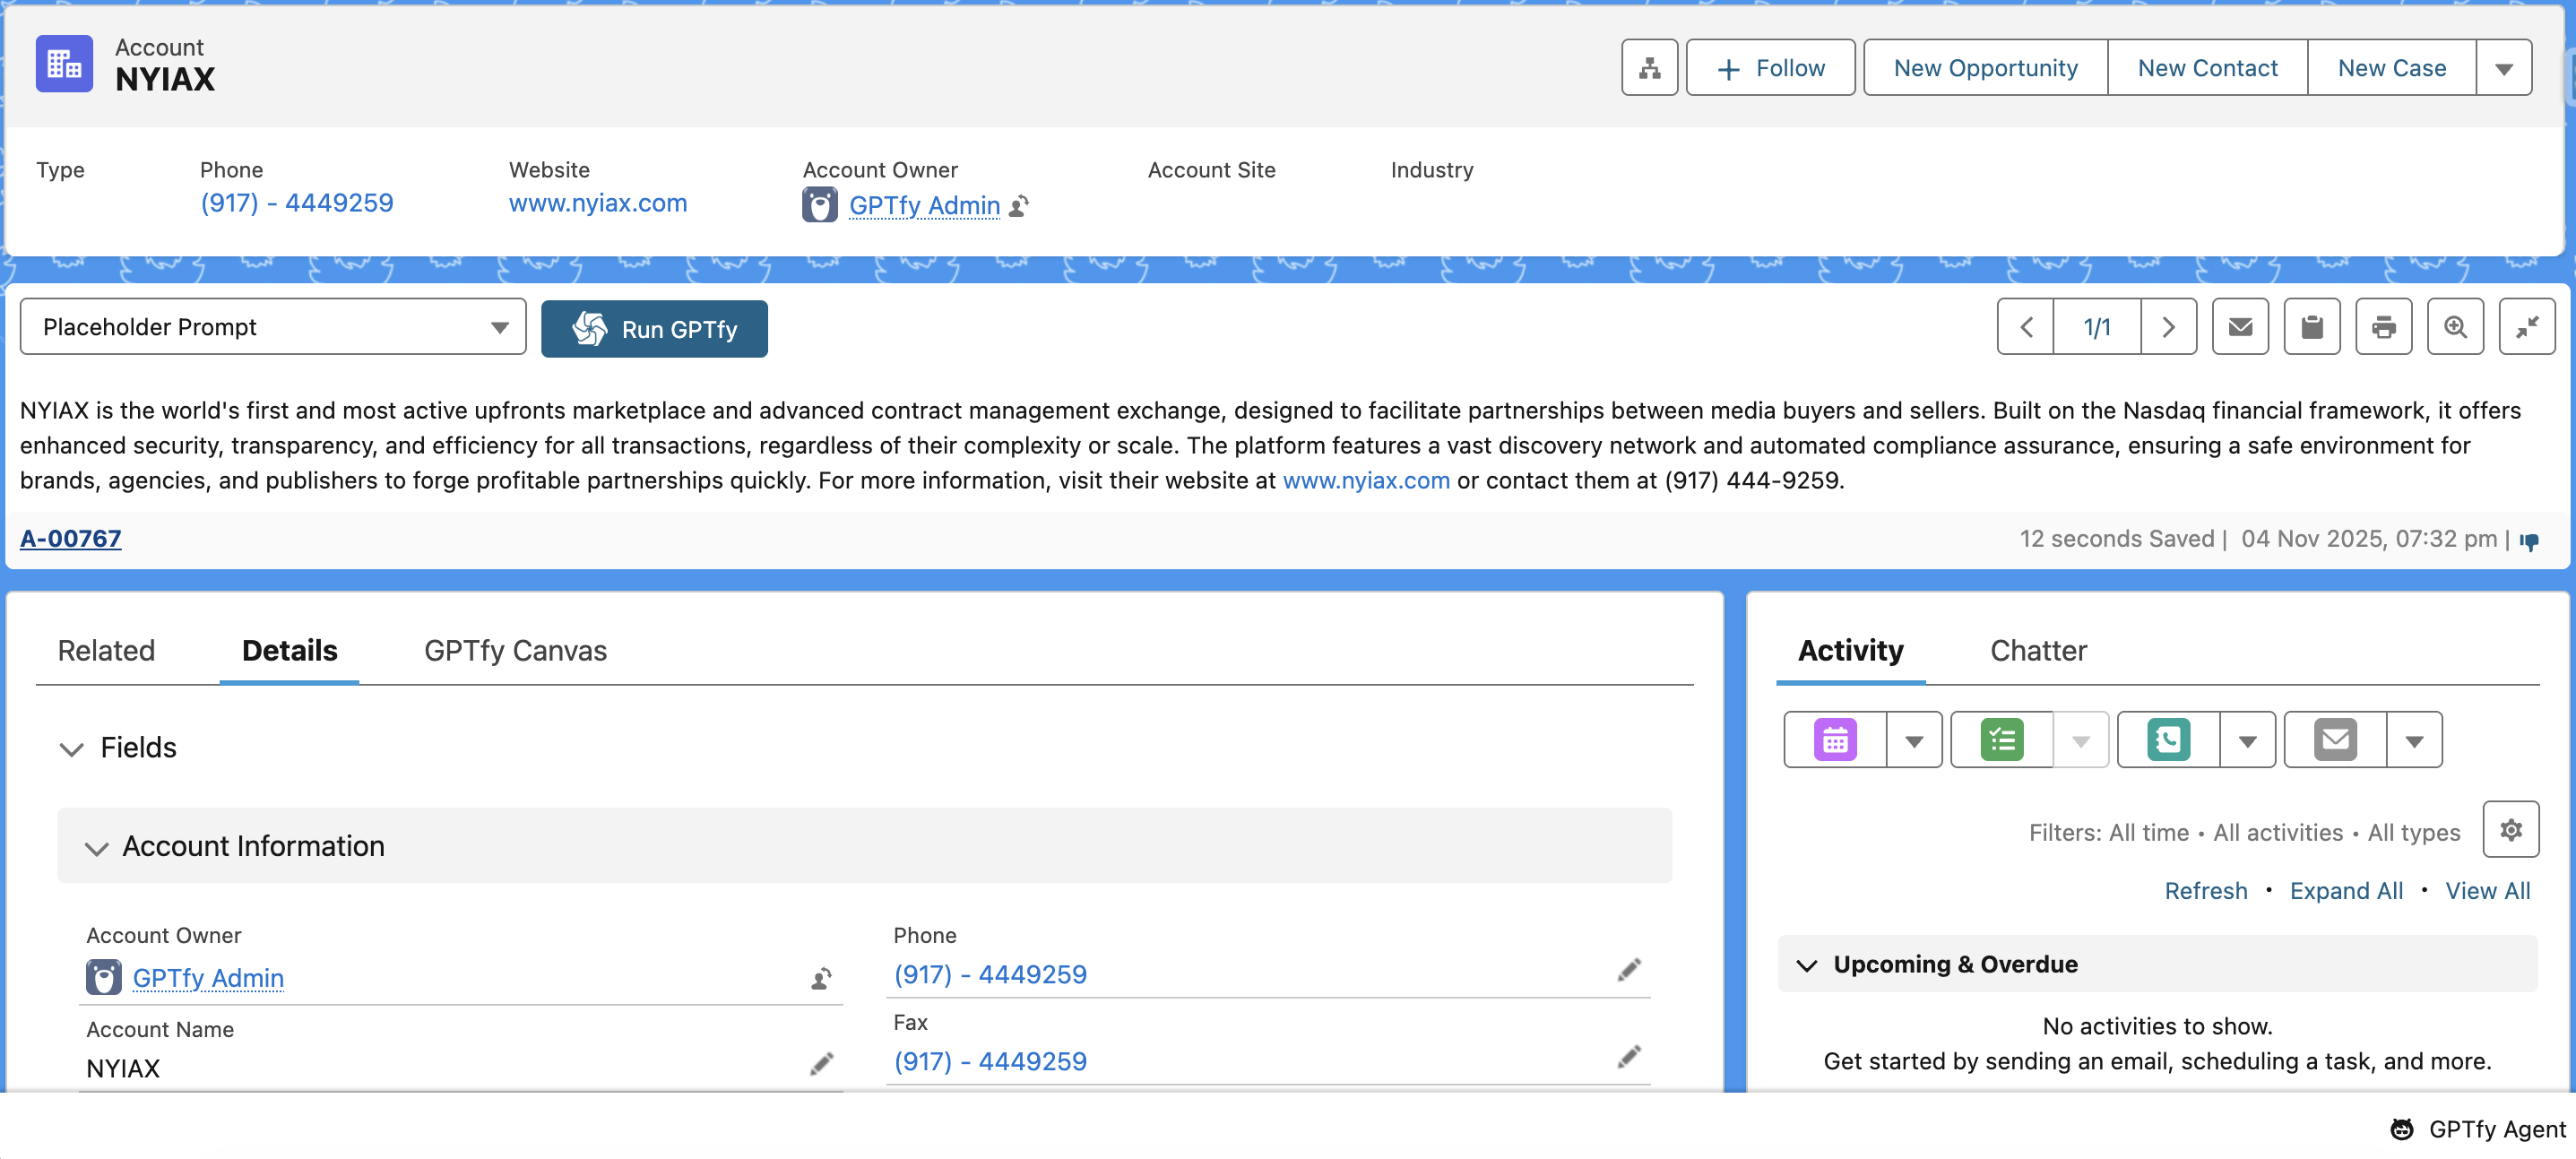
Note: Use a real, verified company website to get meaningful results from Explorium.
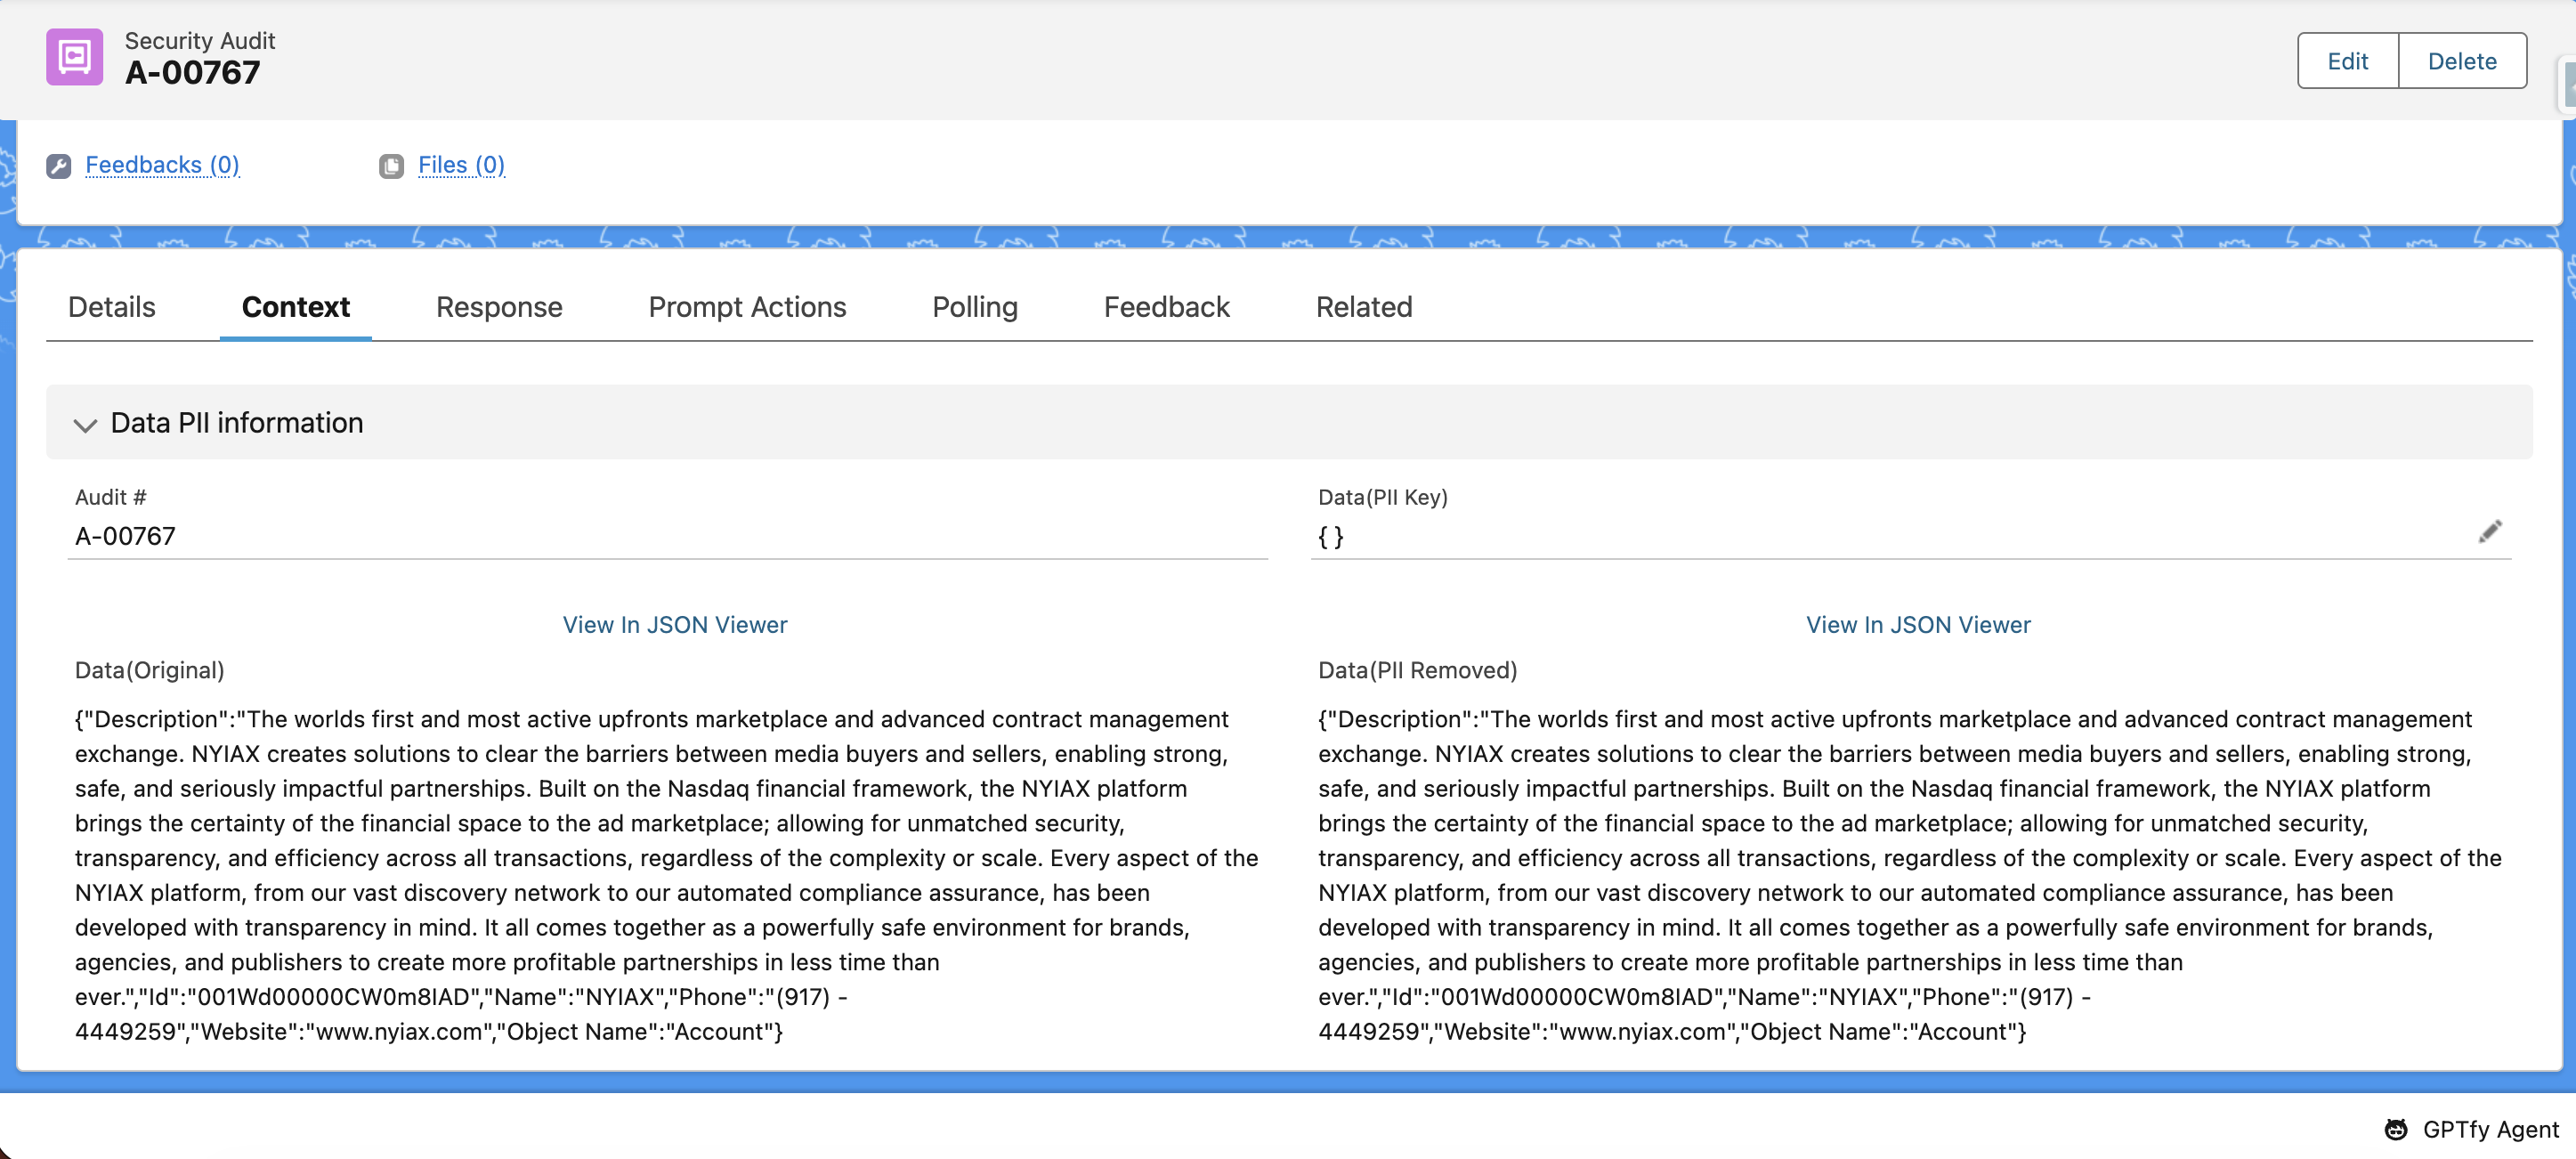
What’s Happening Behind the Scenes
- You run a prompt on an Account
- GPTfy extracts the website field
- Your custom connector sends it to Explorium
- Explorium returns firmographic or business info
- GPTfy merges that data with Salesforce data
- AI uses the combined dataset to answer your prompt
Use Cases for Integrating External API Data Sources
- Whitespace analysis
- Summary Generation
- Intelligent account research
- Triggering automation based on returned data
Sample Connector Class
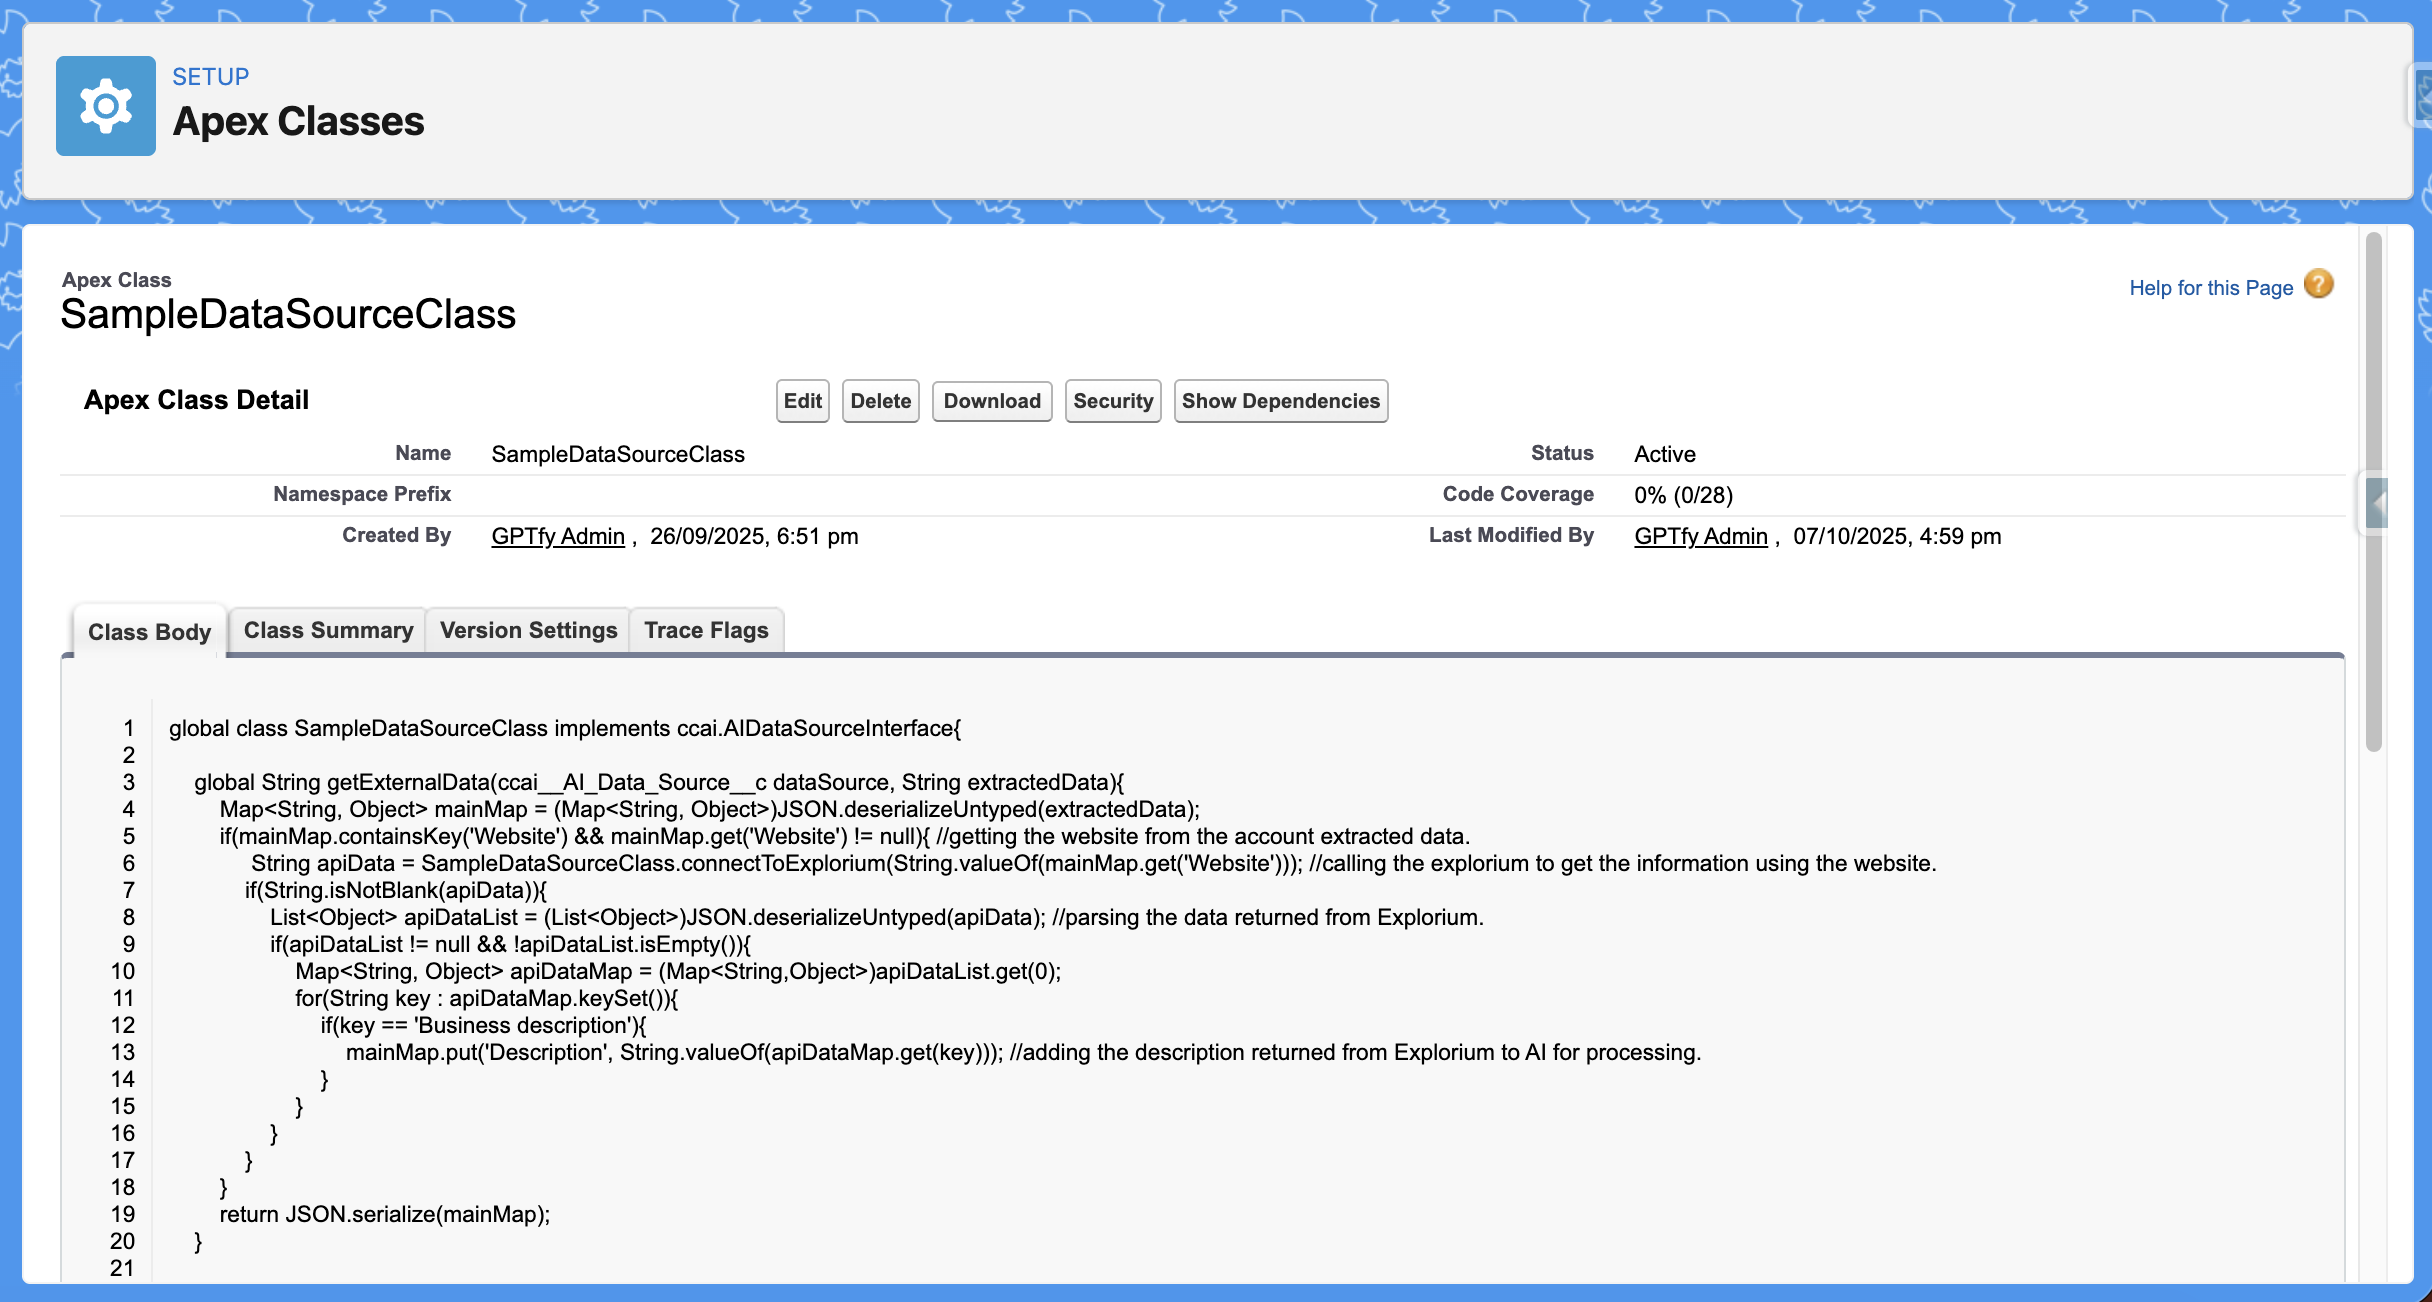
Note: The sample code here is provided ‘as-is’ for reference and informational purposes only.
global class SampleDataSourceClass implements ccai.AIDataSourceInterface {
    public String getExternalData(ccai__AI_Data_Source__c dataSource, String extractedData) {
        Map<String, Object> mainMap = (Map<String, Object>)JSON.deserializeUntyped(extractedData);
        if(mainMap.containsKey('Website') && mainMap.get('Website') != null) {
            // getting the website from the account extracted data
            String apiData = SampleDataSourceClass.connectToExplorium(String.valueOf(mainMap.get('Website')), dataSource);
            // calling the explorium to get the information using the website
            if(String.isNotBlank(apiData)) {
                List<Object> apiDataList = (List<Object>)JSON.deserializeUntyped(apiData);
                // parsing the data returned from Explorium
                if(apiDataList != null && !apiDataList.isEmpty()) {
                    Map<String, Object> apiDataMap = (Map<String,Object>)apiDataList.get(0);
                    for(String key : apiDataMap.keySet()) {
                        mainMap.put(key, String.valueOf(apiDataMap.get(key)));
                        // adding the description returned from Explorium to AI for processing
                    }
                }
            }
        }
        return JSON.serialize(mainMap);
    }

    public static String connectToExplorium(String sourceUrl, ccai__AI_Data_Source__c dataSource) {
        HttpRequest request = new HttpRequest();
        request.setEndpoint('callout:' + dataSource.ccai__Named_Credential__c); // create a named credential for the external system you are calling
        request.setMethod('POST');
        request.setHeader('accept', 'application/json');
        request.setHeader('content-type', 'application/json');
        request.setTimeout(120000);
        List<requestBody> lstObj = new List<requestBody>();
        lstObj.add(new requestBody(sourceUrl)); // passing the website URL
        String body = JSON.serialize(lstObj);
        request.setBody(body);
        Http http = new Http();
        HttpResponse response = http.send(request);
        System.debug('body: ' + response.getBody());
        System.debug('status: ' + response.getStatus());
        System.debug('statusCode: ' + response.getStatusCode());
        return response.getBody();
    }

    public class requestBody {
        public String url { get; set; }
        public requestBody(String url) {
            this.url = url;
        }
    }
}