Create BYOK connection
This step-by-step guide helps you securely connect GPTfy to your own Azure-hosted OpenAI service using BYOK. You’ll configure Azure, Salesforce, and GPTfy to establish a secure, scalable, and compliant integration.
What is a BYOK connection?
BYOK (Bring Your Own Key) connection in GPTfy is a configuration that allows customers to use their own AI service connections instead of GPTfy-managed connections.
The documentation outlines the detailed process for creating this connection, which includes:
- Setting up the necessary Azure infrastructure (creating an Azure OpenAI service and deploying models)
- Configuring Salesforce components (External Credentials, Custom Headers, Permission Sets)
- Setting up Named Credentials to securely connect Salesforce to Azure OpenAI
- Configuring GPTfy to use this connection
This functionality is ideal for customers who:
- Want to use their own Azure-hosted OpenAI services
- Need more control over AI infrastructure and model deployments
- Have specific security or compliance requirements
- Want to leverage existing investments in Azure OpenAI
The BYOK approach offers flexibility while still benefiting from GPTfy’s seamless Salesforce integration.
Prerequisites
- An Azure subscription
- Access to Microsoft Foundry (apply if needed)
1. Azure Setup
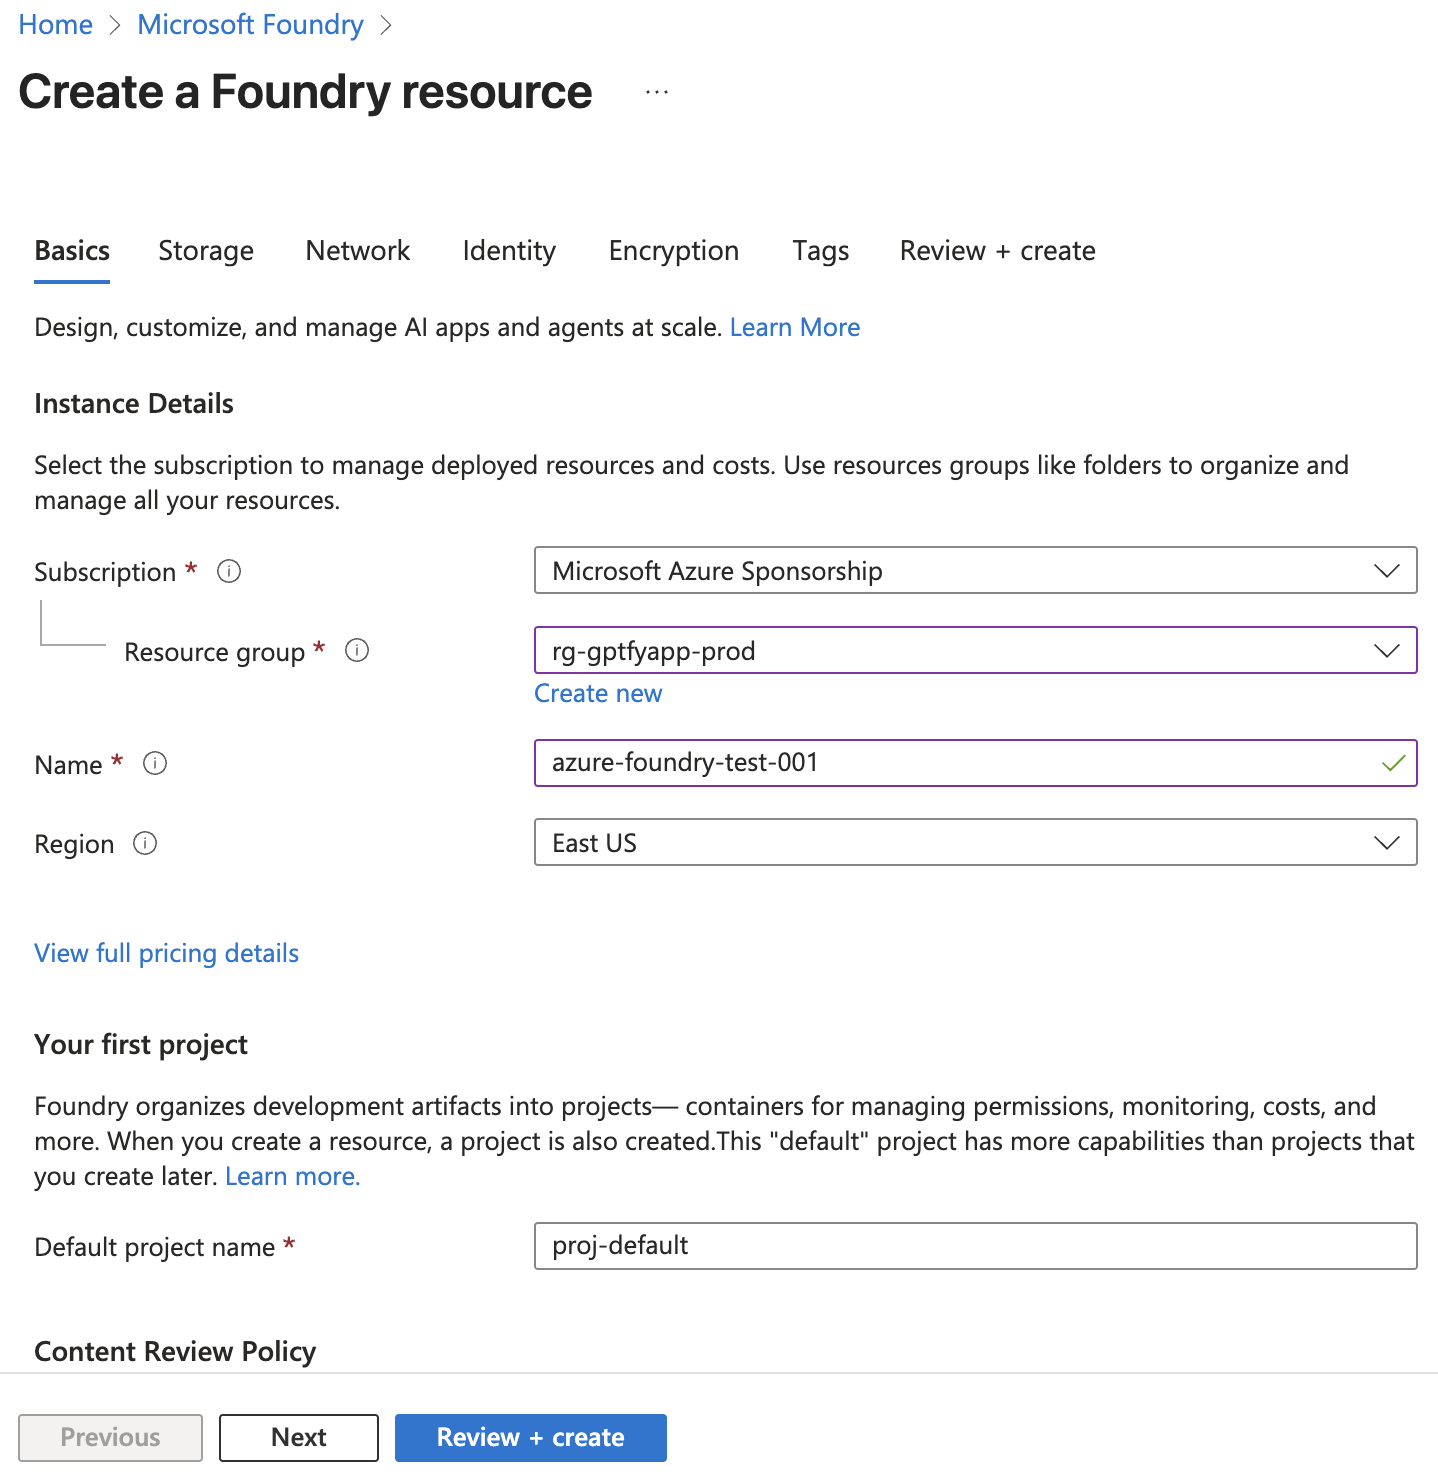
Step 1: Create a Microsoft Foundry Resource
- Navigate to the Azure Portal.
- In the search bar at the top, search for Foundry.
- Select Azure Foundry from the search results.
- Click Create to create a new resource.
- Fill in the required details:
- Subscription: Select your Azure subscription
- Resource Group: Choose an existing resource group or create a new one
- Region: Select the region closest to your users
- Name: Enter a unique name (e.g.,
azure-foundry-test-001) - Default project name: Create a new one
- Click Review + Create, then click Create to provision the resource.
Step 2: Deploy a Model in Microsoft Foundry
- Navigate to Microsoft Foundry.
- Enable the New Foundry toggle button located at the top of the page.
- Select Build from the top navigation menu.
- From the left navigation menu, select Models → Deployments.
- Click Deploy a base model.
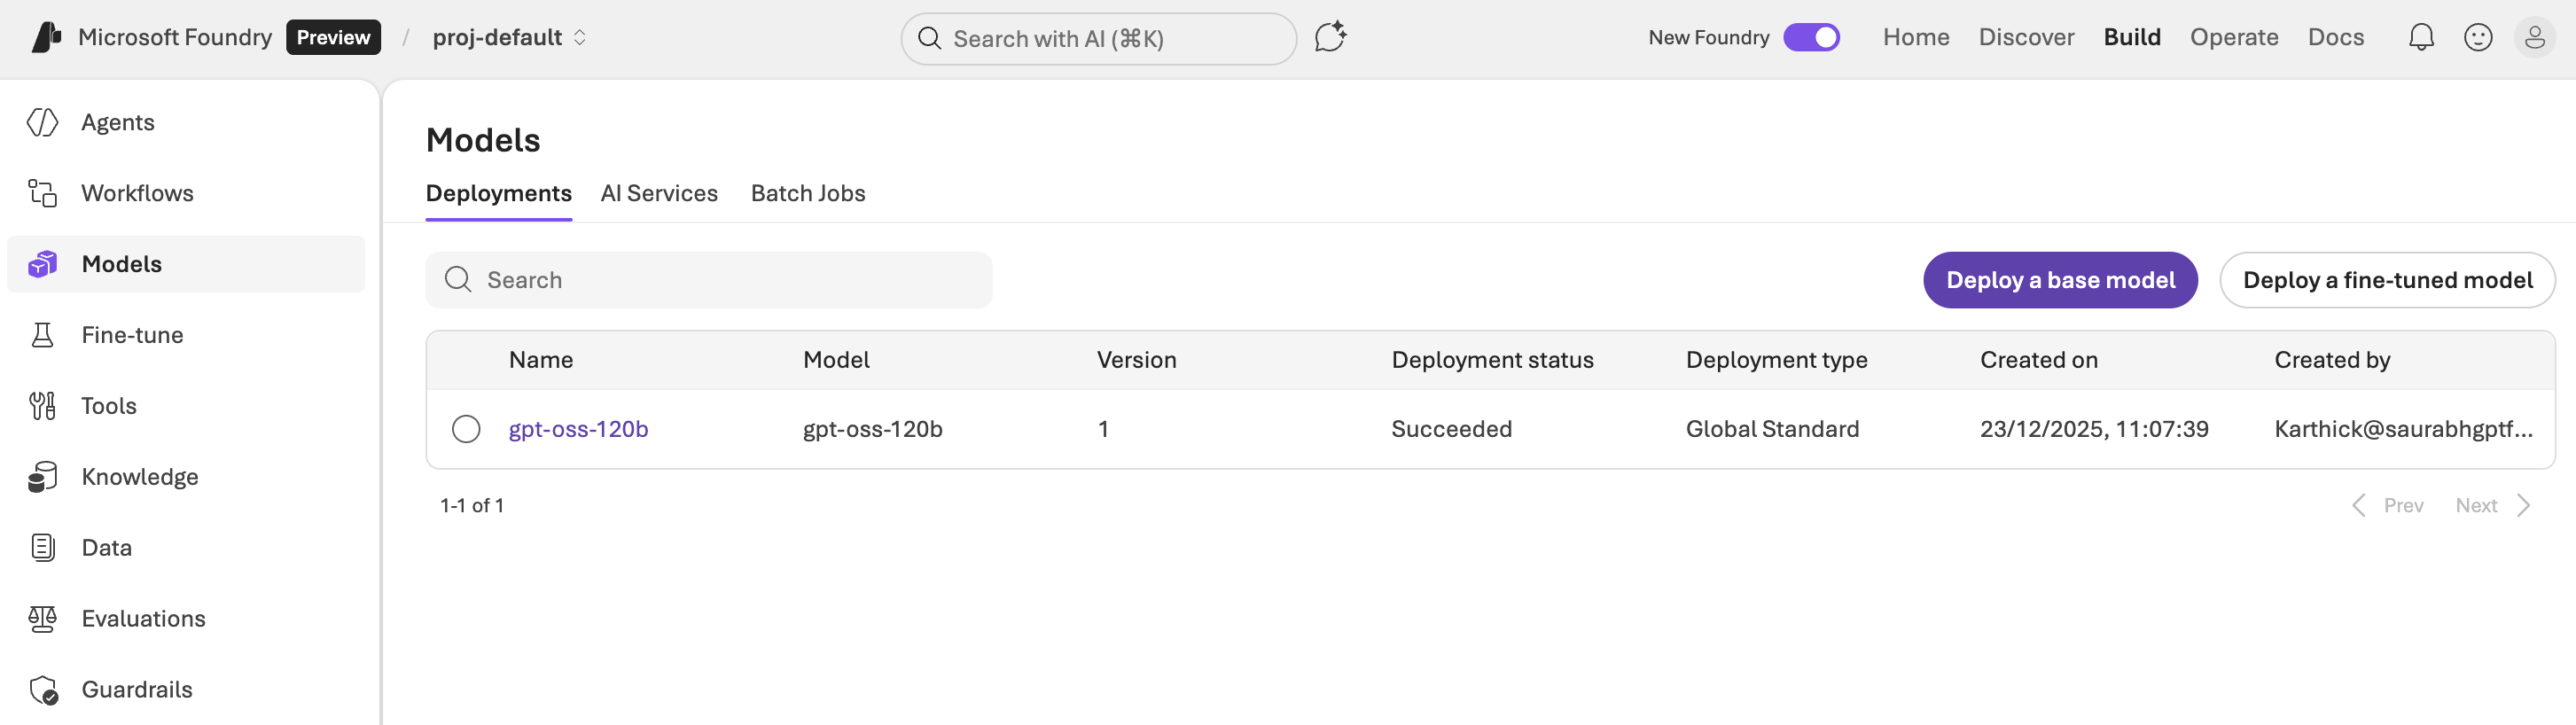
- Choose your desired model (e.g.,
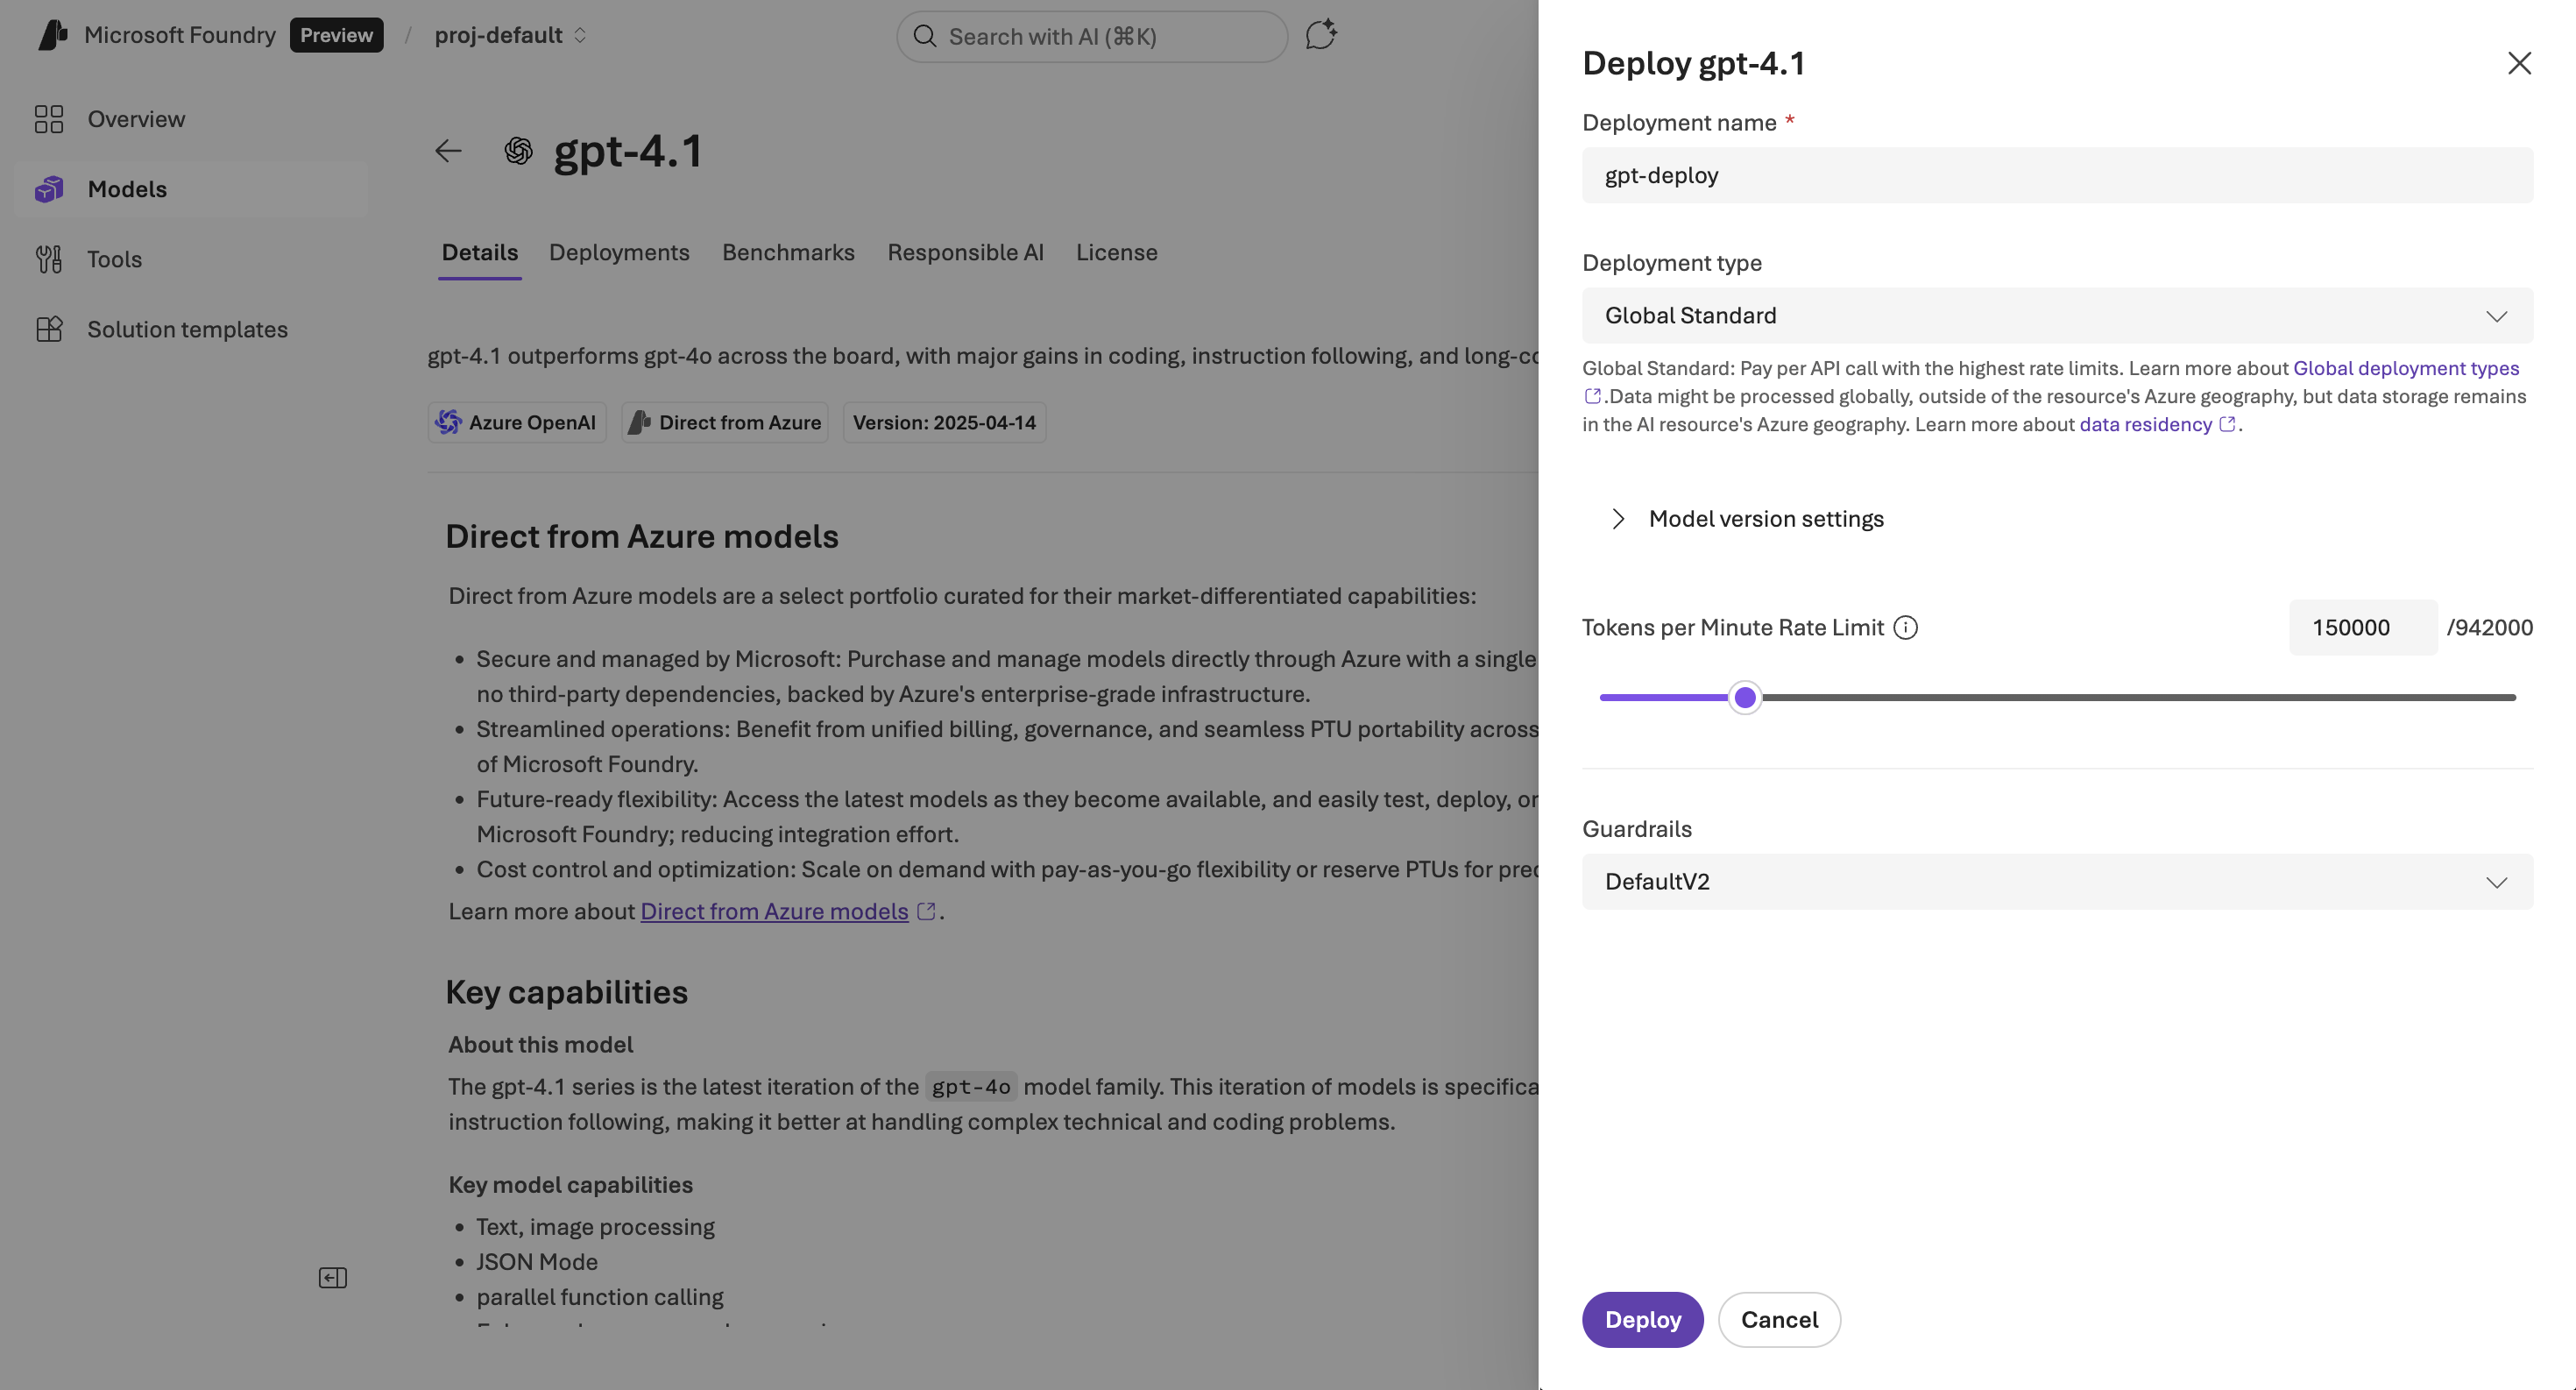
gpt-35-turbo,gpt-4, orgpt-4o). - Enter a deployment name (e.g.,
gptfy-deploy). - Configure the deployment settings as needed.
- Click Deploy to complete the deployment.
- Once deployed, navigate to the deployment details and save the Endpoint URL and API Key for later use in Salesforce configuration.
2. Salesforce Setup
These steps configure secure callouts from Salesforce to Azure using Named Credentials and External Credentials.
Step 1: Create an External Credential
- Go to Setup → Named Credential → External Credentials
- Click New
- Fill in:
- Label:
OpenAIOnAzure - Name:
OpenAIOnAzure - Authentication Protocol:
Custom
- Label:
Step 2: Create a Principal
- Under the External Credential, go to Principals
- Click New
- Fill in:
- Parameter Name:
AzureOpenAI_Principal - Authentication: Leave blank
- Sequence:
1
- Parameter Name:

Step 3: Create a Custom Header
- Go to Custom Headers under the External Credential
- Click New
- Depending on the header name you choose, the value format changes:
Option 1: Using Authorization header
- Name:
Authorization - Value:
Bearer <your-api-key>(e.g.,Bearer 3xtFyD0...) - Sequence:
1

Option 2: Using api-key header
- Name:
api-key - Value:
<your-api-key>(Paste the key directly) - Sequence:
1

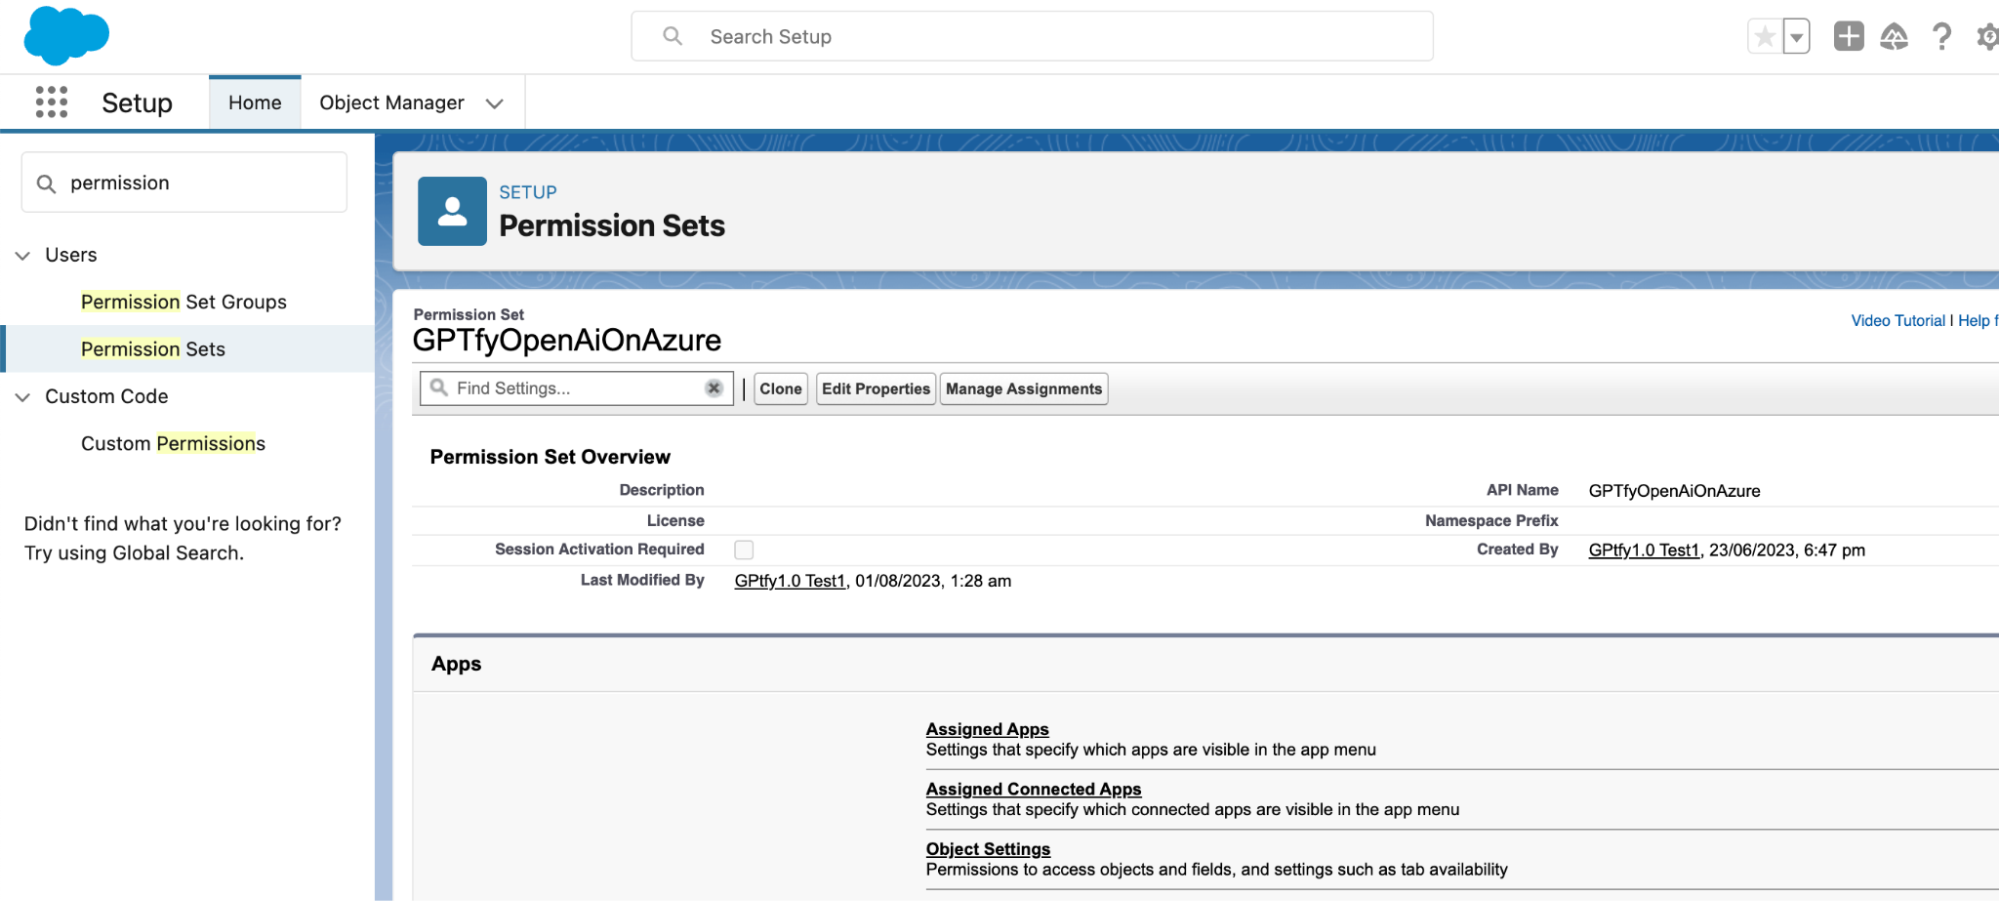
Step 4: Configure the Permission Set
- Go to Setup → Permission Sets.
- Create a new Permission Set named
GPTfy_Azure_OpenAI_Permission(or click on an existing one).
- Scroll down to the Apps section and click on External Credential Principal Access.
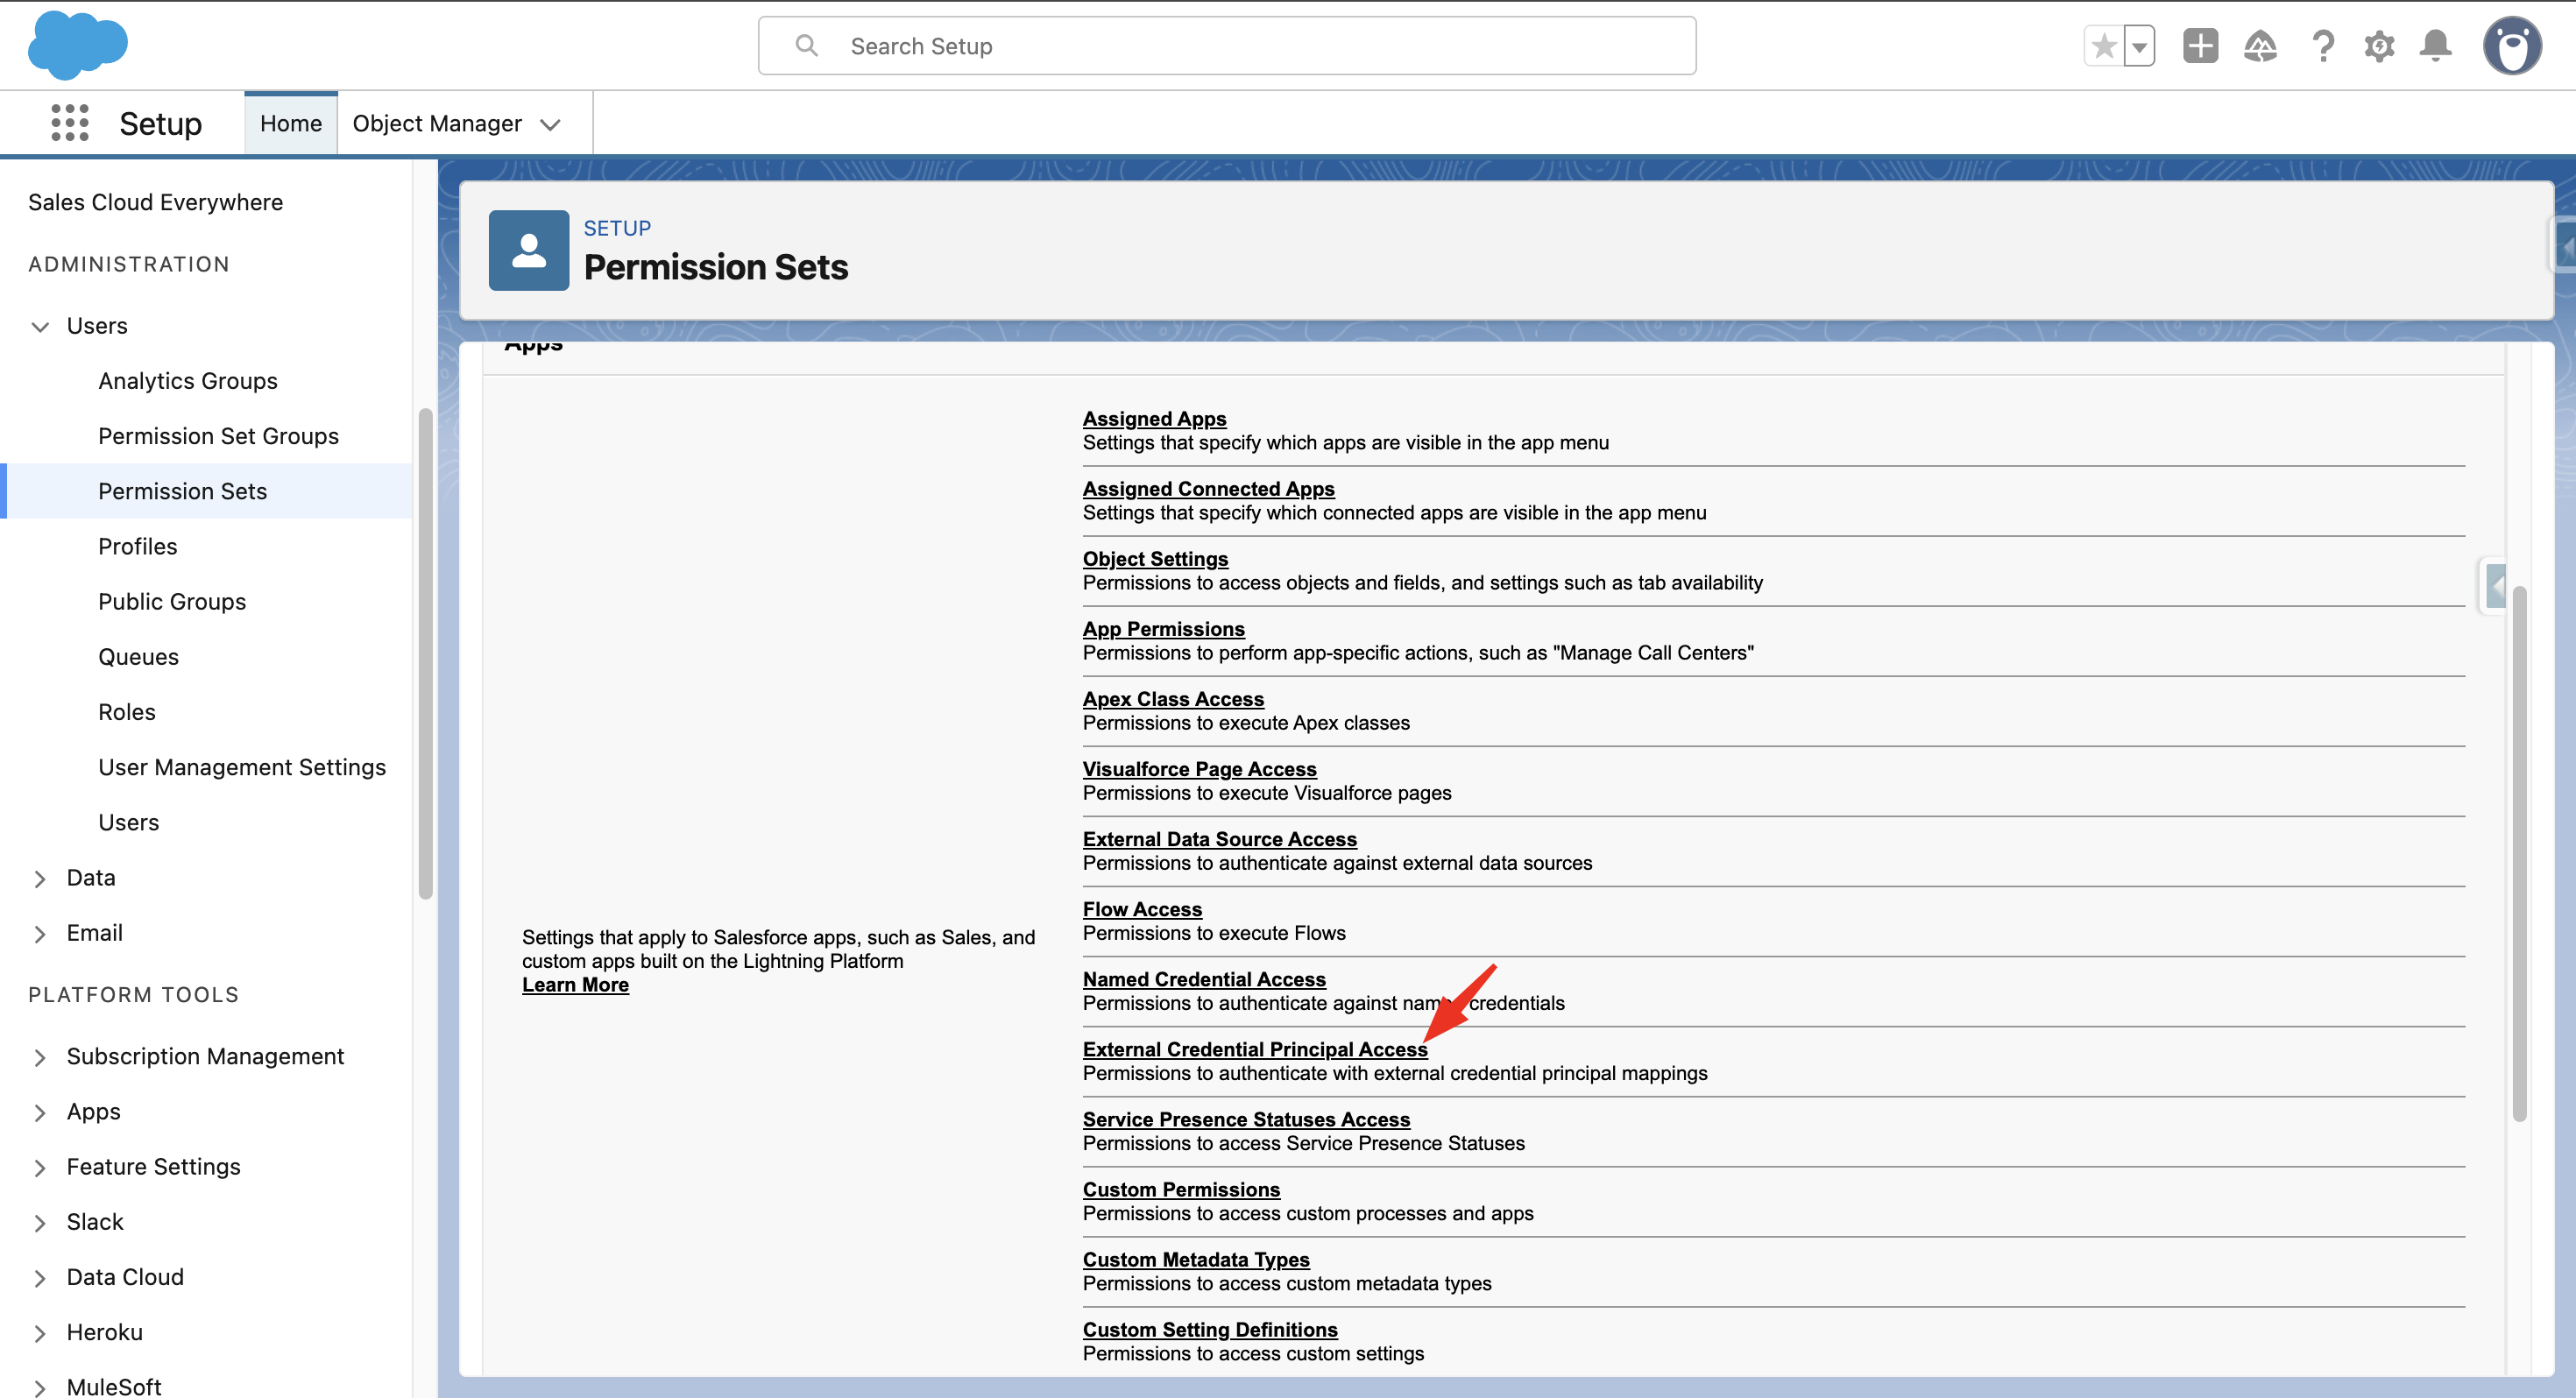
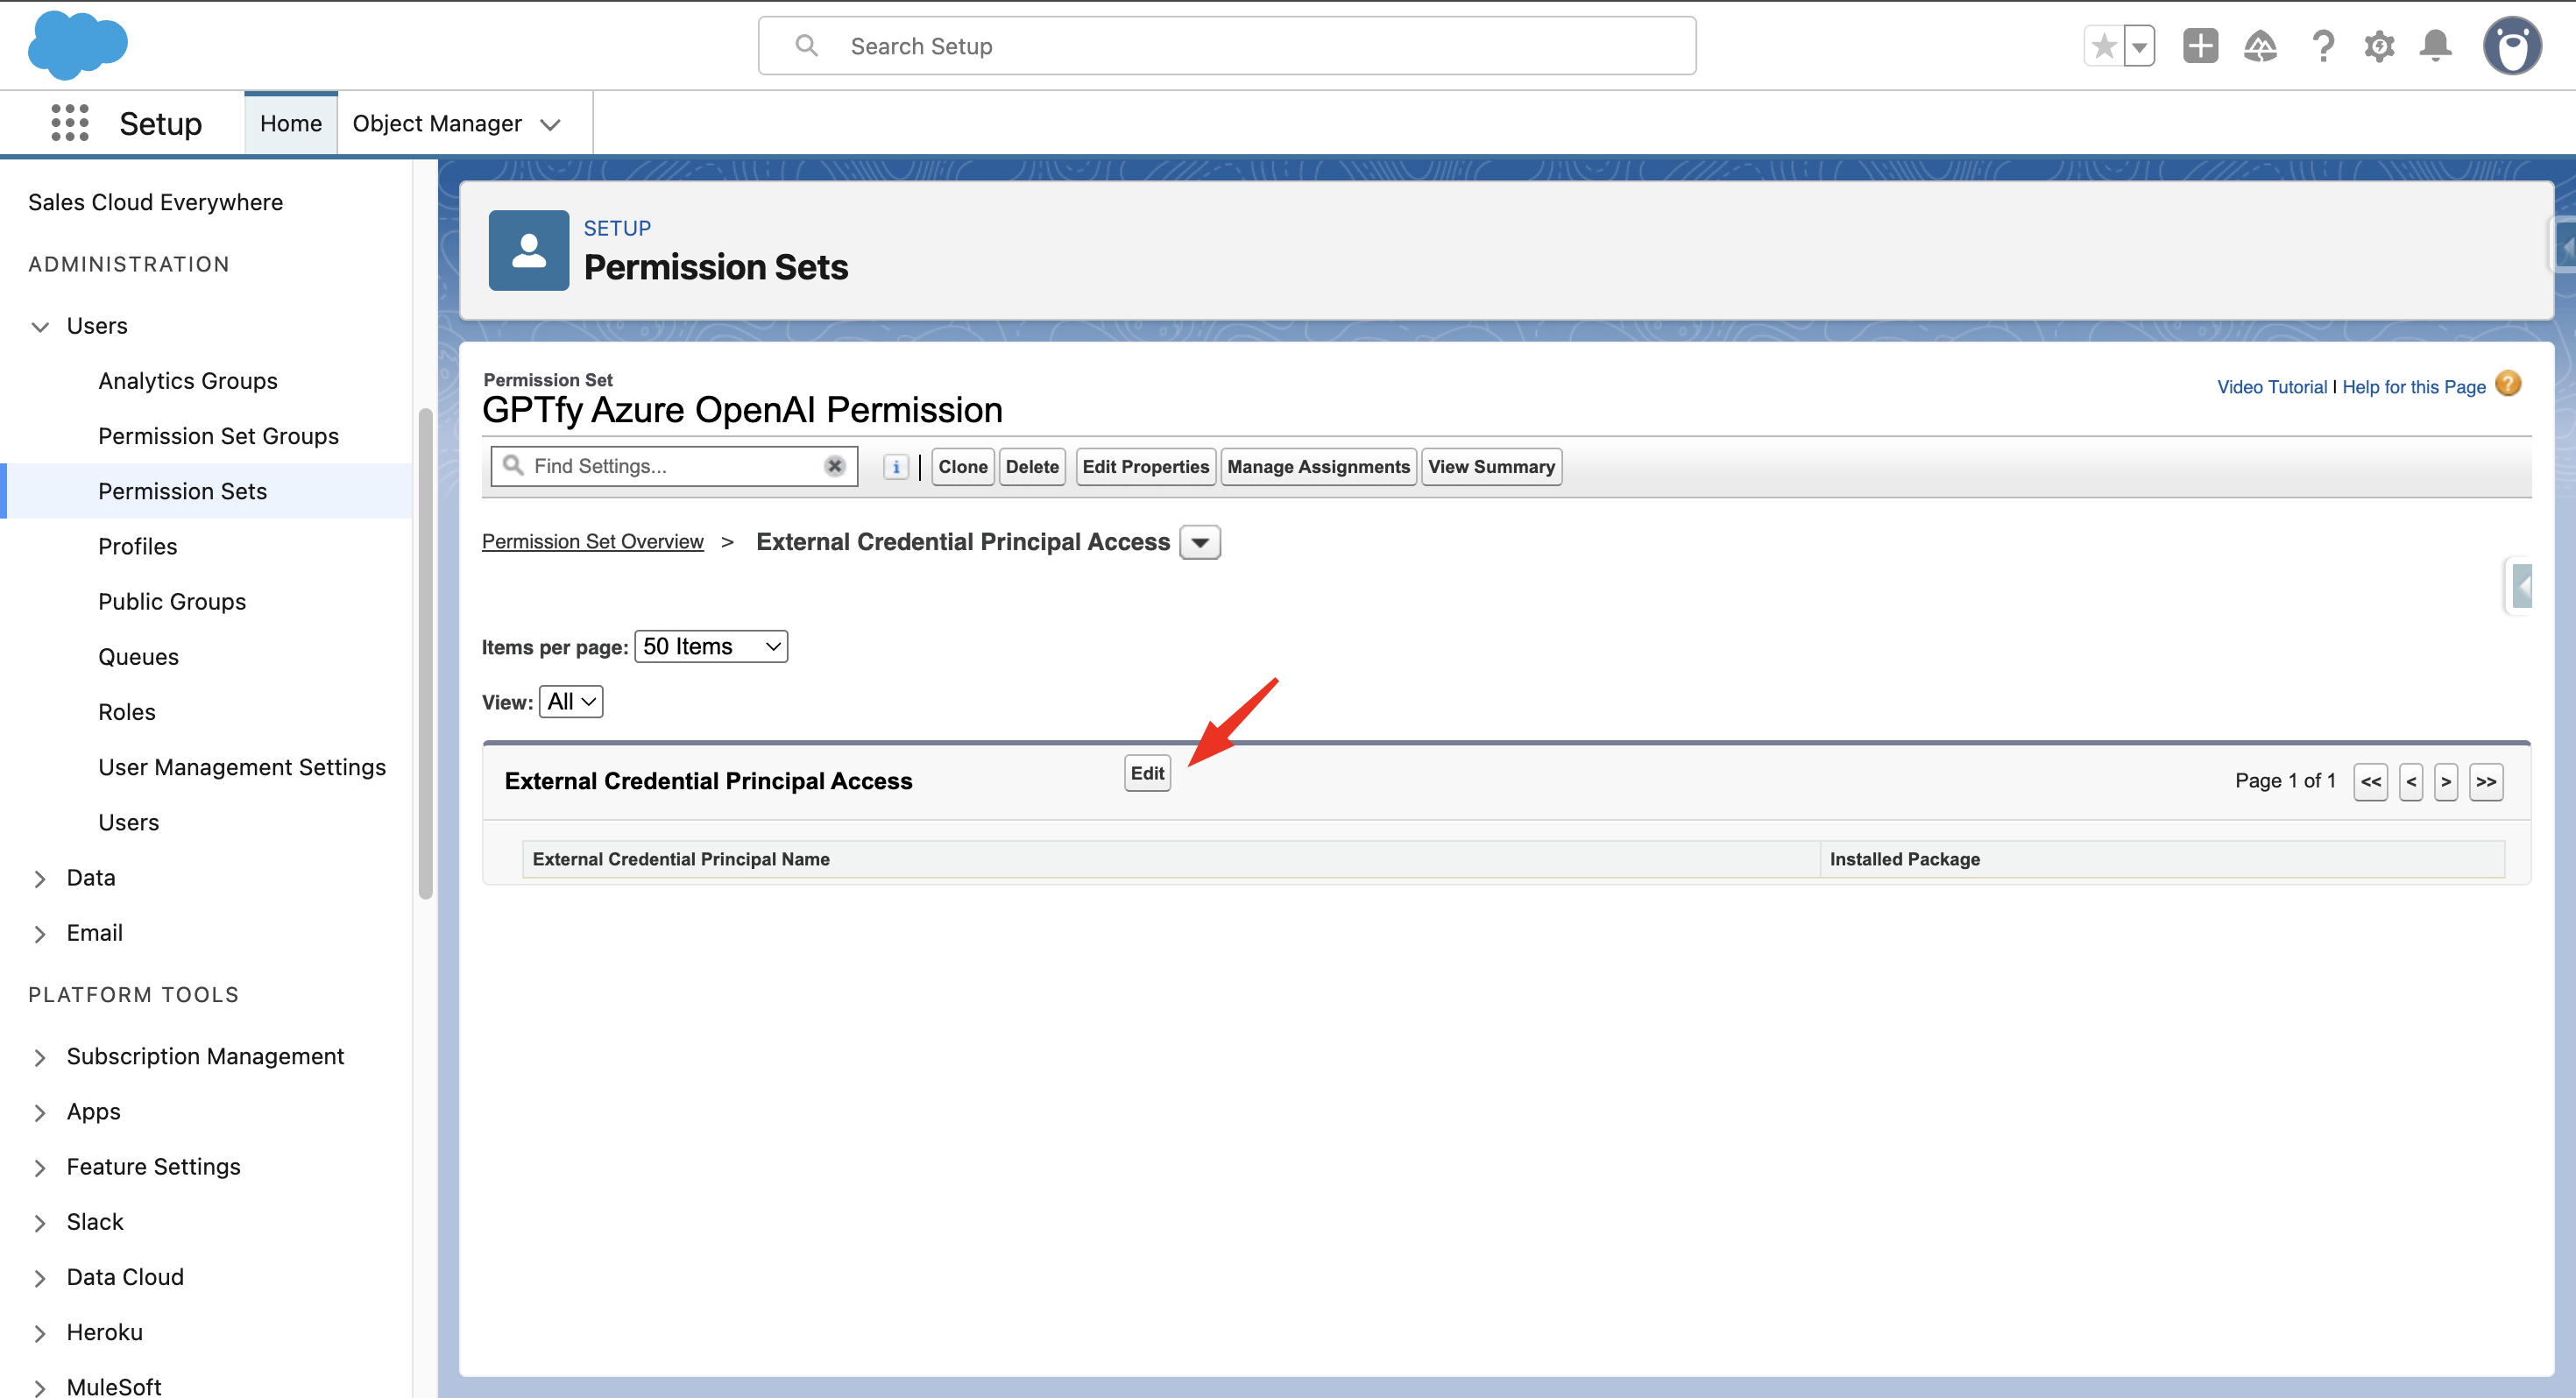
- Click Edit in the External Credential Principal Access section.
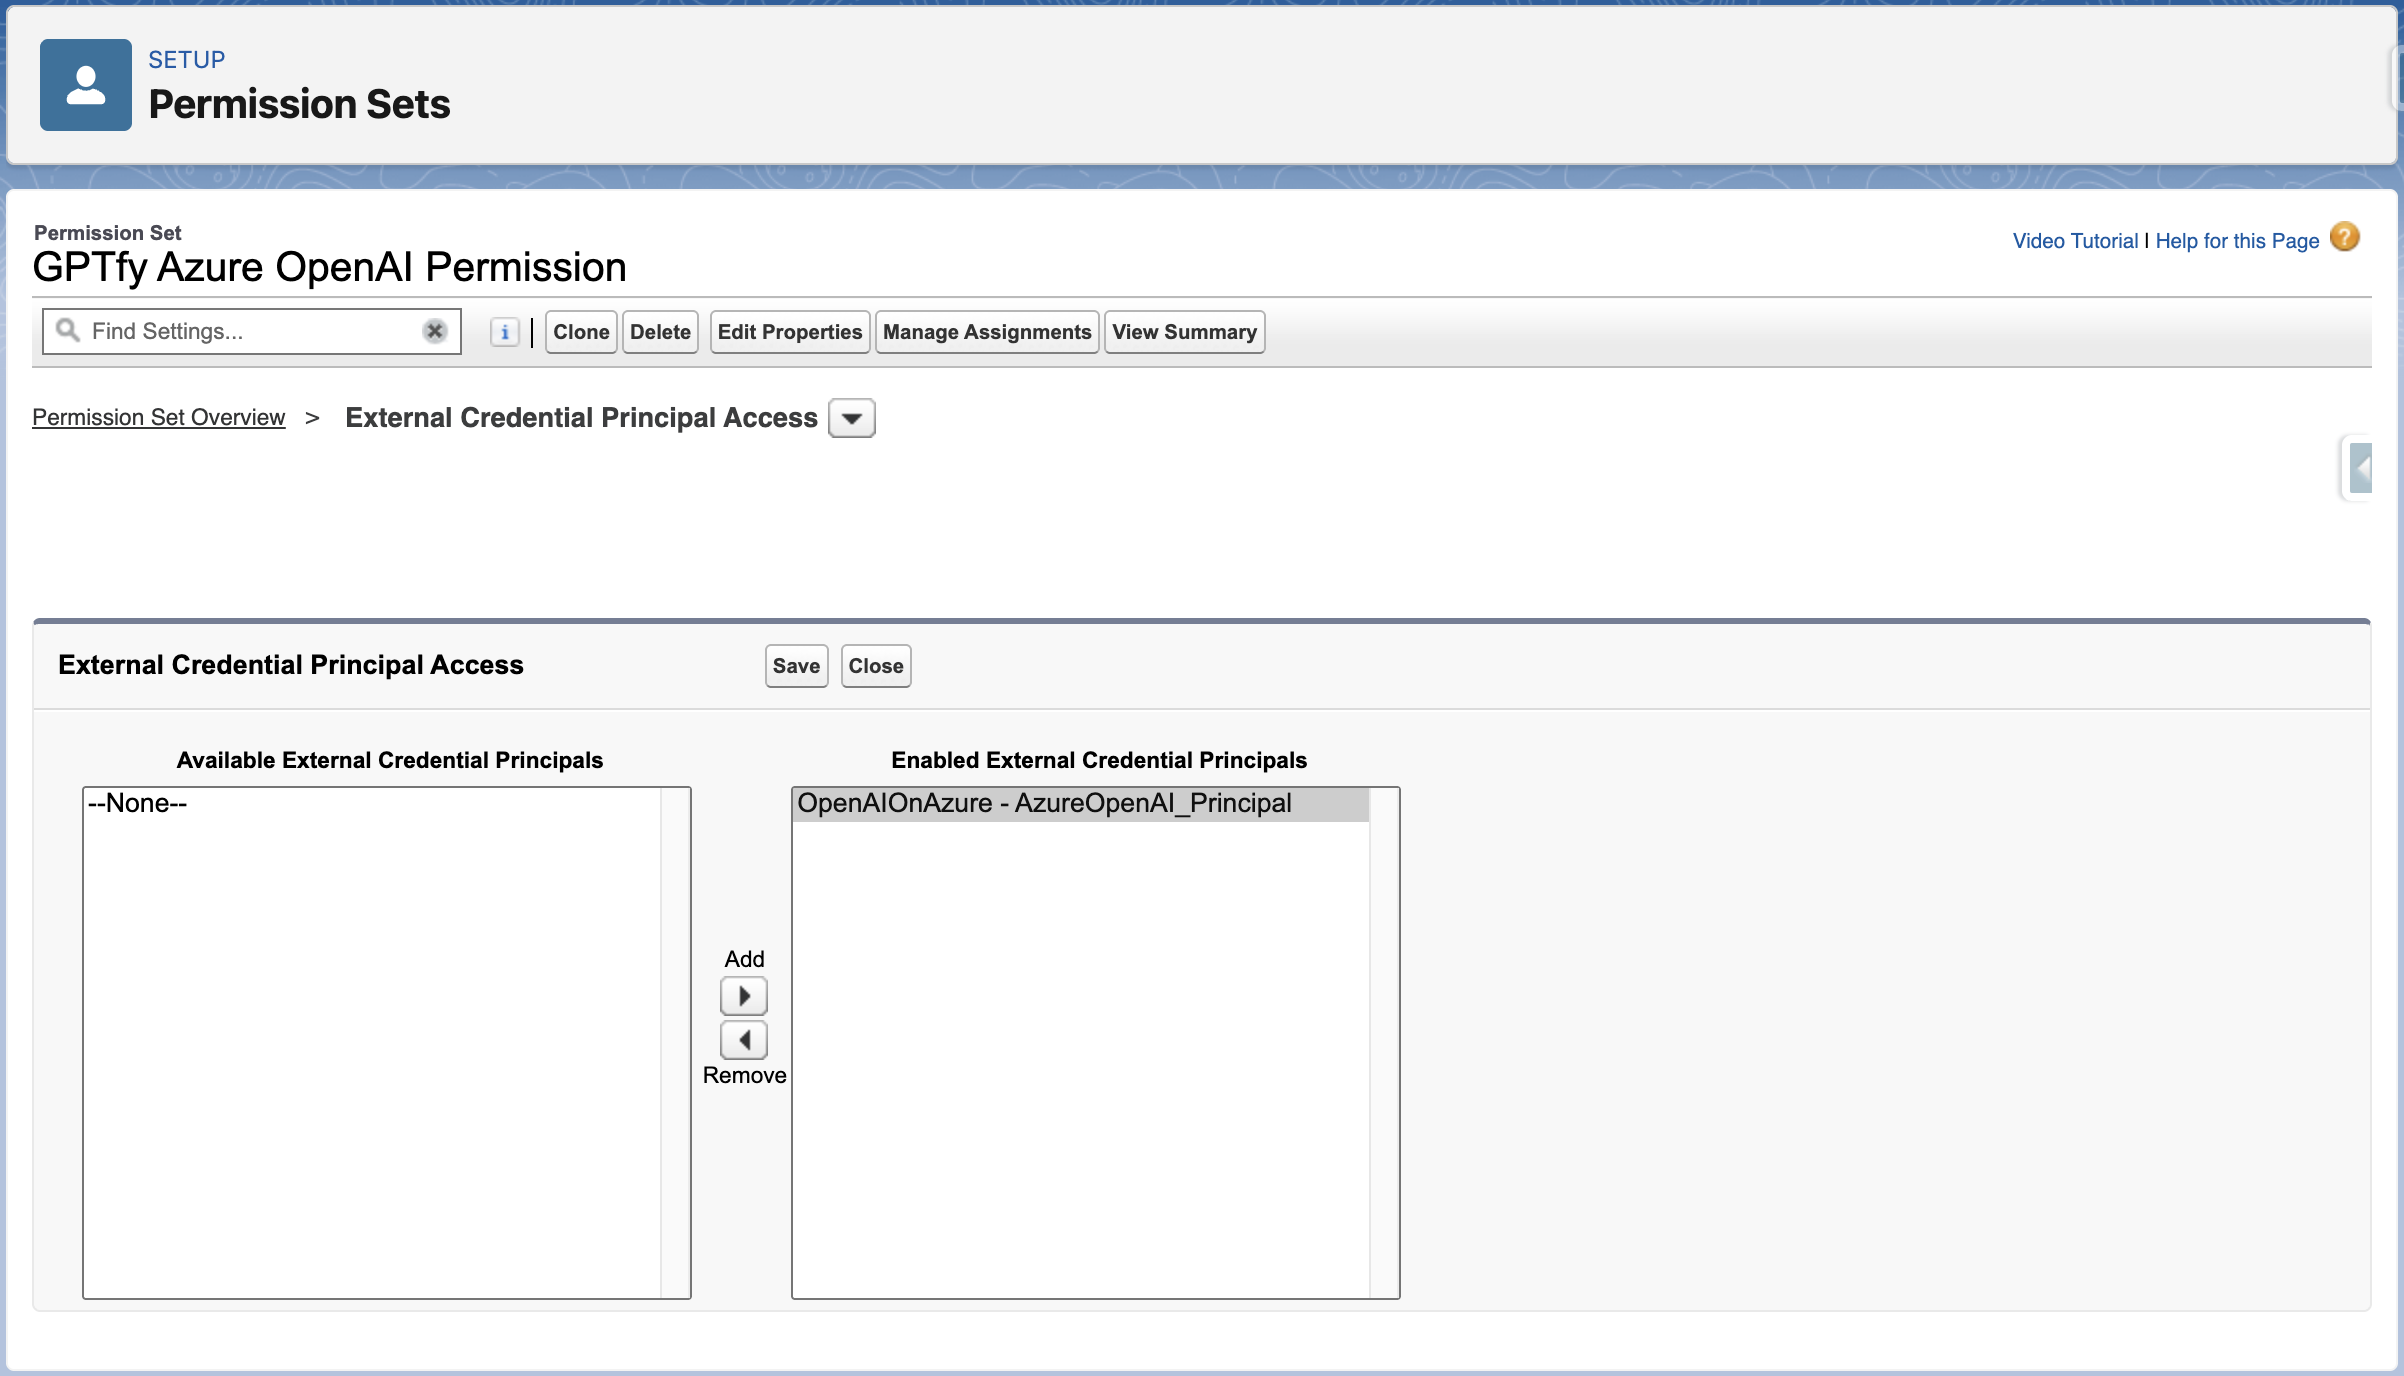
- Select the appropriate principal (e.g.,
OpenAIOnAzure - AzureOpenAI_Principal) from Available External Credential Principals and move it to Enabled External Credential Principals. Click Save.
- Return to the Permission Set overview and click Manage Assignments.
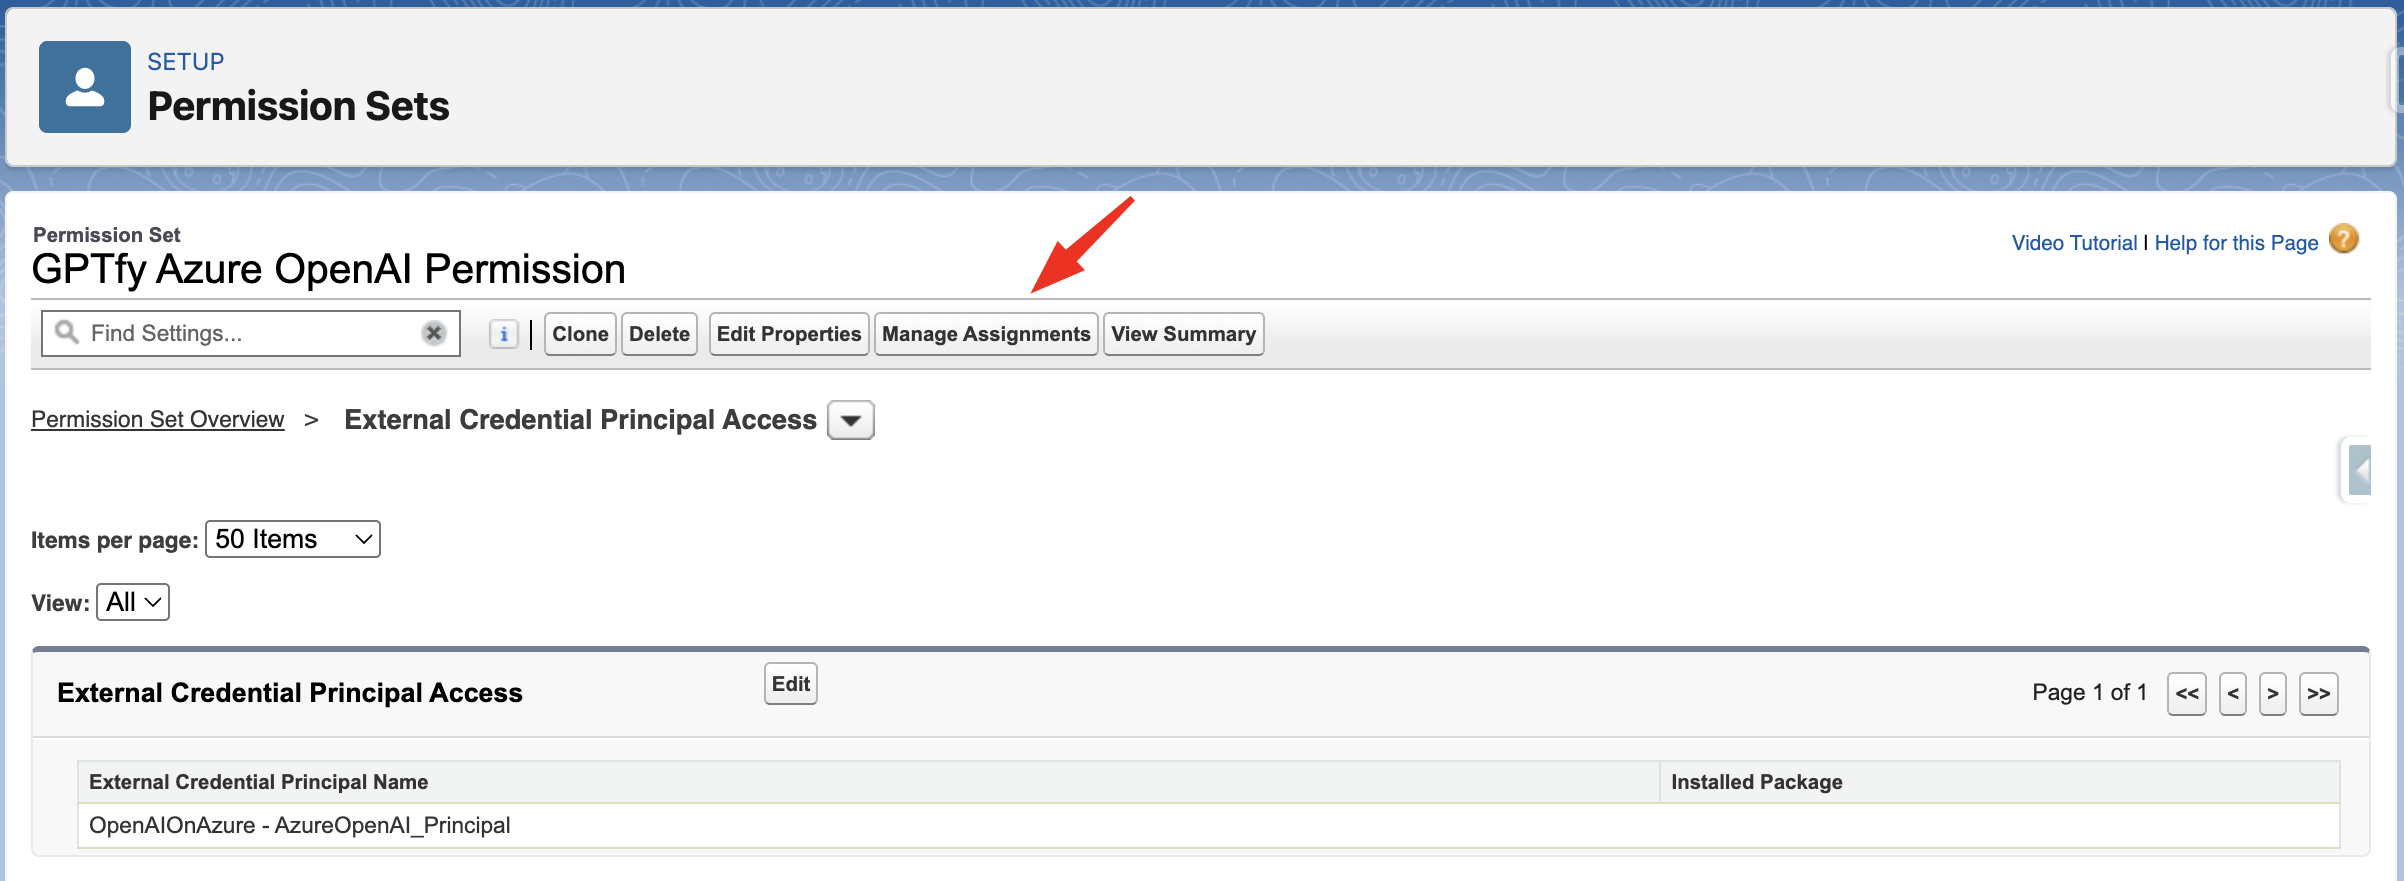
- Click Add Assignment and select the required users.
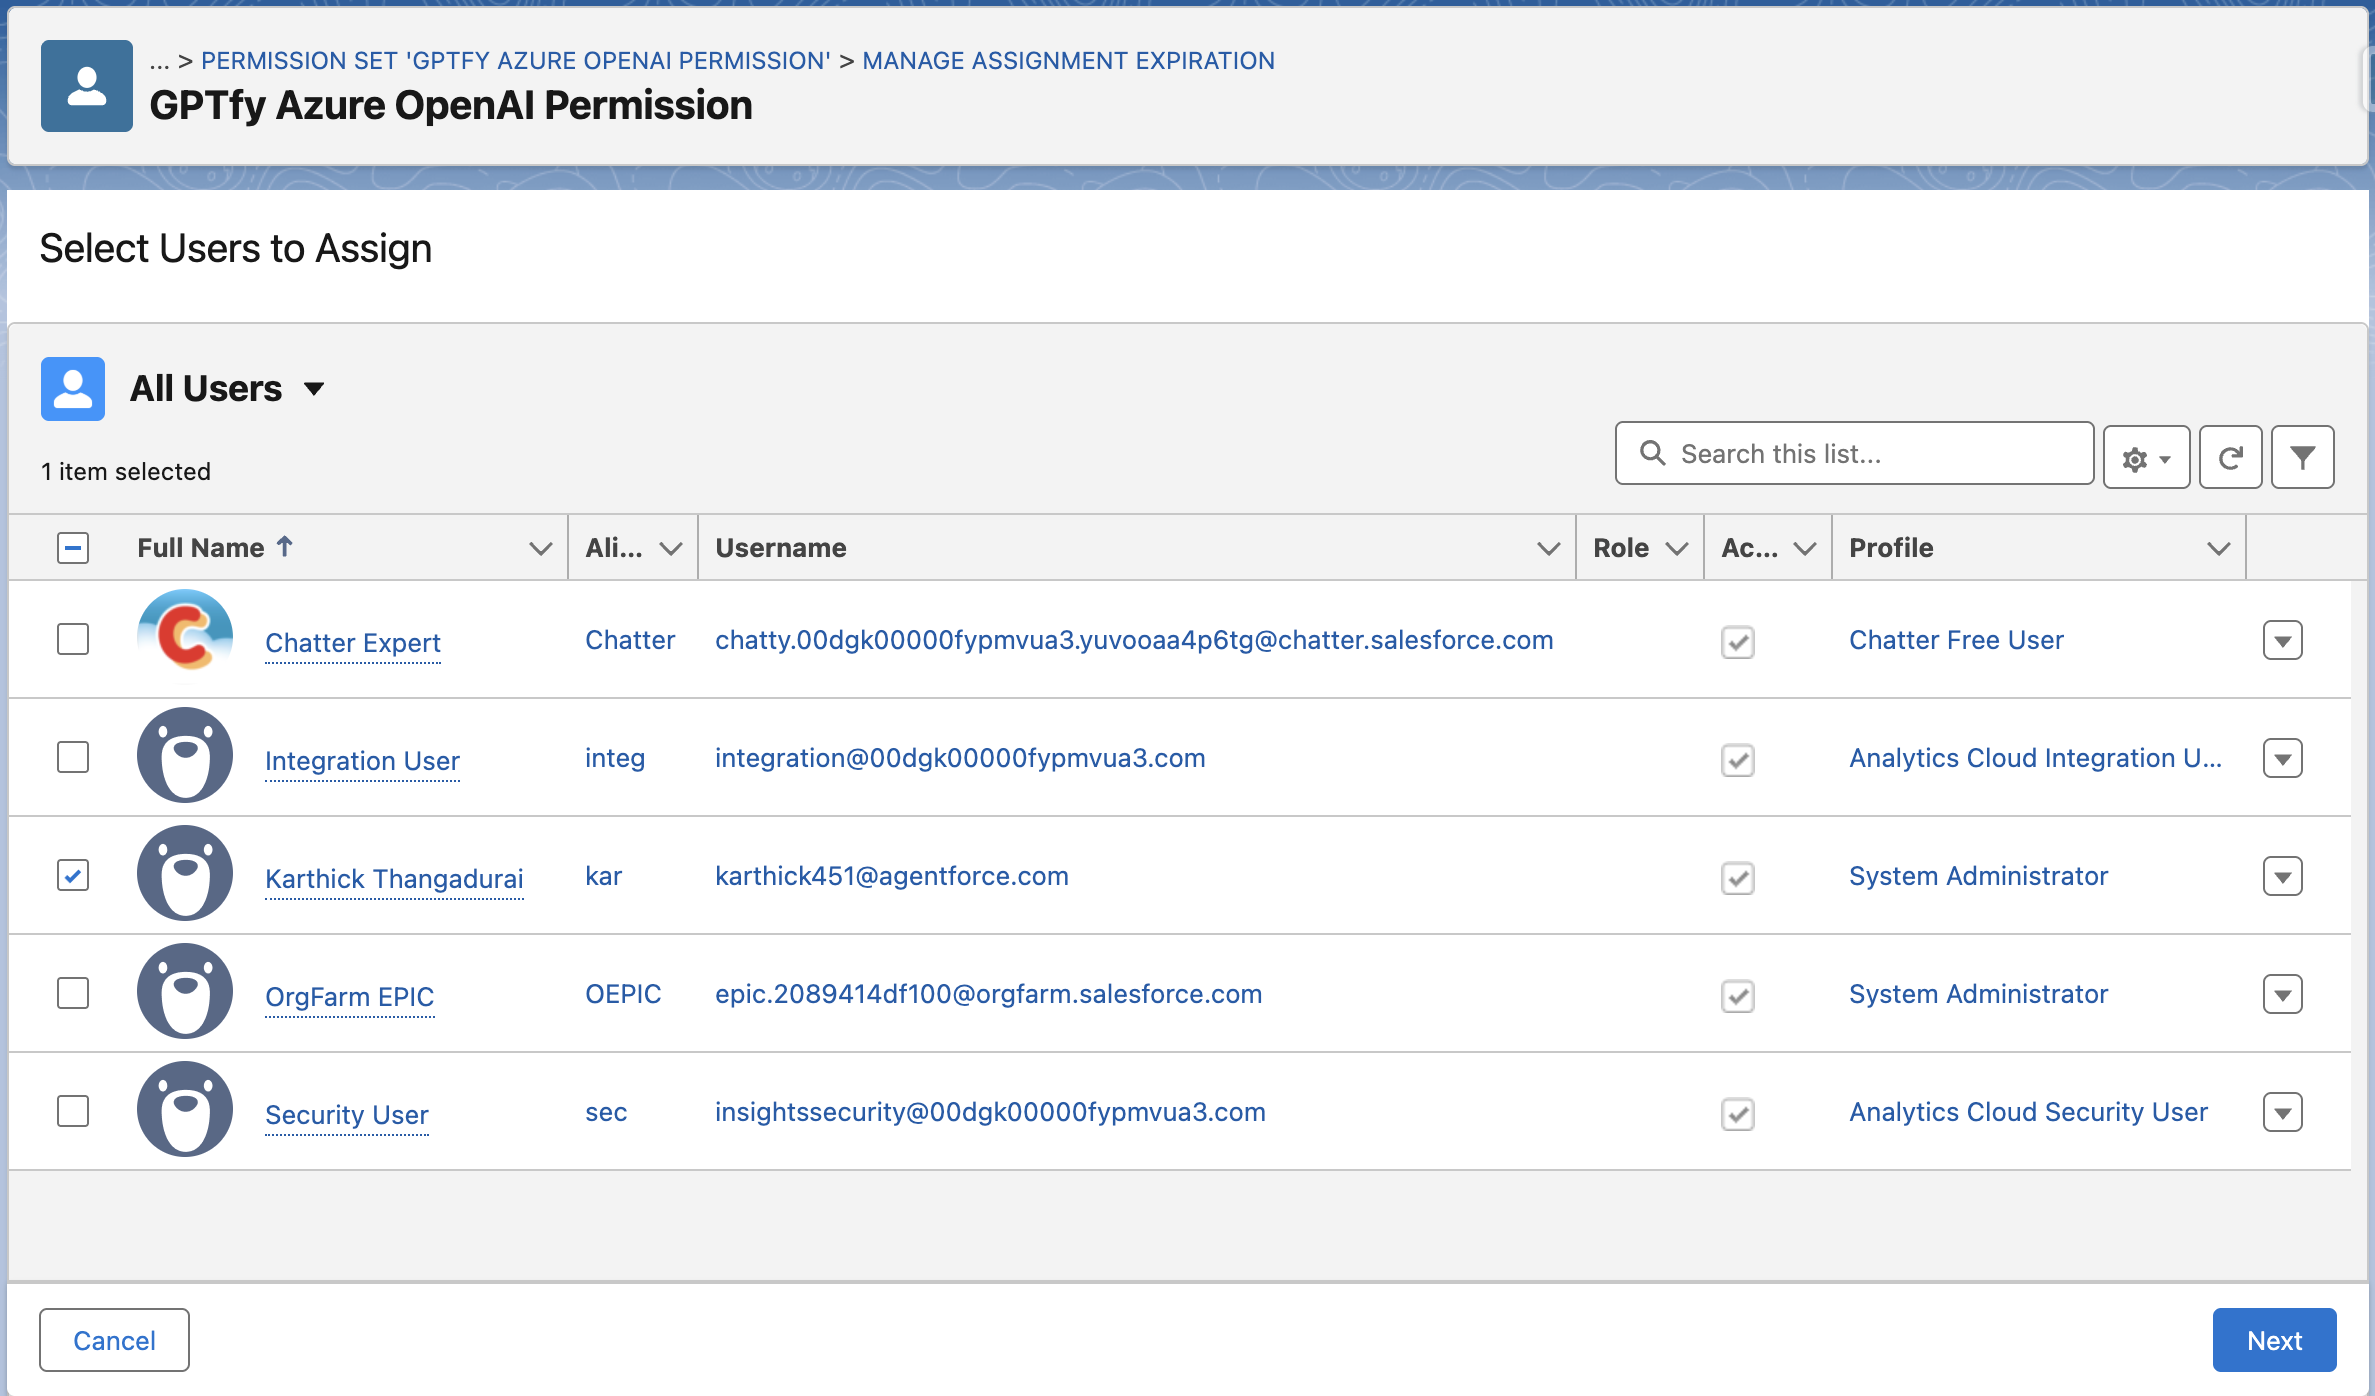
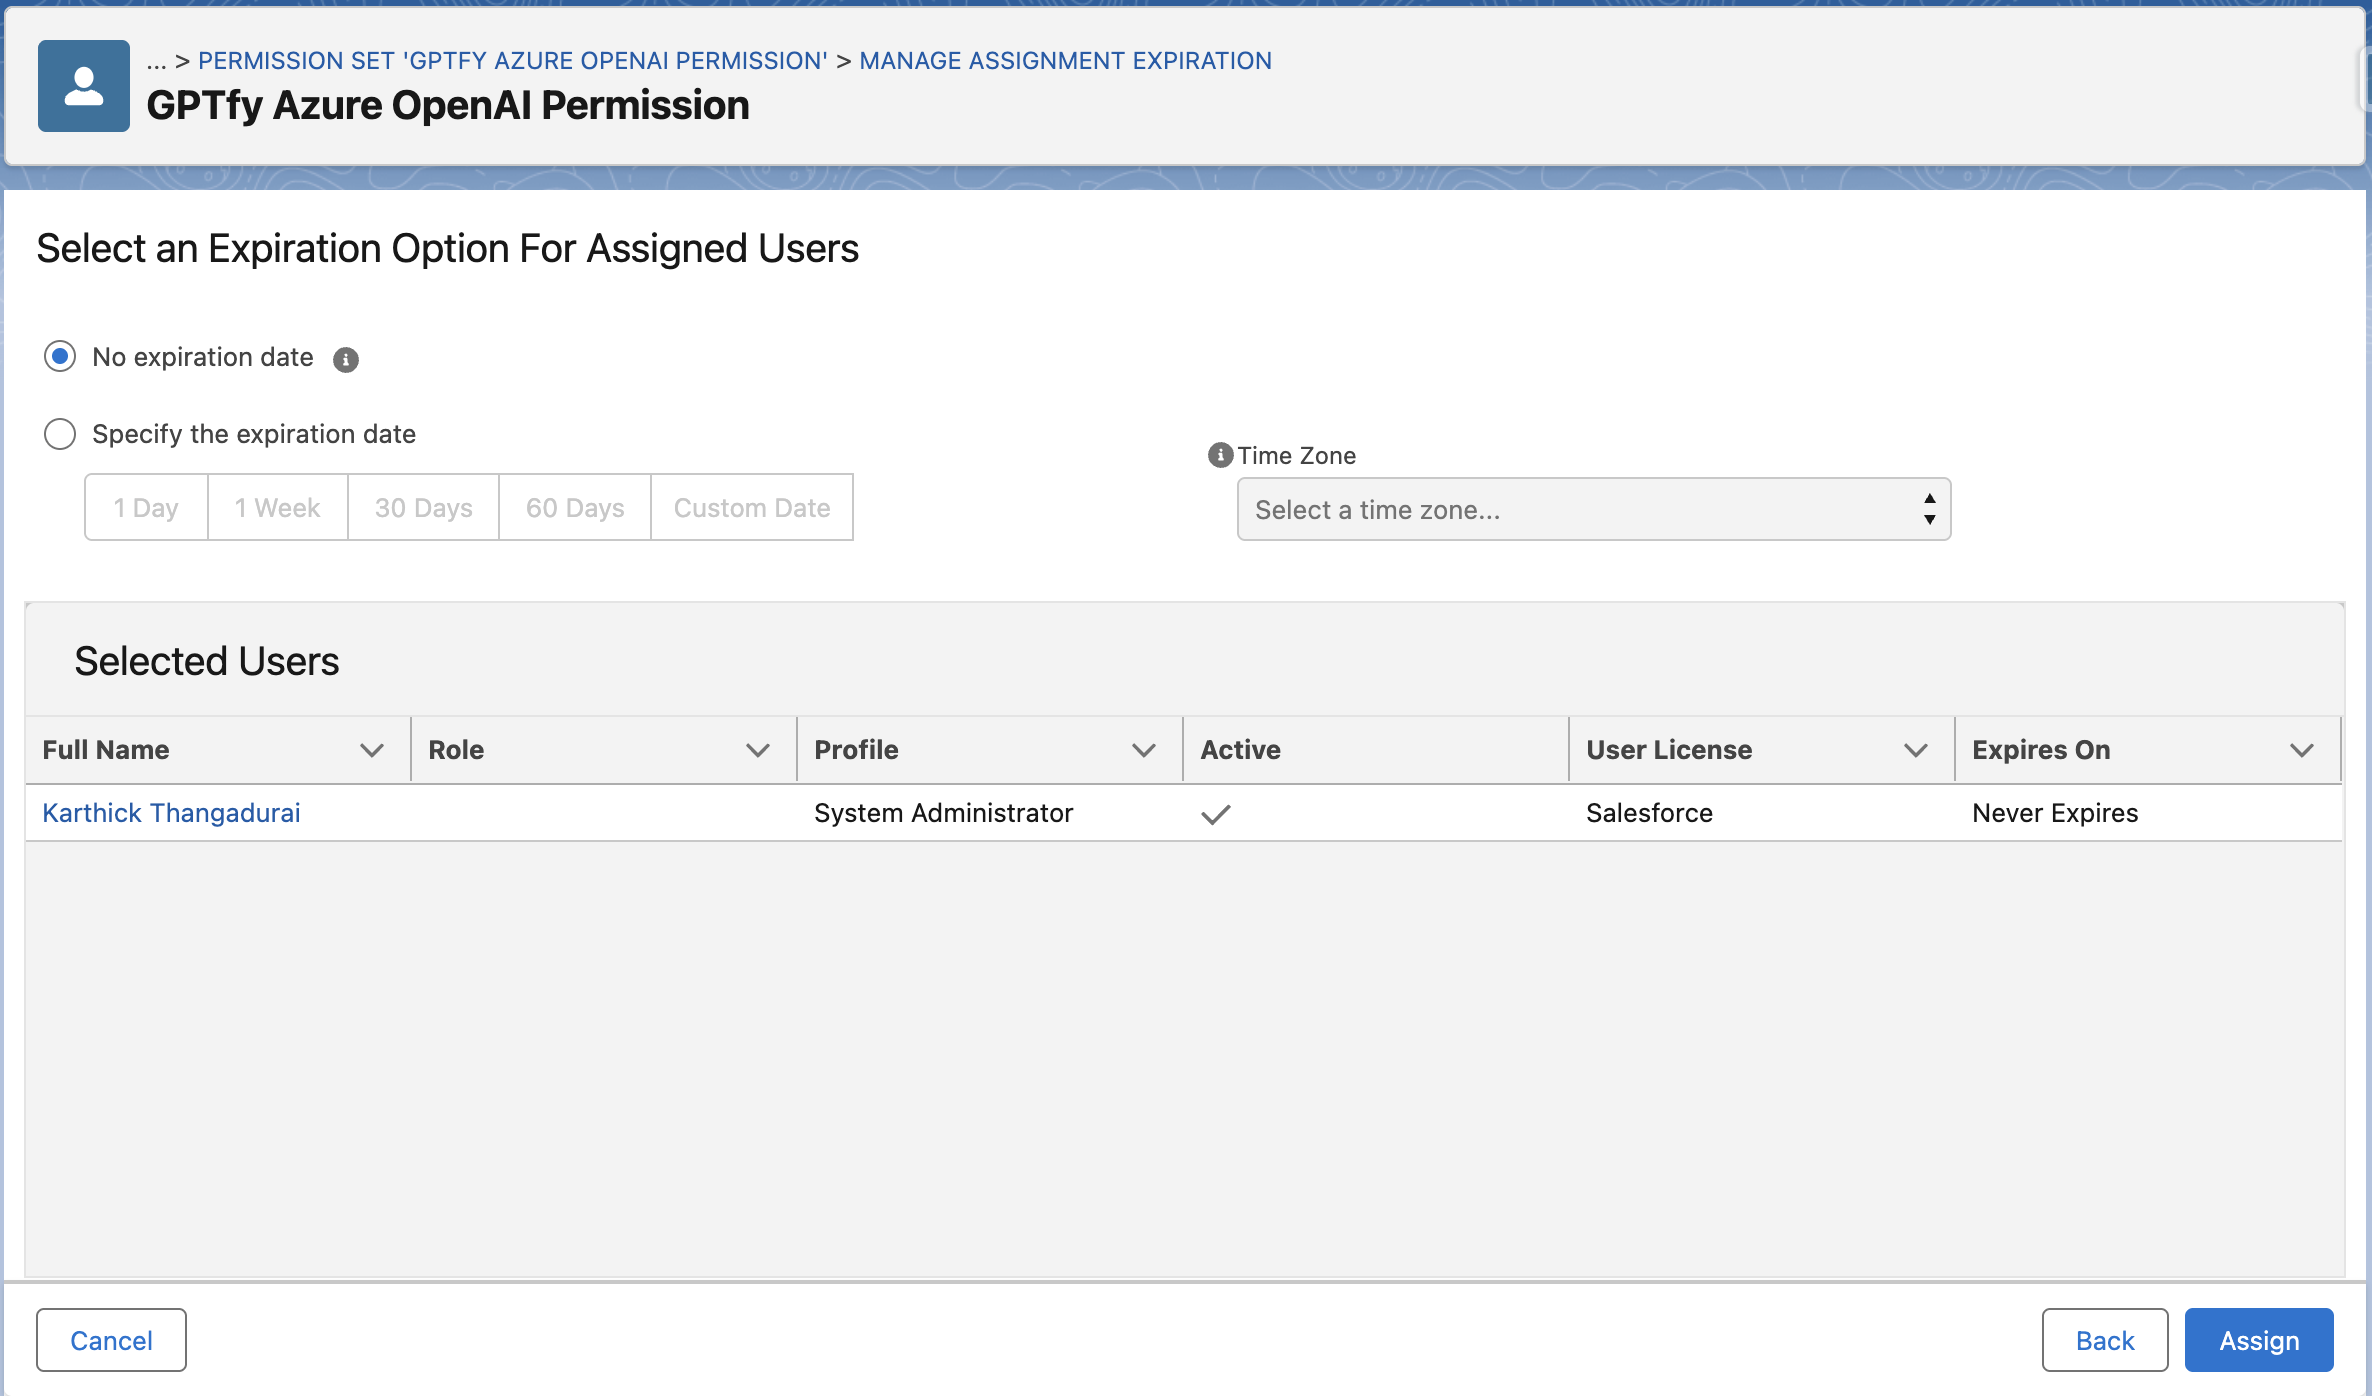
- Click Next, choose assignment options, and then click Assign.
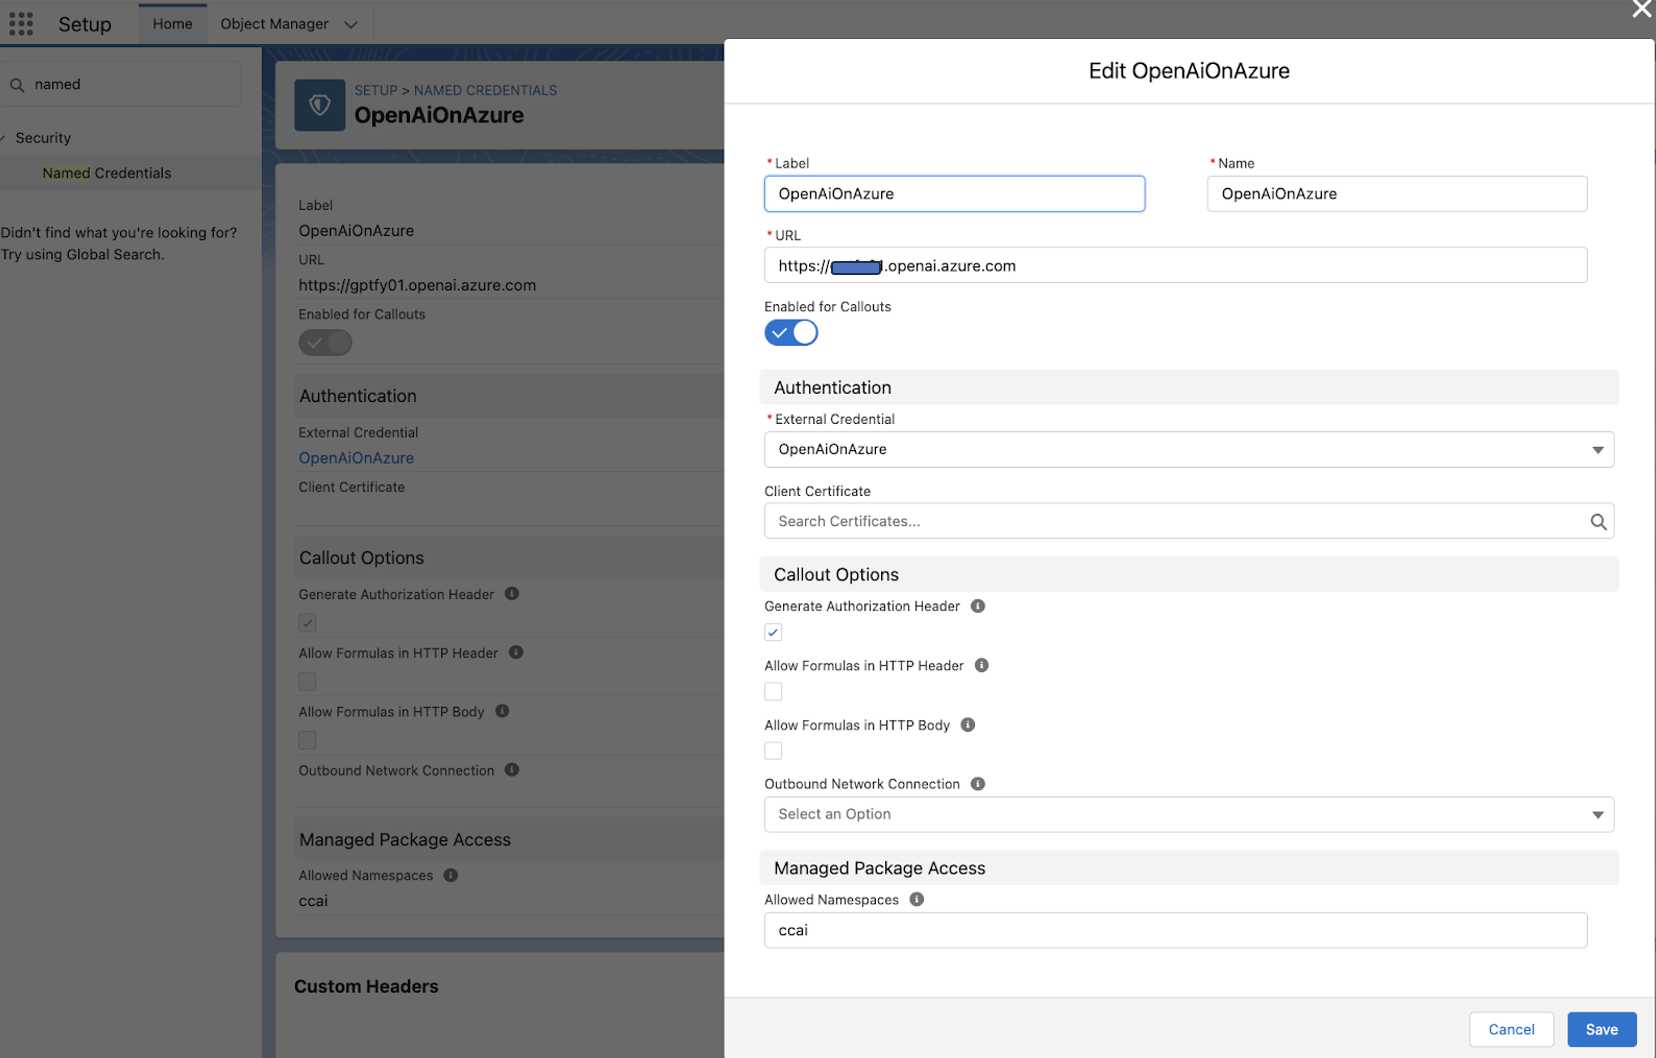
Step 5: Create a Named Credential
- Go to Setup → Named Credentials
- Click New
- Fill in:
- Label:
GPTfyAzureOpenAI - Name:
GPTfyAzureOpenAI - URL: Your Azure endpoint (e.g.,
https://foundry-resource.cognitiveservices.azure.com) - Enabled for Callouts:
true - External Credential:
OpenAIOnAzure - Allowed Namespaces: Add
ccai(GPTfy package namespace) under Callout Options
- Label:
- Click Save
[!TIP] Understanding the URL Split (Part 1) When configuring the Named Credential, use only the Base URL of your Azure resource.
- Full Endpoint Example:
https://foundry-resource.cognitiveservices.azure.com/openai/deployments/gptfy-deploy/completions?api-version=2022-12-01- Value for Named Credential:
https://foundry-resource.cognitiveservices.azure.com
3. GPTfy Configuration
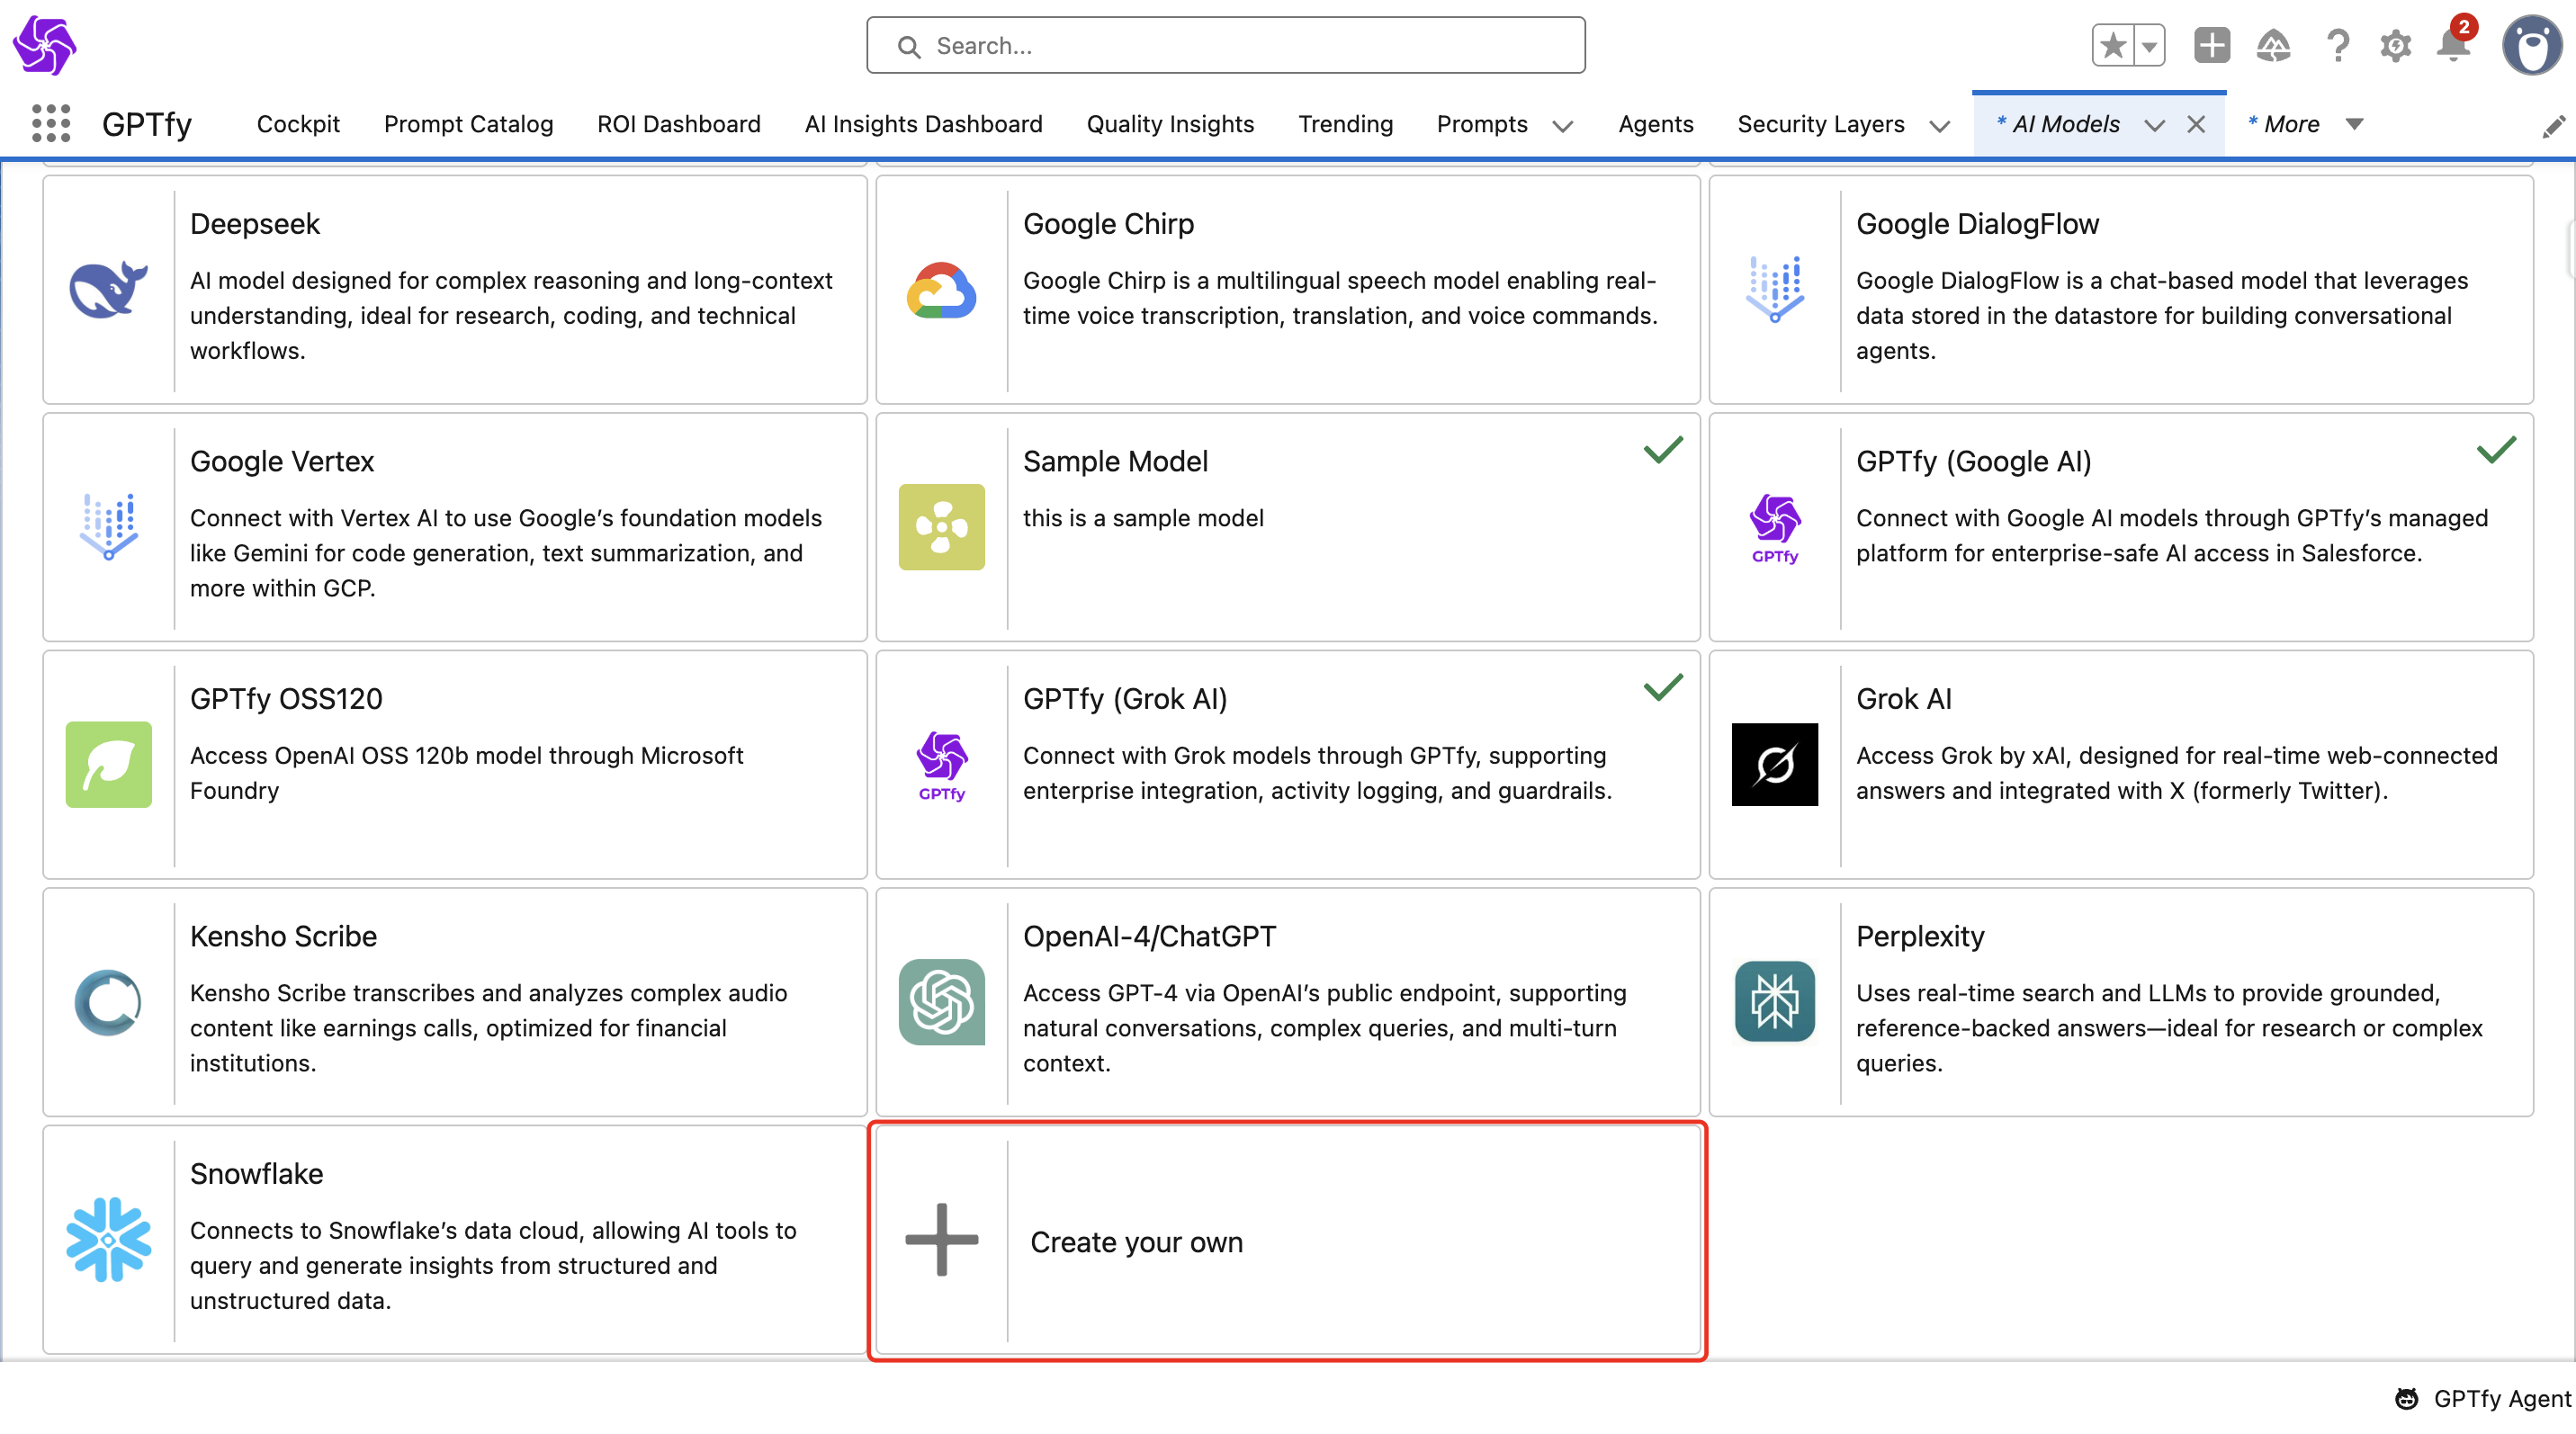
Step 1: Create the Model Connection
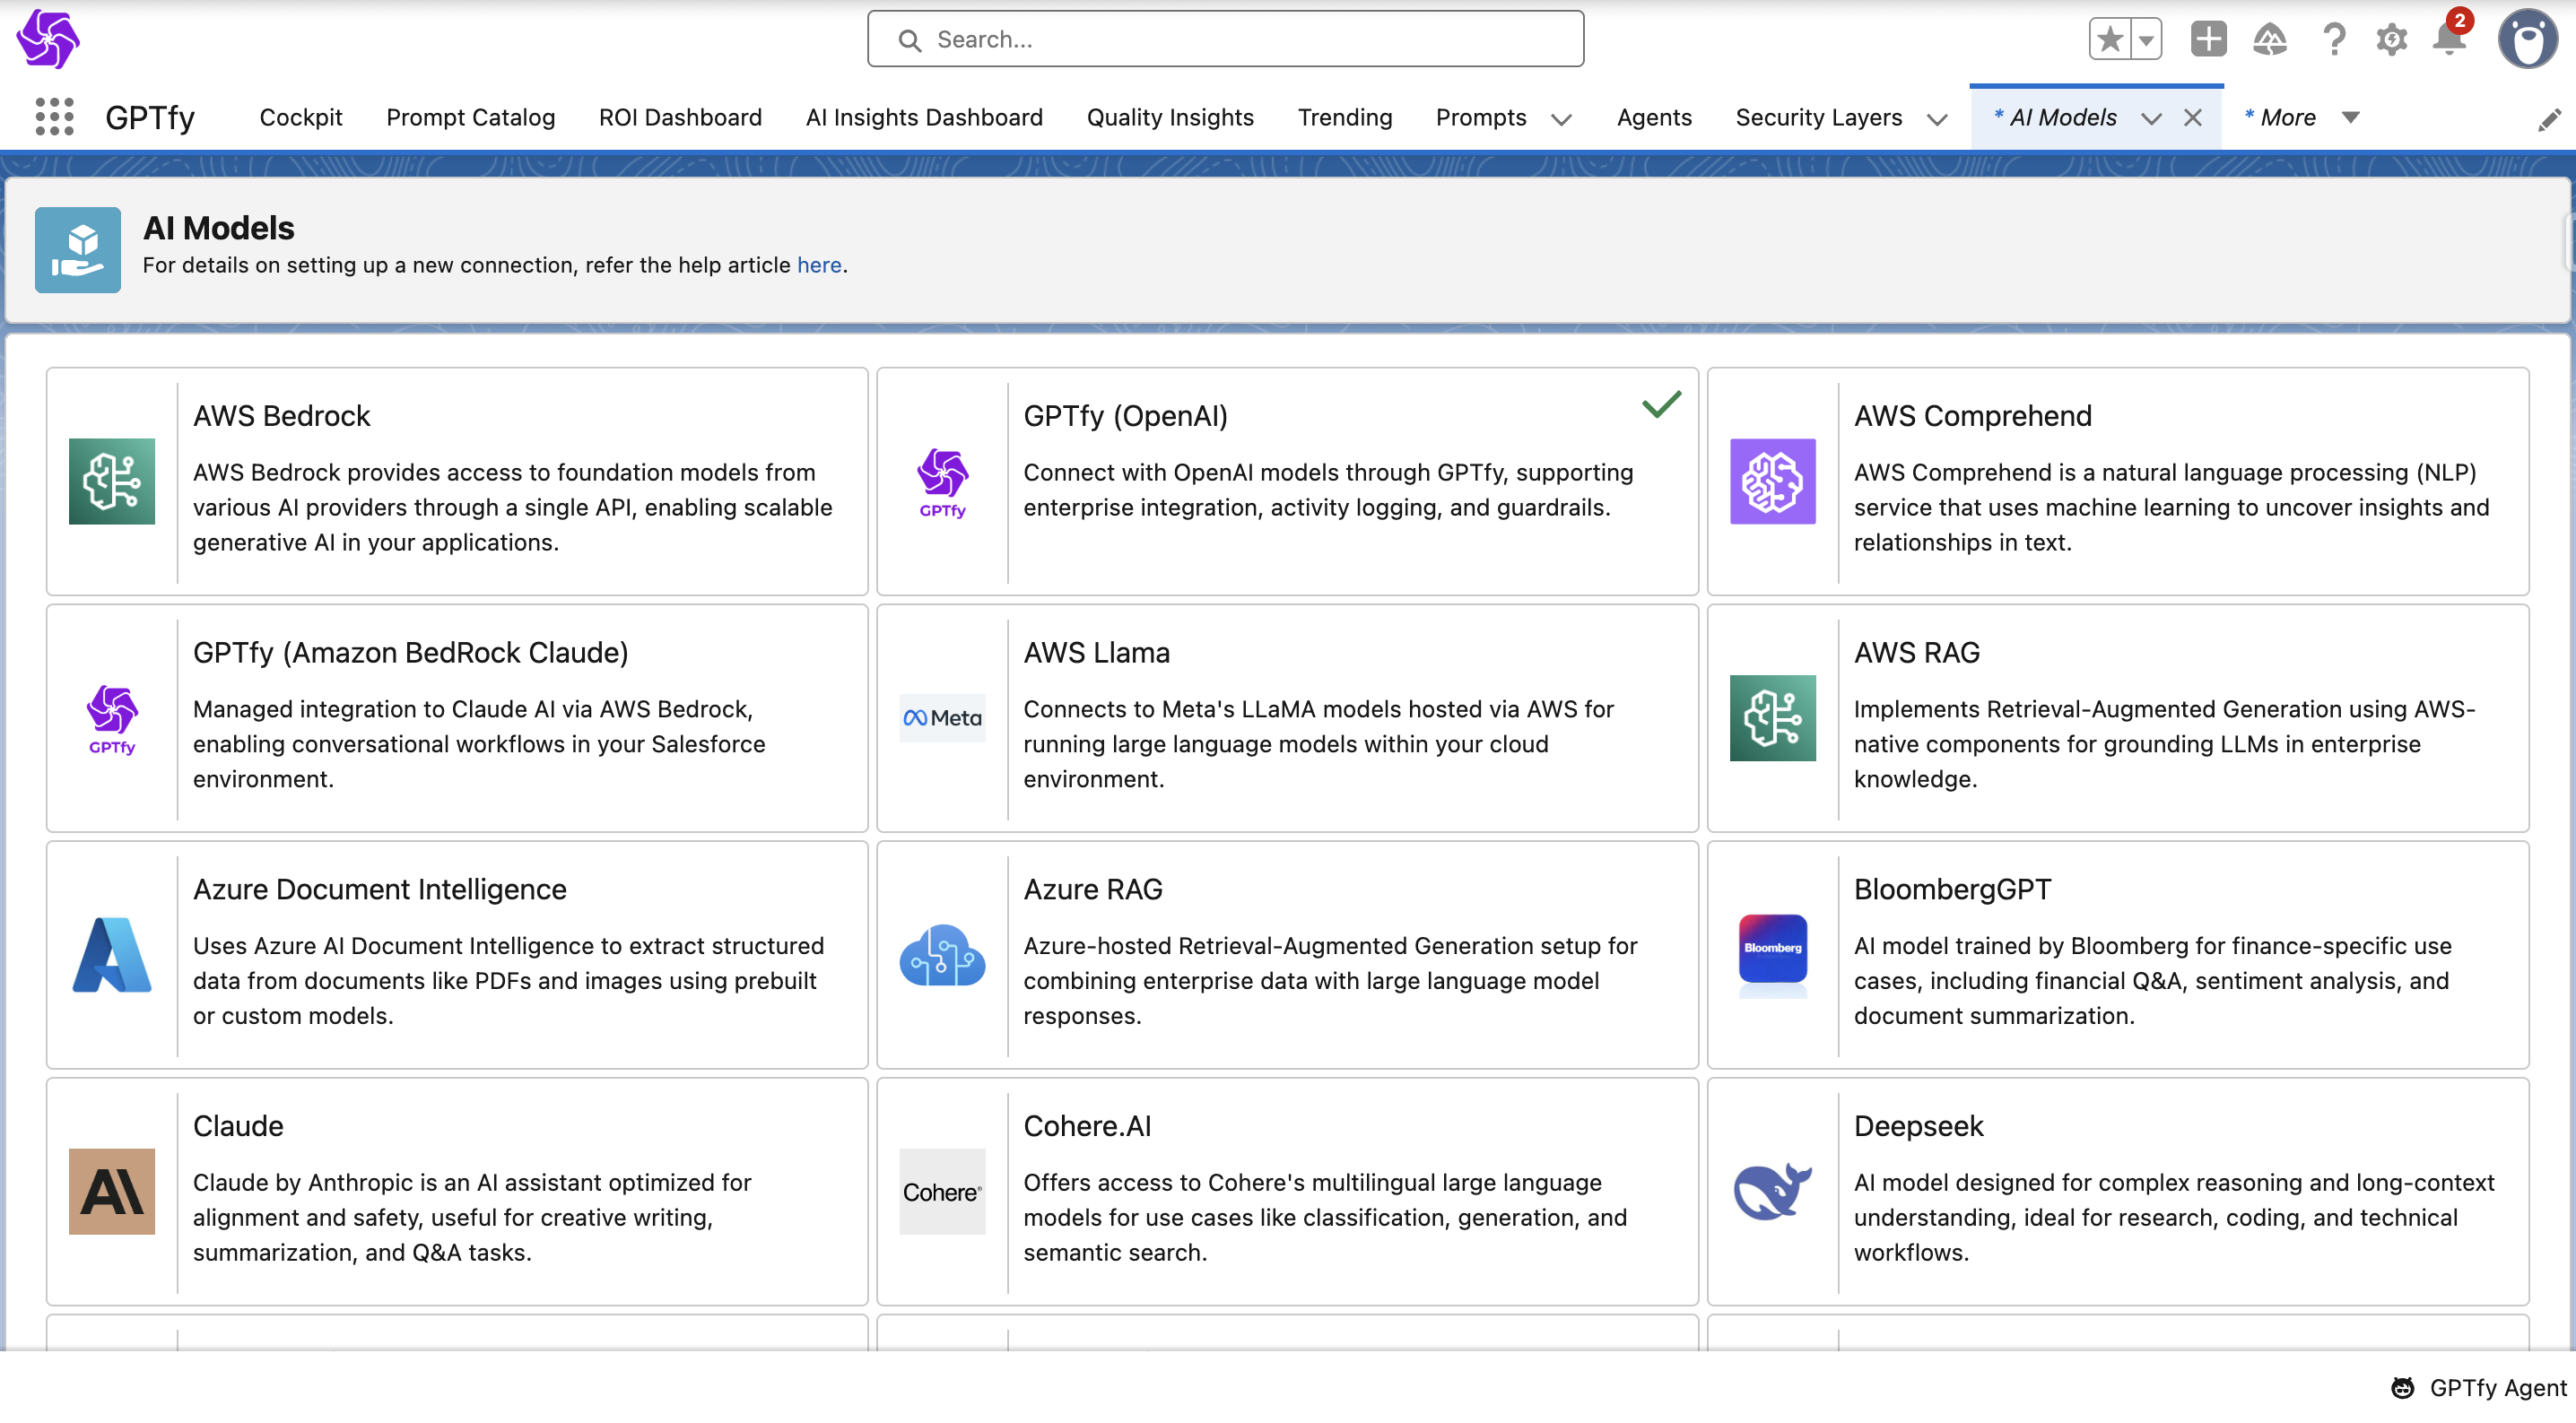
- Go to GPTfy Cockpit in Salesforce
- Click on Advanced → AI Models
- Click New → Create Your Own
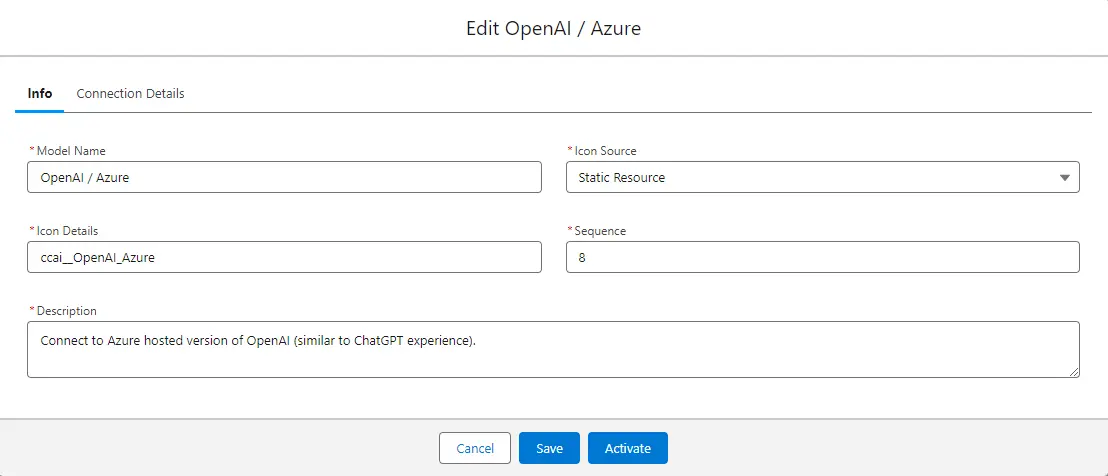
Step 2: Fill in Info Tab
- Model Name:
Azure OpenAI - Description:
BYOK connection to Azure-hosted OpenAI - Icon Source: SLDS Icon or Static Resource
- Sequence: e.g.,
5 - Save and proceed
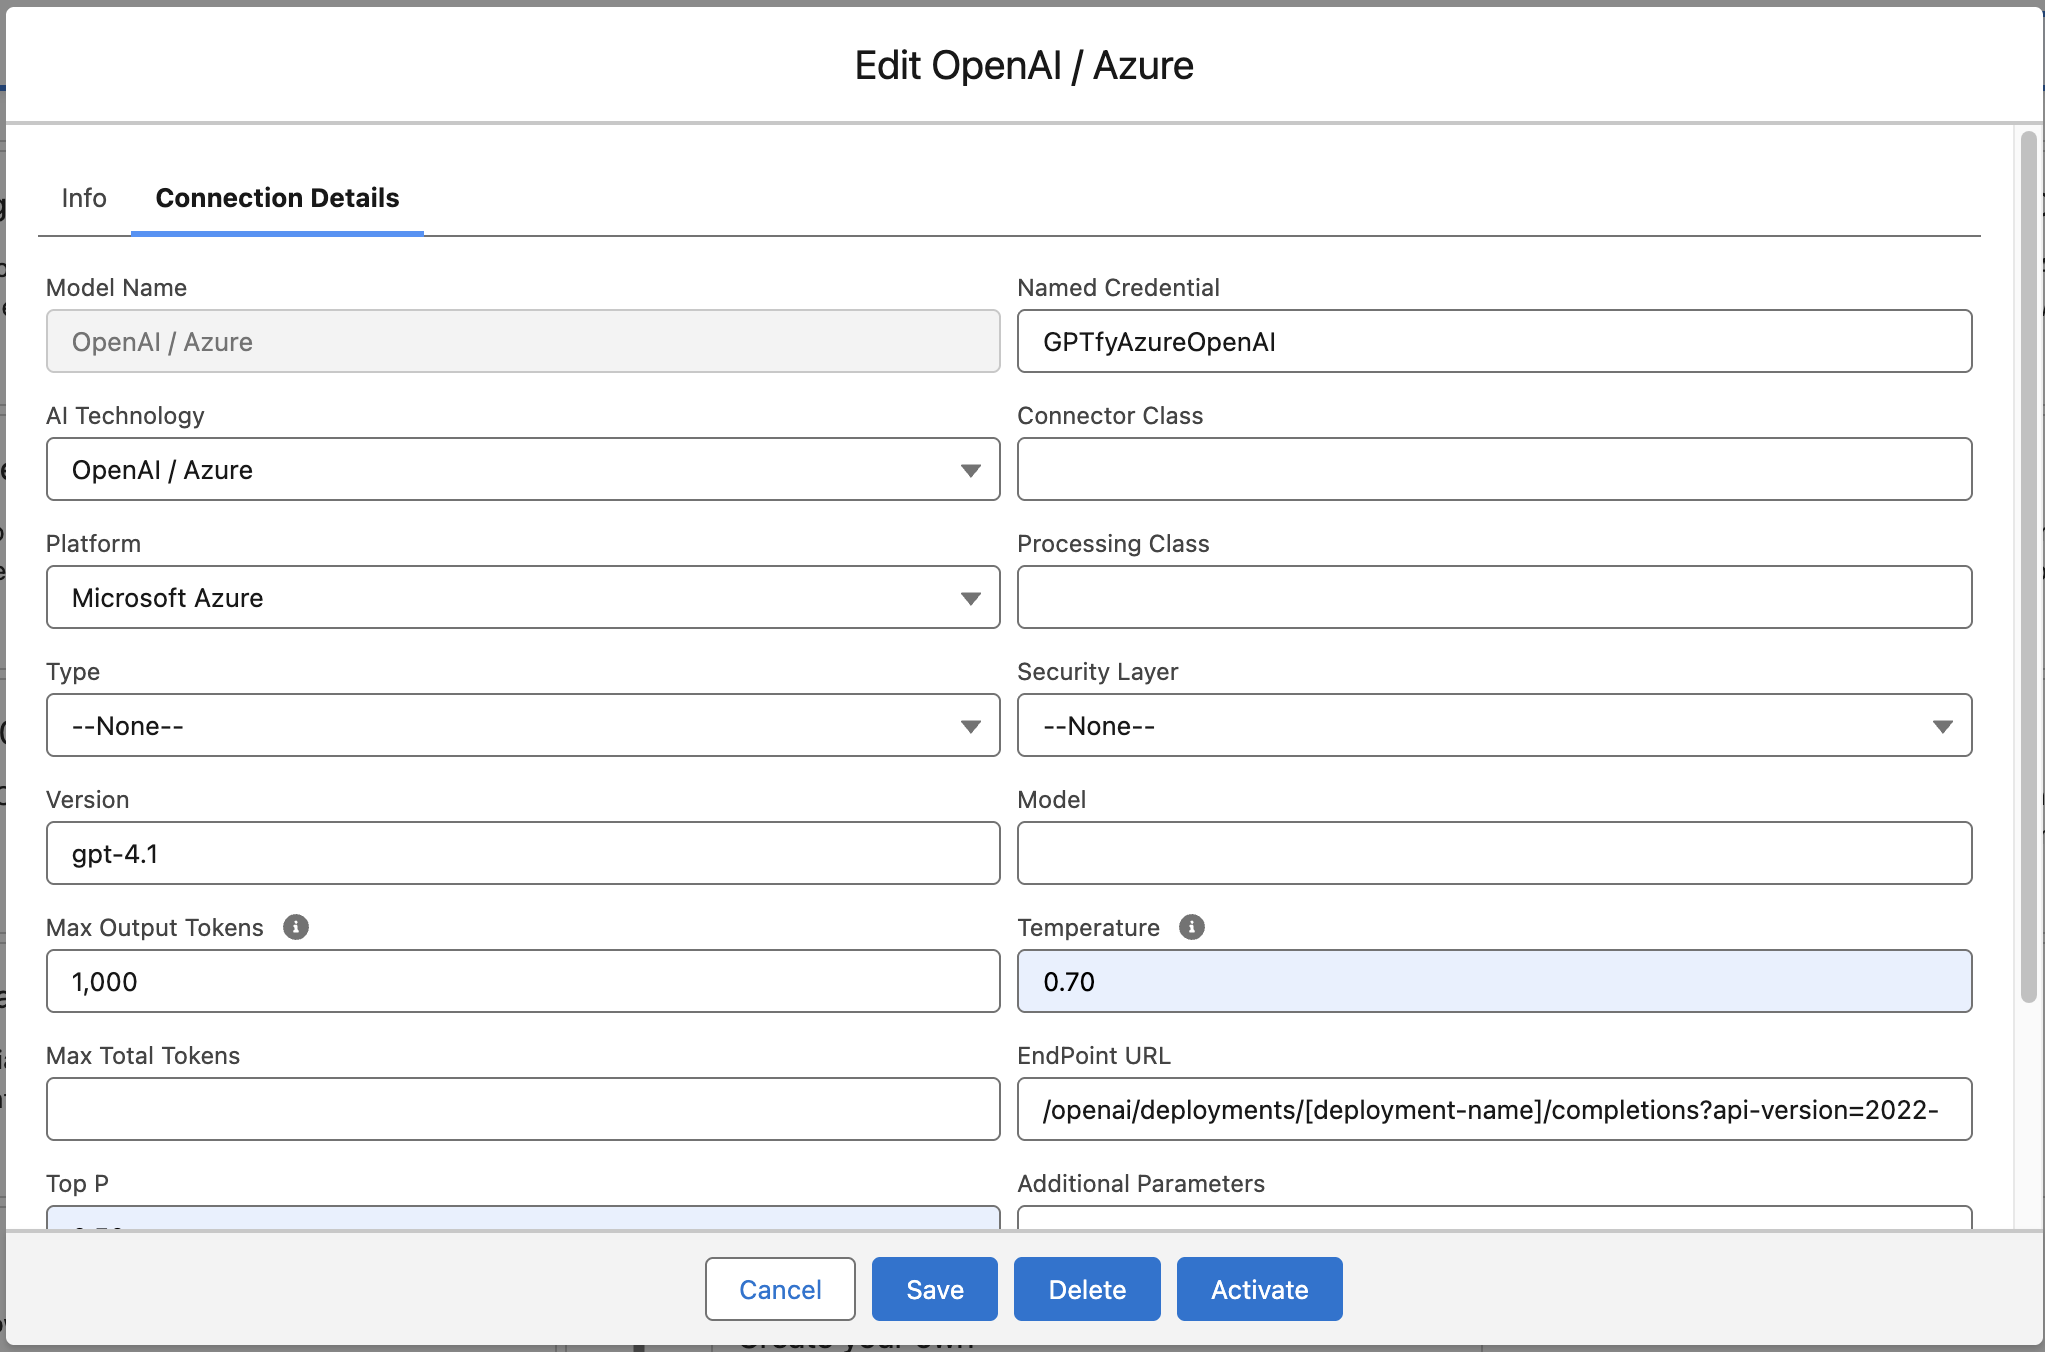
Step 3: Fill in Connection Details Tab
| Field | Value |
|---|---|
| AI Technology | OpenAI/Azure |
| Platform | Microsoft Azure |
| Version | gpt-35-turbo or gpt-4.1 |
| Temperature | 0.7 |
| Top P | 1 |
| Max Output Tokens | 1000 |
| Named Credential | GPTfyAzureOpenAI |
| Endpoint URL | /openai/deployments/[deployment-name]/completions?api-version=2022-12-01 |
[!TIP] Understanding the URL Split (Part 2) The Endpoint URL in GPTfy refers to the Relative Path that follows the base URL.
- Full Endpoint Example:
https://foundry-resource.cognitiveservices.azure.com/openai/deployments/gptfy-deploy/completions?api-version=2022-12-01- Value for GPTfy Endpoint URL:
/openai/deployments/gptfy-deploy/completions?api-version=2022-12-01
Click Activate
Step 4: Test the Integration
- Open a Salesforce record (e.g., Account)
- Ensure a prompt is linked to the model
- Use GPTfy Console:
- Select the prompt
- Click Run GPTfy
- Review the response and audit logs
Troubleshooting
| Issue | Resolution |
|---|---|
| Named Credential errors | Ensure Principal and Custom Header are assigned |
| Key not accepted | If header is Authorization, ensure value starts with Bearer . If header is api-key, provide key directly. |
| Prompt doesn't show | Confirm prompt is active and mapped |
| Callout errors | Check ccai is set as the allowed namespace |
Bonus: Configure Azure RAG Model in GPTfy
Take it a step further with GPTfy’s Azure RAG (Retrieval-Augmented Generation) integration.
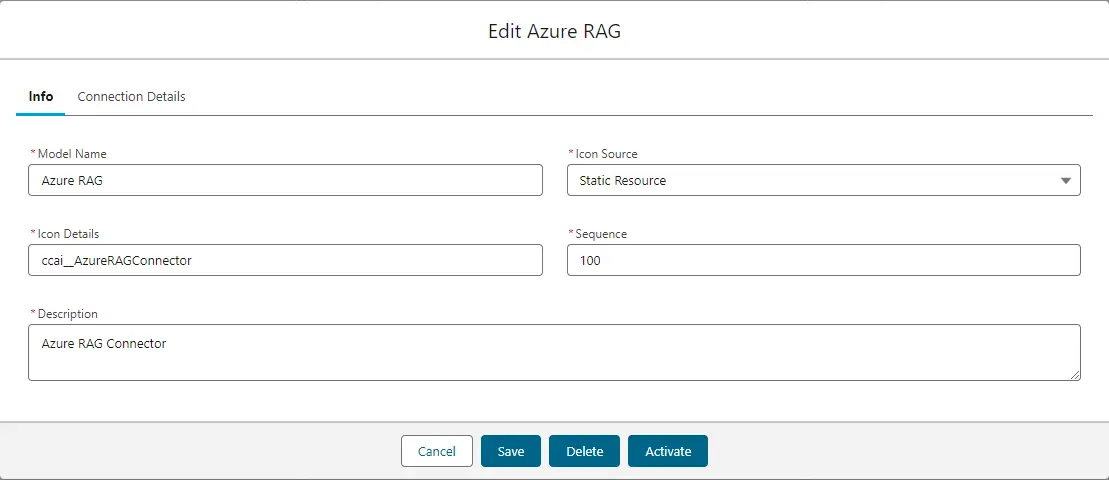
Step 1: Create Azure RAG Model
- Go to Cockpit → Advanced → AI Models
- Click
Azure RAG→ Edit Info tab - Provide:
- Name
- Icon
- Sequence
Step 2: Setup Credentials
Repeat the steps in Salesforce Setup:
- Create External Credential
- Add Principal and Custom Header
- Create Named Credential using Azure endpoint
Ensure:
- Header key is
api-key- Namespace is
ccai- Permission Set is assigned
Step 3: Activate the RAG Model
- Once configuration is complete, activate the Azure RAG model
- This model can now be used across prompts to bring in external data contextually
By completing this setup, you’ve enabled GPTfy to securely use your Azure OpenAI deployment while preserving compliance and maintaining full control over your AI infrastructure.